Manual
1Registration and Login
1.1Registration
There are two ways to register for SMASHDOCs:
1.Registration via the SMASHDOCs homepage
2.Registration via invitation link

Login page with button "Create a new account" highlighted
After clicking "No account yet? Create a new one!", the user is asked to enter his personal data.
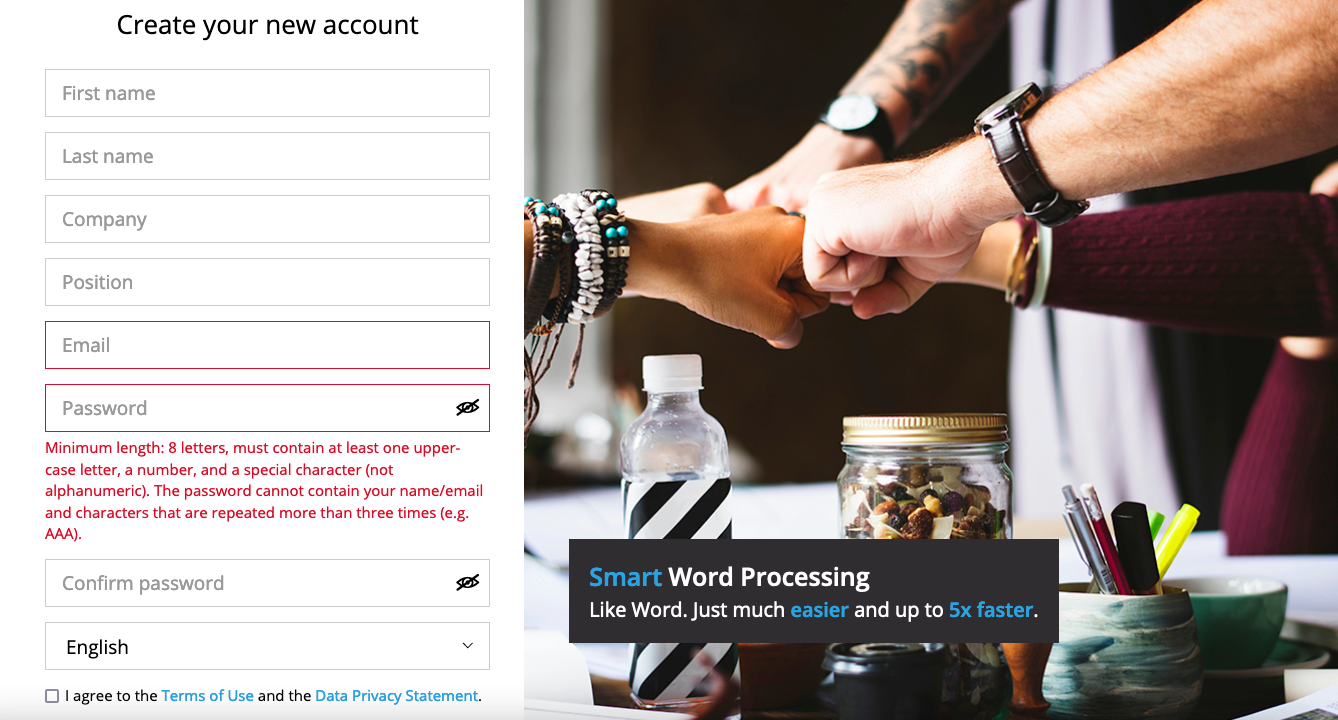
Registration page highlighted
First and last name, email, password and confirming password - are obligatory fields for inserting. The registration data also include optional fields, such as the company you're working in as well as your position. You can also add or edit this information later in the profile settings.
1.2Password requirements
To set password you need to stick to some particular rules. These are the following:
●The minimum length of the password should be 8 characters (letters, at least one upper-case letter, one number and one non-alphanumeric special character).
●The password should not be the same as or part of the user ID (email/first name/last name).
●The password must be without characters that are repeated more than 3 times (e.g. AAA).
Having completed the registration form by agreeing to the terms of use and clicking on "Create your new account", user gets a verification link via e-mail. Only after following this link user's profile is fully activated, hence SMASHDOCs can be used to its full extent.
If a user was invited to SMASHDOCs by another user, he gets an e-mail with a link. Following it, the user reaches the registration page. In this case, it is not possible to register with a different e-mail address than the one with which the invitation e-mail has been received.
2Login
A user needs to complete registration as described in the previous chapter to log in to SMASHDOCs. In order to log in the user has to enter e-mail address and password on the SMASHDOCs homepage and click on the login button to access.
Also, there are such options to perform straight from the login page, as:
●reset your password, in case you have forgotten it;
●choose the language of the page;
●address to our Help Center, in case you've faced with some issues during the login process;
●look through the terms of use and privacy statement

Additional options on the login page highlighted
After clicking on "Language" you will be able to choose the required language from the list of supported ones.
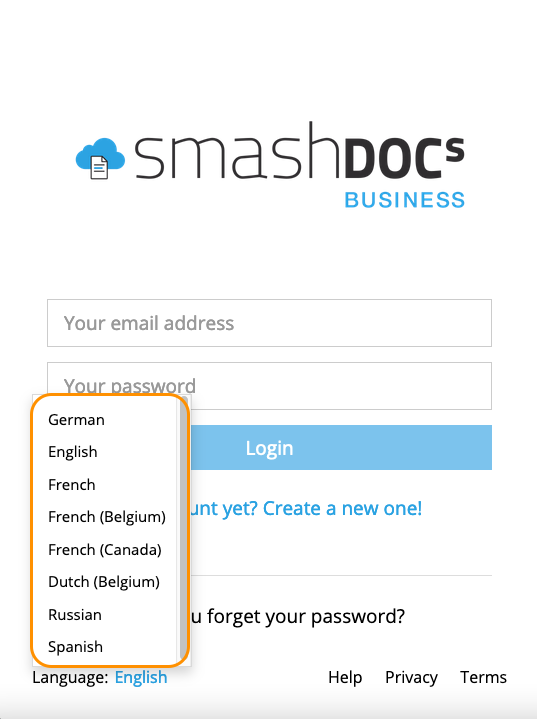
The list of supported languages
If you click "Help", you will be redirected to the page where it is possible to submit a request to our support team. Click buttons "Privacy" and "Terms" - and the page with described terms of use and privacy statement will open.
3Organizing documents
3.1The document list
3.1.1My documents
The document list is the first interface user sees after the login. It shows an overview of all documents that user created themselves or participates in.
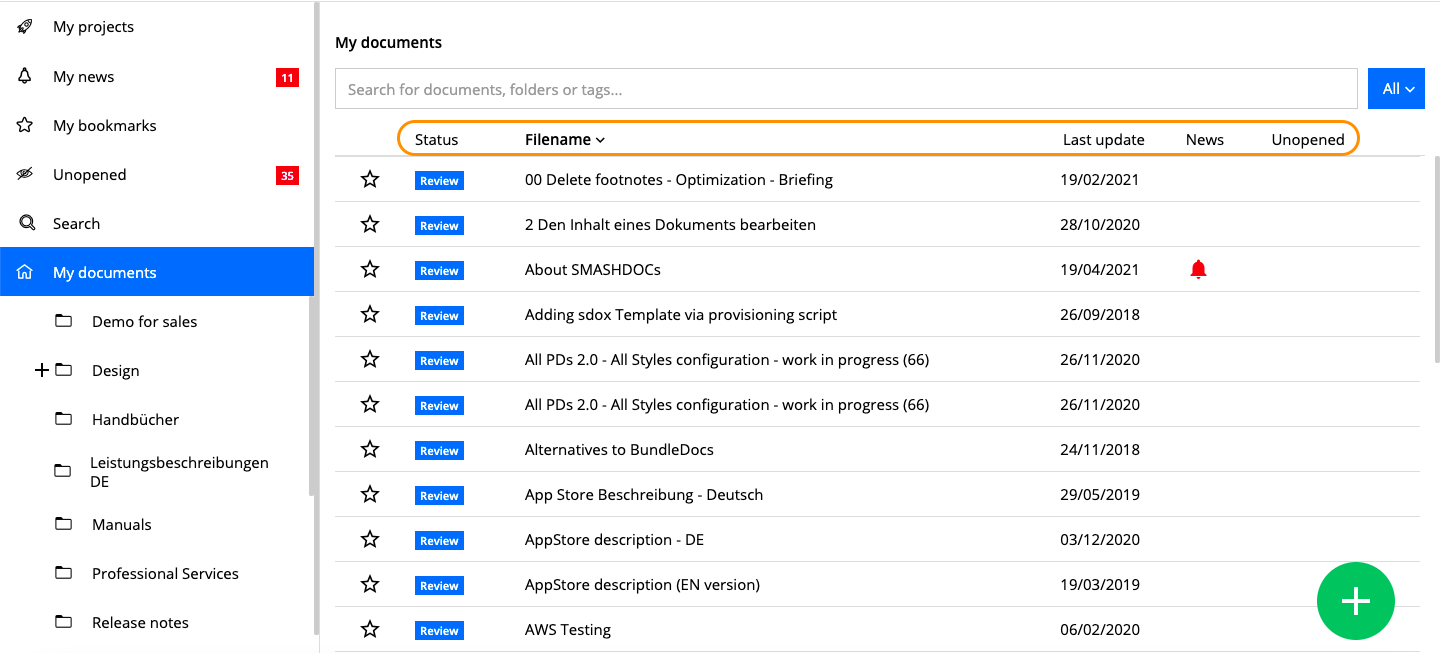
The document list (example) highlighted
The following information appears for every document:
●Bookmark including due date (if activated)
●Status (Draft, Review)
●Filename of document
●Last update
●News symbol (only displayed if there are changes in the document unseen by the user)
●Unopened symbol (only shown if the document has not been opened before)
When selecting a document from the list, it opens in a new browser tab.
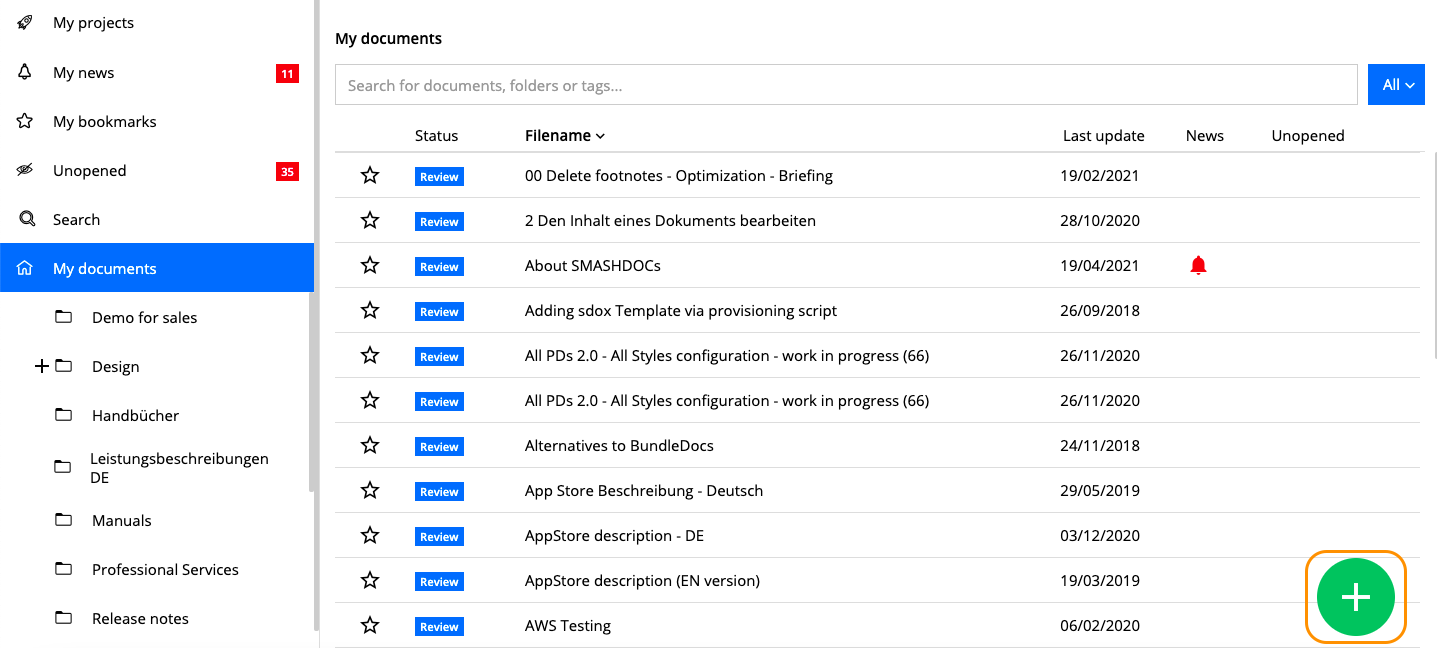
"Add a new document" button highlighted
You can create new documents by clicking the green plus-button on the downright corner of the page. For further information about creating documents, please refer to the corresponding chapter of the manual 4.1.1.
3.1.2The editing status
A document can have different editing states:
●Draft mode.
●Review mode.
The draft mode
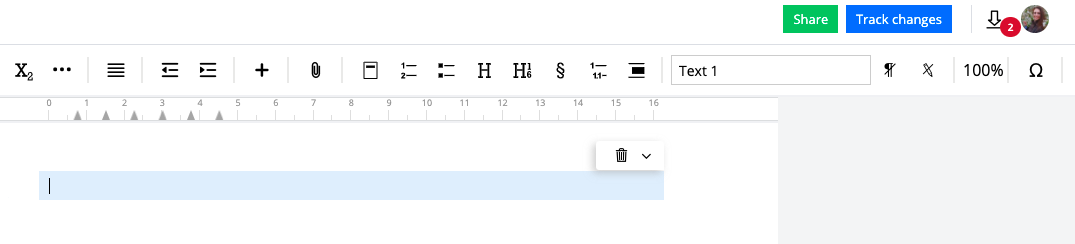
Documents in draft mode can solely be accessed and edited by the creator only. The system does log changes to the content if a user presses the blue button "Track changes" in the top header of the document. This button is only visible for the creator of the document. Other users can neither read nor edit the document. To add further users to a draft document, the creator has to share the document for review by pressing the green "Share" button in the top header of the document.
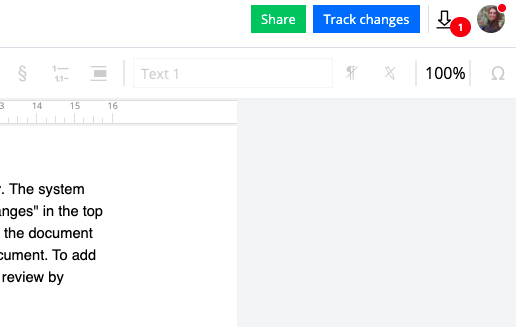
Buttons for "Share" and "Track changes" in the top header of the document highlighted
The review mode
In review mode, all content changes are tracked, documented, and displayed in the change view. The creator can grant other users access to the document and confer different editing rights (see also chapter 7.1.2.3).
3.1.3The context menu
User should move the cursor over an entry in the document list to display the context menu on the right side.
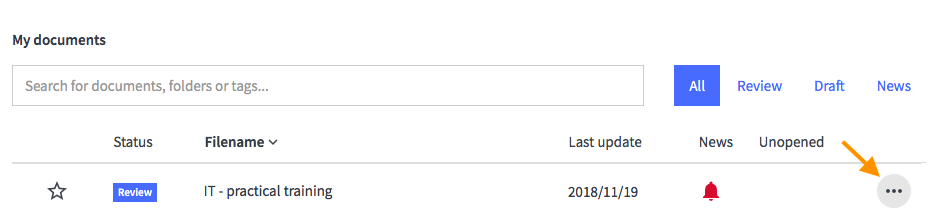
Context menu icon in document list highlighted
Depending on the document editing state, the user's role, and further permissions the options displayed in the context menu vary for each user.
The context menu of draft documents holds the following options:
●Open
●Edit
●Move
●Duplicate
●Move to recycle bin
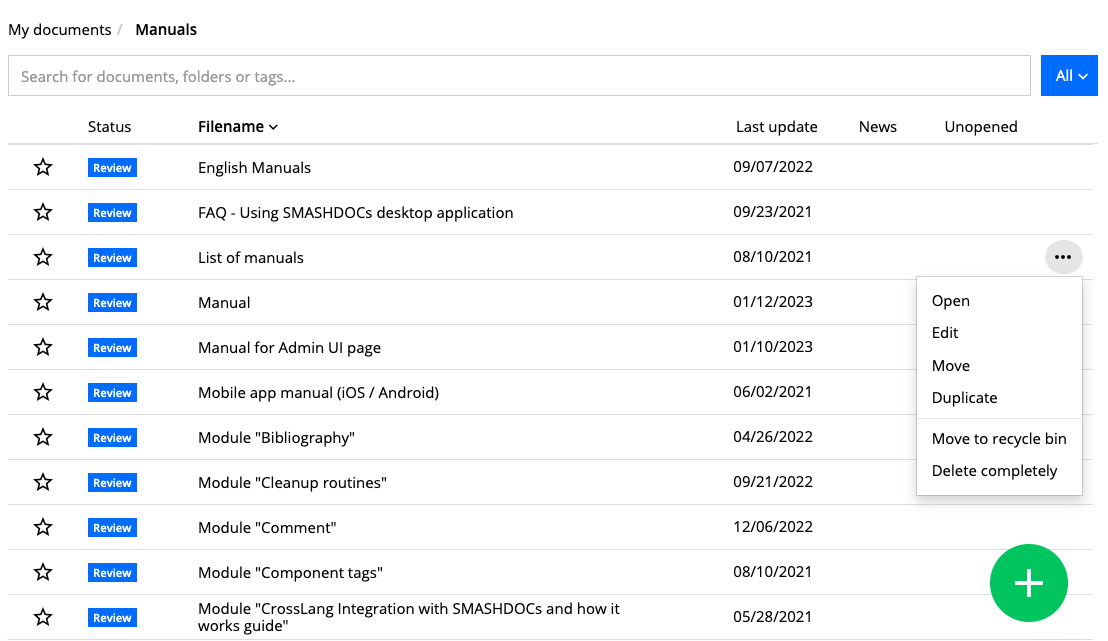
Context menu of a document highlighted
NB. User can only edit the metadata of a document if they have administrator rights.
3.1.4Delete documents completely in the system
Authorized users can also delete documents in review mode completely from the system.
The document can be deleted immediately as well as after a specific time. The standard deletion period is the time between the start of the final deletion process and the final deletion date. It is configurable individually per system by a system admin, the default is 15 days.
A document admin can start the final-deletion process for a review document by selecting the option “Delete completely” in the context menu to the document. This option is only visible for document admins.
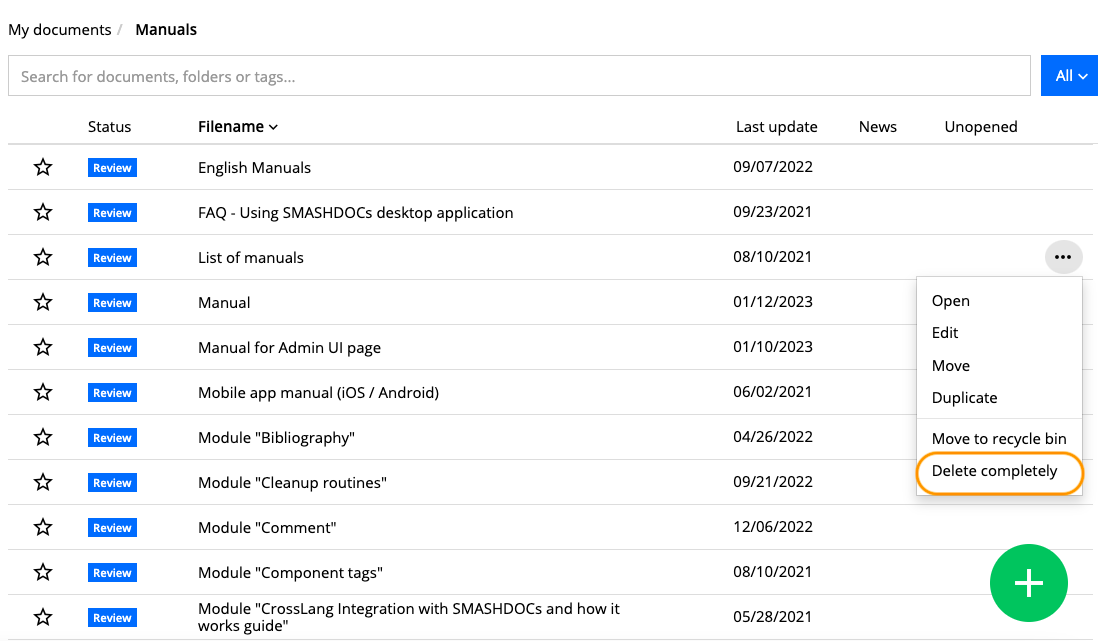
Button "Delete completely" highlighted in the context menu
A modal dialogue appears where document admin can define in which way the document shall be deleted:
●after 15 days (with the possibility to download the document within this time frame)
●immediately (without the possibility to download the document anymore)
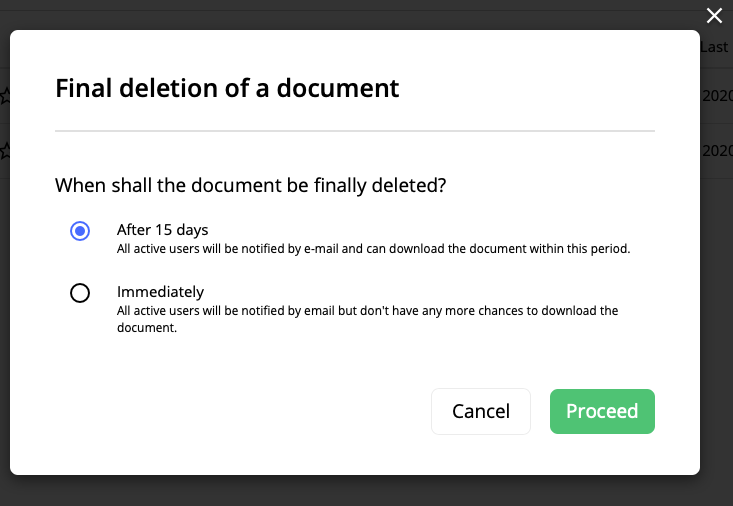
Options for final deletion of a document highlighted
When proceeding with document final deletion option "After 15 days", document admin can also type a short message for active users in the document that is about to be completely deleted.
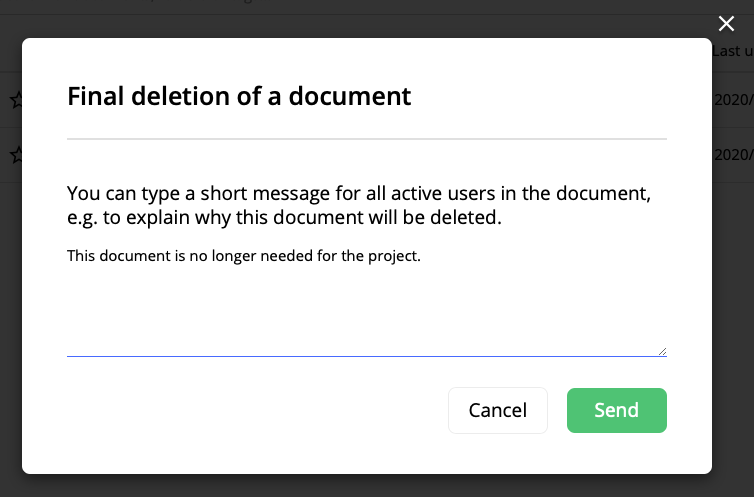
Modal dialogue for input of a short message for active users in the document to be completely deleted
Same option is available for document admins that chose to delete the document immediately.
After starting the final-deletion process, relevant users are being notified and all active users in the system can see which documents are in the final-deletion process. Also, the option “Delete completely” will no longer be provided in the document context menu and the document will be moved to trash for all users in the document.
After clicking on the "Send" button, all active users in the document receive an email with the following information:
(a)for option "After 15 days"
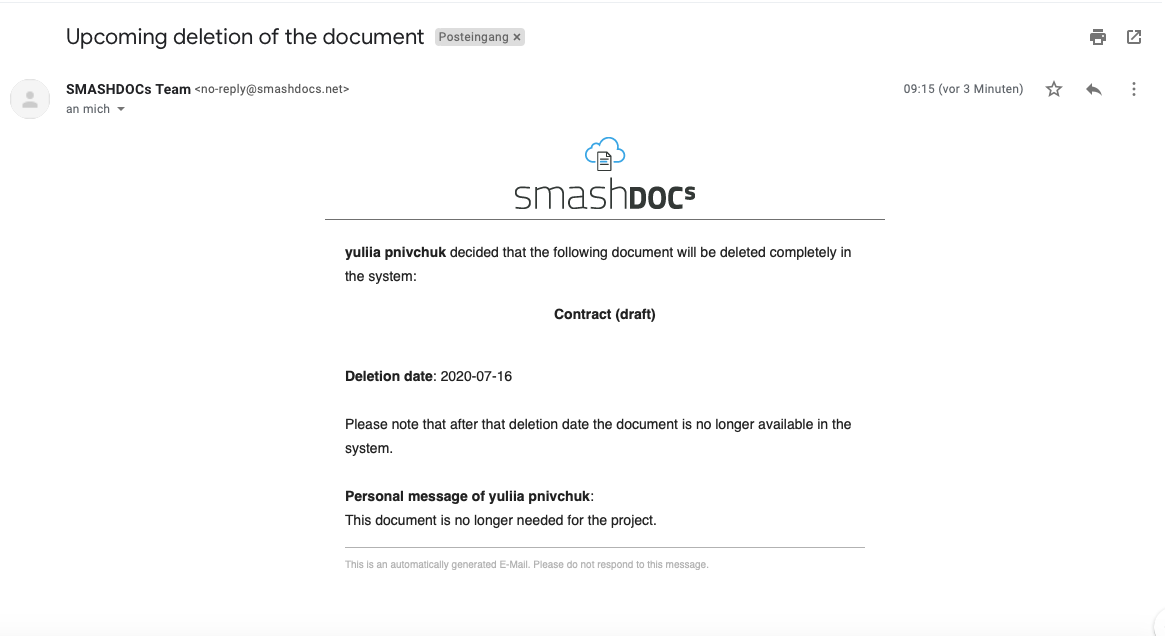
E-mail for final document deletion option "After 15 days"
(b)for option "Immediately"
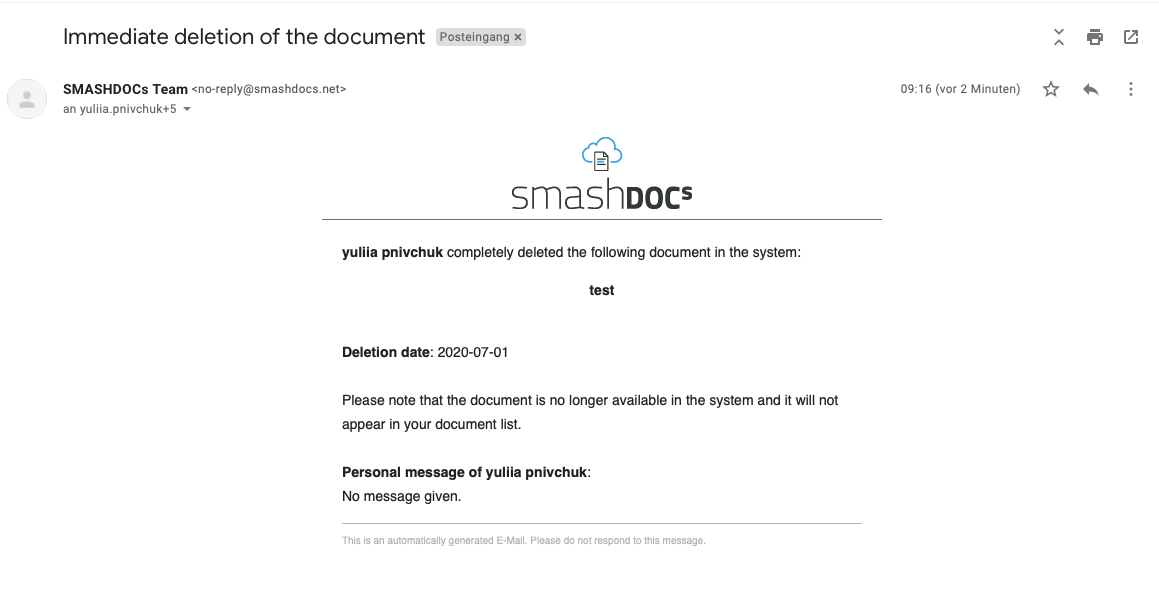
E-mail for document final deletion option "Immediately"
After the final deletion process has started, the new "Delete completely" option would no longer be available in the context menu of the document and the document will be moved to the trash for all users in the document.
The system also automatically sends reminder e-mails to all active document users regarding the upcoming deletion. Default setting is:
●5 days after starting the final deletion process
●10 days after starting the final deletion process
●14 days after starting the final deletion process
This setting is configurable and system admin can define the number of reminder e-mails and the day when they shall be sent after starting the final deletion process.
After a review document has been finally completely deleted from the system, all active users are informed about the deletion with a confirmation e-mail.
Document and system admins can see a list of all documents in which they are involved and which are in the final-deletion process under the tab “To be deleted shortly” on the home page.
The list shows the following information:
●Name of the document
●Name of user which started the final deletion process
●Final deletion date
●Remaining days till complete deletion
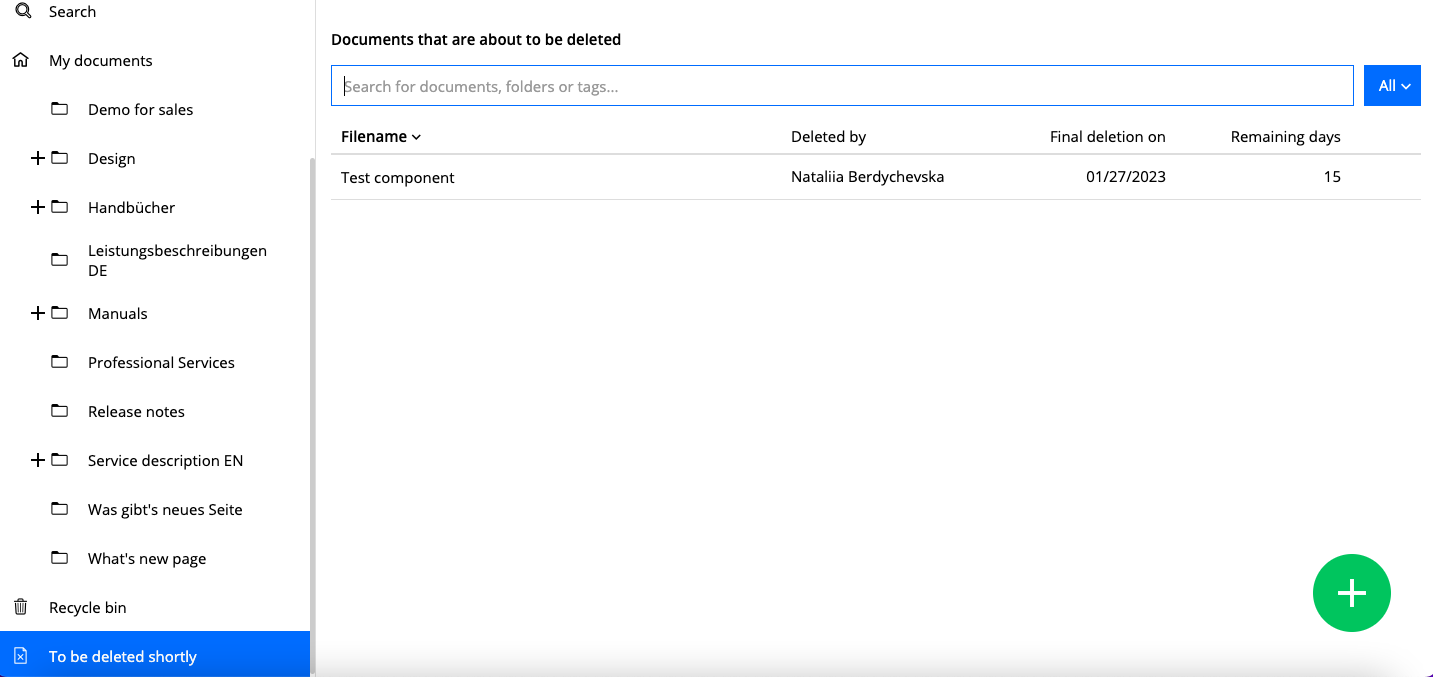
Tab "Will be deleted shortly" highlighted
A document admin can cancel the final-deletion process. To do so, they should select the option “Cancel final deletion” in the context menu of a document. This option is only visible for documents that are marked for final deletion.
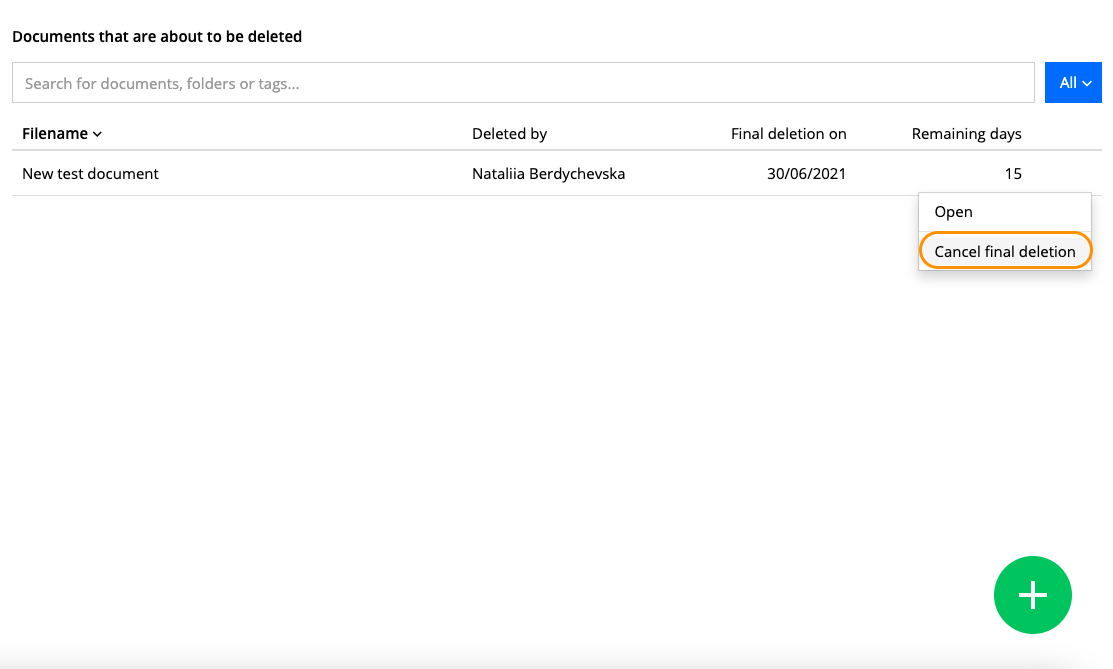
Option "Cancel final deletion" highlighted in the context menu
A modal dialogue appears where the document admin can type a short message for all active users in the document, e.g. to explain why this document won’t be deleted.
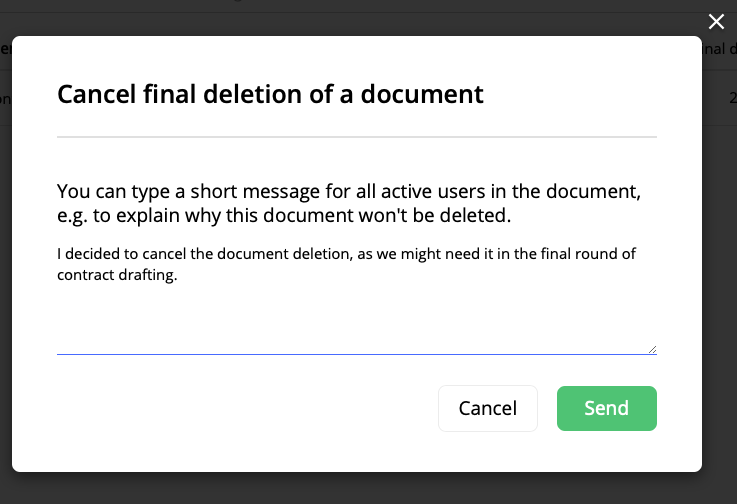
Window to type short message for users about cancellation of document deletion
After canceling the final deletion process,
●the option “Cancel final deletion” will no longer be displayed;
●the email will be sent;
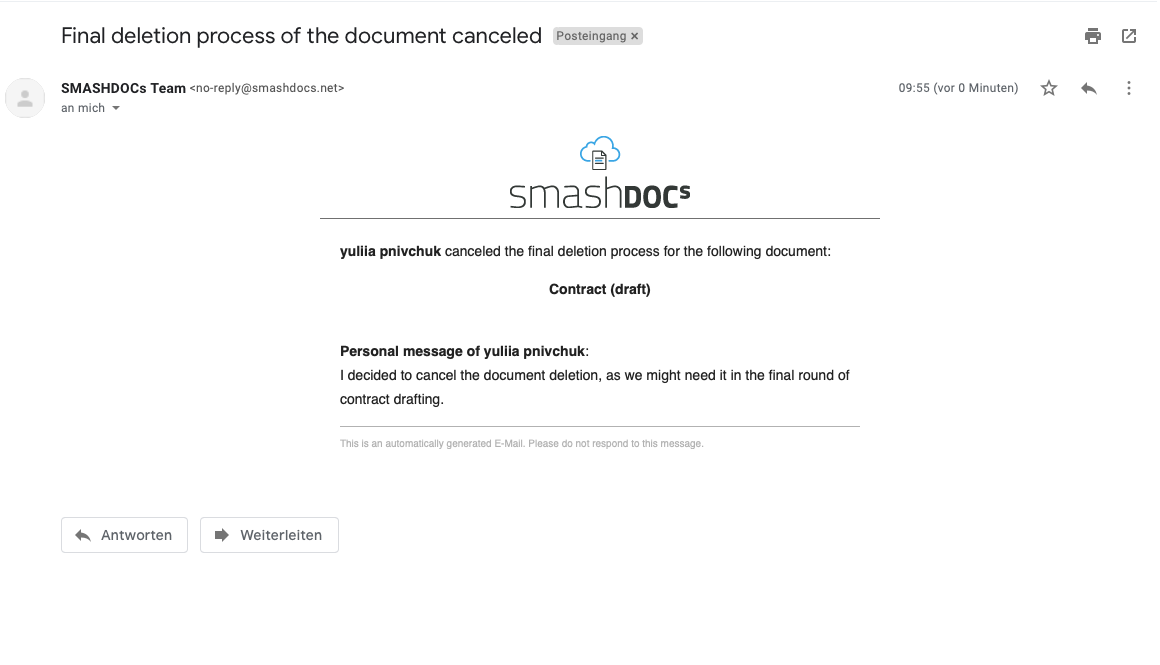
E-mail about canceling the final deletion of document highlighted
●the document will no longer be displayed in the list of documents marked for final deletion and moved back to "My Documents".
A system admin, in contrast to document admin, can also find a specific document in the system by searching for the
●name of the document and / or
●the user who created the document
A system admin can also cancel the final deletion process of a specific document. The cancelation process is the same as described for document admin.
3.1.5Documents in the folder "Recycle bin"
If you perform the option "Move to recycle bin" from the document context menu, then this document appears in the folder "Recycle bin".
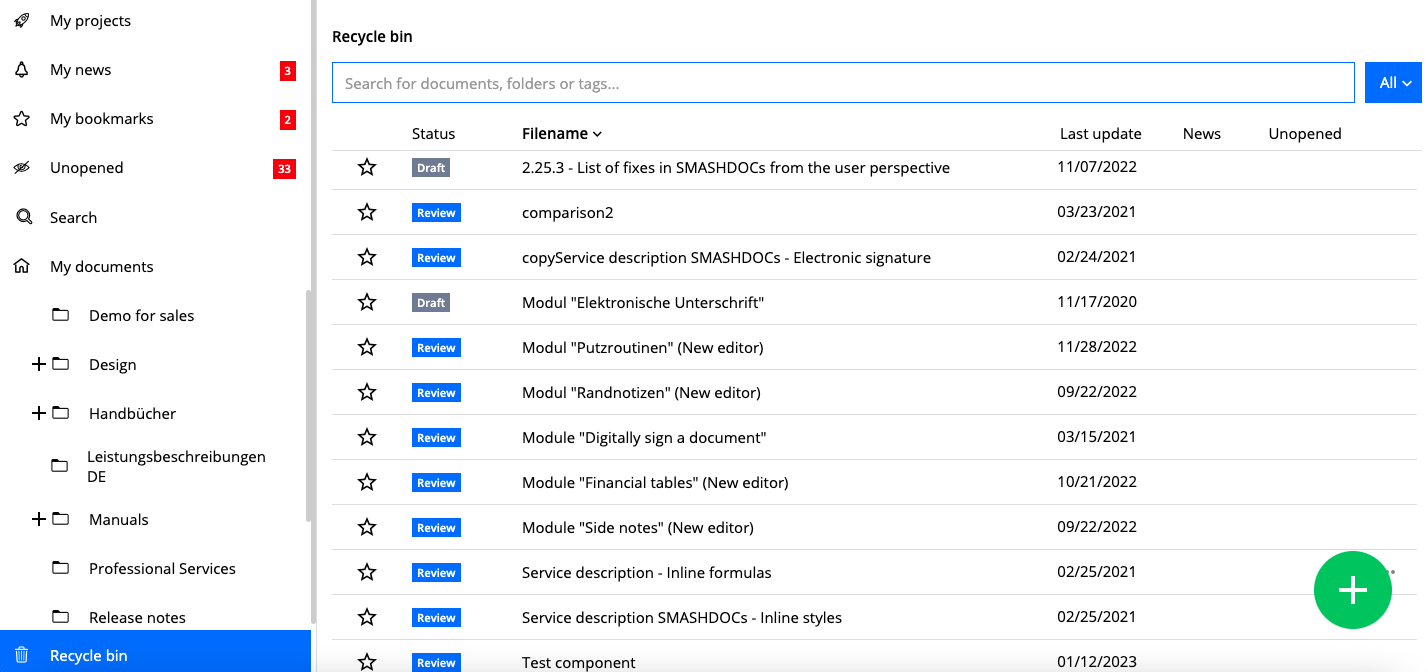
Documents in the folder "Recycle bin" displayed
Three options are available in the context menu of documents in recycle bin: to open the document, to restore it (to remove from the folder "Recycle bin") and delete the document completely.
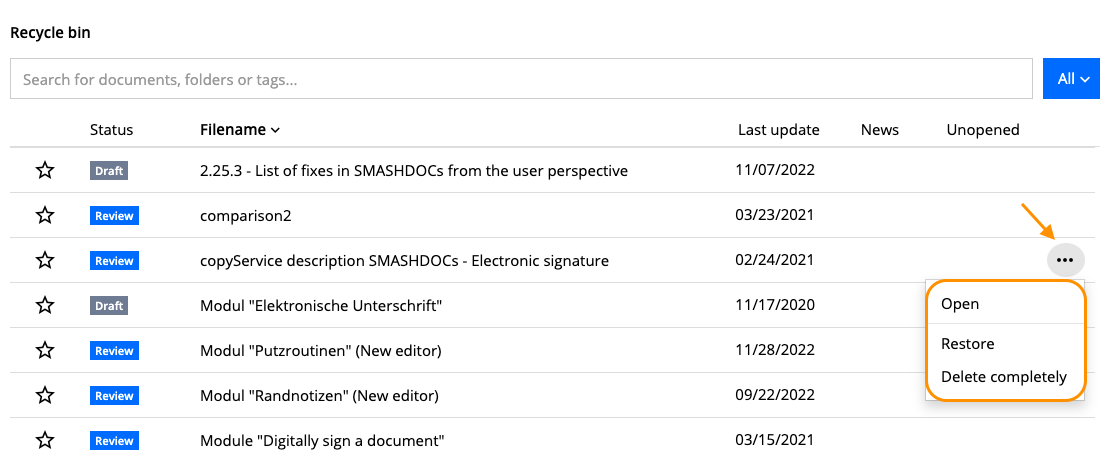
Options "Open", "Restore" and "Delete completely" for documents in the folder "Recycle bin"
3.2View documents with news
The column on the left indicates if there are any news in documents by displaying a red number next to "My news".
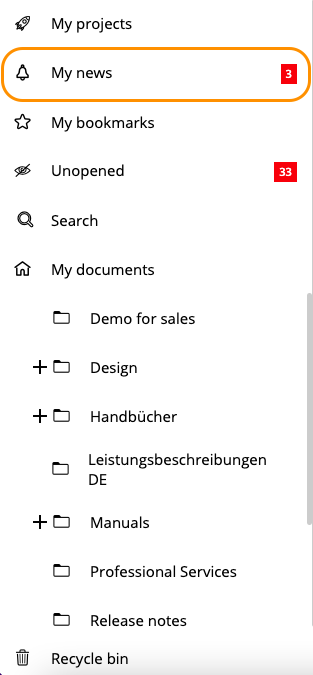
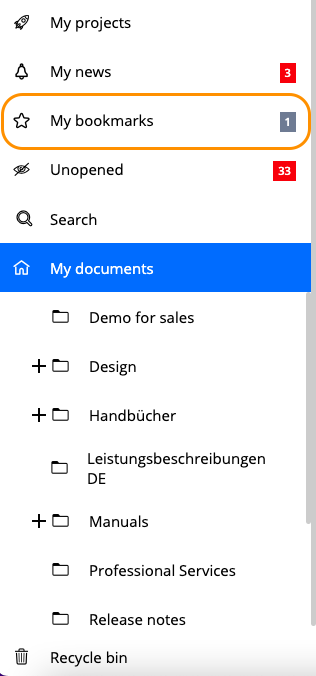
Tab "My news" highlighted in the tab bar
"My news" only shows if there are unseen changes, pending decisions or unread conversations in review documents user contributes to. If none of the above criteria are met, the meter with number of documents containing news is not displayed. Documents with many changes do only count once.
The symbol for unseen changes is also shown in the "News" column of the document list.
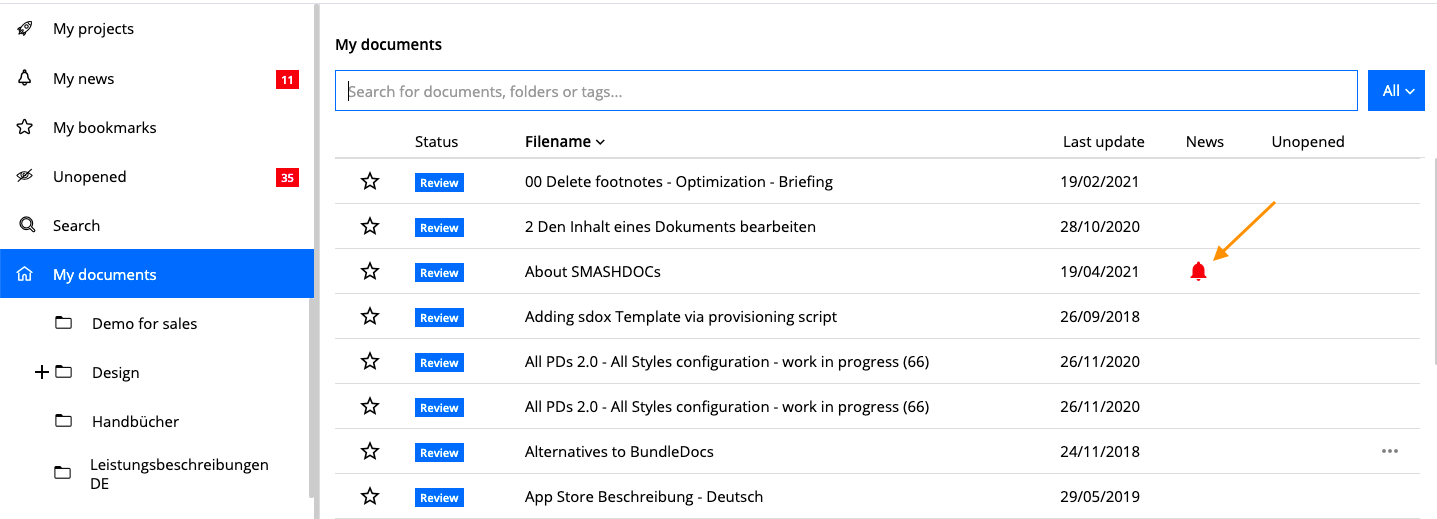
Column and icon "News" highlighted in the document list
3.2.1View unopened documents
The column "Unopened" on the left also indicates if there are documents that the user got invited to, but has not opened yet. The red meter next to it shows the number of unopened documents.
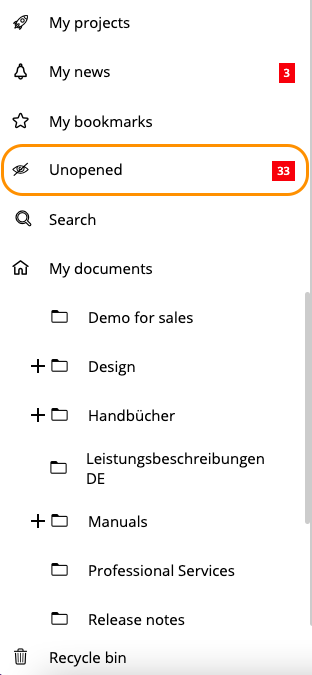
Tab "Unopened" highlighted in the tab bar
As soon as the user opens a document, the status "Unopened" is adjusted automatically.
The symbol for unopened documents is also shown in the "Unopened" column of the document list.
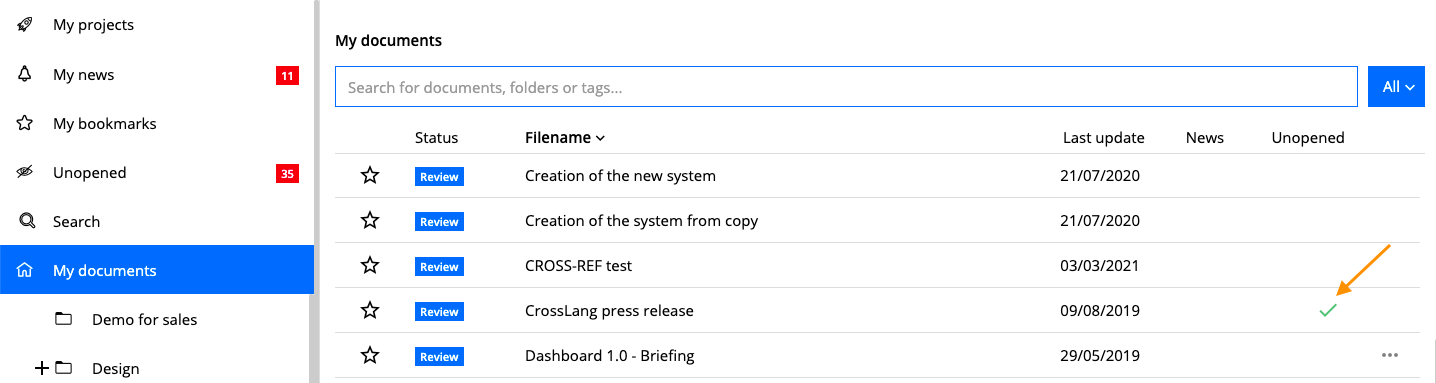
Column and symbol "Unopened" highlighted in the document list
3.2.2Bookmark documents
User can bookmark each document in the document list that they created themselves or contribute to.
If there is at least one document with a bookmark, "My bookmarks" is shown in the column on the left. The meter shows the number of bookmarked documents.
User can bookmark a document by clicking on the star symbol in the document list. The user can also use the hotkey (Ctrl + Shift + B) for PC / (CONTROL + SHIFT + B) for MAC.
The symbol has different colors, depending on the status.
●White: no bookmark set;
●Yellow: bookmark set with/without due date (that has not been reached yet);
●Red: bookmark set and due date reached or exceeded.
When setting a bookmark, user can specify a due date in the input field that appears.
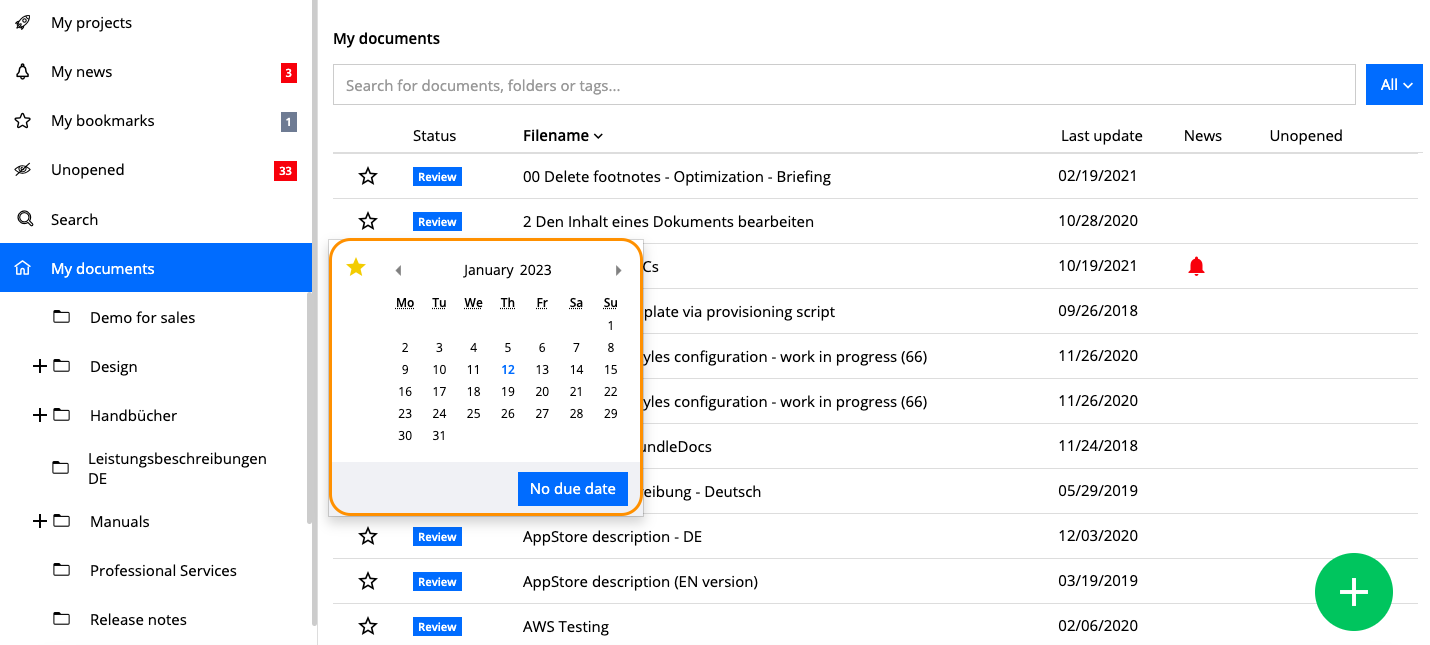
Input window for selecting a due date
The due date can have the following properties:
●Upcoming
●Due
●Overdue
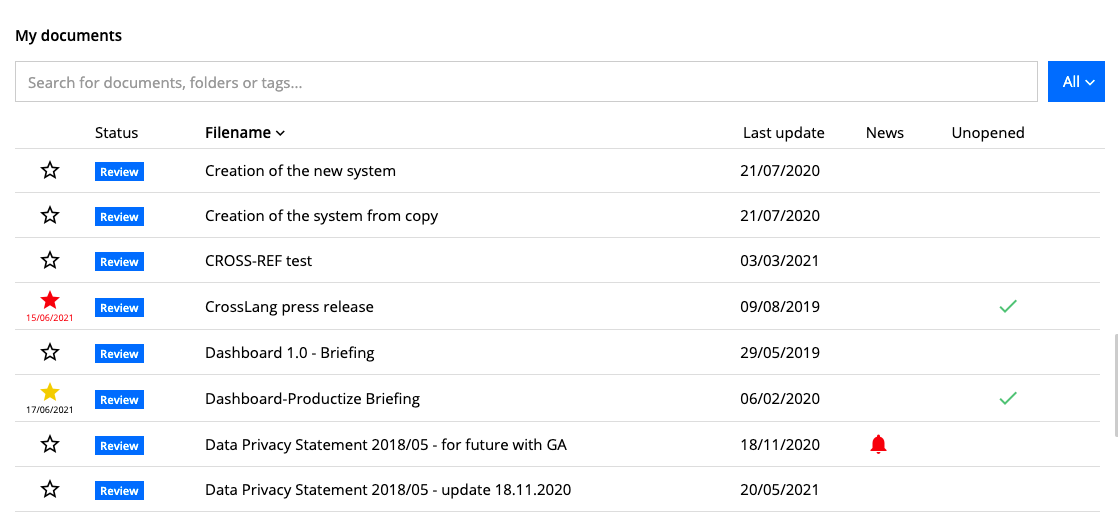
Different types of bookmarks highlighted in the document list
When a bookmark reaches its due date the meter turns red and so does the star symbol at the document.

Tab "My bookmarks" with at least one due or overdue bookmark highlighted in the tab bar
When there are only documents with upcoming due dates the meter is grey.
Tab "My bookmarks" without due bookmarks highlighted in the tab bar
NB: Bookmarks are only visible to the user who set them and can therefore only be changed or deactivated by that user.
3.2.3Bookmark components in the document
Users can also bookmark components in the document.
In this case, bookmarks' purpose is to distinguish particular components as unique or easily findable. Therefore, bookmarks of components do not have due dates to them in contrast to the bookmarks of documents.
To bookmark a component, you have to open the component menu, go to "Others" and click on "Bookmark".

Creating bookmark via component menu highlighted
Red star icons will instantly appear next to the components you have bookmarked.
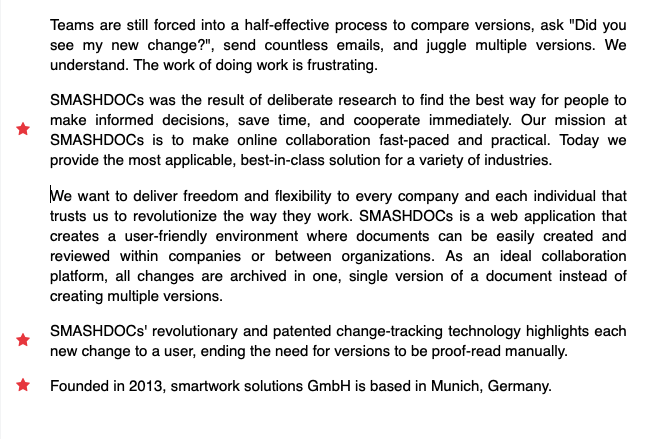
Red star icons near the bookmarked components highlighted
After you have successfully bookmarked at least one component, the tab “Show all document bookmarks” will appear in the left tab bar. Under this tab, you can have an overview of the list of components bookmarked in the document. Clicking on each entry will automatically direct you to the bookmarked component.
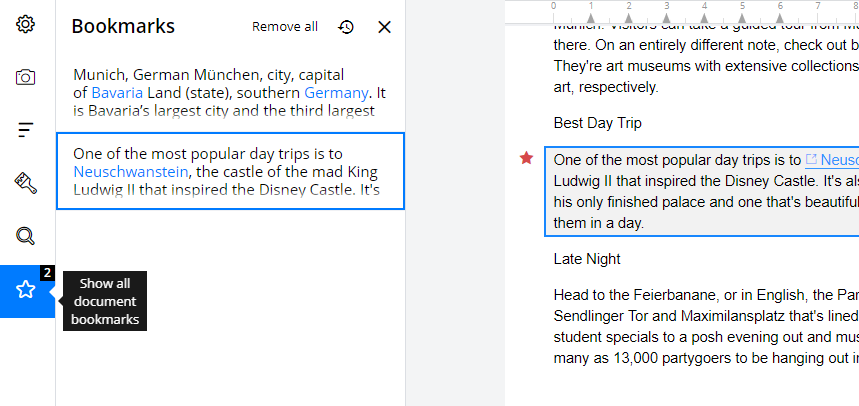
List of all document bookmark highlighted
To delete a set bookmark, go to the list of bookmarks and click "Remove bookmark". You can also simply click on the red star icon next to the bookmarked component to delete the bookmark. Alternatively, you can do the same set of actions as described for adding a bookmark, and remove it.
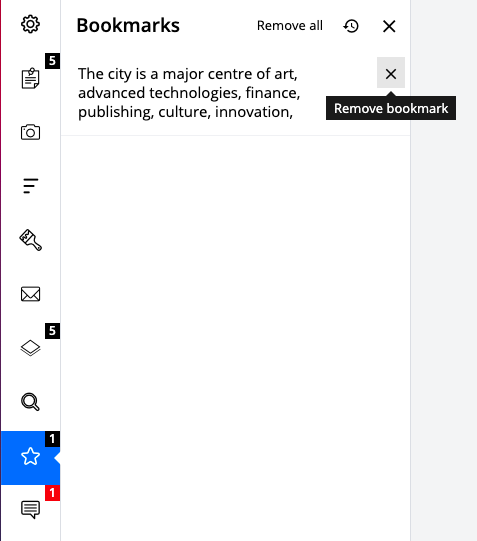
Option "Remove bookmark" highlighted
3.2.4Filtering the document list
User can choose between several options to filter documents in the upper right part of the document list:
●All documents (All)
●Documents in review mode (Review)
●Documents in draft mode (Draft)
●Documents containing news (News)
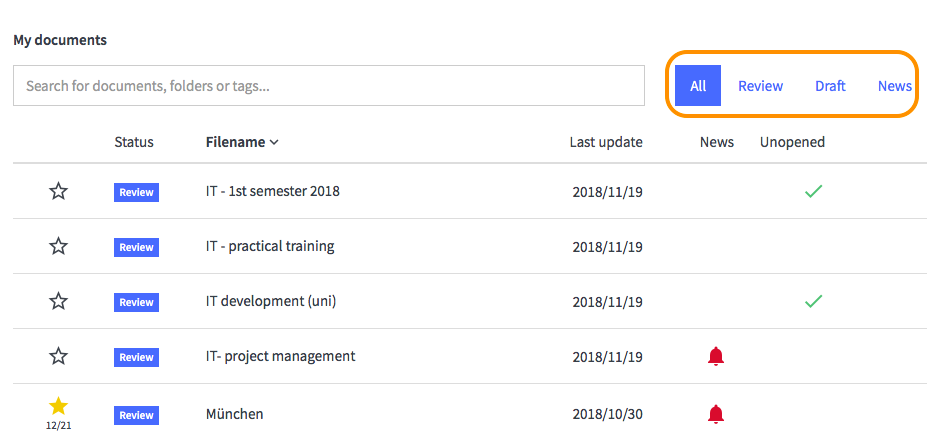
Filter highlighted in the document list
The number of the listed document is adjusted depending on the chosen filter.
3.3Manage documents with folders
3.3.1The standard folder "My documents"
The "My documents" folder in the document list helps the user manage and structure their documents within SMASHDOCs.
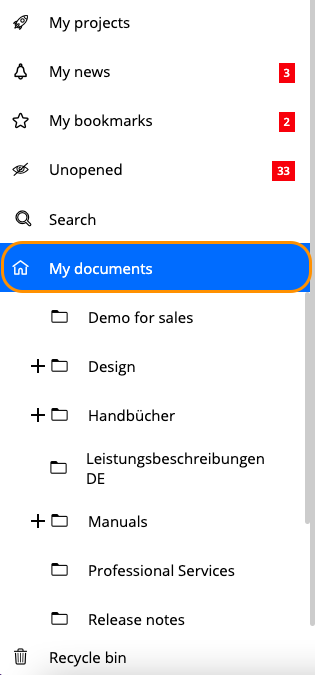
The standard folder "My documents" highlighted in the document list
This folder can neither be deleted nor renamed. It serves as standard filing for all documents that a user created or got invited to.
3.3.2Creating new folders
Within the folder "My documents", user can create new folders on different hierarchy levels to structure documents thematically, according to projects, etc. Click three dots inside the folder "My documents" and the button "Add new folder" will appear.
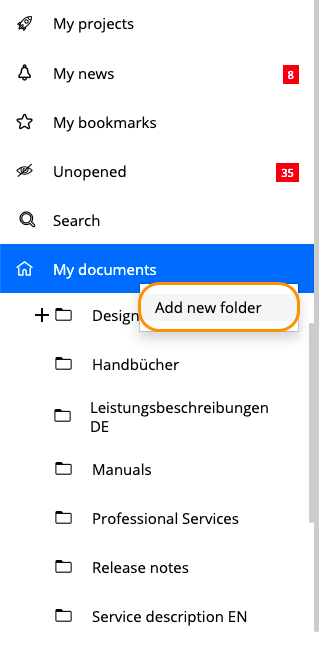
The standard folder's context menu highlighted
Press "Add new folder" - and a folder will be successfully created.
3.3.3Add new folders and subfolders
Using the "My documents" context menu user can create new folders on the highest hierarchy level. Folders on lower hierarchical levels can be created accordingly via the "subfolders" context menu.
A folder's context menu offers the following options:
●Add new folder
●Edit
●Delete
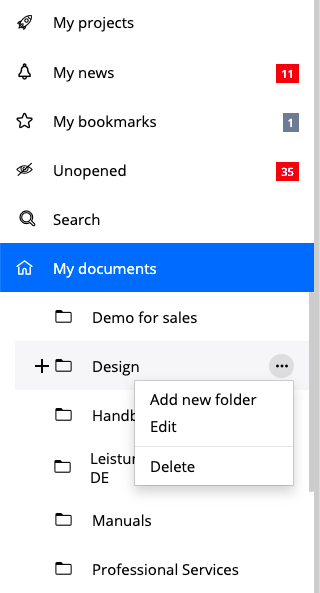
Context menu of an ordinary folder highlighted
3.3.4Move existing folders
User can move folders within SMASHDOCs via Drag & Drop by selecting the folder they want to move and dragging it to its new position. If there are already folders on the same hierarchy level, the relocated folder will be alphabetically sorted into the structure.
Any subfolders move along with the relocated folder to maintain the hierarchy.
3.3.5Edit or delete existing folders
Once created, folders can always be edited or deleted. The folder context menu offers three options:
●Add new folder
●Edit
●Delete
Folders with identical names are also forbidden when editing a folder. When user deletes a folder, the documents kept in this folder are moved to the "My documents" folder.
3.3.6Move documents
You can also move single documents via Drag & Drop. Select an object from the list and drop it into the desired folder on the left.
3.4The search function
The search function can be accessed via "Search" in the column on the left side.
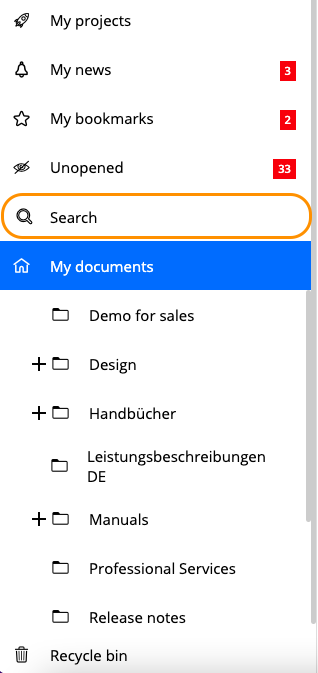
The search function highlighted in the tab bar
The search scans documents as well as folders and document tags for matches with one or multiple search terms.
3.4.1Filtering results by type
Using the filters on the left side of the search window, user can narrow down their search even further. The parameters available for the search are:
●All (default setting)
●Documents
●Folders
●Tags
●Deleted documents
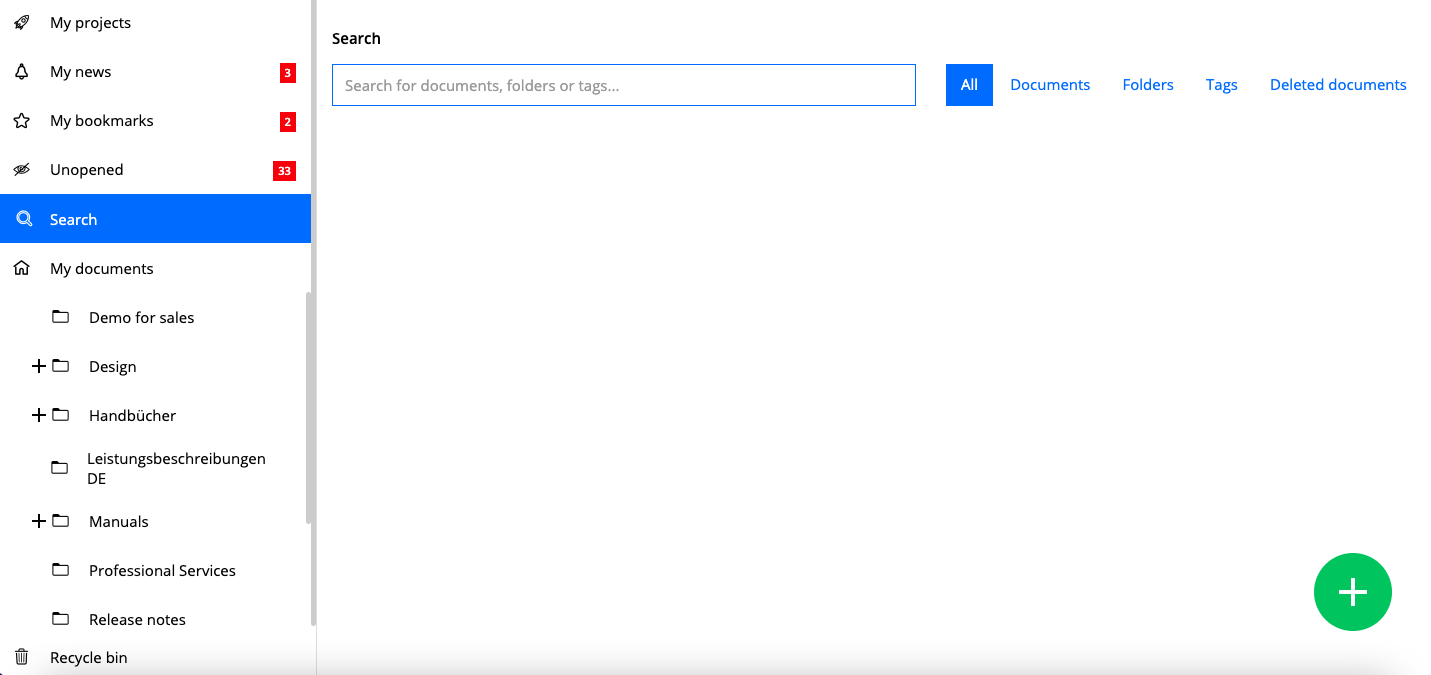
Search dialogue with selection "All" highlighted
3.4.2Folder paths of documents
Under each document in the result list user can see the respective folder path.
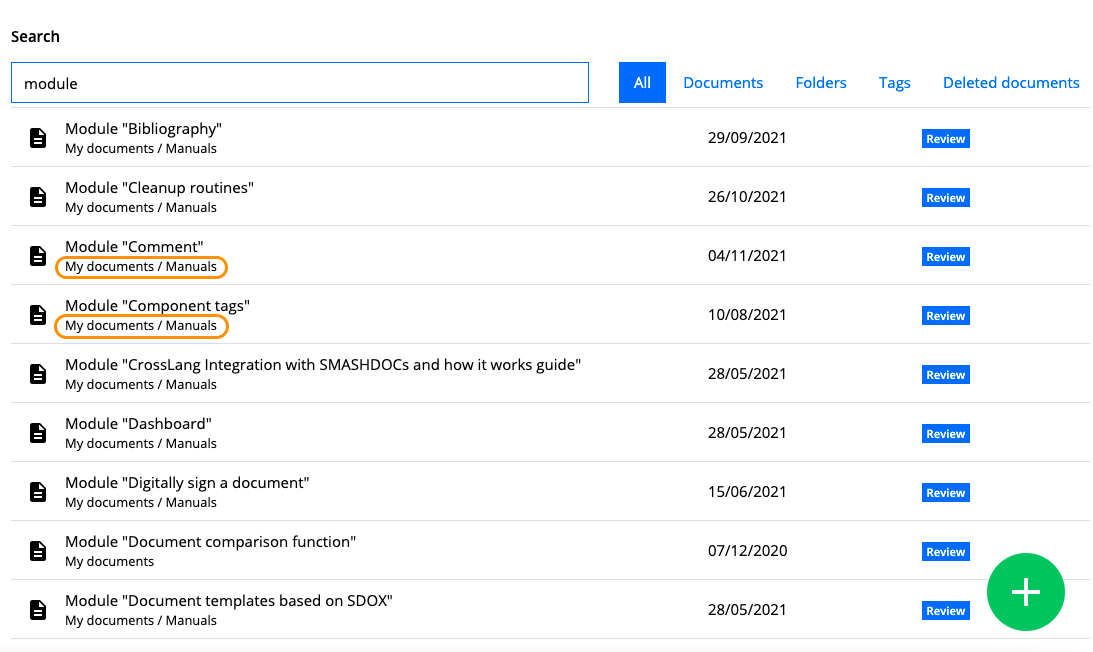
Display of folder path highlighted in result list
To directly open a folder and show all documents within, just click on the folder name in the search results.
3.4.3Searching for documents
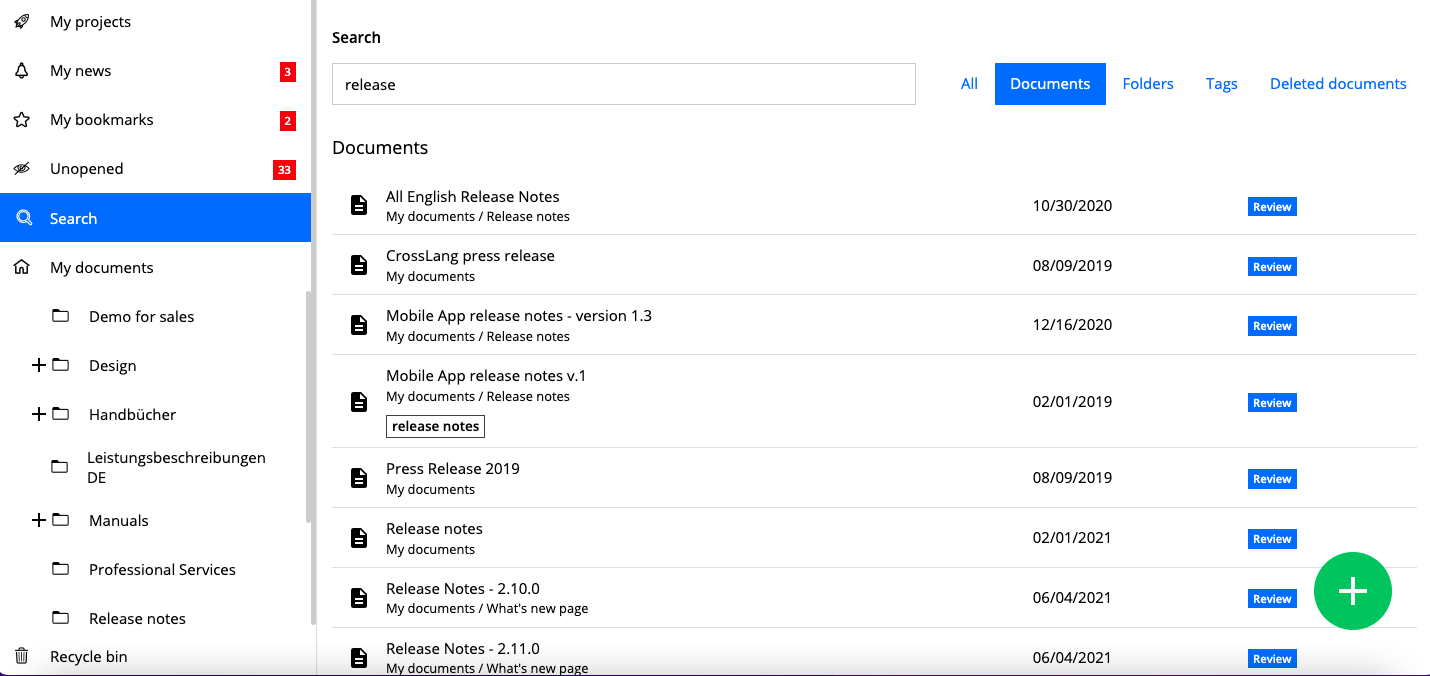
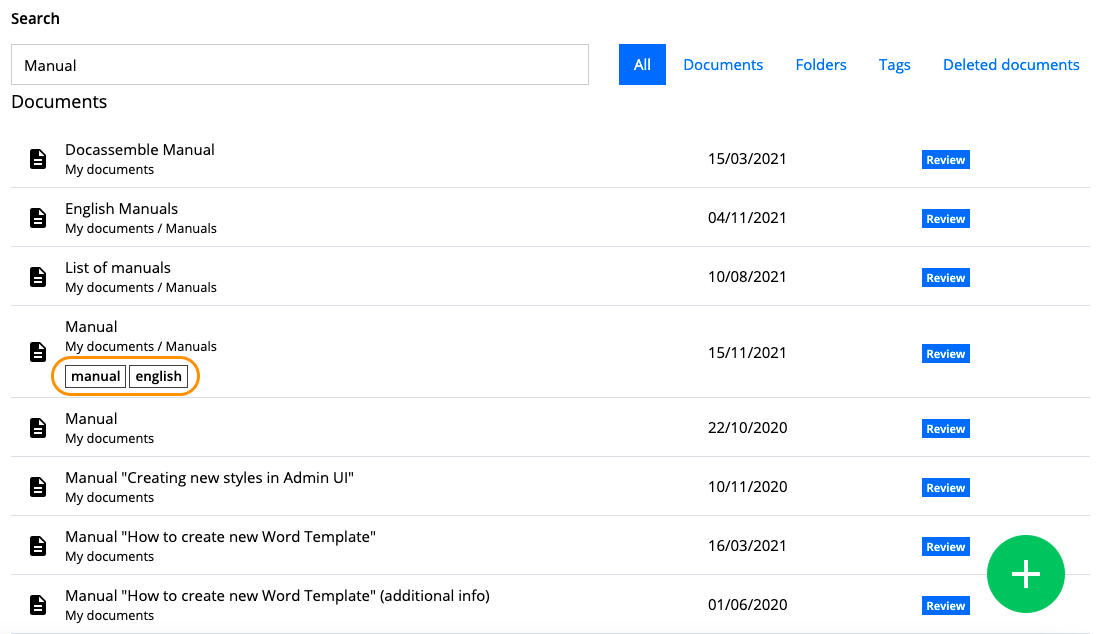
"Documents" search highlighted
To search for documents, enter one or more search terms. Documents that match those terms appear in the result list together with other types of results (folders & tags).
Click on the filter "Documents" on the upper right side of the search window to only show the document results.
Clicking on a document from the list opens it in a new tab.
3.4.4Searching for folders
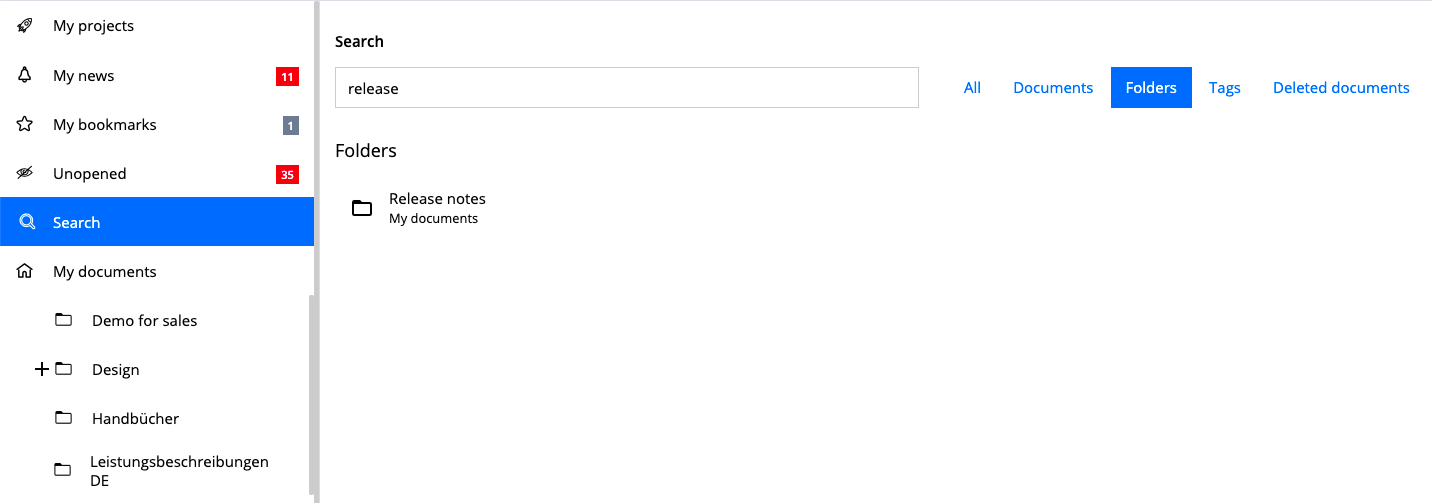
"Folders" search highlighted
Search for folders by entering one or more search terms. Folders matching those criteria appear in the result list with other types of results.
Click on the filter "Folder" on the upper right side of the search window to only show the folder results. If the searched item is a subfolder, it's displayed with the main folder path.
Clicking on a folder from the result list opens it in the same tab and shows all documents within.
3.4.5Searching for documents via tags
If a document got tagged, these tags are also shown in the search results. Selecting a tag not only shows the user all documents marked with this tag, but also a list of all tags combined with the selected tag. Another click on a tag from the list adds it as a search term and further narrows down the search.
You can delete a tag from the search terms at any time. The result list adjusts automatically.
Result list for searching via tags highlighted
4Creating and reviewing documents
4.1Creating a new document
4.1.1Creating a new draft document in SMASHDOCs
In SMASHDOCs a new document is always created in draft mode. The creator works on a document by themselves. Changes of the content or document structure are tracked if a user presses the button "Track changes" in the top header of the document. In this mode the user works on the document on their own. For a short explanation of the different editing states see chapter 3.1.2.
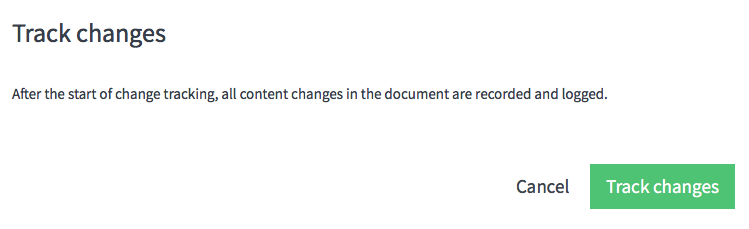
Modal dialogue explaining what "Track changes" means
In order to create a document, a user has to click on the green plus button on the downright corner of the document view and select "New document" from the appearing dialogue or use a shortcut (Ctrl + Shift + N) for Windows / (CONTROL + SHIFT + N) for Mac users.
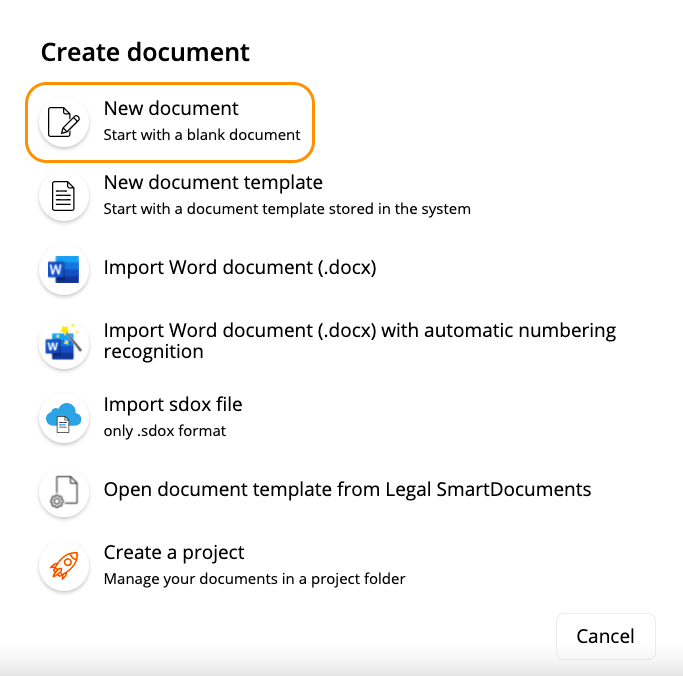
Dialogue window for creating a new document with an option "New document" highlighted
In the dialogue that appears after clicking "New document", you can enter the document's metadata:
●File name (mandatory)
●Document title (optional)
●Subtitle (optional)
●Description (optional)
●Tags (optional)
●Footer (optional)
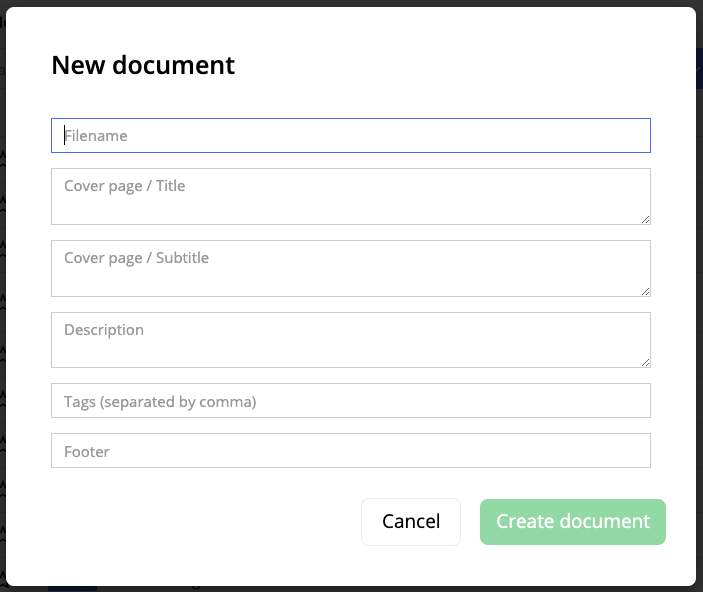
Dialog window after clicking "New document"
By clicking "Create document" the new SMASHDOC is saved in the folder where it has been created and can be edited.
4.1.2Change document metadata
After a document has been created, you can edit document metadata. For that open document options left and click "Edit metadata".
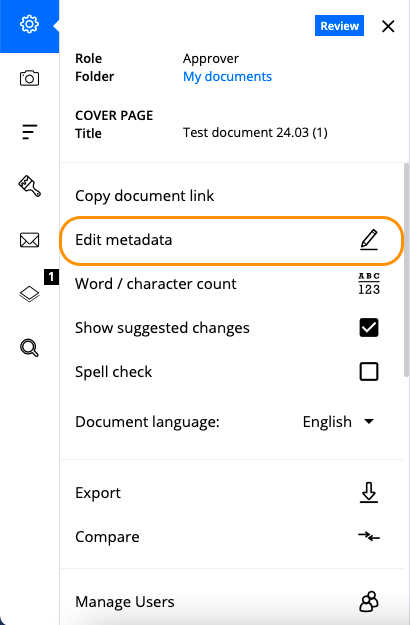
"Edit metadata" in document options highlighted
Then the dialog window appears where you can change the information about the existing document.
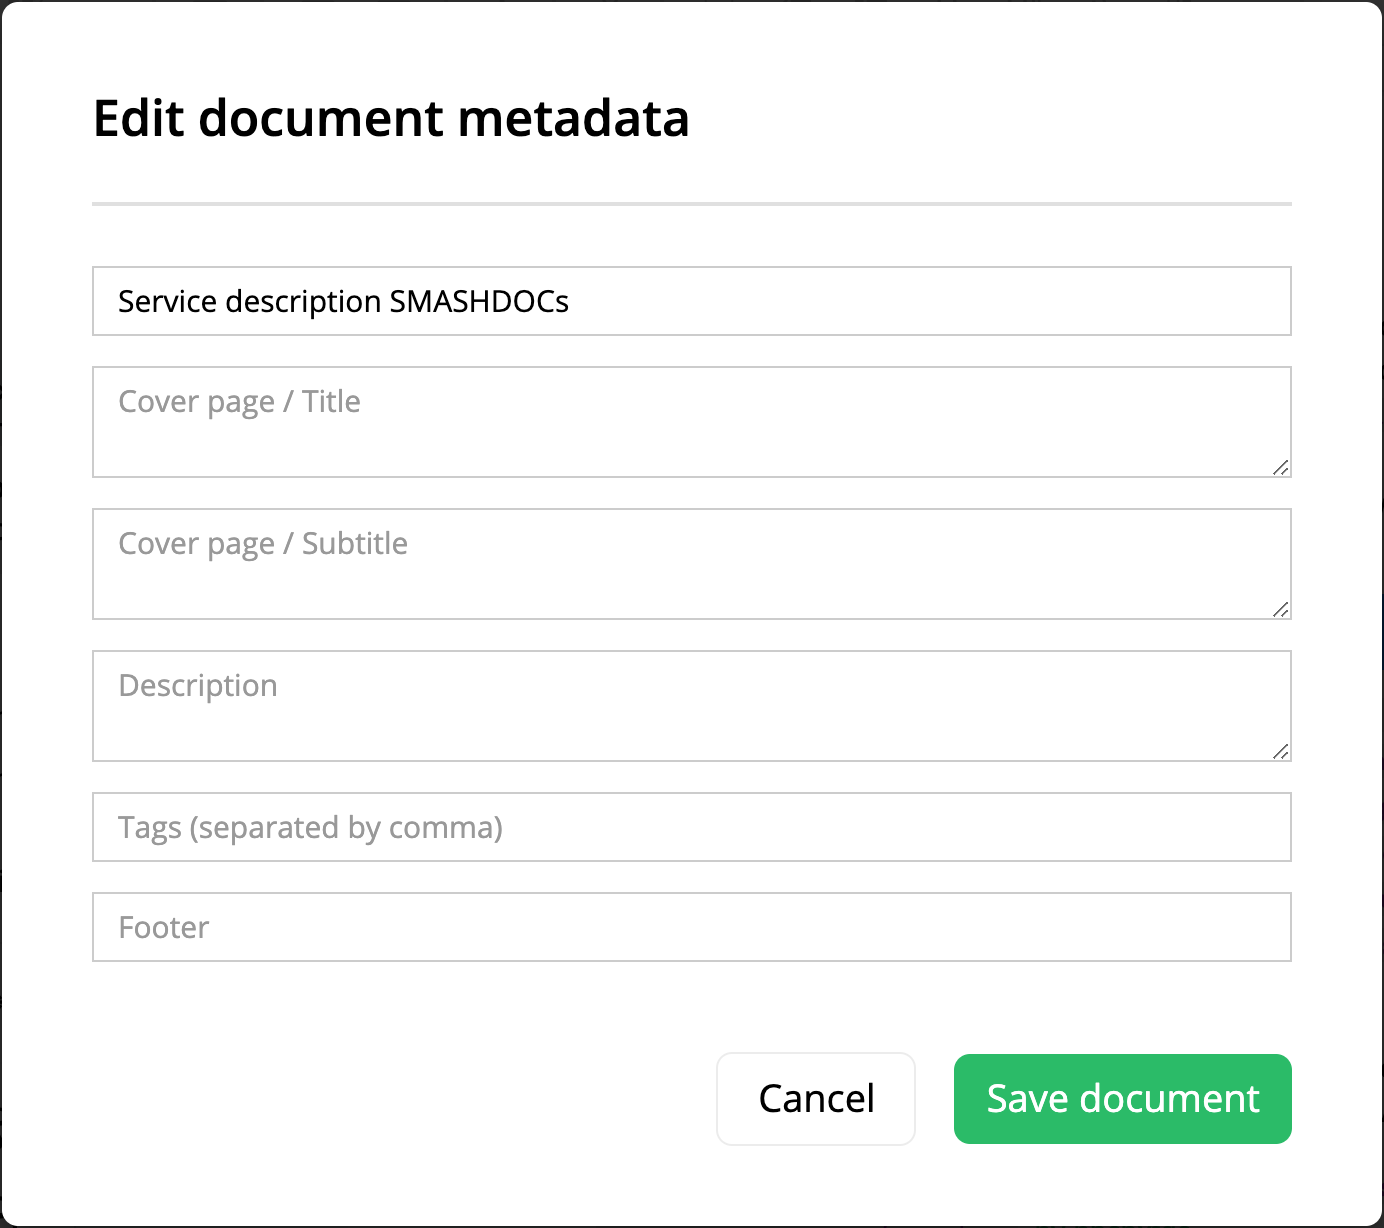
Edit document metadata highlighted
The core characteristic of a document in SMASHDOCs is that it is divided into different components. This makes it easy to make changes to the content in review documents, track them in the versions of a component and approve them.
Hitting ENTER in a draft document creates a new component. Every component has specific properties concerning formatting and outline levels.
The definition of every component's outline level makes it possible to create a document with a logical structure - at any time. Illogical structures within a document, like an inconsistent outline numbering are not possible in SMASHDOCs.
The formatting information let the user create components with different properties such as headings or lists.
Documents can also contain images and tables. They do not have any formatting properties. Every image or table gets a number in chronological order, and the user can add image or table captions.
4.1.2.1Importing a Word document into SMASHDOCs
Apart from creating new documents directly in SMASHDOCs, users can also import an existing Word file in DOCX format into SMASHDOCs. Documents in DOC format are not supported.
After clicking the green plus-button downright in the document view user has an option to "Import Word document (.docx)" in the appearing dialogue.
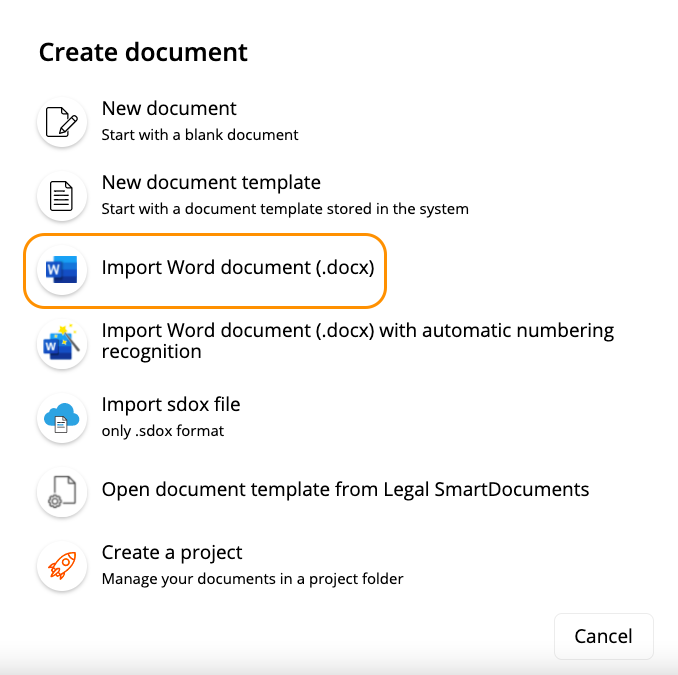
Dialogue for importing a Word document highlighted
In the following, you can either insert a document via Drag & Drop or browse for a document on your local drive.
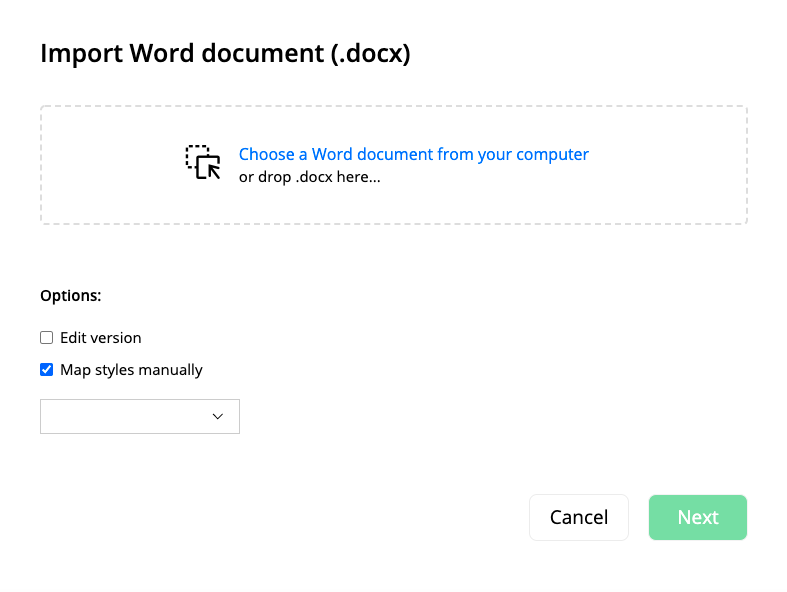
Dialogue for importing a document highlighted
During the import you can perform such functions as "Edit version" and "Map styles manually".
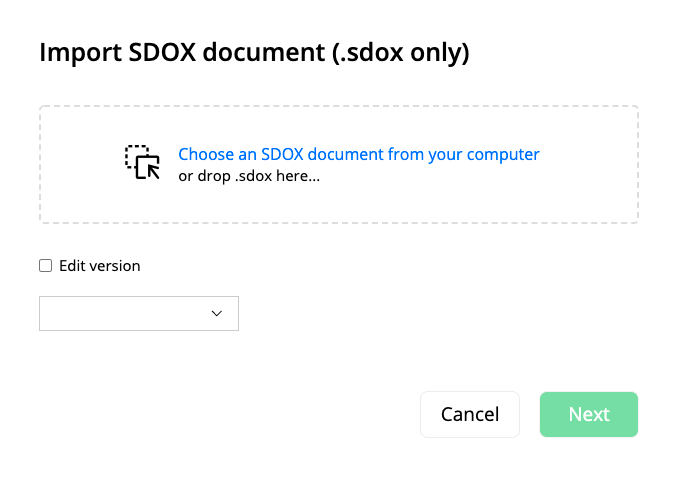
Also, you have an opportunity to decide, whether you would like to choose a particular SDOX-template, into which your document will be imported, or you want to import it, as usual, without any template. If you need to select a template, open the dropdown menu and choose an appropriate one (see Image 50). In case you do not need any templates, leave the field for template empty (see Image 49).

Dropdown menu for choosing a template
All SDOX-templates are configurable in the AdminUI page and can be set for each system individually, therefore, SDOX-templates are not the same in different systems. After importing, the document will look structured according to the selected template.
If you have activated "Edit version", then after clicking "Next", the window with fields for editing version will appear, where you have to insert the name of a version (obligatory) and notes (optionally).
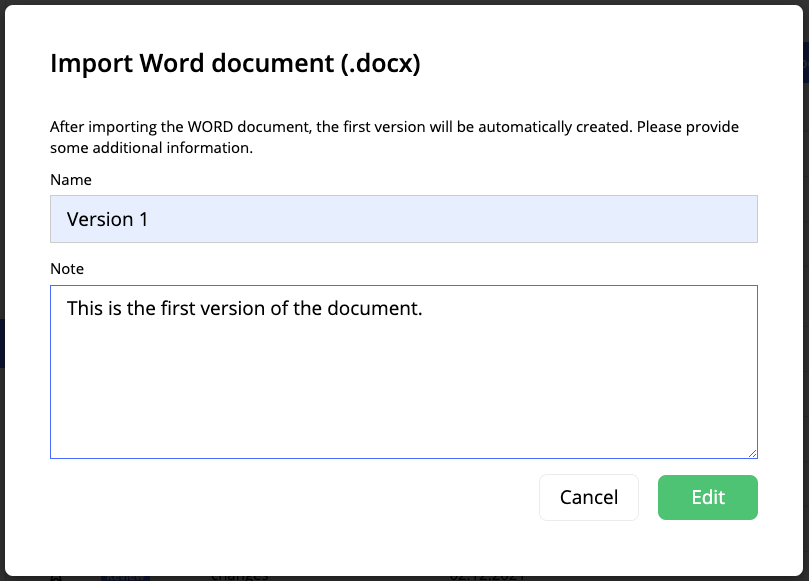
Editing version during the import of Word document
Click "Edit" and in the next step you will be able to determine how an identified Word formatting template will be processed in SMASHDOCs.
By default, the option "Map styles manually" is on. It means you can map WORD with SD styles and / or modify the outline levels for headings and numbered paragraphs manually. During manual mapping only styles that exist in the chosen SDOX-template are suggested. If there are certain paragraph decorators and inline styles which are deactivated in the SDOX-template, these decorators will become default ones, and inline styles will be cleared.
If you wish for SMASHDOCs to assign the styles automatically, deactivate the checkbox "Map styles manually" before inserting the document.
In case no changes were made by the user, then SMASHDOCs automatically formats the respective components accordingly to default settings.

Converting the formatting templates highlighted
In the next step the user can edit the document's metadata after clicking "Import " button.
SMASHDOCs creates a new document out of user's Word file, with all formatting attributes set specifications (if they are technically recognizable and convertible).
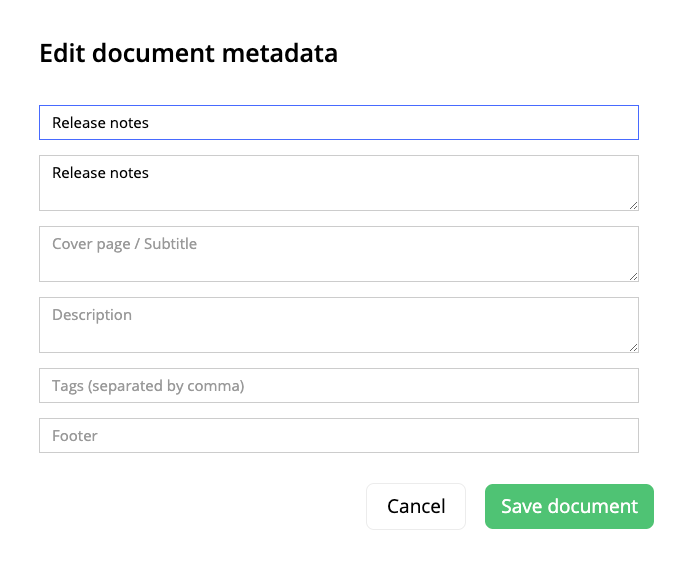
Editing document metadata highlighted
Afterwards, you can edit the document as a draft and share it for review as you would do with a document created directly in SMASHDOCs.
Note: in partner mode systems there is a possibility to set asynchronous import. In this case import will be performed on the background and won't interrupt the process of editing the other documents.
4.1.2.2Import Word document (.docx) with automatic numbering recognition
Apart from the above described importing process there is also an opportunity to import Word documents through the function "Import Word document (.docx) with automatic numbering recognition". This option is particularly useful for legal documents, e. g. contracts. The key notion about such a type of importing is that all levels of numbered headings, specific for legal documents, that have been applied in the Word document are distinguished by SMASHDOCs. Thus, after the import documents have the same outlook in the SMASHDOCs editor, as they have been created in Word.
Note: there are certain paragraph decorators that must be set in the system before activating this type of import. Otherwise, Word import with automatic numbering recognition will not work properly. The required decorators can be installed by SMASHDOCs Professional Services Team.
You can find the option "Import Word document (.docx) with automatic numbering recognition" in the list of options for importing.
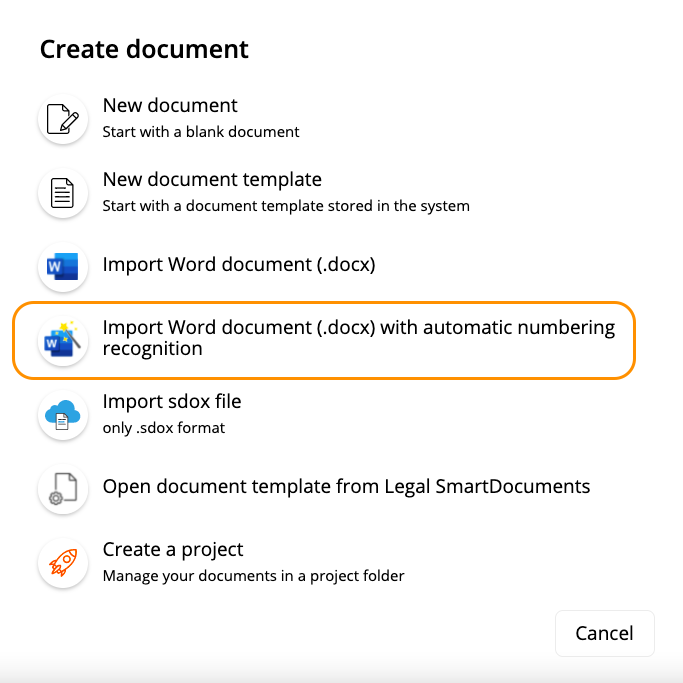
The option "Import Word document (.docx) with automatic numbering recognition" highlighted
After clicking this option, choose a required Word document from your device or add this document via Drag&Drop function. Optionally, you can select also "Apply cleanup routines" and "Edit version", in case you need this actions to be performed towards your document during the import.
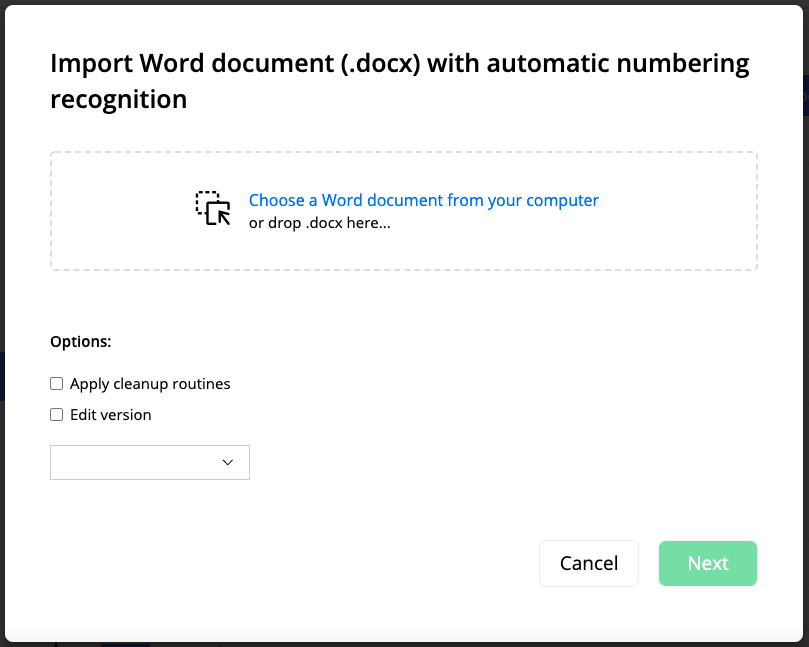
Choosing a Word document for import with automatic numbering recognition
The next step is to decide upon the numbering logic in the imported document.
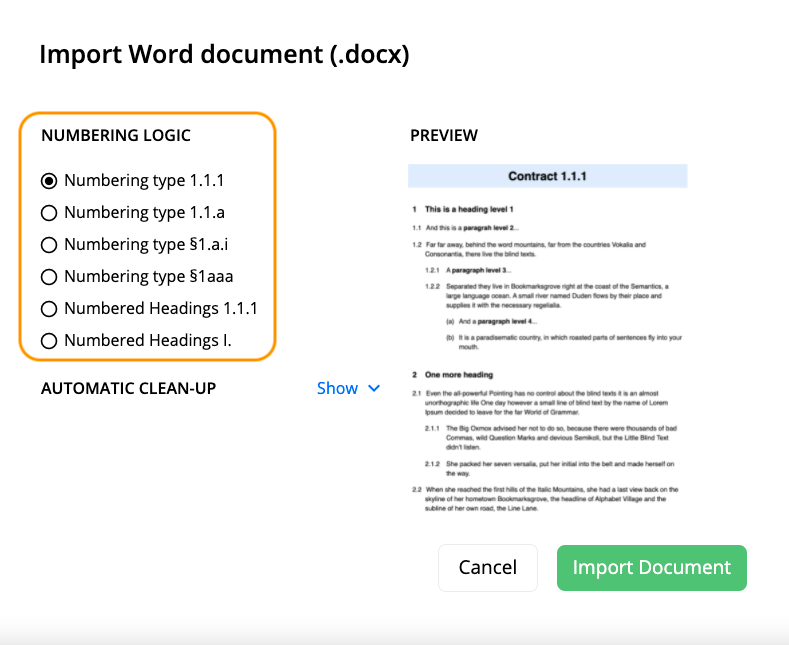
Field for selecting numbering logic
Your selection will depend on the numbers of headings, applied in the Word document. For instance, if in the original Word file there are more than one level of numbered headings and all these levels are marked only with numbers, then you should select the first logic - "Numbering type 1.1.1".
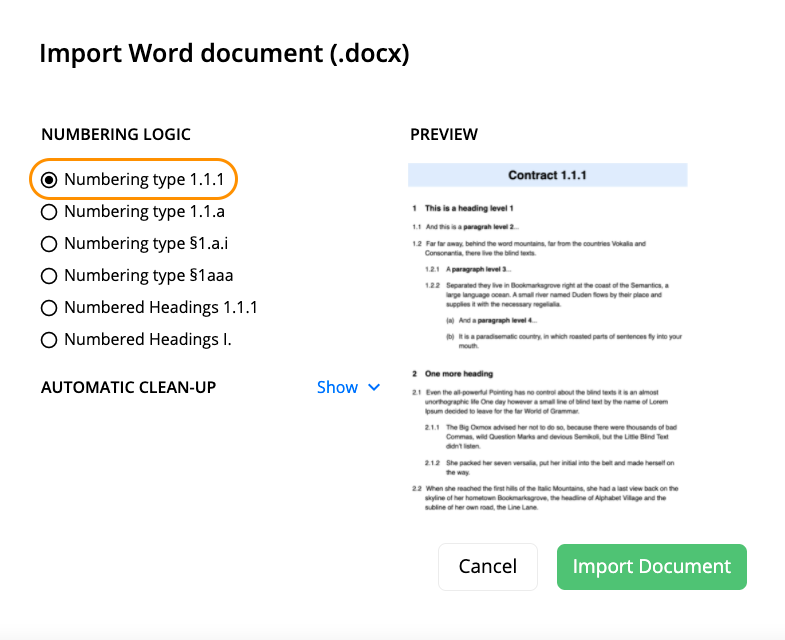
Numbering logic "Numbering type 1.1.1" highlighted
In SMASHDOCs editor all levels of headings will be displayed with numbers, as well.
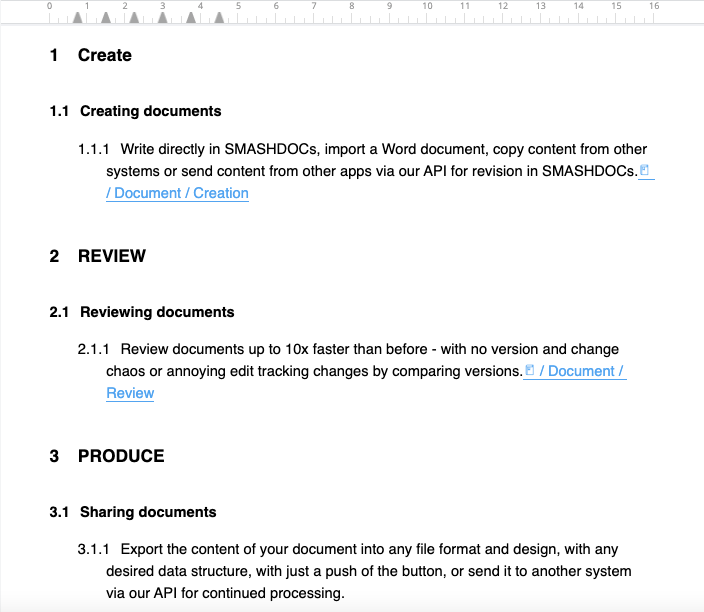
The outlook of the imported document with selected numbering logi "Contract 1.1.1" in SMASHDOCs editor
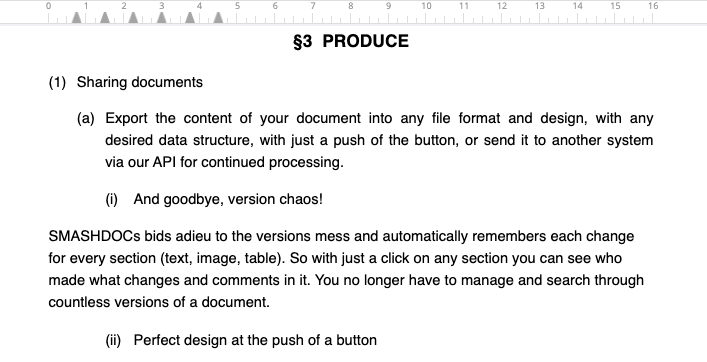
In case there are three heading levels in the Word document and the third level is marked with a letter, then select the second logic - "Numbering type 1.1.a" (see Image 56).
The outlook of the imported document with the third heading level marked with a letter
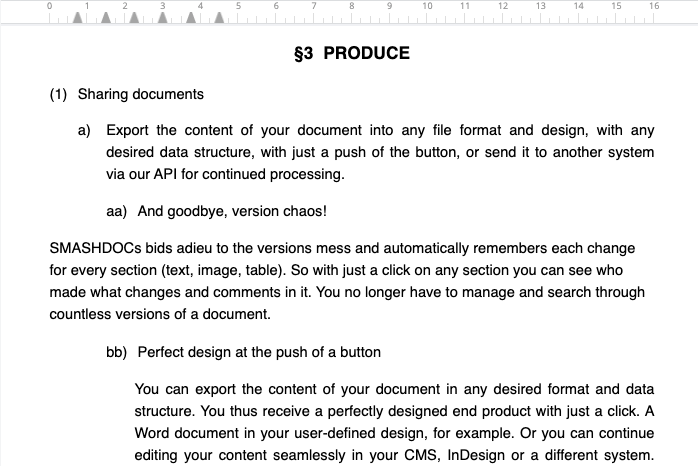
If there are headings in the document that are marked with a paragraph symbol "§" and there are more than three heading levels, then select the logic "Numbering type §1aaa" or "Numbering type §1.a.i", where the levels starting from forth will be marked as "aa" or "i" correspondingly.
The outlook of numbering logic "Contract §1aaa"
The outlook of numbering logic "Contract §1.a.i"
After choosing any numbering logic, you will get preview of how your document will look like, as soon as you upload it. In preview is a default page with the example of selected numbering logic, it is not a page from an imported document.
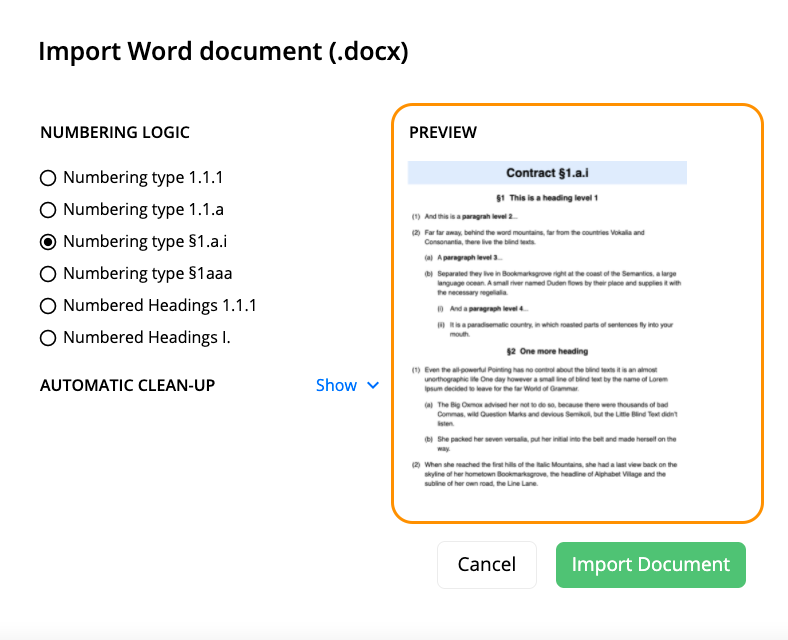
Preview before importing a document
4.1.2.3Support of table indents by Word import
It is also possible to import a Word-file that includes table indents into SMASHDOCs. After you imported such a file, your document in the SMASHDOCs editor will look like this:

Tables with indent highlighted in SD
4.1.2.4Importing SDOX file into SMASHDOCs
The procedure of importing SDOX file into SMASHDOCs is the same as for importing Word document. To see the detailed guide, please go to chapter 4.1.2.1. The only difference is that during the import of an SDOX-file you cannot activate such options, as "Apply cleanup routines" and "Map styles manually".
Importing an SDOX-file
All other procedures with editing version, choosing a template and importing a document are the same, as for Word-document.
Note: available size of an SDOX document for importing is up to 200 MB.
4.1.3Copy document link
Document link is a URL of a document which is displayed above the document in the URL-string. You can copy this link and send it to the other users, and they will be able to open the document right after clicking the link, if they have access to this document.
So, copying the document link is possible in two ways:
●by selecting and copying the link in the URL-string;
●by clicking the option "Copy document link" in the document options left.
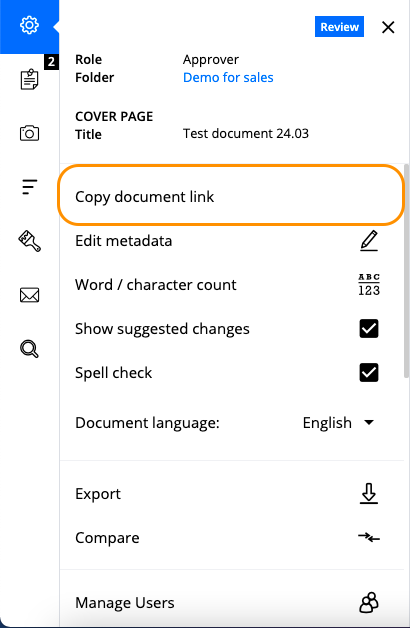
The option "Copy document link" highlighted
After that the document link will be successfully copied to clipboard, and you will be able to send it.
4.1.4Creating a text component
After establishing a new document, the user can easily create new components.
A new draft document always holds one empty standard component.
The first component of a new document highlighted
A user can add content and write text by clicking into the empty component. Hitting ENTER creates further new components.
The procedure of adding new components to an imported document is the same.
SMASHDOCs automatically and continuously saves new changes in a document.
New components do not have to contain text, but you can also save them as empty components. In the document they are displayed as an empty line.
When you open context menu either with right click or by clicking corresponding button in a document, you can see the list of all functions that you can perform with text components. They are:
●Copy;
●Cut;
●Paste;
●Delete;
●Restart/Continue numbering (if context menu was opened in numbered text component);
●Create Conversation;
●Component Tag;
●Others.
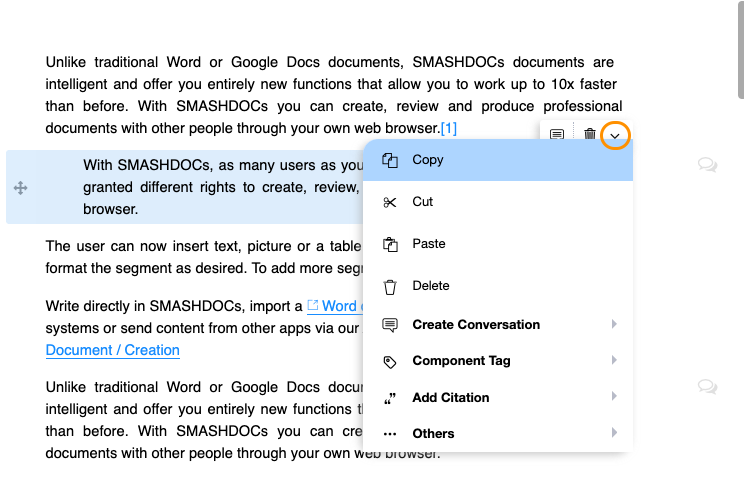
Context menu opened by clicking a corresponding button (highlighted)
4.1.5Change to landscape format
To change pages orientation, go to the context menu of the text/image/table component, click on "Others "and choose "Change to landscape format ".
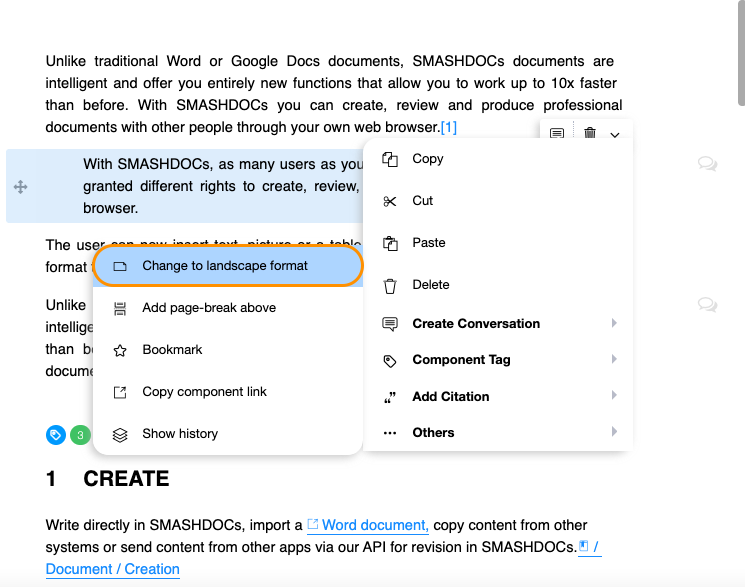
Option "Change to landscape format" highlighted
Once you have applied the landscape orientation, you will notice orientation separator "Landscape" on the top of the component. Please note that using the landscape format in a particular component will apply it to all the subsequent components until you remove it.
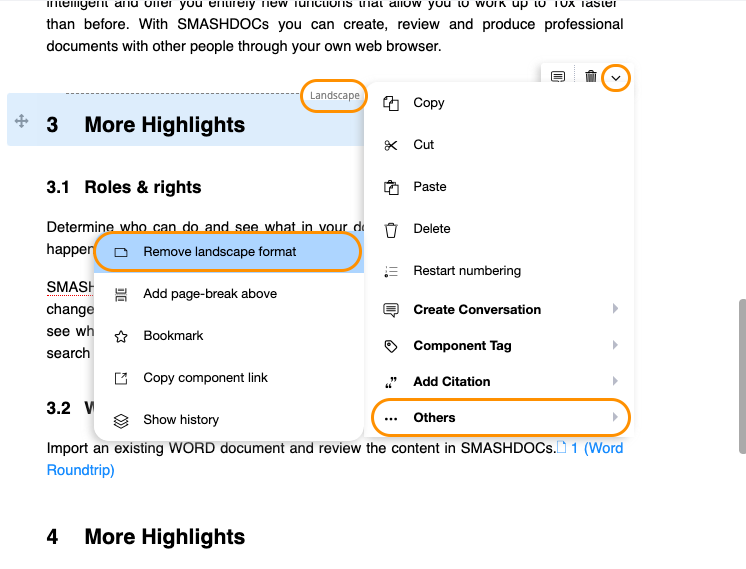
Landscape format and option to remove it highlighted
Orientation switch is not visible in SMASHDOCs editor and gets applied only in the exported file. A particular case exists only for table components. Those are still not being entirely displayed in the landscape format but are scrollable in the document via the horizontal scrolls meaning they get the full landscape width.
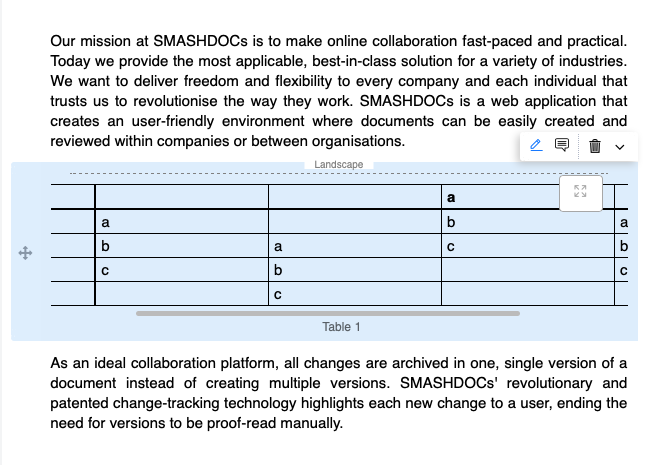
Table in landscape format
Also, once you implement the orientation switch to a table component, the next component automatically receives the opposite orientation switch if it has none.
Important: orientation switch is not visible in SMASHDOCs editor but in the exported file.
SMASHDOCs supports landscape format for such export formats as:
●Word;
●SDOX;
●other formats upon request.
Please also note that the option "Change to landscape format" in the document shared for review is available exclusively for users with roles "Suggest", "Approver".
4.1.6Undo (Cmd + Z) / Redo (Cmd + Shift + Z)
If a user wrote something and made a mistake, they can erase (undo) it using either the Cmd+Z for Mac / Ctrl+Z for Windows = "Undo" shortcut or using Undo button in the toolbar.
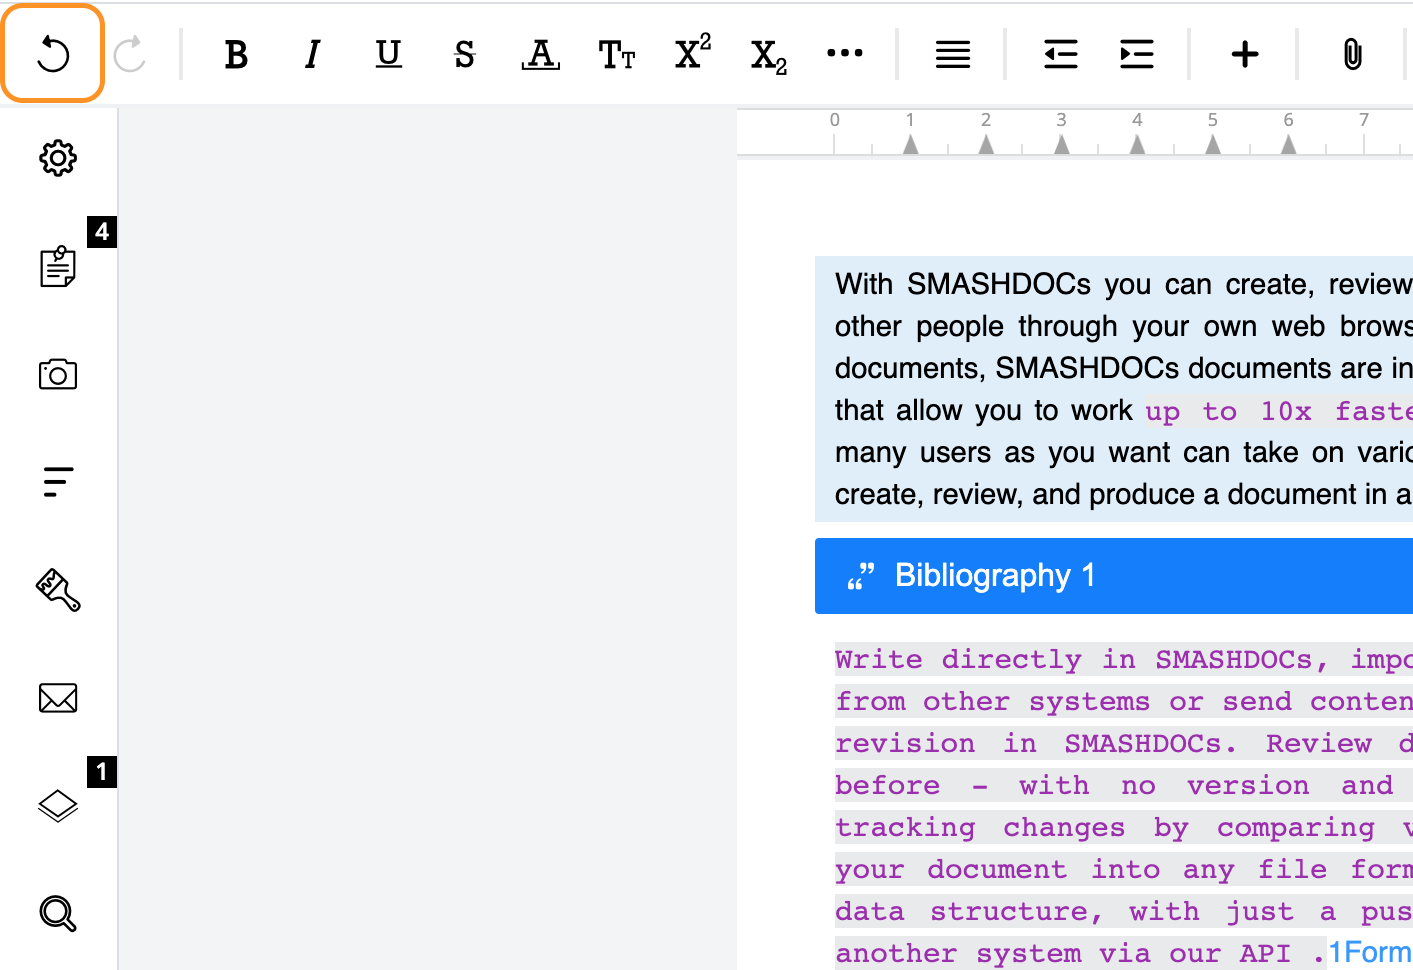
Undo button highlighted in the toolbar
Undo action deletes the last change made by the user. The number of undos is limited only by the number of actions made during the session.
4.1.6.1Draft components
If you accidentally deleted your draft component, it can be restored by merely clicking the Undo button or using our Undo-Shortcut.
Moreover, deleted side notes, images, tables while in the draft mode can be restored as well.
4.1.6.2Review components
While in the review process, the changes can be undone only while staying active within the component.
Note: If leaving the editing component or clicking outside of it, making changes and then closing the document or program any changes that have been made earlier cannot be undone.
Every undo action can also be redone using the shortcut Cmd + Shift + Z for Mac / Ctrl + Shift + Z for Windows or pressing the Redo button in the toolbar. Redo can be performed immediately after the previously undone action. The number of redos is limited only by the number of performed undos.
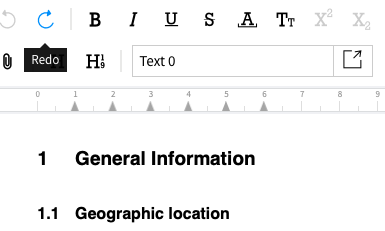
Redo button highlighted in the toolbar
4.1.7Document width and grid settings
The width in the SMASHDOCs editor is 16 cm. This is optimal width for placing text in the line during creating a new document in SMASHDOCs and during the Word-import for text to be aligned and displayed properly.
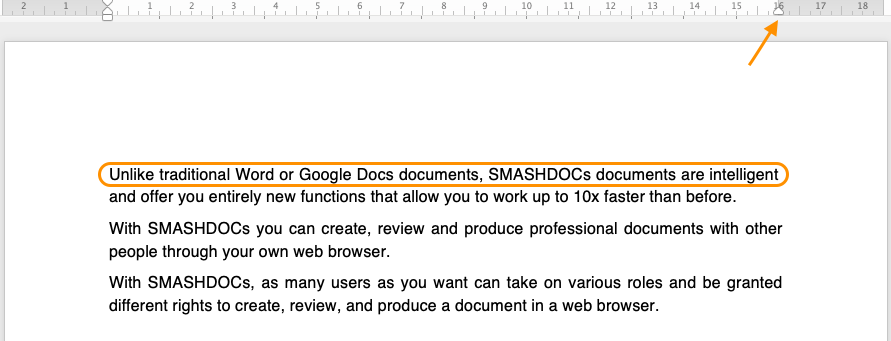
Document width in Word
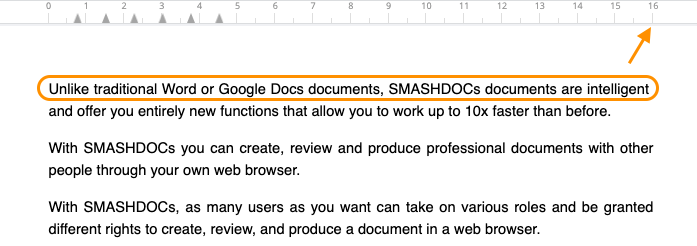
Document width in SMASHDOCs editor
Also, there are default and customized grid values in SMASHDOCs editor. The default grid value is 0.75, customized one is 0.25.
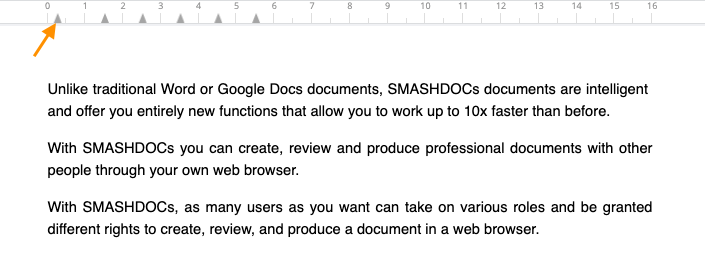
Grid value of 0.25
4.1.8Magic Tabs
Magic tabs are activated in each document by default and it is not possible to deactivate this option.
The option "Magic tabs" provides the user with the possibility to organize the content in his lists according to global grid levels set in the document.
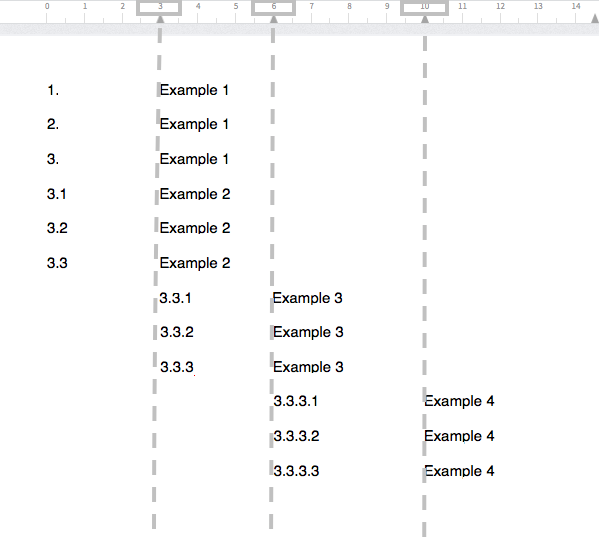
Magic tabs highlighted
4.1.9SD Shortcuts
| Alignment | Windows | Mac |
|---|---|---|
| Centered | Ctrl + Alt + C | CONTROL + Alt + C |
| Left aligned | Ctrl + Alt + L | CONTROL + Alt + L |
| Right aligned | Ctrl + Alt + R | CONTROL + Alt + R |
| Justify text | Ctrl + Alt + J | CONTROL + Alt + J |
Shortcuts for alignment
| Inline styles | Windows | Mac |
|---|---|---|
| Bold | Ctrl + B | CONTROL + B / COMMAND + B |
| Italic | Ctrl + I | CONTROL + I / COMMAND + I |
| Underline | Ctrl + U | CONTROL + U / COMMAND + U |
| Stroke | Ctrl + D | CONTROL + S |
| Superscript | Ctrl + Plus sign | CONTROL + Plus sign |
| Subscript | Ctrl + Minus sign | CONTROL + Minus sign |
| Transcript | Ctrl + T | CONTROL + T |
| Small capitals | Ctrl + 0 (zero) | CONTROL + 0 (zero) |
| Clear format | Ctrl + Space | COMMAND + D |
Shortcuts for inline styles
| Insertions | Windows | Mac |
|---|---|---|
| Insert footnote | Ctrl + Shift + F | CONTROL + SHIFT + F |
| Insert register mark | Ctrl + Shift + I | CONTROL + SHIFT + I |
| Insert side note | Ctrl + Shift + S | CONTROL + SHIFT + S |
| Insert weblink | Ctrl + Shift + L | CONTROL + SHIFT + L |
| Insert cross-reference | Ctrl + Shift + R | CONTROL + SHIFT + R |
| Insert citation | Ctrl + Shift + T | CONTROL + SHIFT + T |
| Insert page-break above | Ctrl + Shift + P | CONTROL + SHIFT + P |
| Delete page-break above | Ctrl + Shift + P | CONTROL + SHIFT + P |
| Set personal component bookmark | Ctrl + Shift + B | CONTROL + SHIFT + B |
| Share draft component for review | Ctrl + Shift + E | CONTROL + SHIFT + E |
Shortcut for insertions
| Special characters | Windows | Mac |
|---|---|---|
| No-break space | Ctrl + Shift + Space | CONTROL + SHIFT + Space |
| Soft-hyphen | Ctrl + Alt + | | CONTROL + COMMAND + | |
| Six-per-em-space | Ctrl + Alt + Space | SHIFT + COMMAND + Space |
Shortcuts for adding special characters
| Approve changes | Windows | Mac |
|---|---|---|
| Accept suggested change | Ctrl + Alt + Y | CONTROL + ALT + Y |
| Reject suggested change | Ctrl + Alt + N | CONTROL + ALT + N |
Shortcuts for approving changes
| Comments | Windows | Mac |
|---|---|---|
| Create comment | Ctrl + Shift + C | CONTROL + SHIFT + C |
| Send reply | Ctrl + Enter | COMMAND + RETURN |
Shortcuts for comments
| Others | Windows | Mac |
|---|---|---|
| Create new document | Ctrl + Shift + N | CONTROL + SHIFT + N |
| Save new changes in review component | Ctrl + S | COMMAND + S |
| Don't save new changes in review component | Esc | ESC |
| Send announcement | Tab + Enter | TAB + RETURN |
| Export | Ctrl + E | COMMAND + E |
| Copy | Ctrl + C | COMMAND + C |
| Cut | Ctrl + X | COMMAND + X |
| Paste | Ctrl + V | COMMAND+ V |
| Delete paragraph decorator, bullet / numbered list | Shift + Backspace | SHIFT + BACKSPACE |
| Restart numbering | Ctrl + Shift + O | CONTROL + SHIFT + O |
| Zoom | Alt + Command + Plus sign / Minus sign | ALT + COMMAND + Plus sign / Minus sign |
Shortcuts for others
4.1.10Input of special characters
The special characters menu is located in the toolbar and is marked with the "Omega" icon. The standard list of special characters is quite encompassing and includes the Greek letters and different special characters:
Standard list of special characters highlighted
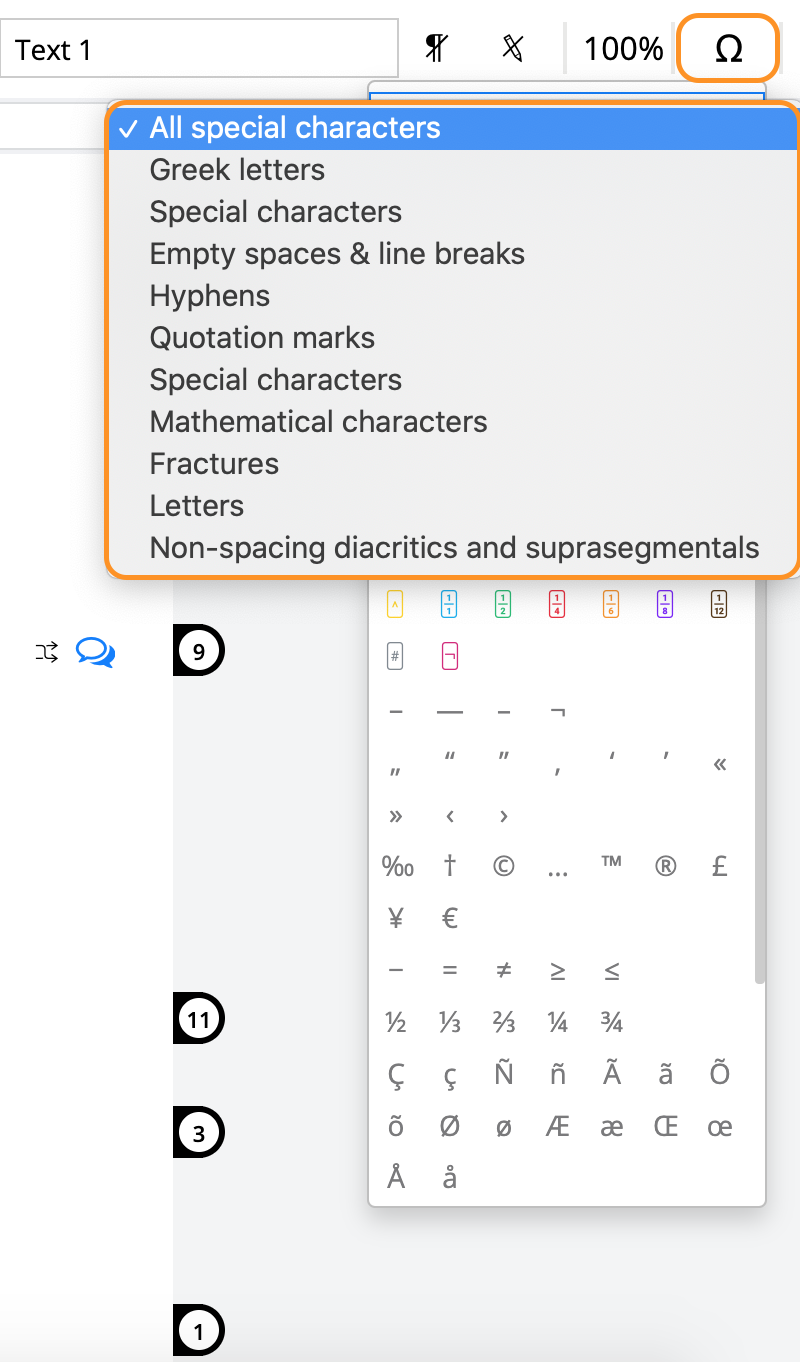
Additionally, the list of special characters can be expanded with non-printing characters upon request, e.g. for publishing purposes. In comparison with special characters that are always being displayed, non-printing characters can be both shown and hidden. For this, click on "Show document options" on the left side of the document and scroll down to "Show non-printing control characters". There you can choose the presentation of non-printing characters in the document:
●Icons
●None
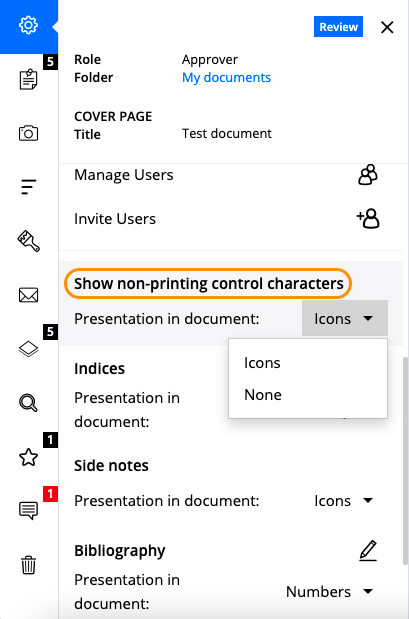
Display options for special characters in the document
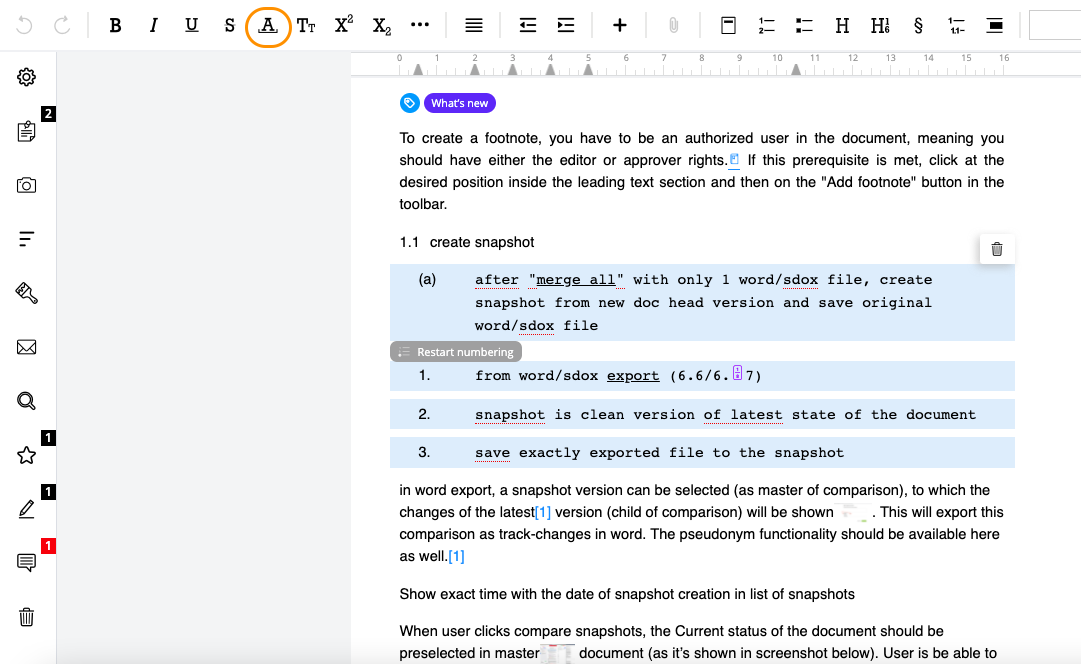
4.1.11Icons for printed symbols in footnote components
To work with the footnotes effortlessly in terms of line breaks and spaces, you can use two special characters for printed symbols. They are hidden under the corresponding icon at the top of a document. You can either find them in "All special characters" or go right to "Empty spaces & line breaks" (can be also in the "Non-printing control characters" tab). The highlighted two options are the ones we need.
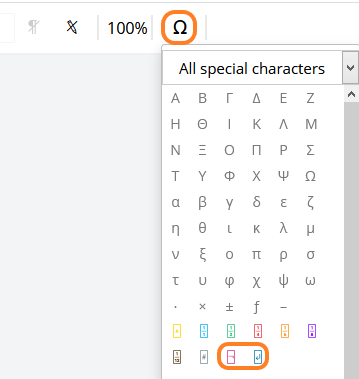
"Soft Hyphen"and "Line Feed" icons in "All special characters" tab
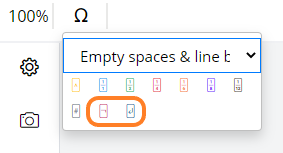
"Soft Hyphen" and "Line Feed" icons in "Empty spaces and line breaks" tab
4.1.11.1Soft Hyphen
This is an essential tool for regulating the hyphens display. Compared to manual typing in, "Soft Hyphen" is a better variant.
Simply click on the supposed place of a hyphen and choose the red "Soft Hyphen" icon.
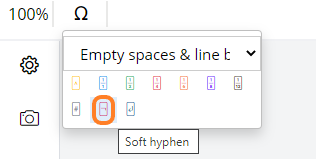
"Soft hyphen" icon highlighted
NB: To see the actual hyphen in the text, go to "Show document options" and see "Show non-printing control characters". Choose "Icons" for the display of a symbol, "None" - for hiding an icon.
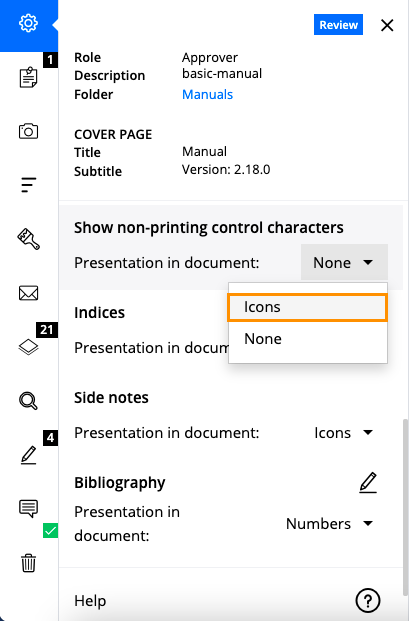
"Show document options" tab with "Show non-printing control characters" options
Continue typing after that, if the word is long enough, the syllable(s) will be moved to the next line. It looks like this:

The footnotes component with the cursor at the place of a supposed hyphen
The footnotes component with a soft hyphen highlighted
In case the word is short and stays on the current line, the hyphen won't be visible at all and you can proceed with writing as usual.

The footnotes component with the cursor at the place of a supposed hyphen

The footnotes component with a soft hyphen highlighted (hyphen isn't visible because the word is short to be segmented and moved to the next line)
4.1.11.2Line Feed (Soft Return)
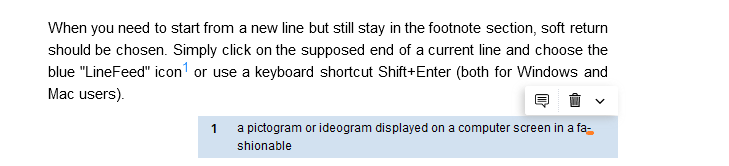
When you need to start from a new line but still stay in the text component, Line Feed (Soft Return) should be chosen.
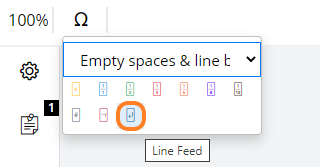
"Line Feed" icon highlighted
Simply click on the supposed end of a current line and choose the blue "Line Feed" icon or use a keyboard shortcut Shift+Enter (both for Windows and Mac users).
"Line Feed" icon highlighted: new line appeared after clicking on it
NB: To see the actual soft return icon in the text, go to "Show document options" and see "Show non-printing control characters". Choose "Icons" for the display of a symbol, "None" - for hiding a symbol.

"Show document options" tab with "Show non-printing control characters" options
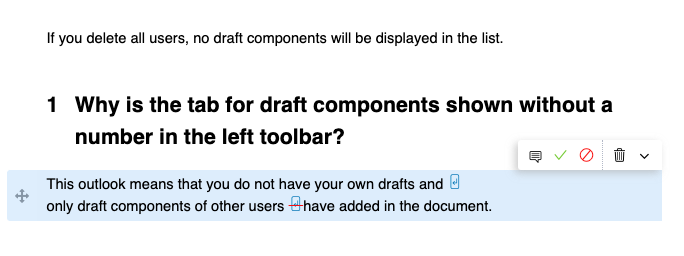
Adding and removing soft return are tracked in the component history of a corresponding text or footnote component. These changes can be also accepted or rejected.
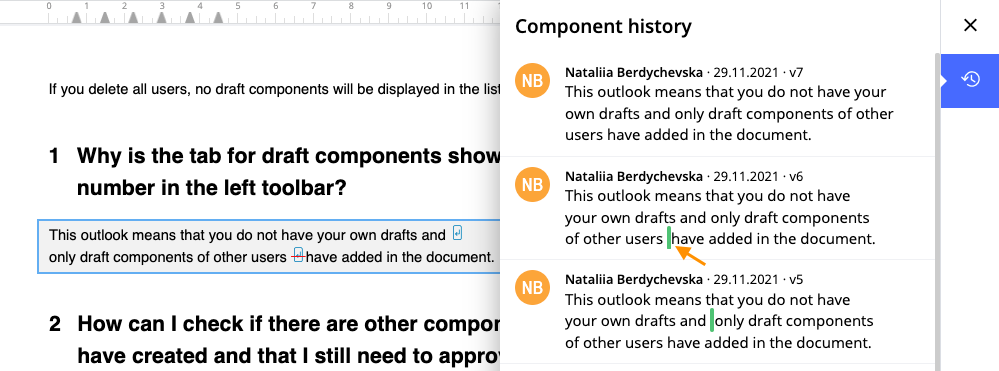
Tracking of adding/removing Line Feed
You are also able to break the existing lines if needed with the same sequence of actions.

Footnote component BEFORE applying "Line Feed"

Footnote component AFTER applying "Line Feed"
All applied soft return options in Word document are supported in SMASHDOCs after importing, as well.
4.1.12Quick Format Buttons
Quick Format buttons mean one or a few groups of paragraph styles fixed in the tab bar with the default or custom icons. Usually, these include most frequently used styles that therefore should be accessed easier and quicker.
Quick Format buttons are configurable for each system individually.
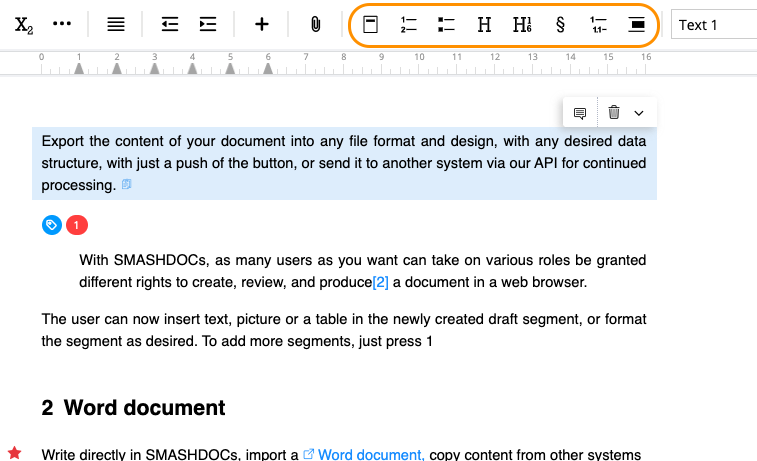
Quick Format Buttons
4.1.13Zoom button
Zoom button enlarges the font size (text component, text in tables, image and table captions), while all control buttons remain unchanged. Default when opening / reloading a document is 100%.

Zoom button highlighted in the toolbar
Besides the zoom button in the toolbar, you can also use the key combinations "Ctrl + / Ctrl - " for Windows and "COMMAND + / COMMAND - " for Mac. For more shortcuts see Shortcuts in SMASHDOCs.
4.1.14Inserting an image
A document can also contain images. Currently, SMASHDOCs supports the following image formats:
●PNG
●JPEG
●TIFF
●EPS
●PDF (the first page will be inserted as an image, other ones ignored)
There are several options to insert an image into a document.
Click into the component that you want to add the image below. Afterwards, click on the "Insert image" button in your formatting bar.
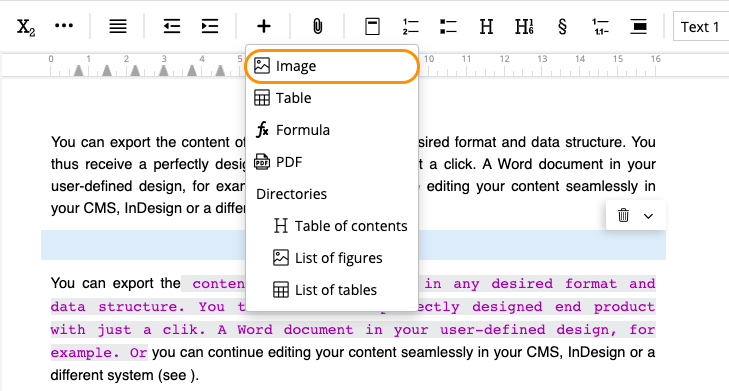
Button "Insert image" highlighted in the formatting bar
A dialog box appears for adding images. A user can insert an image as follows:
●Upload manually and search for the image in PC's file storage
●Drag & Drop an image into the dialogue box
For manually uploading an image a user has to open computer's file browser by clicking on "browse" and search for the desired image.
For inserting an image via Drag & Drop, a user opens image from PC's file storage and drags it into the defined area within the dialogue box. SMASHDOCs uploads the image automatically.
User can decide for each image individually whether to number it. Unnumbered images do not count for the ongoing numbering but still appear in the table of images. If the numbering is active, users can choose the numbering level: first (1.), second (1.1).
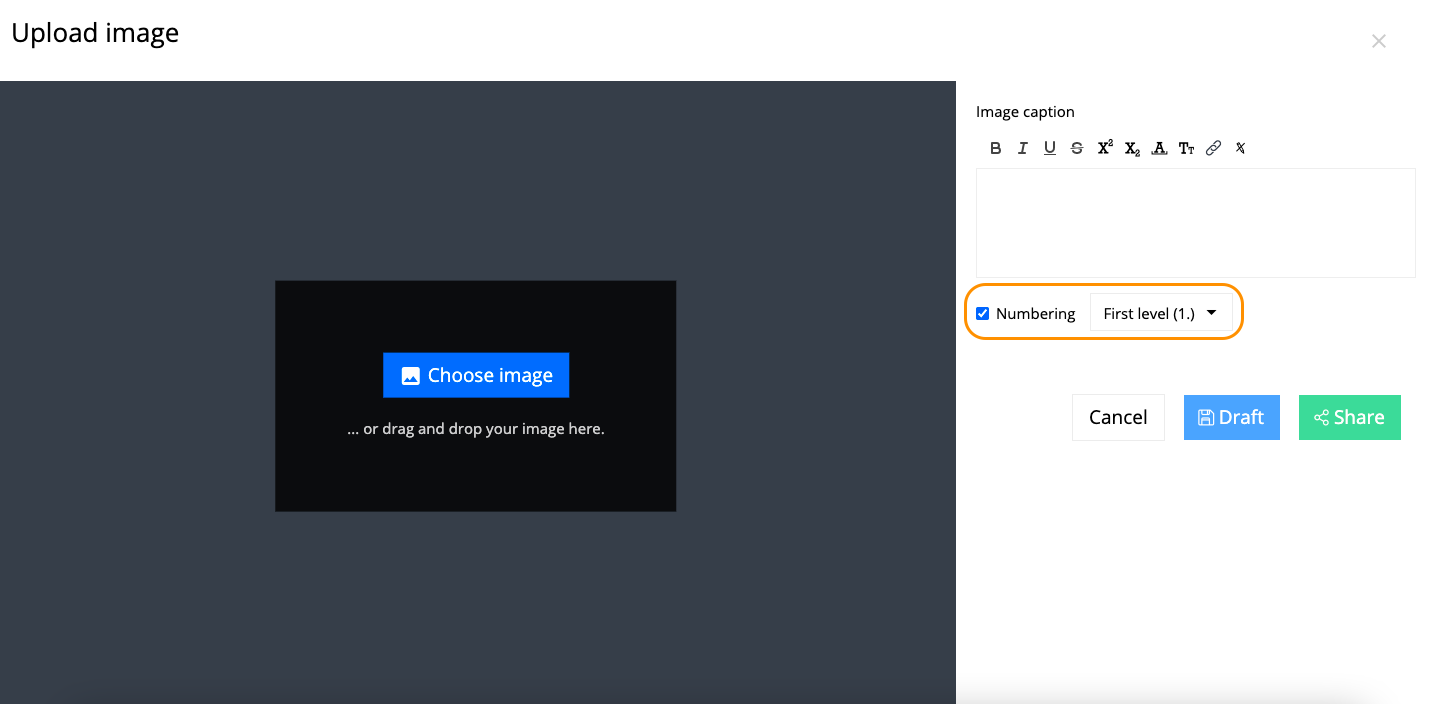
Dialogue window "Insert image" highlighted
You can also insert image caption. After saving the image, the caption appears below it and in the list of figures.
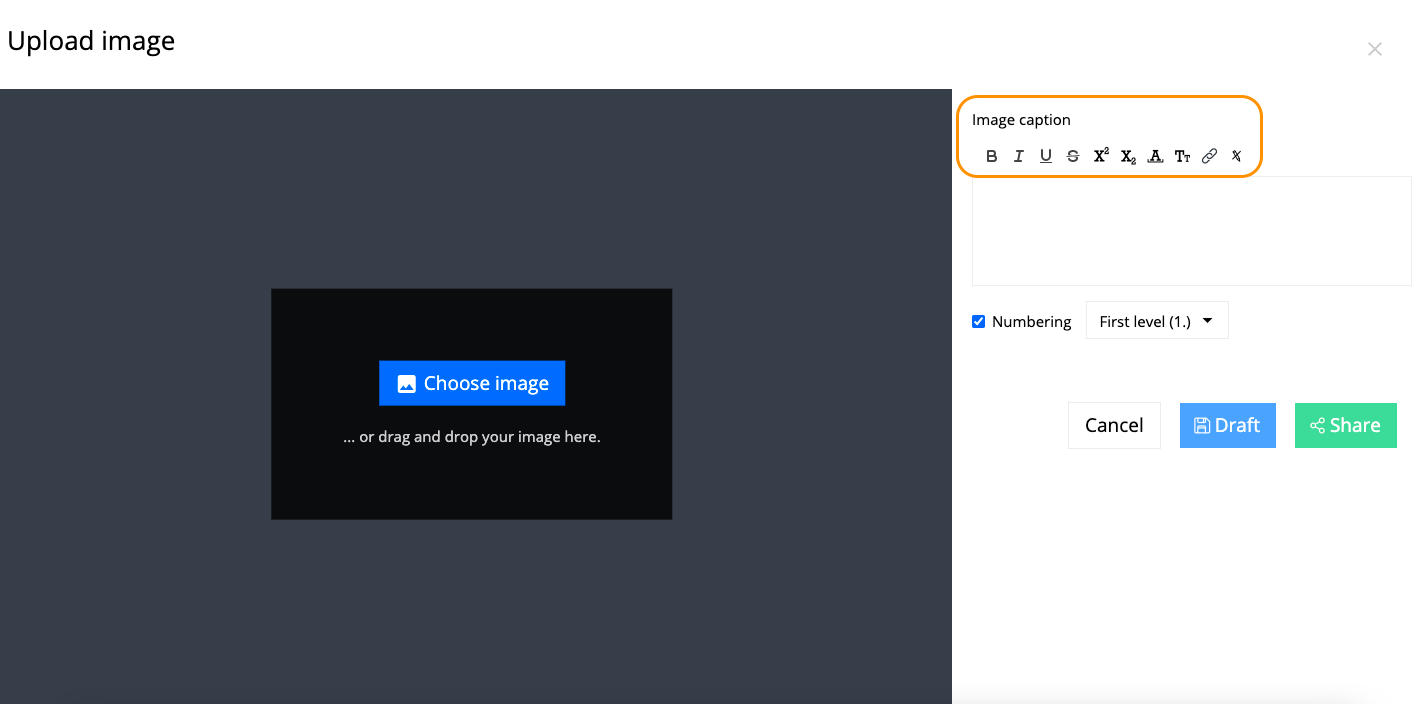
Inserting image caption
Text in image caption can be formated with the following styles:
●Bold;
●UItalic;
●Underlined
●Strike through
●Superscript
●Subscript;
●Monospace;
●Small caps.
Options to insert a weblink and clear formatting are available during inserting image caption, as well.
It is also possible to directly insert an image into the document by choosing an image from local file storage and dragging it to the respective position in the document. SMASHDOCs automatically creates an image component and opens the window for entering a title.
If a user clicks outside the dialogue window without inserting or saving an image, the process gets canceled, and the empty image component disappears.
Unlike text components, image components do not have any formatting or additional properties.
4.1.15Inserting a table
In addition to texts and images, users can also insert tables into a SMASHDOCs document. Just like images, user can create table components either right under a selected component or create a new empty component that will be transformed into a table component. Also, there is a possibility to create tables using the "Insert table" button in the formatting bar.
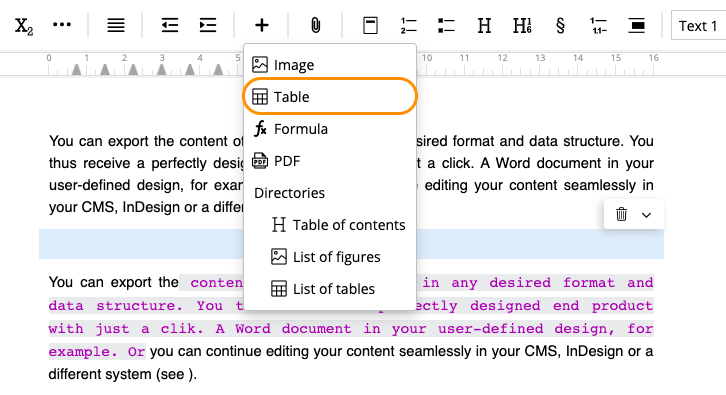
"Insert table" button highlighted in the formatting bar
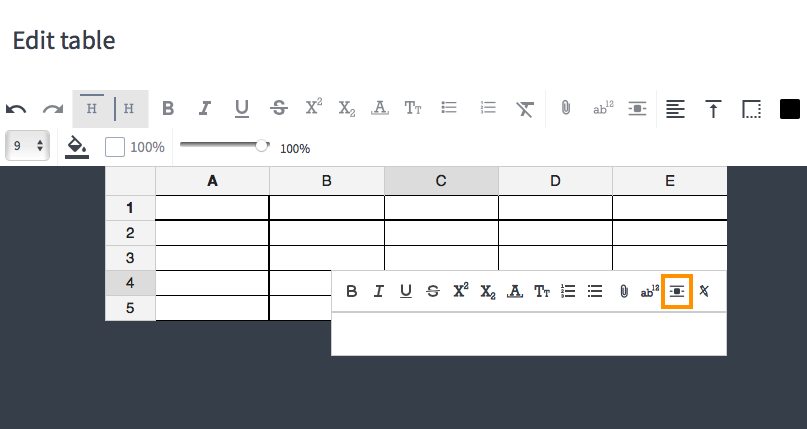
A user can edit the table in the appearing dialog window. It is possible to mark the first row and column bold as a header, adjust the table's overall size and add a caption.
Furthermore, a user can adjust the formatting for every cell individually in the formatting bar on the dialog box's upper margin.
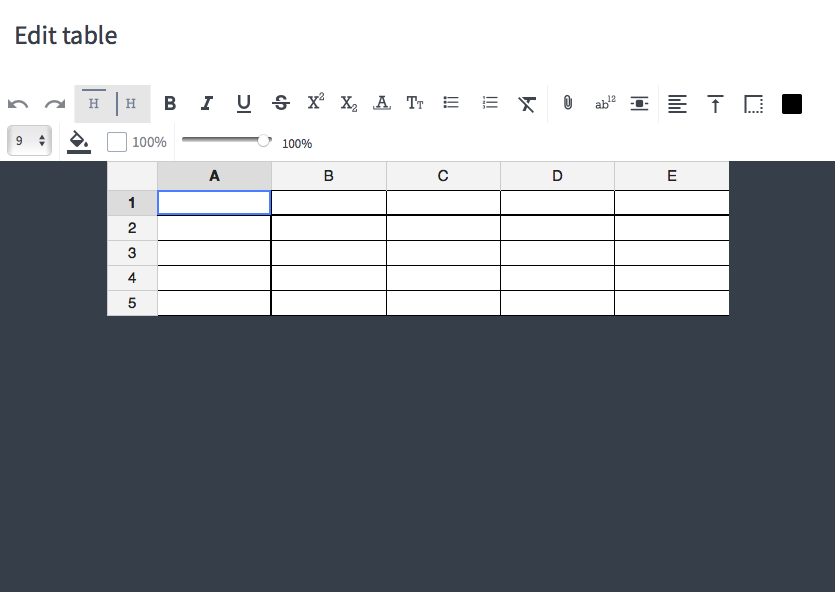
Dialogue for creating tables highlighted
Right-clicking into a cell or double-finger clicking for Mac users opens the menu for adding, merging and deleting rows and columns.
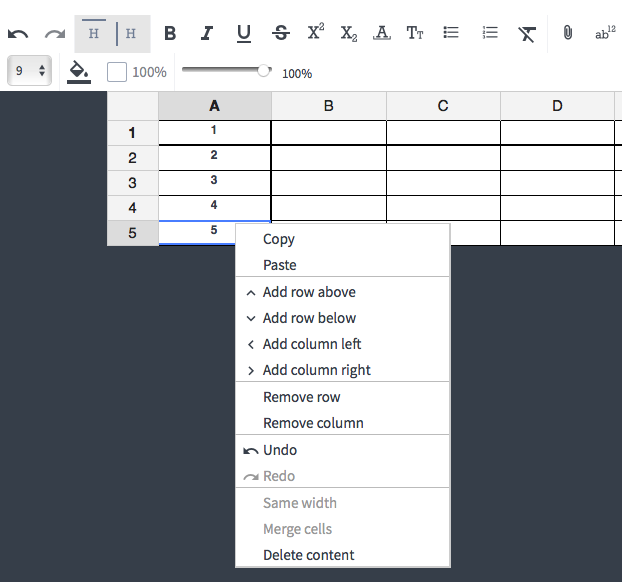
Menu for adding and deleting rows and columns highlighted
Move one or more rows of columns by marking them and dragging them to their new position.
If a user wants to delete the inserted text in a table cell, it is needed to select the cell, then open the context menu and click "Delete content".
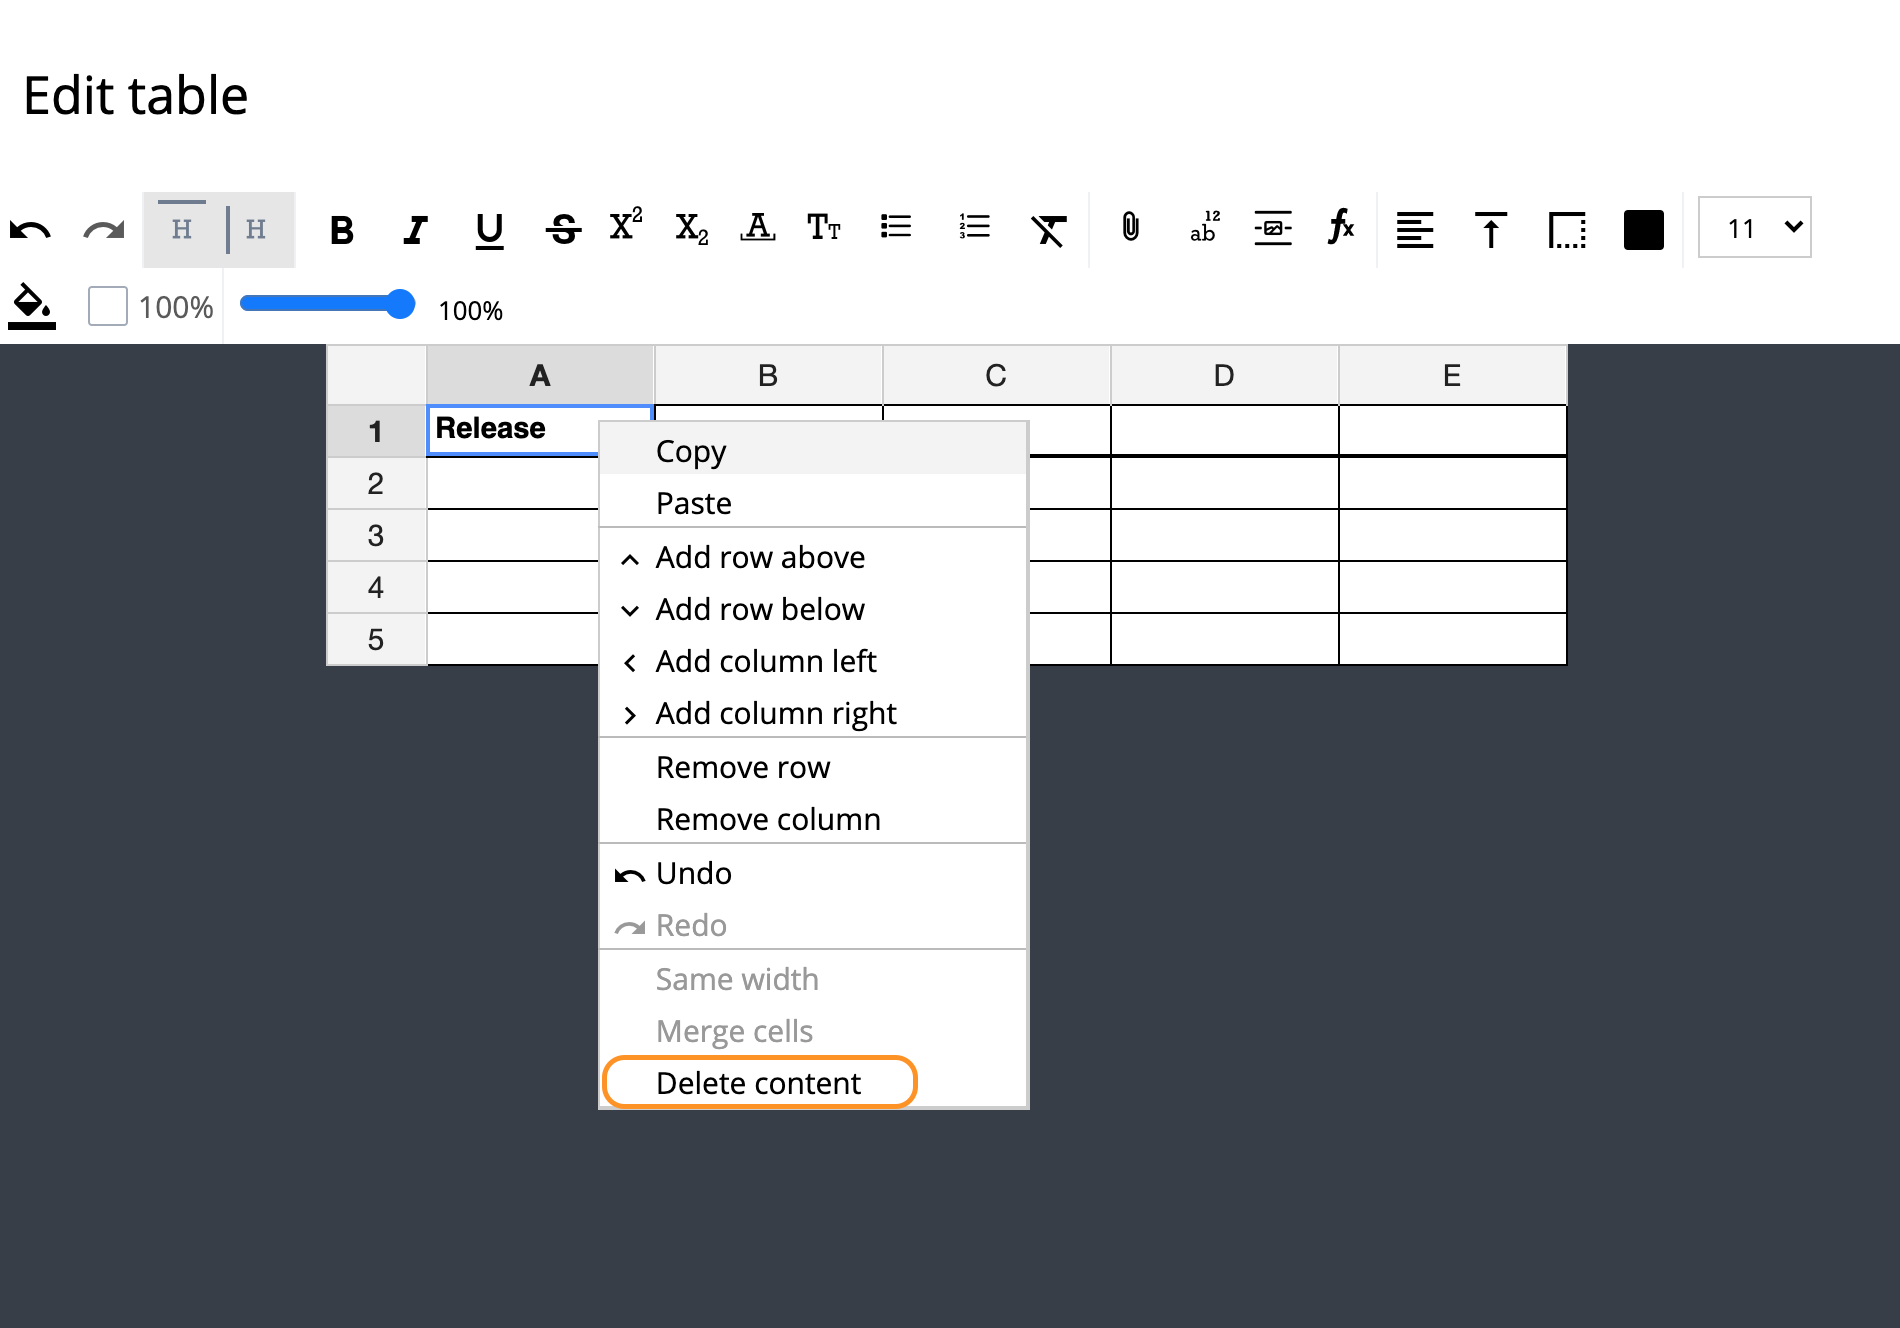
'Delete content' highlighted
To return deleted text, "Undo" in the context menu should be clicked (Image 101).
Like for images, table numbering is optional. Tables without numbering still appear in the list of figures.
It is also possible to process content from Excel tables in SMASHDOCs. Just copy the content in Excel and paste it in a SMASHDOCs table. Unlike images, however, this only works within the dialog window. Importing tables directly into the document using drag & drop is not supported.
Like image components, table components do not have any formatting or additional properties.
If a user wants to delete a table from the document, it is required to select the table, then press the button "Backspace". In order to return the deleted table, "Undo" in the top left corner must be clicked (see Image 71).
Note: it is possible to return deleted table only in draft mode. In review mode you cannot return your table after deletion.
4.1.16Inserting a weblink
With SMASHDOCs it is possible to integrate web links into documents. A user can add web links in text components but not headings.
There are two ways to create a link: a user can either select text and link the highlighted text or insert a link without selecting text in advance. In this case, the link is placed at cursor's position in a text component and the user can define the link text themselves.
Afterwards, click on the button "Add link" and then selects "Weblink" or use the shortcut (Ctrl + Shift + L) for Windows or (CONTROL + SHIFT + L) for Mac users.
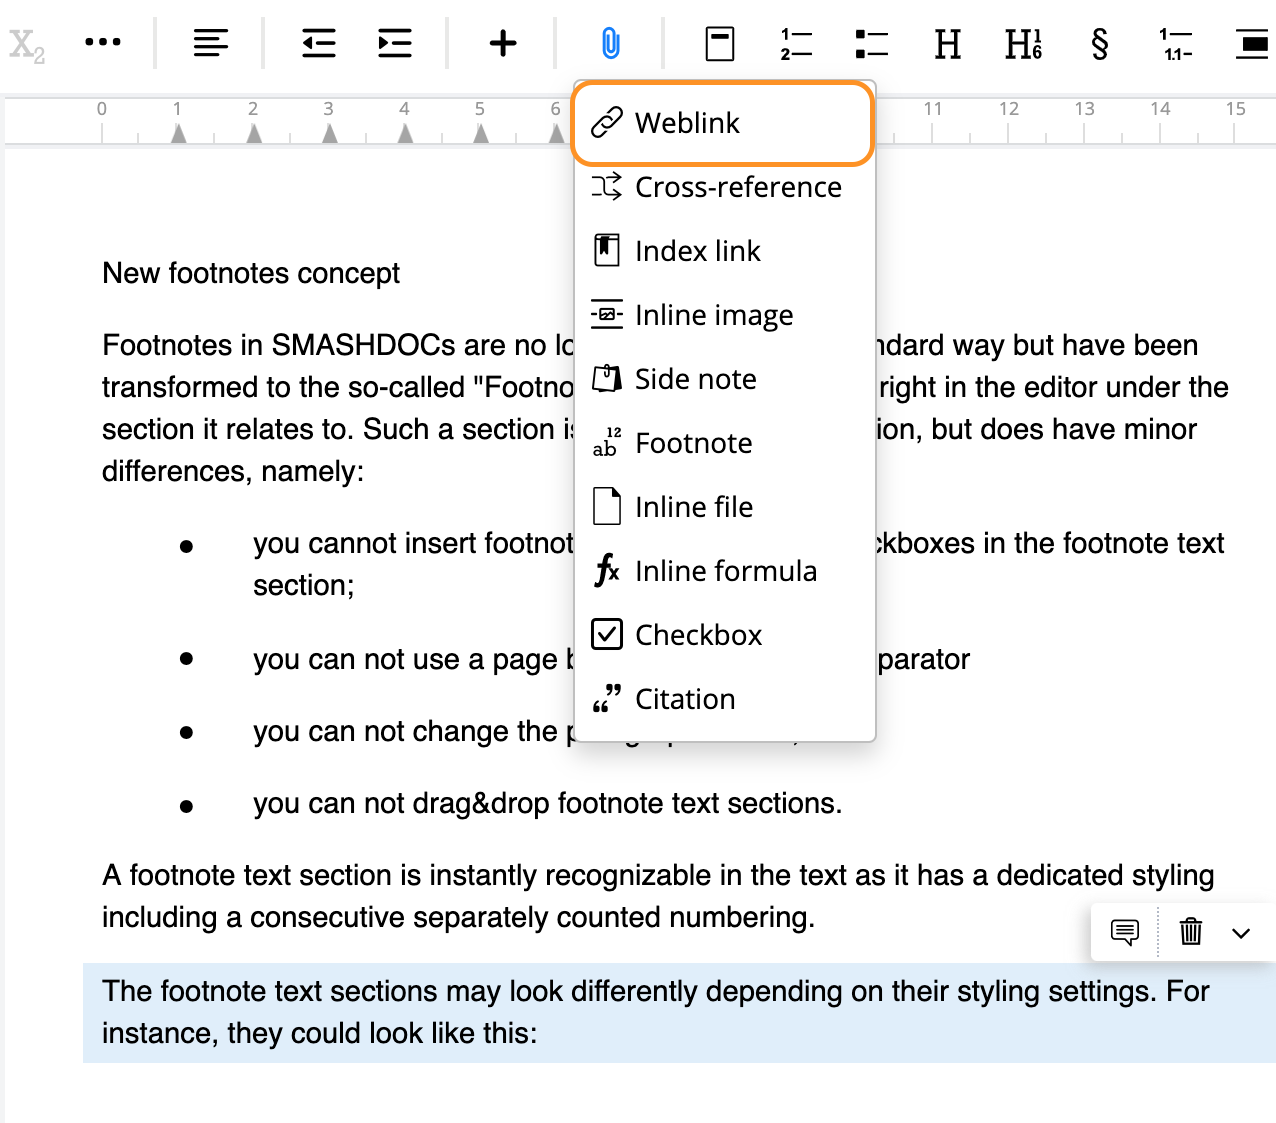
Button for adding a web link highlighted
Enter the respective link into the lower field of the appearing dialogue window. In the upper field, the user can determine how the link is displayed in your document. If you highlighted text when clicking the "Add link" button, this text automatically shows up in this entry field.
Dialogue for editing the weblink highlighted
4.1.17Inserting a cross-reference
Apart from weblinks, a user can also add cross-references within a document.
Reference targets can be:
●Headings
●Numbered headings
●Numbered text components (without heading attributes)
●Tables
●Images
●Footnotes
All paragraph styles can be referenced, the only requirement for that is that it should be configured in Admin UI page per system upon user specifications.
To add a cross-reference, click on the position in a text component where the reference should be. Click on the "Add link" button in the formatting bar and select "Cross-reference" or use the shortcut (Ctrl + Shift + R) for Windows or (CONTROL + SHIFT + R) for Mac users.
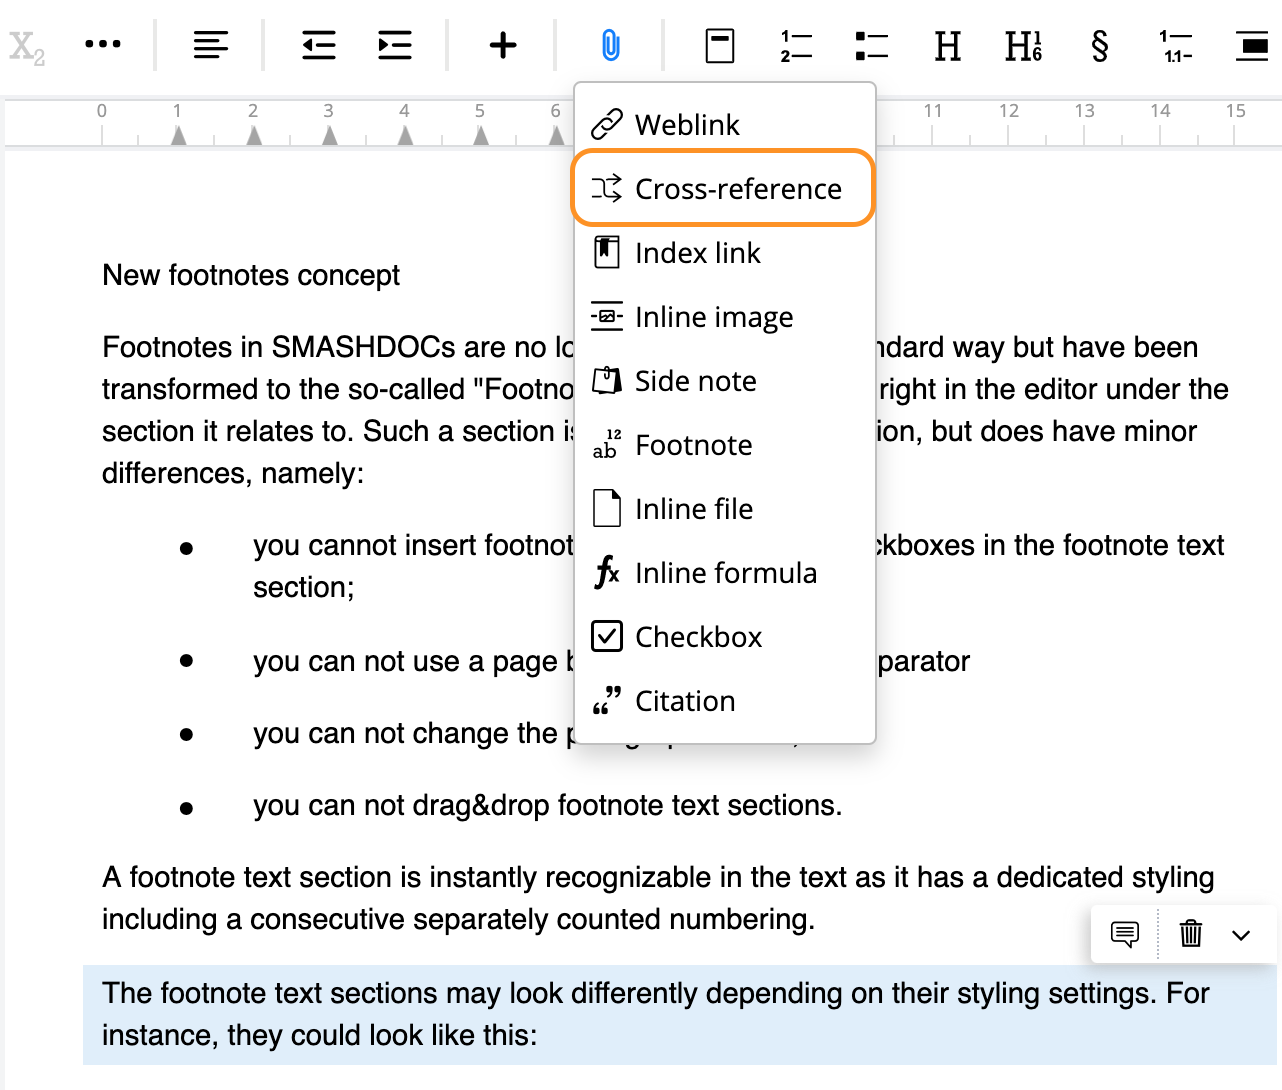
Button for inserting a cross-reference highlighted in the formatting bar
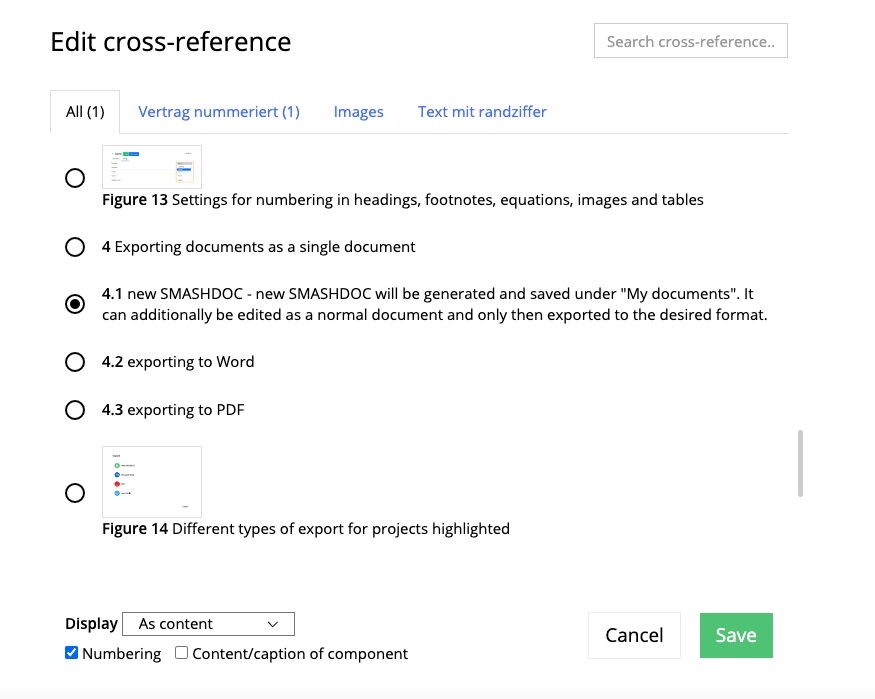
A dialogue window opens, where the user can select the reference target and decide if only to display the number of the respective component or also its text in the reference.
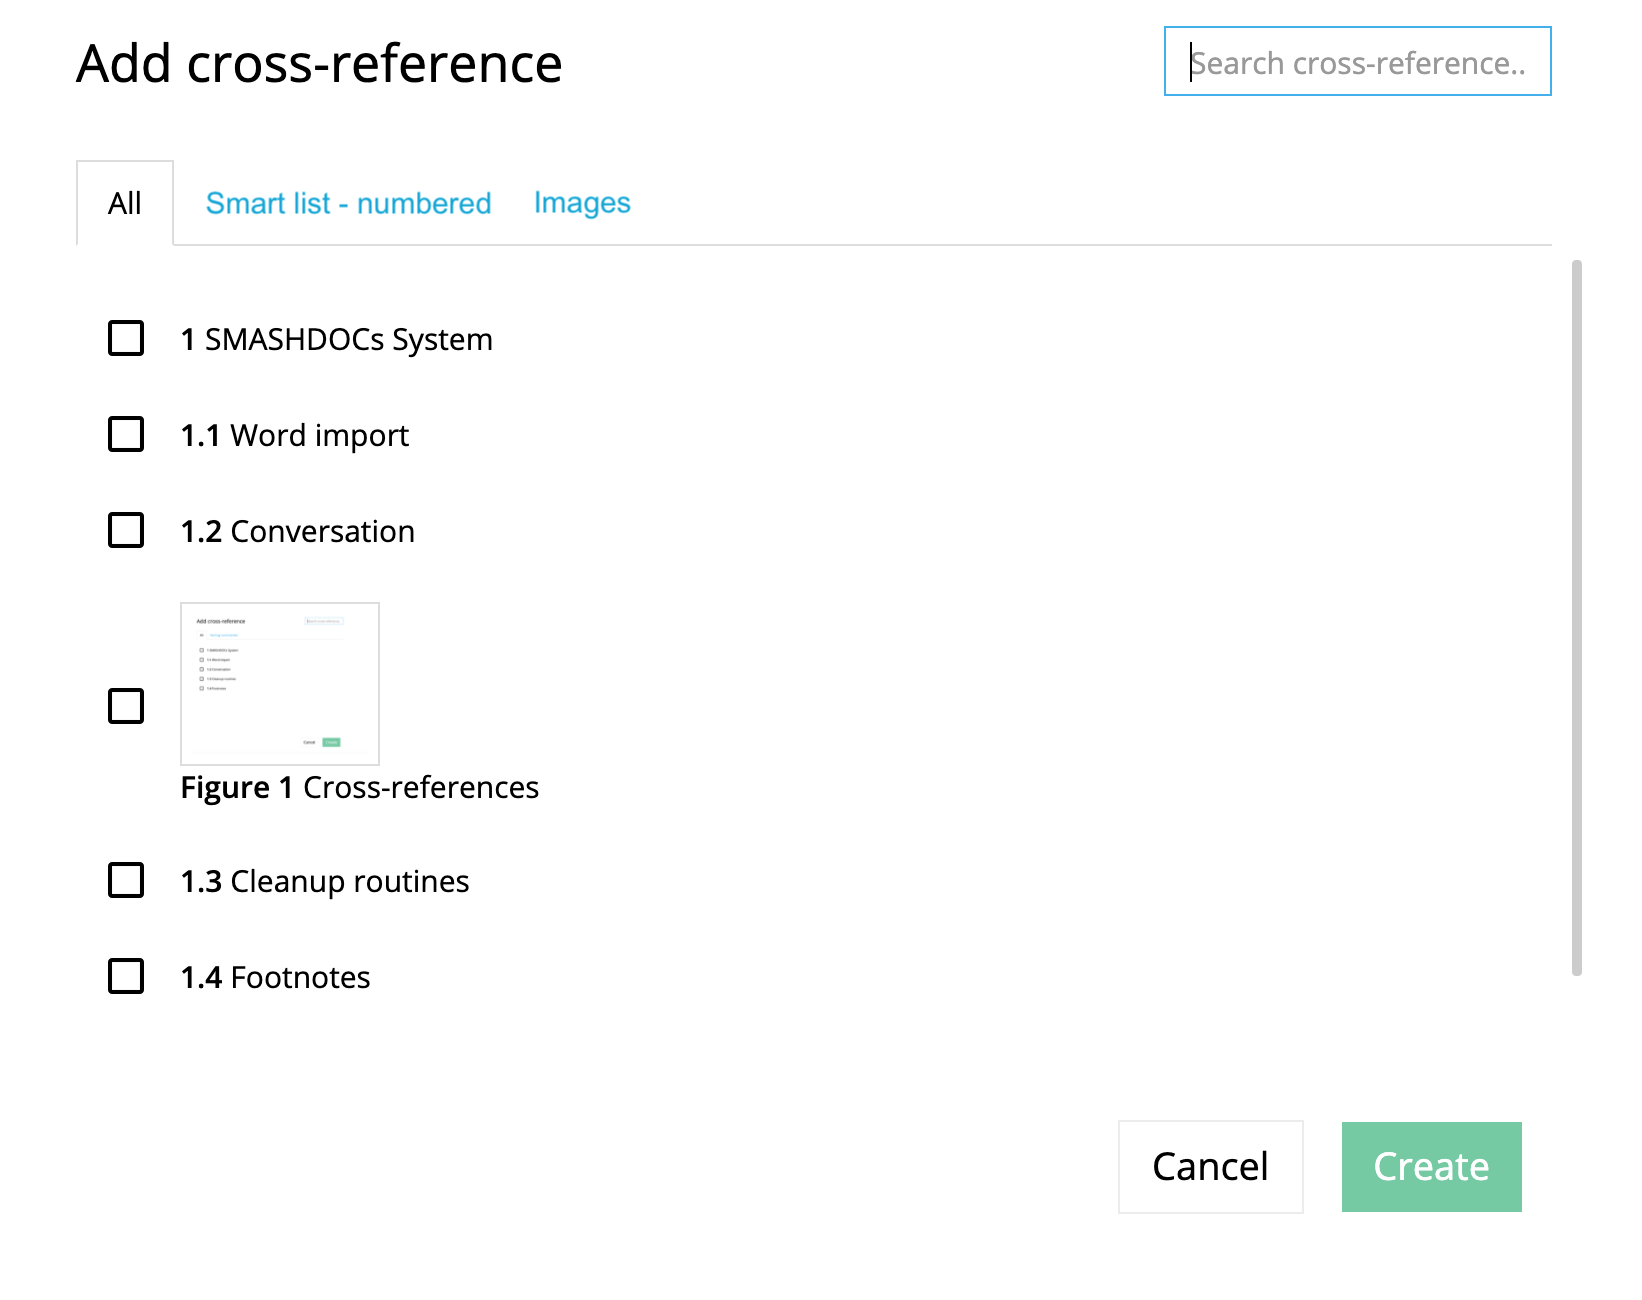
Dialogue window for adding a cross-reference highlighted
You can also choose, whether cross-references should be displayed as content or as page number.
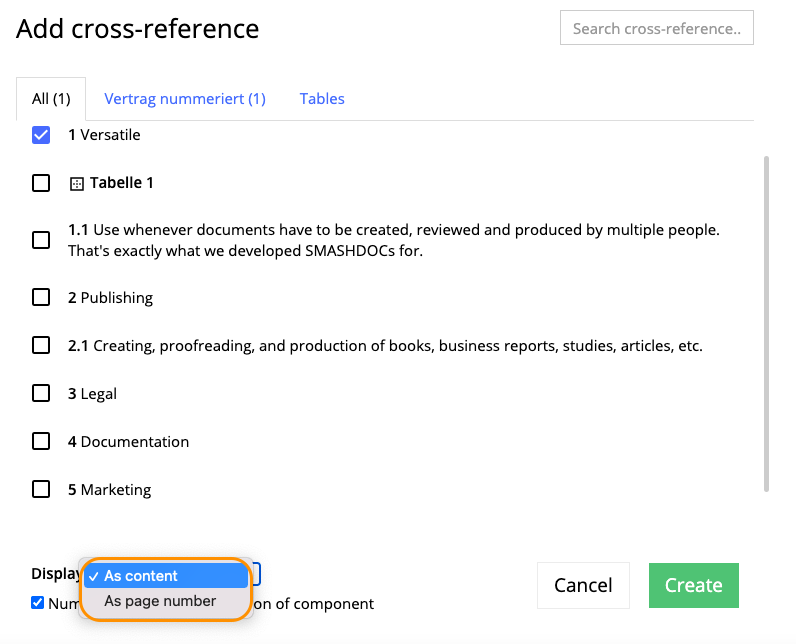
Variants of cross-reference display highlighted
If you select "As content", you are able to set the variant either "Numbering" or "Content/caption of component".
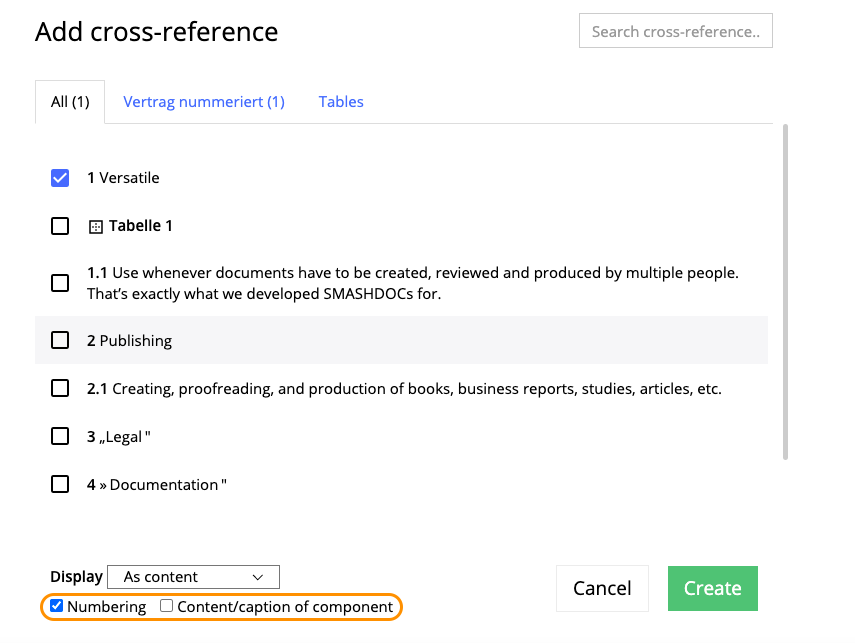
Two additional settings for the outlook of cross-references
In case you opt for the point "As page number", these two additional options become unavailable.
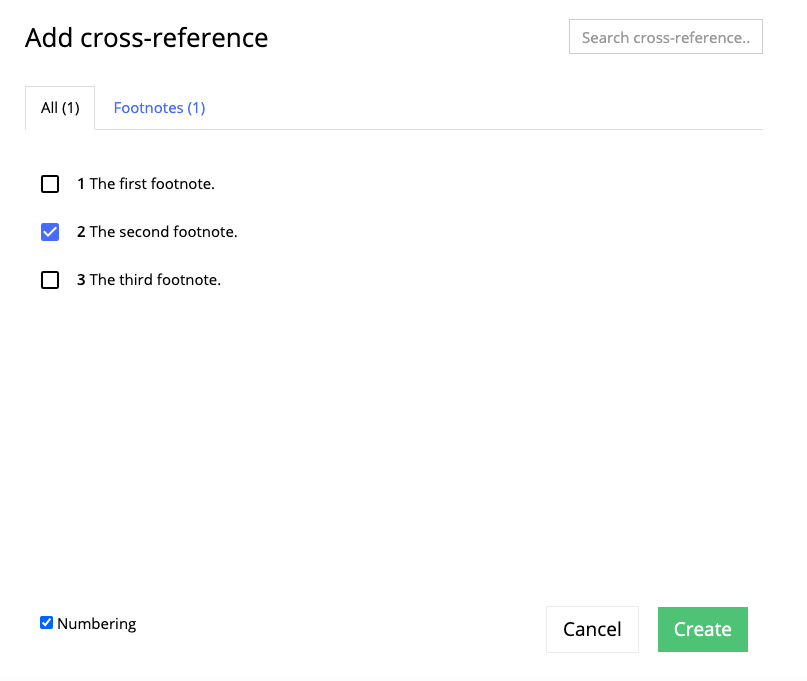
While adding a cross-reference, you can select several reference targets which will be displayed then in the document as separate references. To do that, you have to tick several check boxes with required targets. The number of chosen references will be shown in brackets in the corresponding reference group.
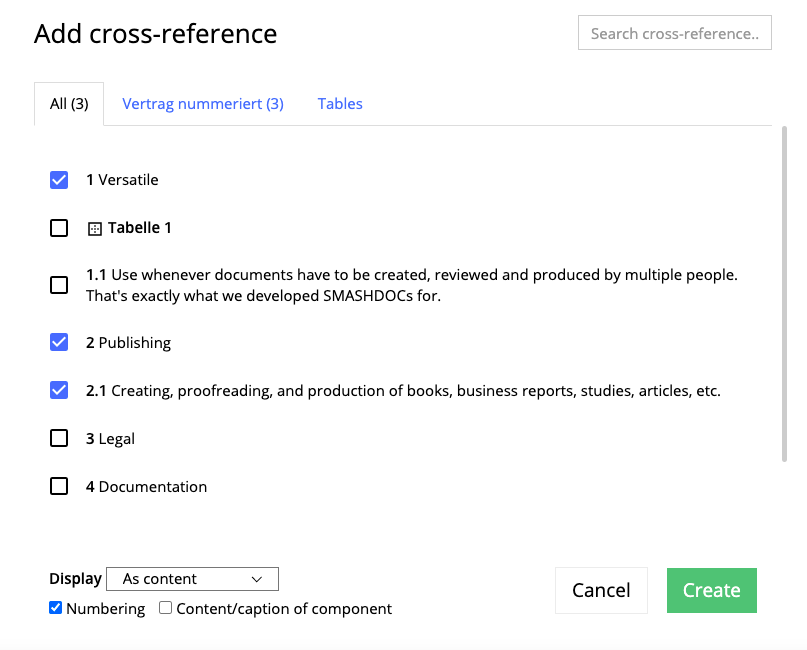
Several reference targets
Several reference targets in cross-references will be displayed in the document as separate targets in the form of numbering or context (depending on which form has been chosen).
Several reference targets in cross-references displayed in the document
Cross-reference with the set outlook "As page number" is displayed in the editor with a special symbol.
Display of a cross-reference with the set outlook "As page number"
In the exported Word document this cross-reference will be shown as a number of the page correspondingly.
Display of a cross-reference in the exported Word document
The process of inserting cross-references where the target is a footnote is quite similar to such targets, as headings, numbered headings and numbered text components. The only difference is that cross-references with footnote targets can be displayed as numbering only.
Adding cross-reference with footnote reference
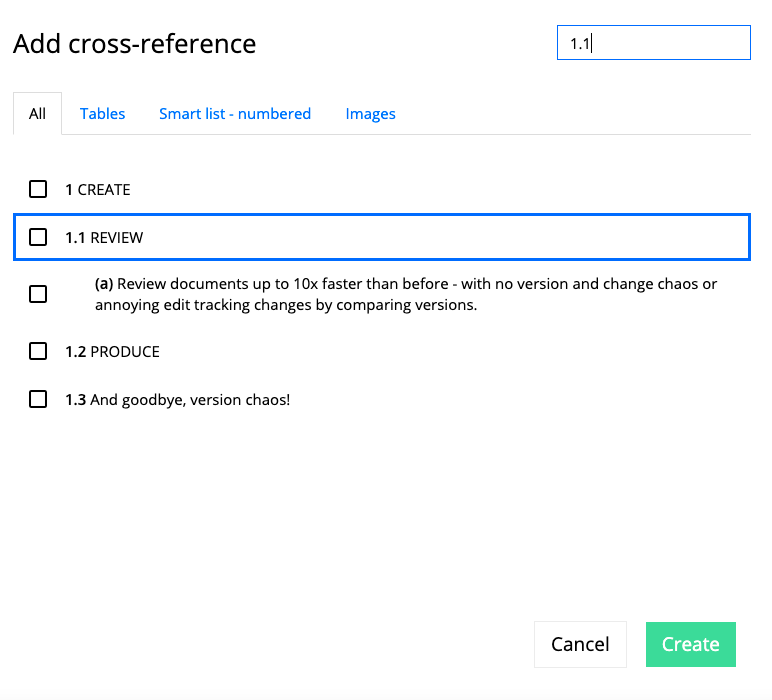
4.1.17.1Search cross-references
While adding cross-reference, you can search for a needed reference target in the search box by such points:
●numbering;
●content;
●caption;
●caption+numbering.
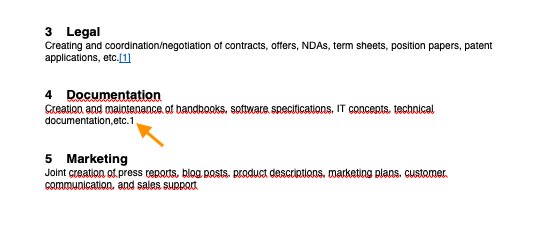
The searched target will be highlighted in a blue border. Apart from that, all surrounding components of the searched one will be displayed along with the searched target. For example, if you search for a component with numbering 1.1 (by any of above-mentioned search points), which is a subparagraph of the component 1, and there are also subparagraphs of this component with numbering of the third level ((a), (b) etc.), as well as following subparagraphs with the same numbering of the second level (1.2, 1.3 etc.), all these components are surrounding for the component 1.1 and will be also shown together with the search result.
Search result in cross-references with all surrounding components highlighted
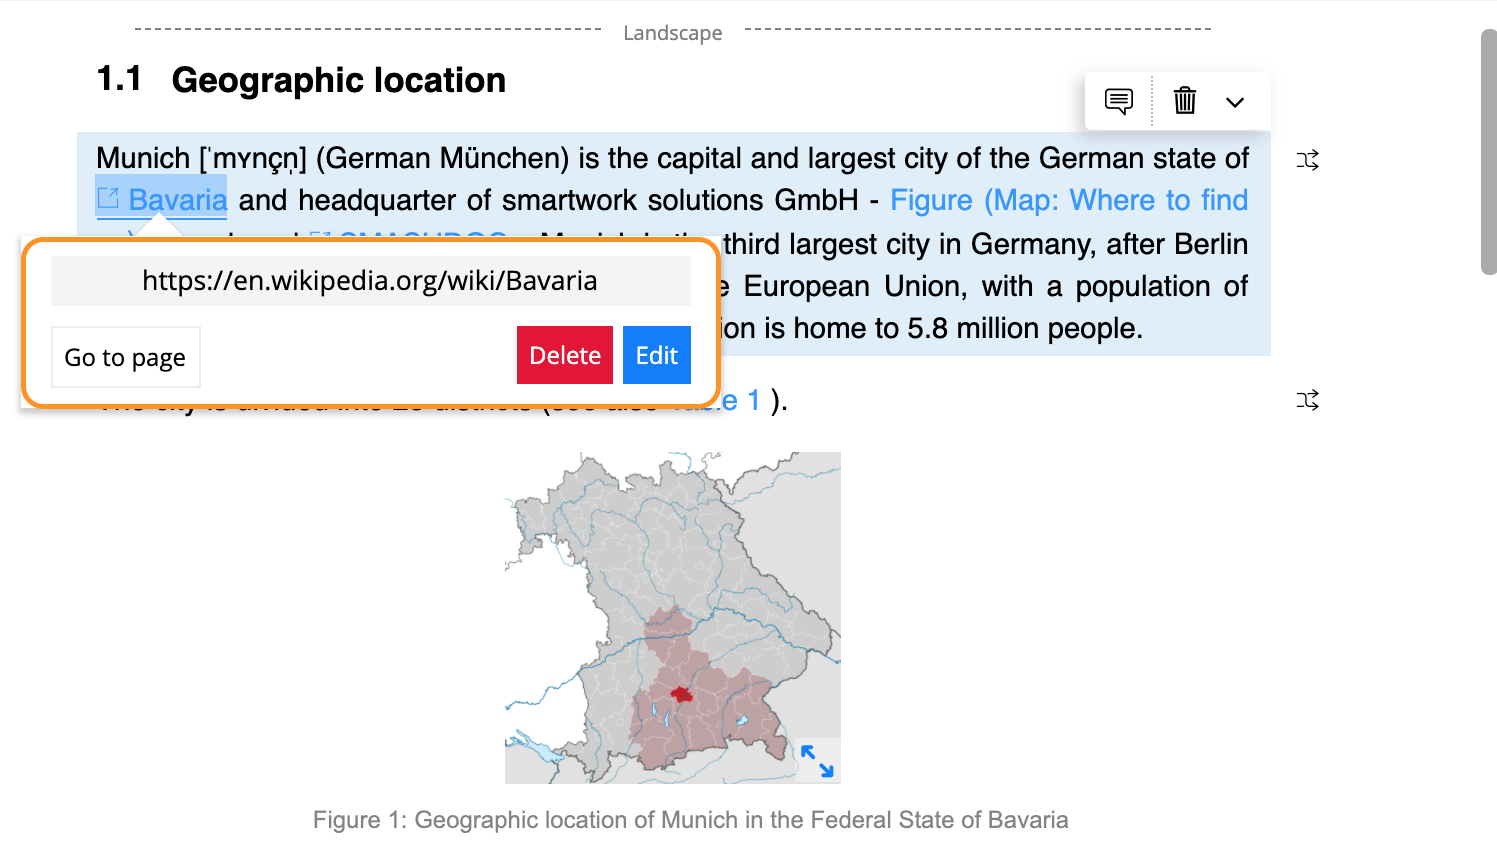
4.1.17.2Edit, delete and display cross-references in the document
Clicking on a cross-reference opens a menu, where the user can choose between the following options:
●Go to reference target
●Edit cross-reference
●Delete cross-reference
Context menu of the cross-reference highlighted
The options "Edit" and "Delete" are only available for users with the role "Approver" or "Suggest".
While editing a cross-reference, you can only change it to one reference target from suggested points in the list. Reference targets are displayed as radio buttons in this case.
Editing cross-reference
When you select another target and click "Save", the previous target will be replaced with the new one. The process of changing reference targets is documented in component history of a corresponding component.
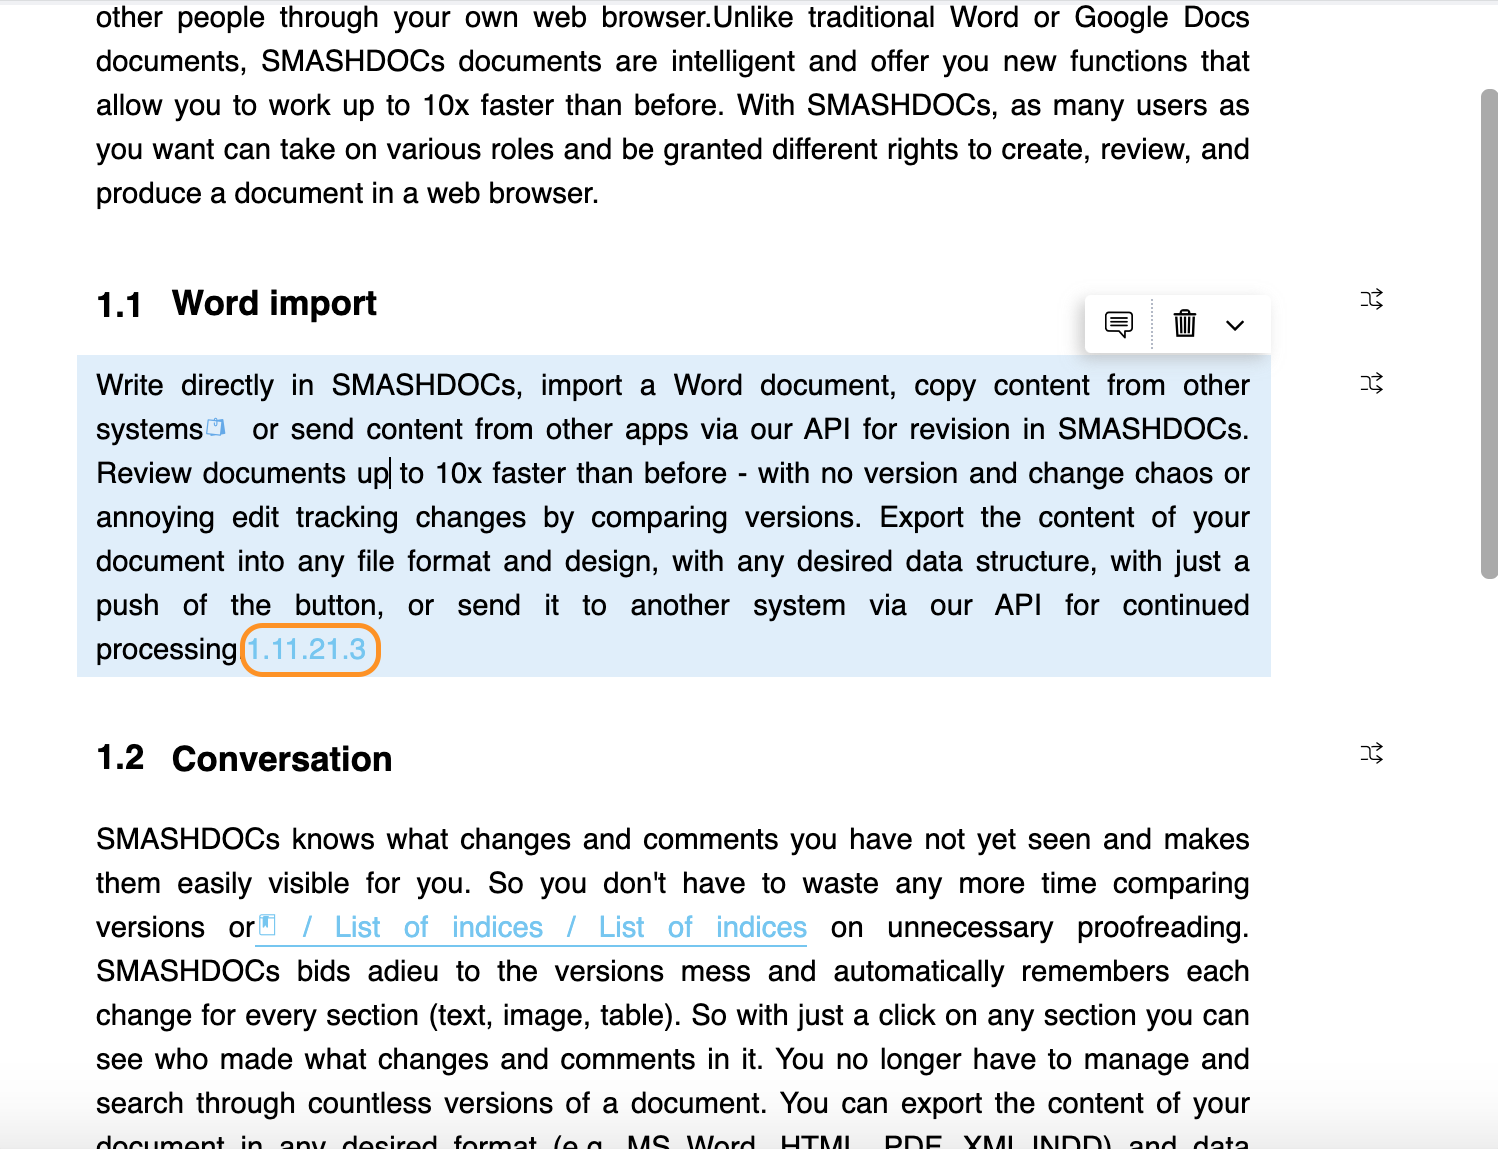
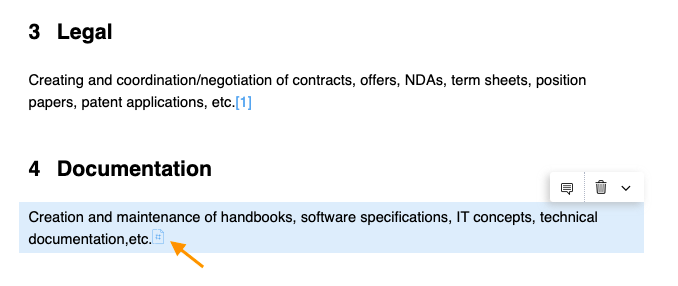
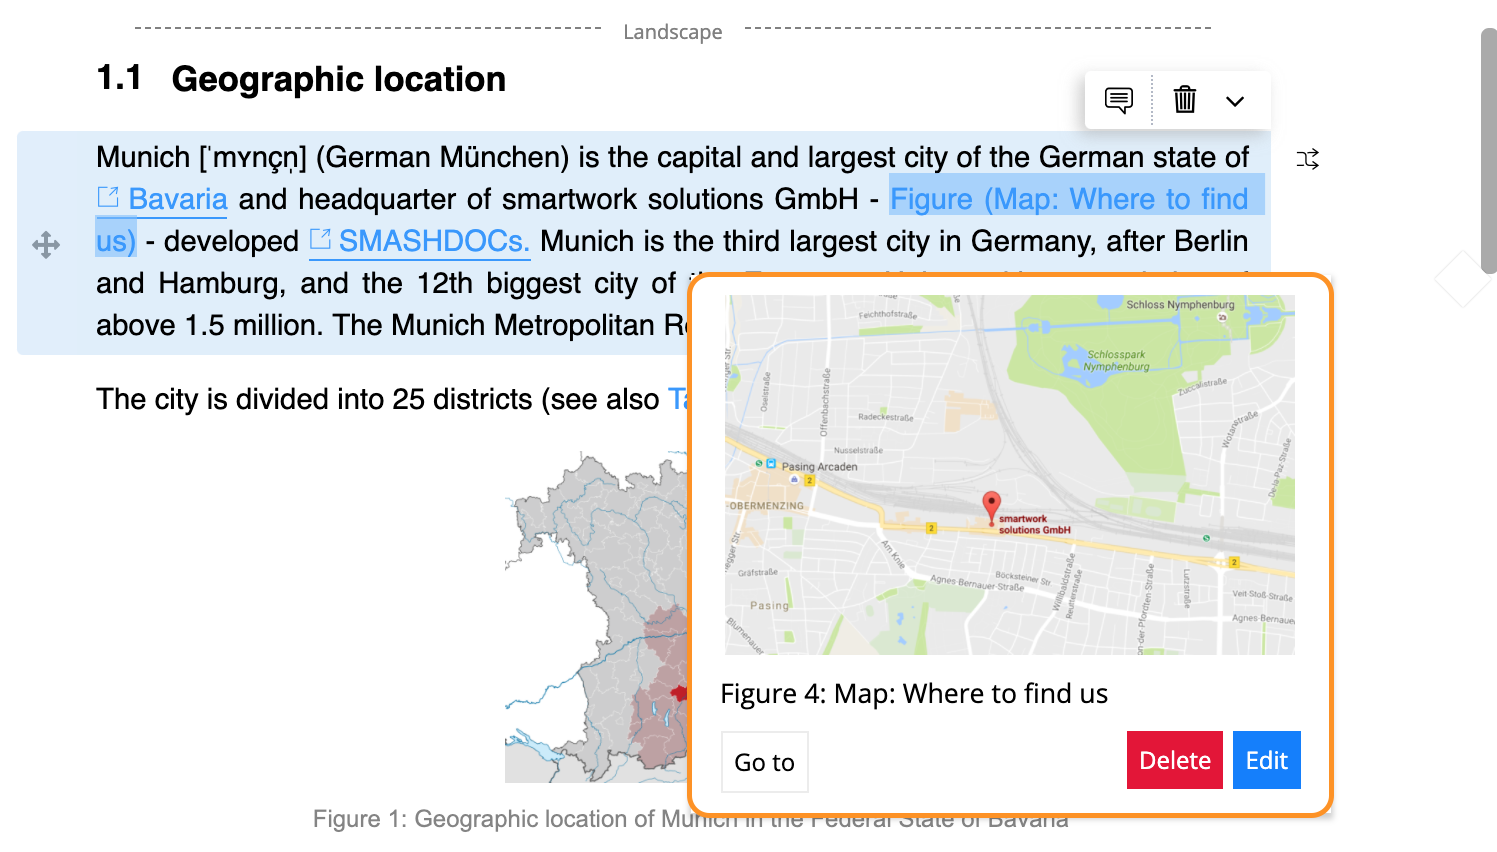
After inserting a cross-reference, a little symbol appears to the right of the component the cross-references has been inserted.
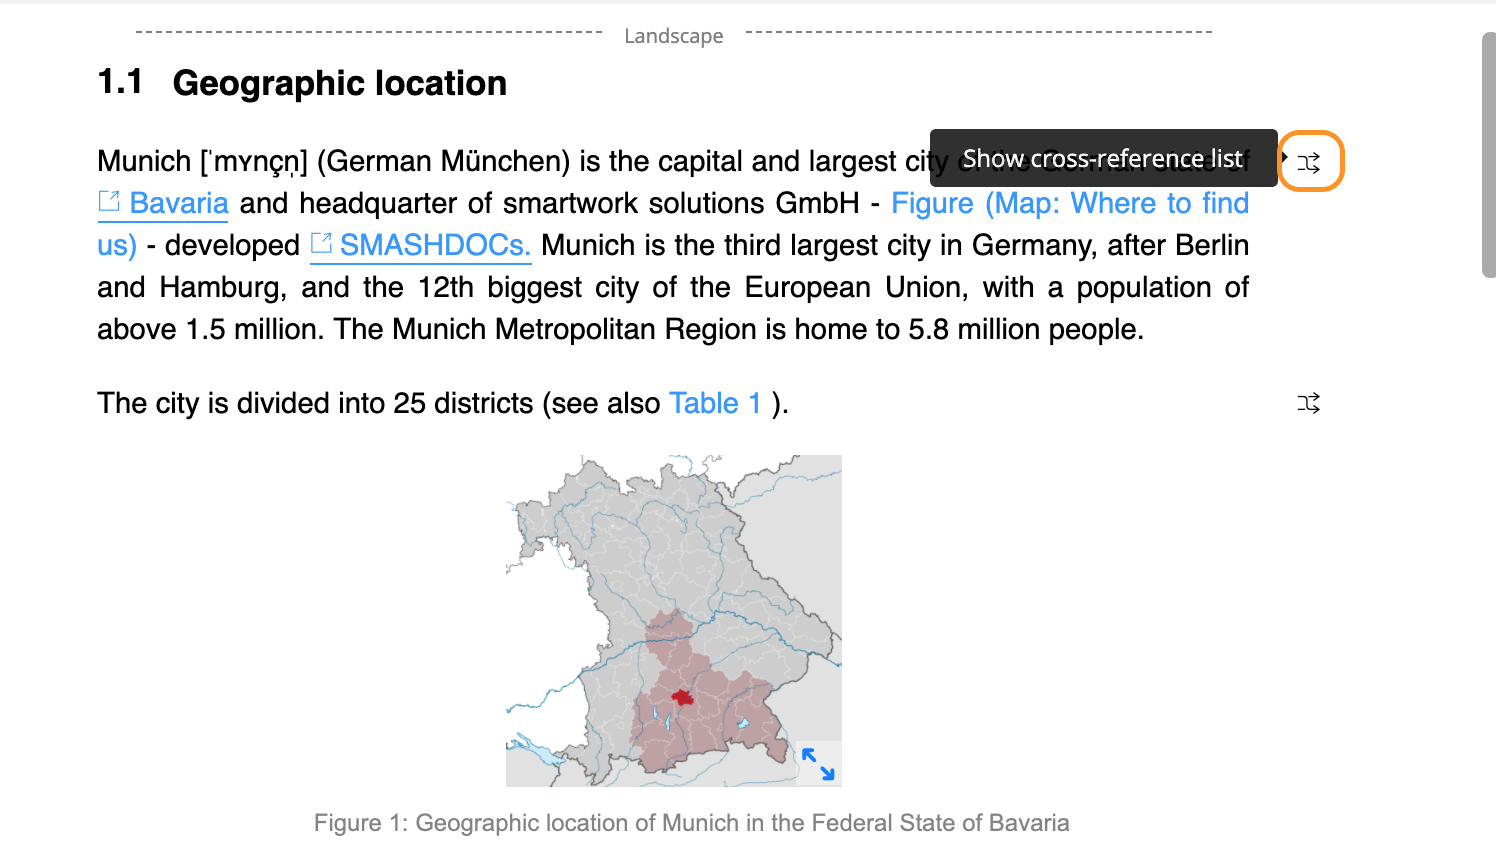
Symbol to click on highlighted
Click on it and a detailed list of all cross-references in the respective component will appear.
An inserted cross-reference is not only displayed beside the component the cross-reference was inserted in, but also next to the component it refers to.
Button for getting an overview about all cross-references in a component highlighted
When content is inserted or deleted and thus changes the numbering sequence of the document, SMASHDOCs checks immediately all cross-references and adjusts the document accordingly.
The cross-references are exported to Word in the same manner as any other components. After the export, the cross-references will be displayed in the exported document right where they are supposed to be.
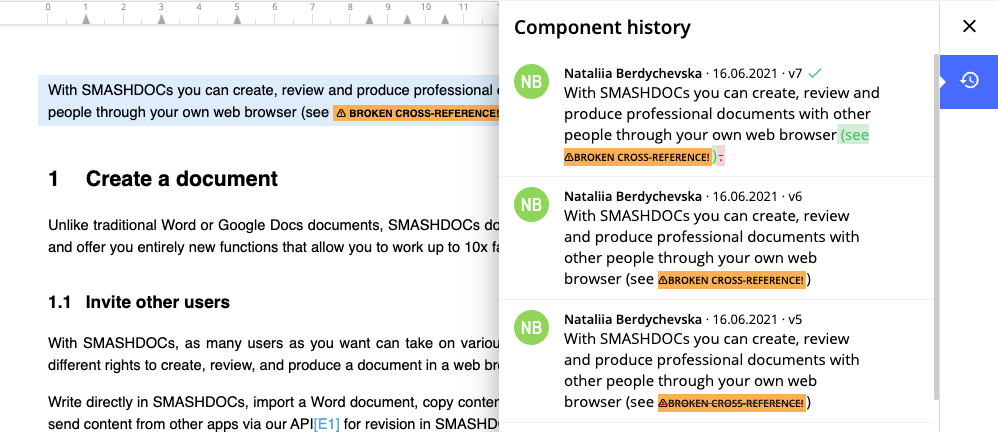
The moment a broken cross-reference occurs, a red tab with an exclamation mark appears in the tab bar. Simply click on the exclamation mark and SMASHDOCs shows the list of all components which contain broken cross-references. Select an item from the list and SMASHDOCs navigates the user directly to the exact sentence where the broken cross-reference occurs. This allows to solve the problem quickly by inserting a reference or deleting it.
Once there are no broken cross-references in document, the red exclamation mark disappears from the tab bar immediately.
NB: A user can only cross-reference to components of the same document. It is not possible to cross-reference to other documents.
4.1.17.3Tracking changes in cross-references
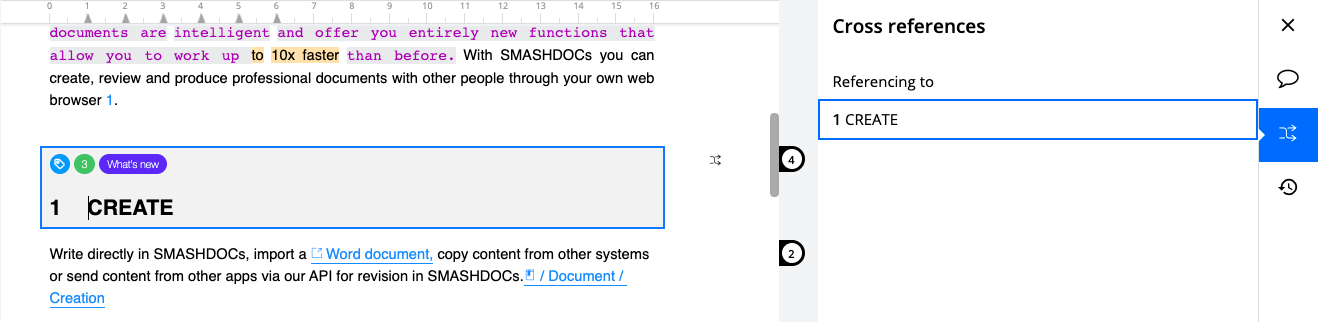
All options performed with cross-references are tracked in the component history of text, footnote and table components. When you insert a new cross-reference, this change will be displayed in the component history of a corresponding component.

Newly added cross-reference displayed in the component history
As soon as you edit/delete a cross-reference, all these updates will be shown in history as well.
Changing outlook of a cross-reference from numbering to caption/content

Deleting a cross-reference
For other users who participate in the document all these changes will be displayed in a component and component history with yellow background.

Changes in cross-references displayed for other users in a document
In case a cross-reference is broken (a target component has been deleted), a new version for this change will not be added in the component history. Instead, in all previous versions the notification about broken cross-reference will be displayed.
Notification about broken cross-reference in the component history
Note: cross-references in side notes are not tracked in component history.
4.1.18Inserting an inline image
The document can also contain inline images. A user is able to create, edit and delete inline images in text components and tables.
To create a new inline image, click into the text component spot where you want to add the inline image. Afterwards, click on the "Insert inline image" button in your formatting bar.
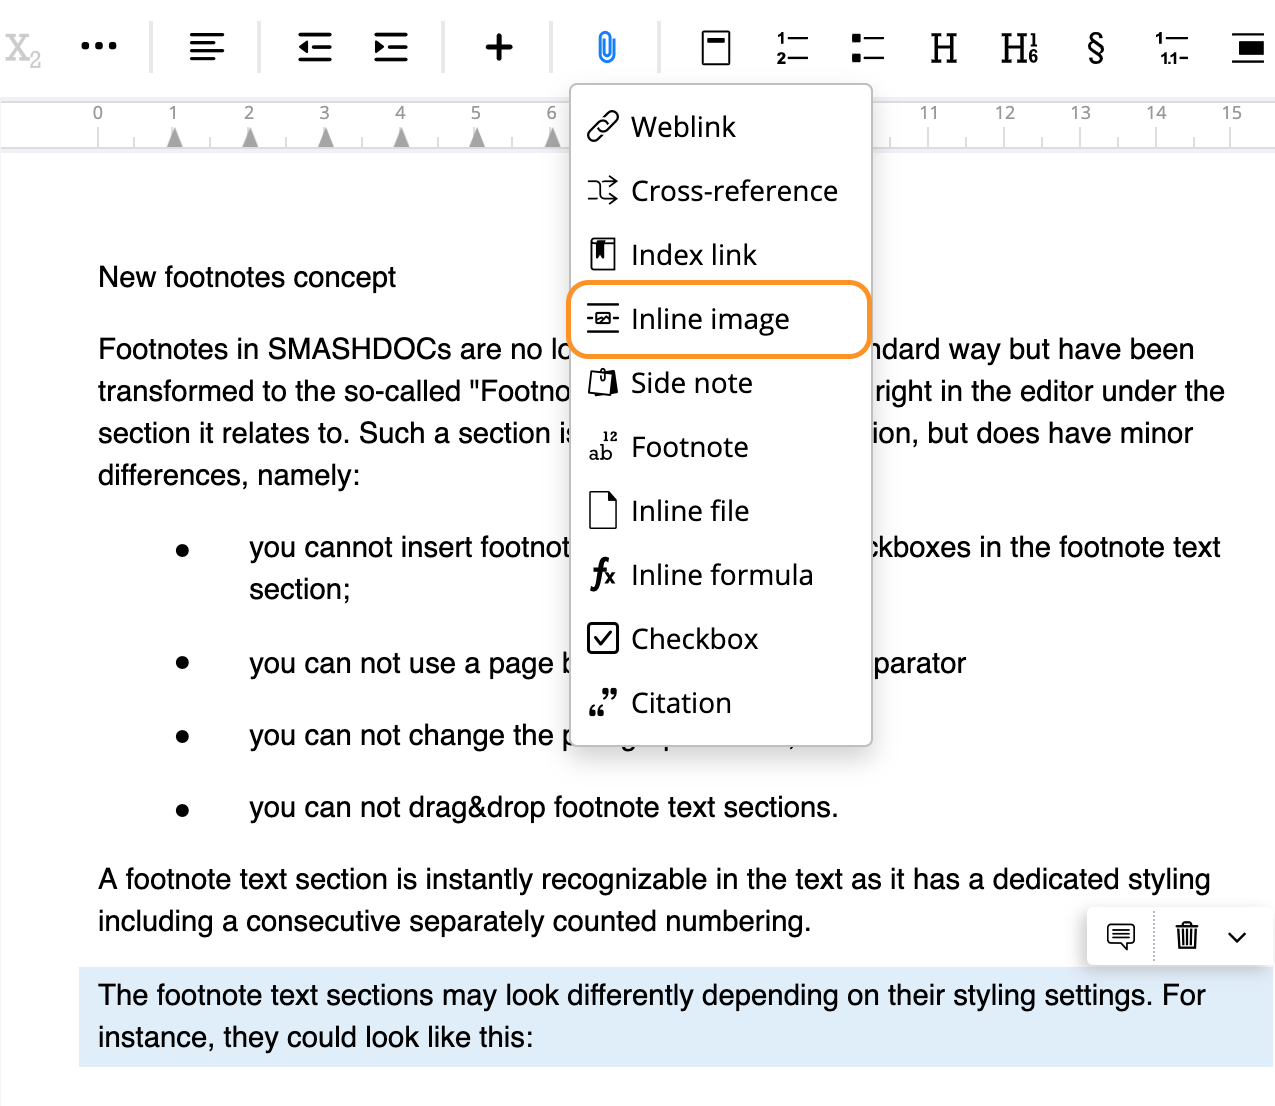
Creating "Inline image" option highlighted in the formatting bar
After clicking on the "Inline image" option the new modal dialog to create an inline image will be displayed. There the user can define the image by:
●dragging and dropping an image file or
●selecting an image from the computer
and see a preview. Basically, the process of uploading an inline image is the same as for creating and updating an ordinary image component.
This is how a couple of inserted inline images look in the text component:
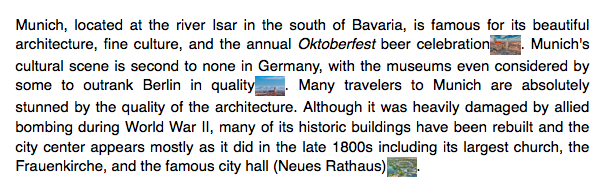
Inline images inserted in the text component highlighted
A user is also able to enlarge the particular inline image in the text component just by clicking on it.
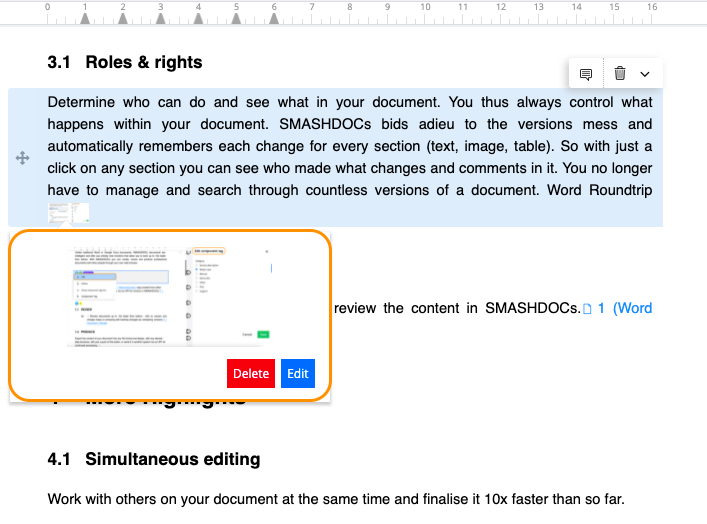
Enlarged version of the inline image highlighted in the text component
Creating an inline image is also possible in the table editor, where you firstly double-click the desired cell in order to activate Enhanced Table Editor and then click on “Create new inline image” icon.
"Create new inline image" icon highlighted in the table editor
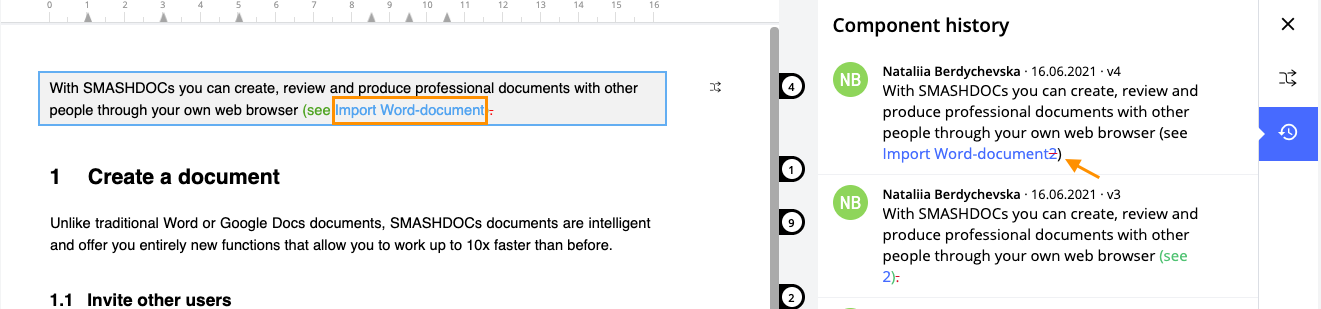
If a text component contains a changed inline image, the last seen version of the inline image is displayed and framed in red and the latest version of the inline image is displayed too and framed in green. Even if there have been multiple changes to the inline image, the user only sees the last version of the inline image they saw and the latest uploaded version highlighted in red and green respectively.
To see the inline image history, click on the "Click to see revision history to component" on the right side of the text component.
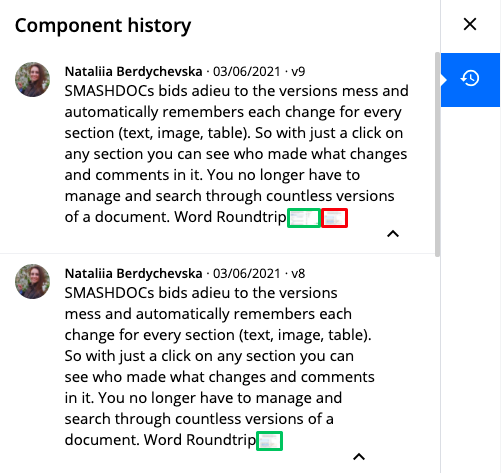
Component history of the text component including changed inline images highlighted
Furthermore, the list of image components in the document will also contain the list of inline images inserted in the text component.
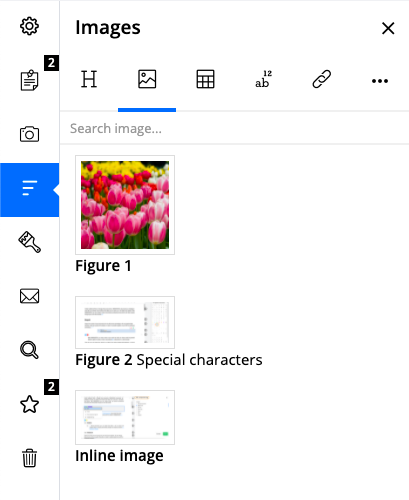
Table of images including inline images highlighted
After a click on a list entry, the document scrolls to the related text component containing the selected inline image and activates the component in the document.
4.1.19Importing PDF as an image
You can upload PDF files in the document with any type of content inside (text, images, hyperlinks etc.) which will be converted into PNG format and will be displayed as images in the editor. Each page of an imported PDF file will look like a separate image.
To import a PDF-file click "+"-sign in the upper toolbar and choose there "Insert PDF".
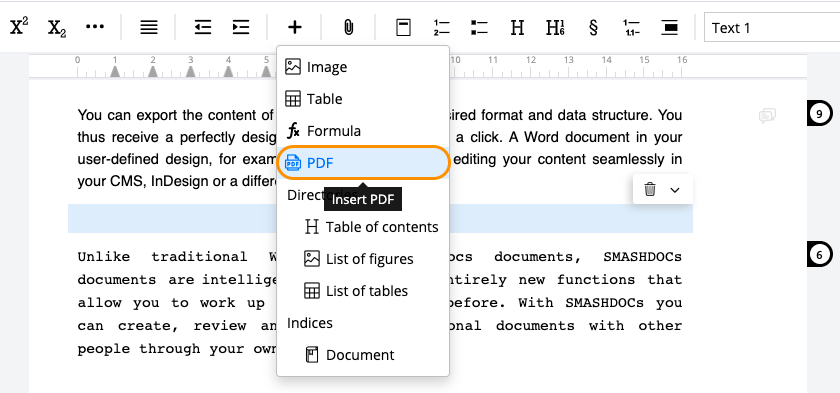
Tab "PDF" highlighted
After that a modal dialog opens, where you can add PDF files for uploading either by selecting them from the device or by dragging&dropping. There are certain limitations for the amount and size of imported files. You can upload up to 1000 PDF-files and not more than 1000 pages. The maximum size of a file is 200 Mb.
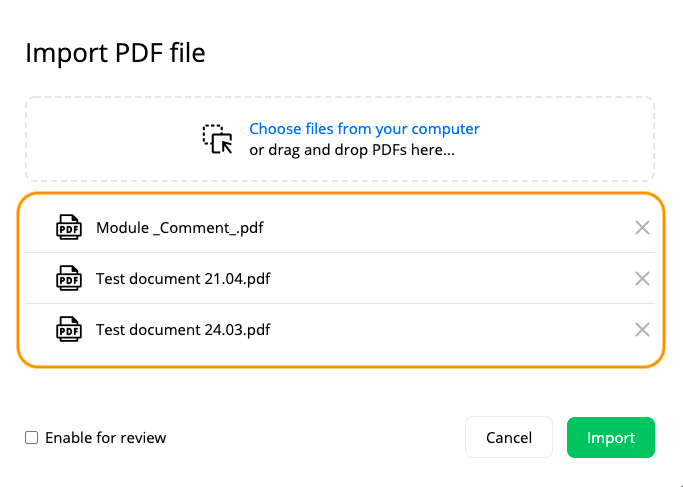
List of PDF files to be uploaded
If there are some invalid PDF files among the added files in the list for import, right after clicking the "Import" button you will receive a notification from the system, which files cannot be imported. Note: invalid files are those with the incorrect definition of format.
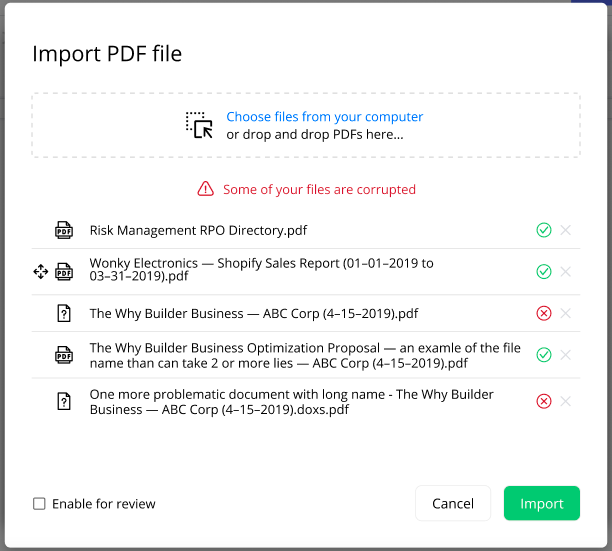
Notification that some uploaded PDF files are broken
Invalid files are marked with a red error sign on the right and with a question icon on the left side; those which are valid - with a green check mark. If there is at least one valid file, the "Import" button will be enabled for further importing process, however, firstly you have to remove corrupted PDF files from the list manually by clicking a cross-sign near the red error sign (see Image 131).
In case there are only invalid files, the "Import" button will be disabled. To enable this button again you should add at least one valid PDF file.
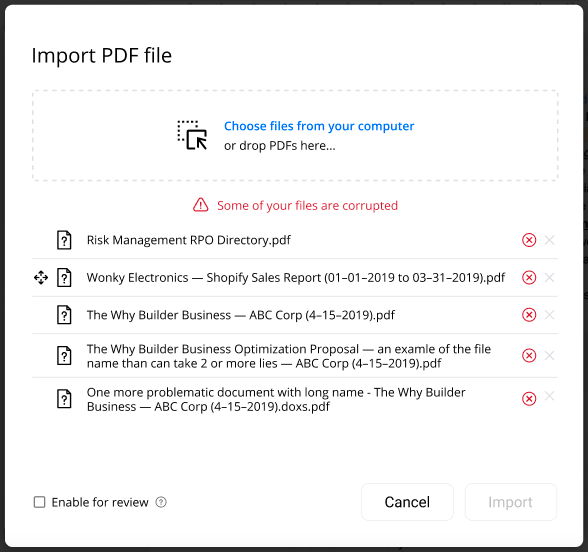
Disabled "Import" button in case only corrupted files appear in the list
You can also remove added files, change their order and add more files to the list. There is an option to enable files for review as well - if you activate this, all pages of PDF files will appear immediately in review mode, if not - they will be displayed in draft mode.
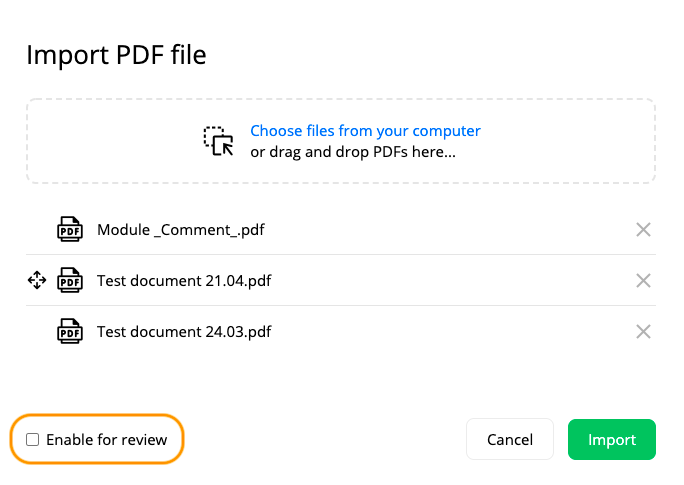
The option "Enable for review" highlighted
Once you click "Import", you will see a progress bar where the following information is shown:
●the number of pages that are already converted;
●the number of pages that are still pending and not converted.
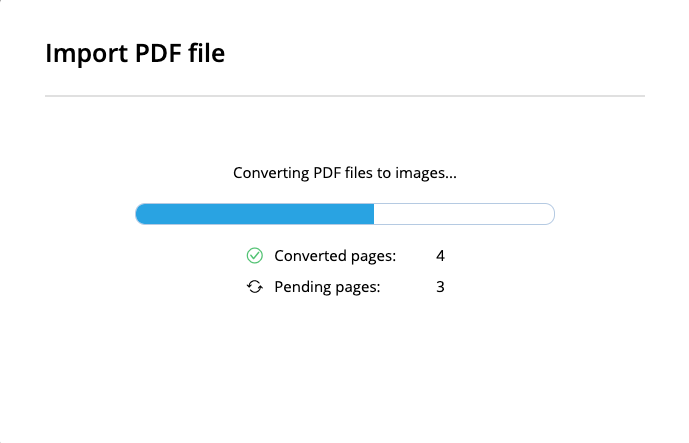
Progress bar with the information about converting pages
As soon as the import process is completed, the modal dialog fades out smoothly and the result of an imported file is displayed in the editor.
Result of importing PDF-file highlighted
Note: all images converted from PDF to PNG are displayed in 100%-width and without numbering and caption.
4.1.20Checkbox
A checkbox can be used in the form-based documents or to indicate something as "yes" or "no", "done" and "not done yet" e.g. in the to do list. To tick or untick the checkbox a user simply clicks on it.
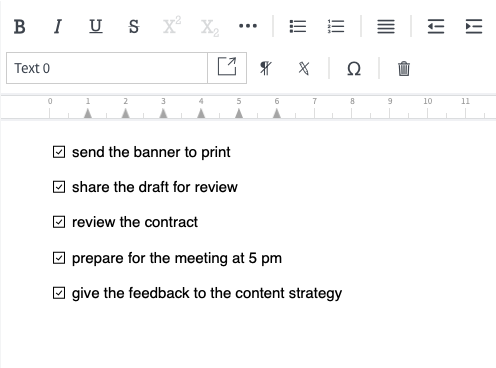
Example of the to do list with ticked checkboxes
The check / uncheck are tracked if shared for review. The checkbox can be deleted via the Backspace key.

Component history displaying the change of the checkbox status
4.1.21Component links
With component links a user can create a direct link to any component in a document.
Open a component's context menu with a right click and choose the function "Copy component link". The link will be copied to the clipboard, and you will see small green notification at the top of the page, that will disappear in seconds.
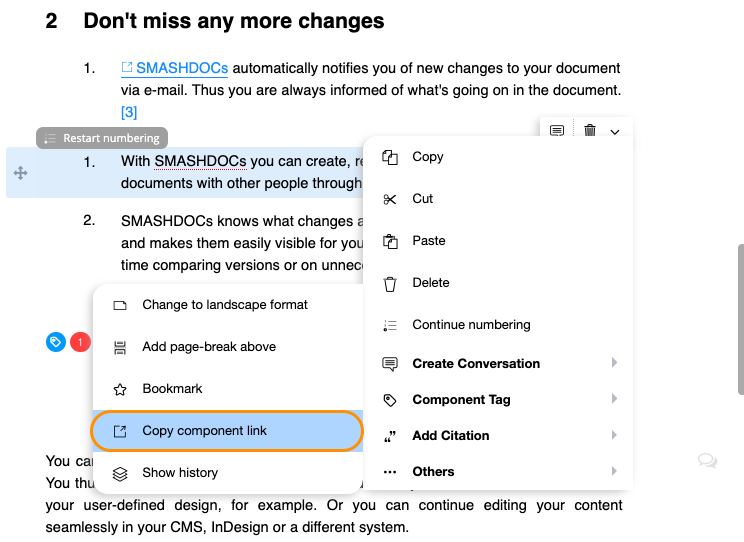
Option "Copy component link" in the context menu highlighted
The procedure of inserting the component link into a document is the same as for creating a weblink. Clicking on the component link lets a user navigate right to the respective component.
A user can also insert component links outside of SMASHDOCs or send them via e-mail. Clicking on the link opens the document and jumps to the correct component.
4.1.22Footnotes
Footnotes can be placed at any spot within a text component. Click on the button in the formatting bar to open the dialogue window for creating a footnote or use a shortcut (Ctrl + Shift + F) for Windows/ (CONTROL + SHIFT + F) for Mac users.
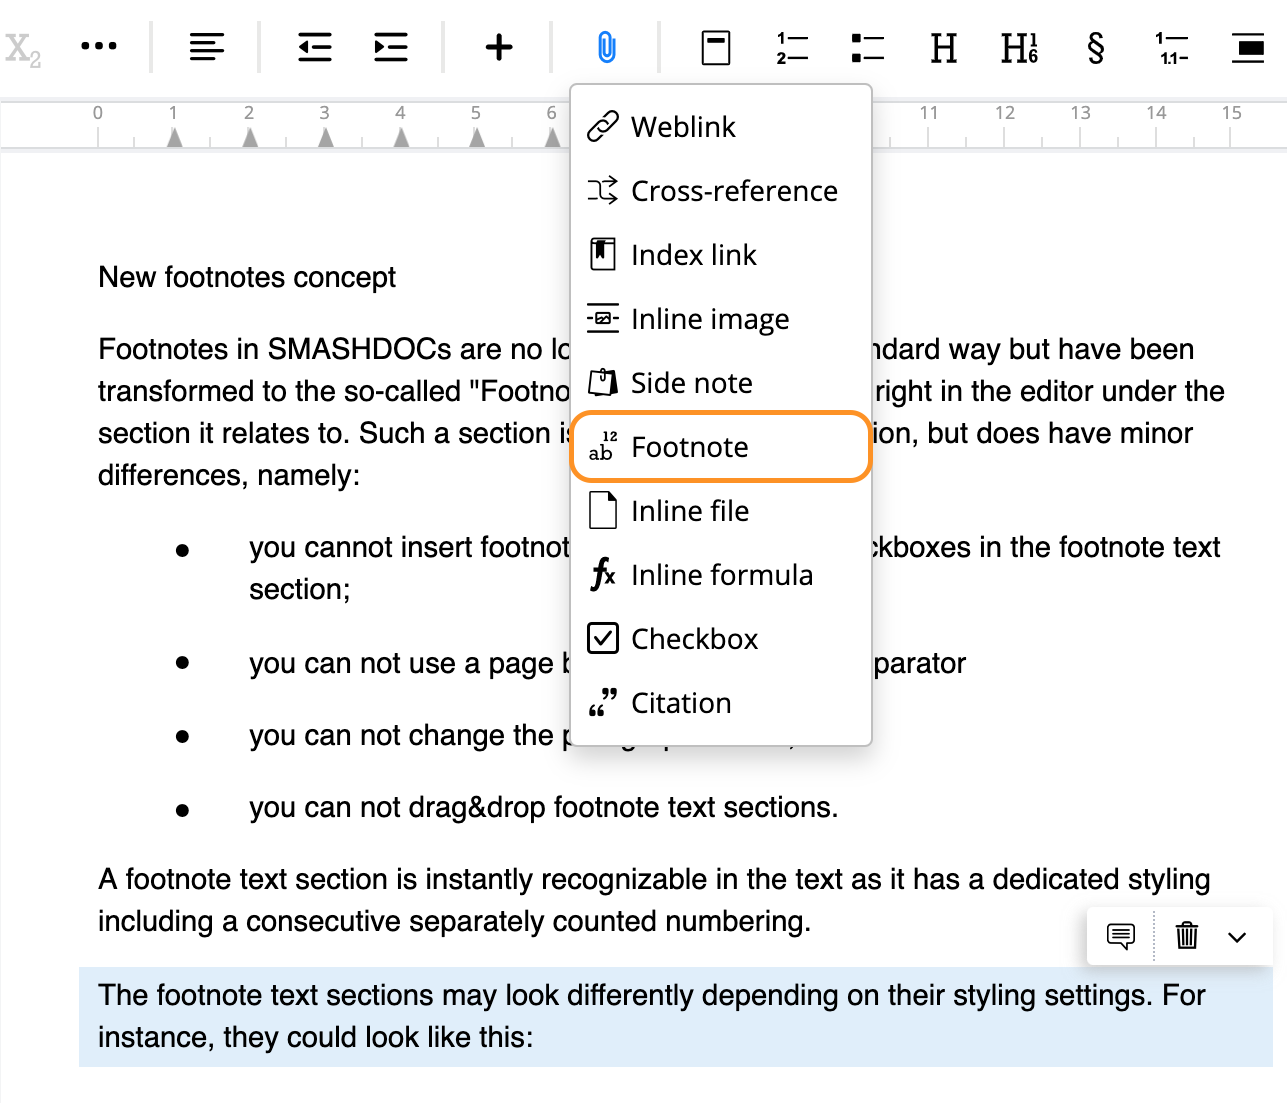
Button for creating footnotes
Footnotes are numbered consecutively. To show a footnote quickly choose the tab "Footnotes" in the table of contents. Clicking on an entry navigates a user to the respective component.
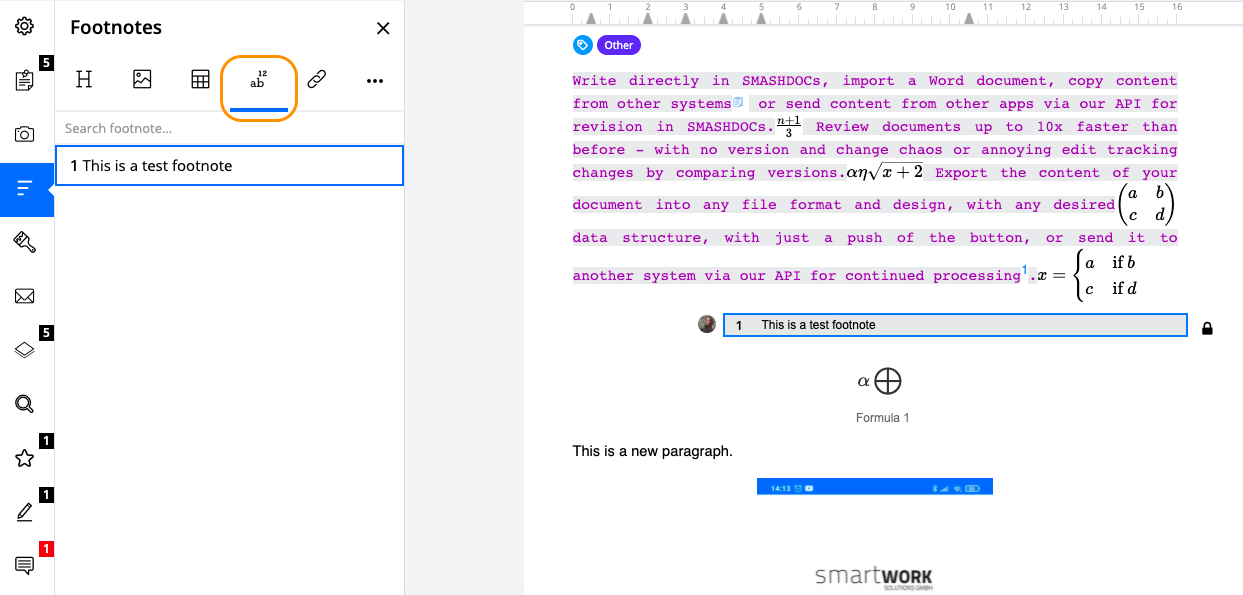
Display of a footnote both in the table of contents and in the document highlighted
4.1.23Cross-references in tables
In addition to weblinks, cross-references to other components within a table can also be created.
To insert a cross-reference, click twice on a table cell in which the cross-reference should be inserted and then on the button "Create a link". In the menu that appears, select "Cross-reference".
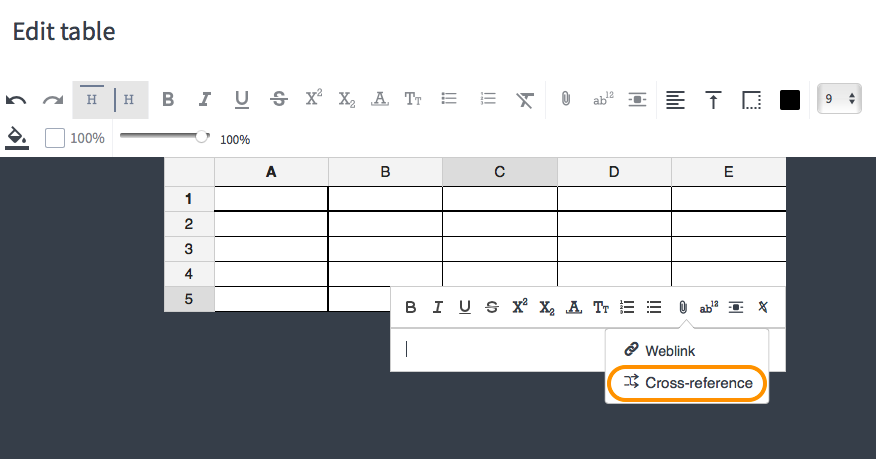
Button for adding cross-reference highlighted in the cell menu
The targets of a cross-reference can be:
●Headings
●Headings with numbering
●Numbered text components (without heading attribute)
●Tables
●Images
A dialog window opens. Here the user selects the target of the cross-reference and specifies whether only the number of the respective component and / or the text contained in it should be displayed in the cross-reference. Then click on the "Create button" and cross-reference will be created.
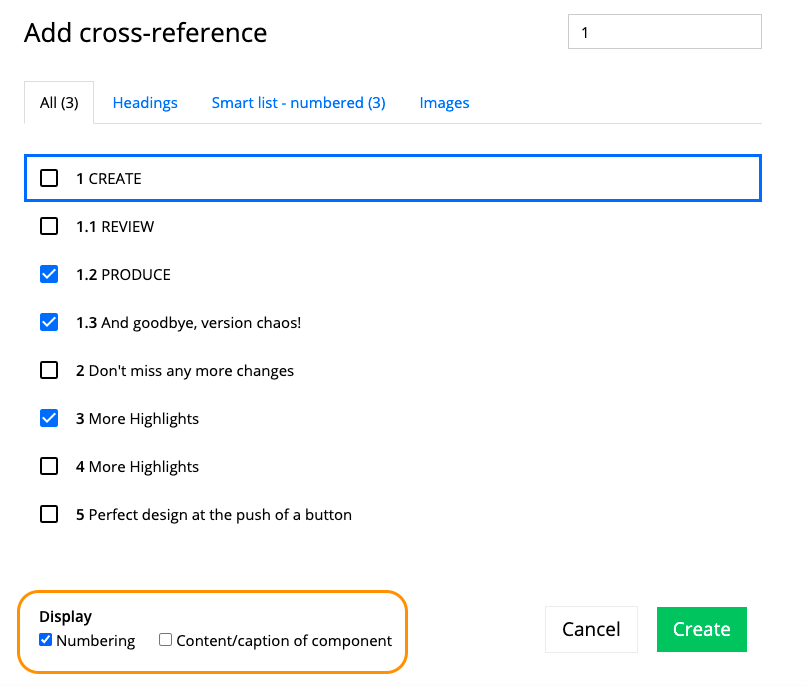
Display options for the cross-reference highlighted
Clicking on a set cross-reference opens a dialog window next to it, in which several options are available when dealing with the cross-reference.
●Go to cross-reference
●Edit cross-reference
●Delete cross-reference
Option "Go to" highlighted
Note: Only the users who are in position of "Approver" or "Suggest" can edit or delete a cross-reference.
NB: Cross-references can currently only be created within a document and can not refer to other SMASHDOCs documents or components in other SMASHDOCs documents.
4.1.24Footnotes in tables
Footnotes can be added to the context within tables.
To do this, the user should click on the active cell, where the footnote will be located and chose footnote icon on the formatting bar.
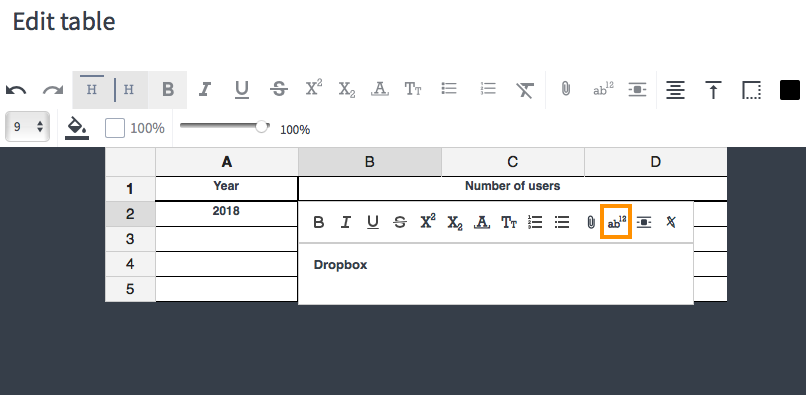
Footnote sign highlighted in the table editor
The text in footnotes has the following formatting options:
●Bold
●Italic
●Underline
●Strike through
●Superscript
●Subscript
●Transcript
●Small caps
●Insert web-link
●Clear formatting
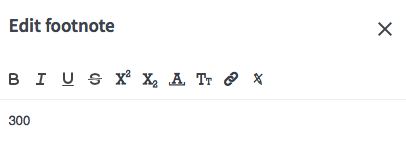
Formatting options for footnotes highlighted
The footnote appears in a list of footnotes.
After importing, the footnote appears at the bottom of the page of the Word document.
4.1.25Special characters in tables
The full list of special characters is also available in the extended table editing mode and is reachable with two clicks on the table cell.

Special characters highlighted in the table cell
4.1.26Multi-level lists in table
Users can create multi-level lists within tables.
To list the items, activate the cell, where the list should appear, highlight the text and press list button. There are 2 types of lists: numbered and unnumbered.
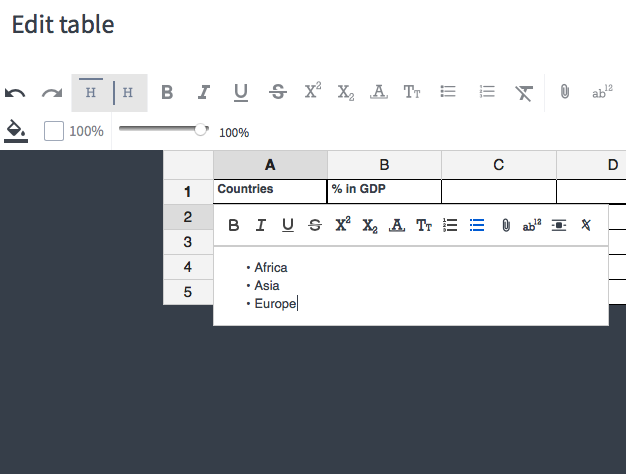
Unnumbered list with first level highlighted
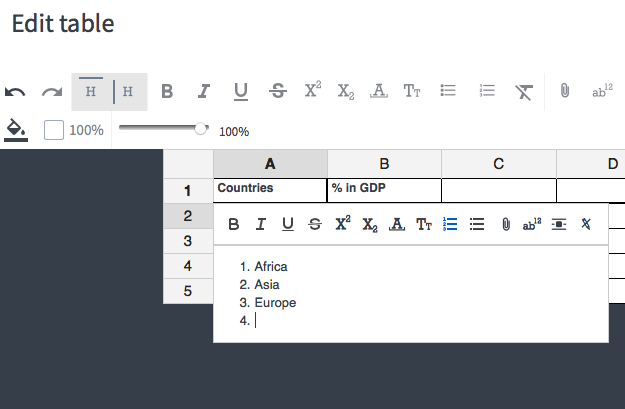
Numbered list highlighted
To go to the next level, insert cursor just before the text that should be moved and hit the TAB button, the text will be numbered one level further from the left.
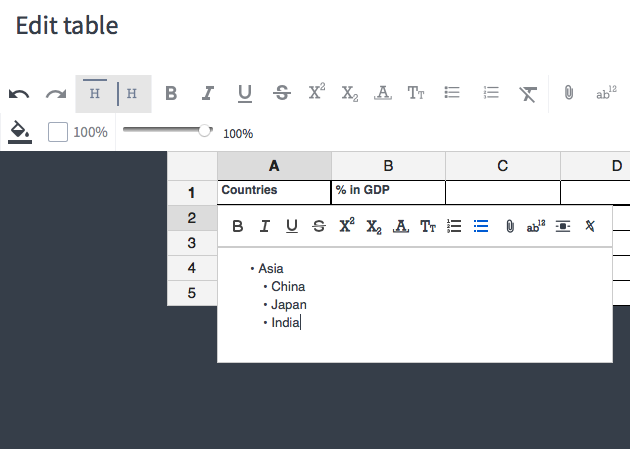
Multi-level unnumbered list highlighted
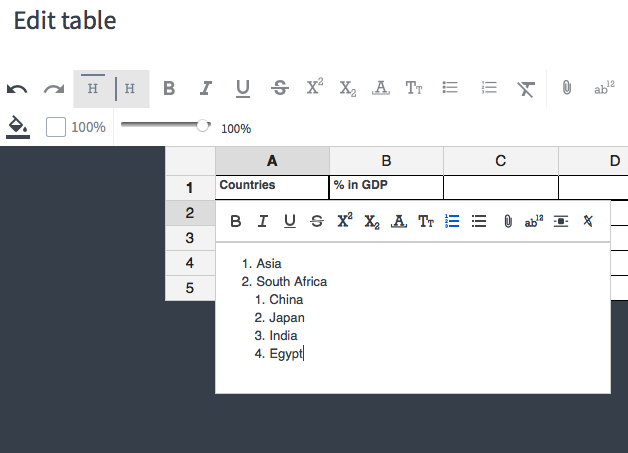
Multi-level numbered list highlighted
Lists can be taken up to 9th level maximum.
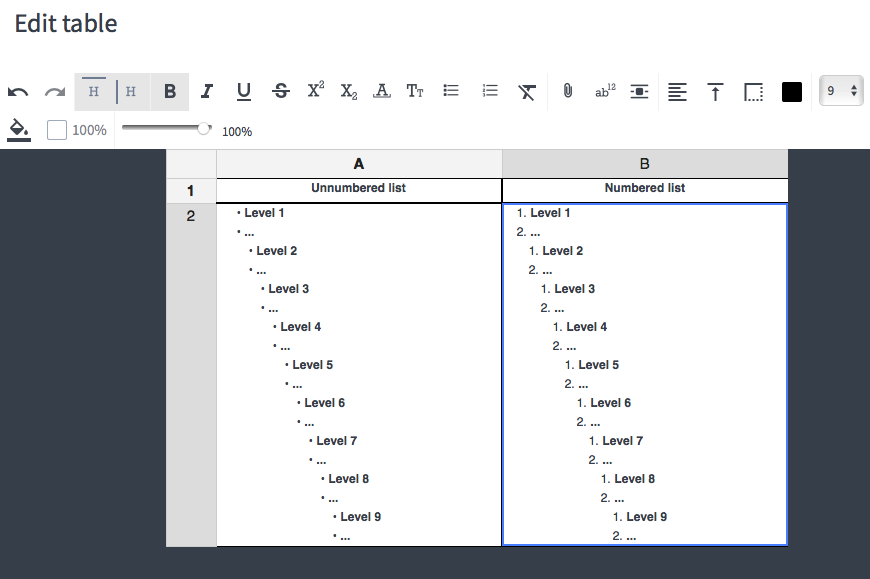
List with 9 levels highlighted
4.1.27Formatting a text component
4.1.27.1Formatting settings
Under the tab "Formatting settings" the user can find all the formattings available. The formattings are divided into three groups:
●All
●Paragraph Styles
●Inline Styles
It is up to the user how the groups should be displayed. By clicking on the three dots button, they can choose whether to expand all groups, collapse all groups or activate auto-collapse.
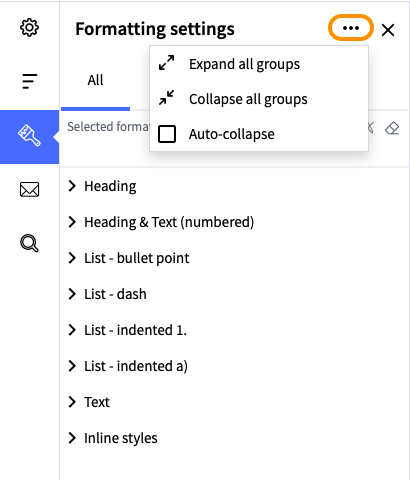
Display possibilities of formatting groups
Alternatively, the user can activate the option "Auto-collapse groups in Formatting Setting panel" in their general settings.
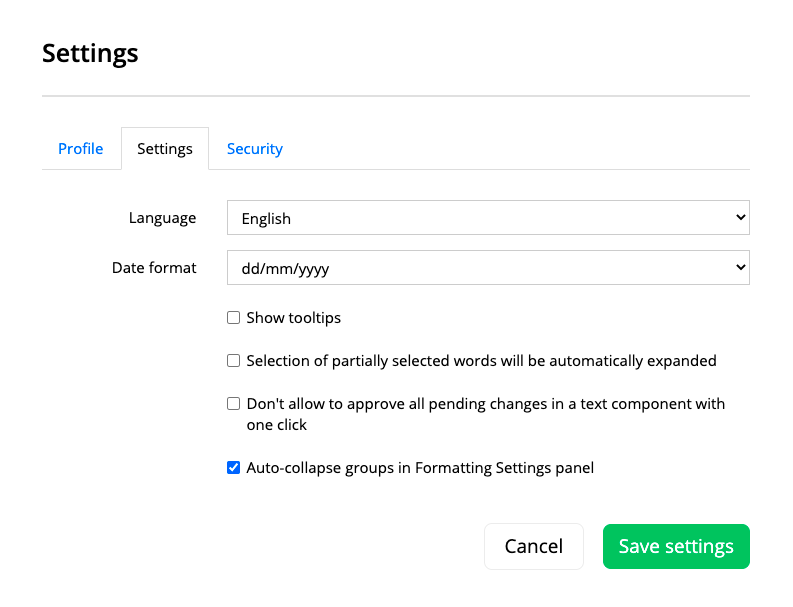
Option "Auto-collapse groups in Formatting Setting panel" activated
The formatting selected for the text component is also displayed in the selected formatting window and highlighted in blue amongst other styles in the respective group.
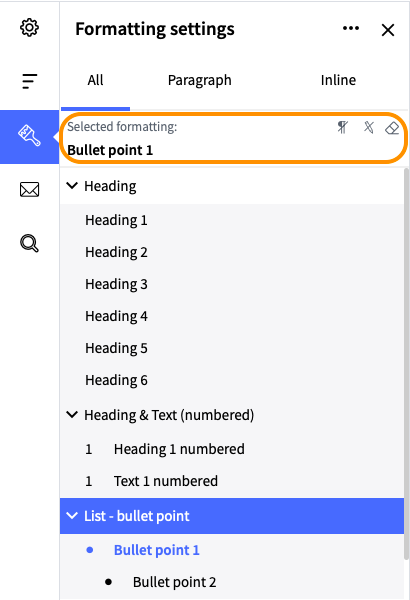
All groups expanded
However, if the auto-collapse or collapse of all groups is activated, only the group with the chosen style will be highlighted in blue. The user can see the format`s name either in the selected formatting window or open the collapsed group manually.

All groups collapsed
If the user clicks on the paragraph and then selects a paragraph style, the entire paragraph will be formatted accordingly.
If the user selects the inline style and the cursor is positioned on one word, only the selected word will be formatted. To format the entire component, the user should first mark the component completely and then apply the selected inline style.
Whereas the inline styles are universal for all users, the list of paragraph styles depends on the particular system.
4.1.27.2Individual formatting options
In SMASHDOCs it is possible to enhance visually individual words, sentences or complete components by using individual formatting (also referred to as inline styles). The following formatting options are available:
●Bold
●Italics
●Underline
●Strike through
●Transcript
●Small caps
●Superscript
●Subscript
●Highlighting
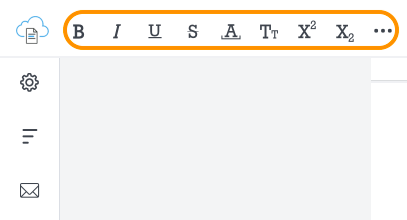
Buttons for individual text formatting highlighted
A user can also use shortcuts for inline styles.
| Inline styles | Windows | Mac |
|---|---|---|
| Bold | Ctrl + B | CONTROL + B / COMMAND + B |
| Italic | Ctrl + I | CONTROL + I / COMMAND + I |
| Underline | Ctrl + U | CONTROL + U / COMMAND + U |
| Stroke | Ctrl + D | CONTROL + S |
| Superscript | Ctrl + Plus sign | CONTROL + Plus sign |
| Subscript | Ctrl + Minus sign | CONTROL + Minus sign |
| Transcript | Ctrl + T | CONTROL + T |
| Small capitals | Ctrl + 0 (zero) | CONTROL + 0 (zero) |
List of shortcuts for inline styles
To activate the functions a user either marks a complete component or selects individual words and clicks on the formatting buttons or uses the shortcuts provided in the following table.
NB: To format text as superscript or subscript a user has to add a space in front of the respective word. Afterwards, mark the word and click on the button. It is not possible to format a whole component or only parts of a word as superscript or subscript.
The individual formatting options do not work on headings, numbered headings or tables. To learn how to format one of those elements, please refer to chapter.
4.1.27.3Automatic recognition of the monospace style
If you import Word documents in which components are formatted with "Courier New", they are automatically recognized by SMASHDOCs as formatted with the inline style "Monospace". This function is settable, which means that it can be switched on/off.
Automatic recognition of Monospace style after Word-Import
4.1.27.4Navigate through inline styles
You can easily navigate in custom inline styles that are applied throughout the document via the "Navigate through inline styles" tab in the left toolbar.
For inline styles to appear in the list the following conditions should be set:
●inline styles have to be actually applied to the text components;
●the applied inline styles should be custom (those under the "three dot button" in the toolbar).

Tab "Navigate through inline styles" highlighted
Below the inline style in the list, you can find the link that navigates to the component where this specific style was used.
Counter near the tab represents how many times all styles are used in all components. Several appearances in one component are counted as one.
Note: inline styles under "Navigate through inline styles" tab are displayed as plain text, without the formatting.
Apart from inline styles this function can also include paragraph styles upon request.
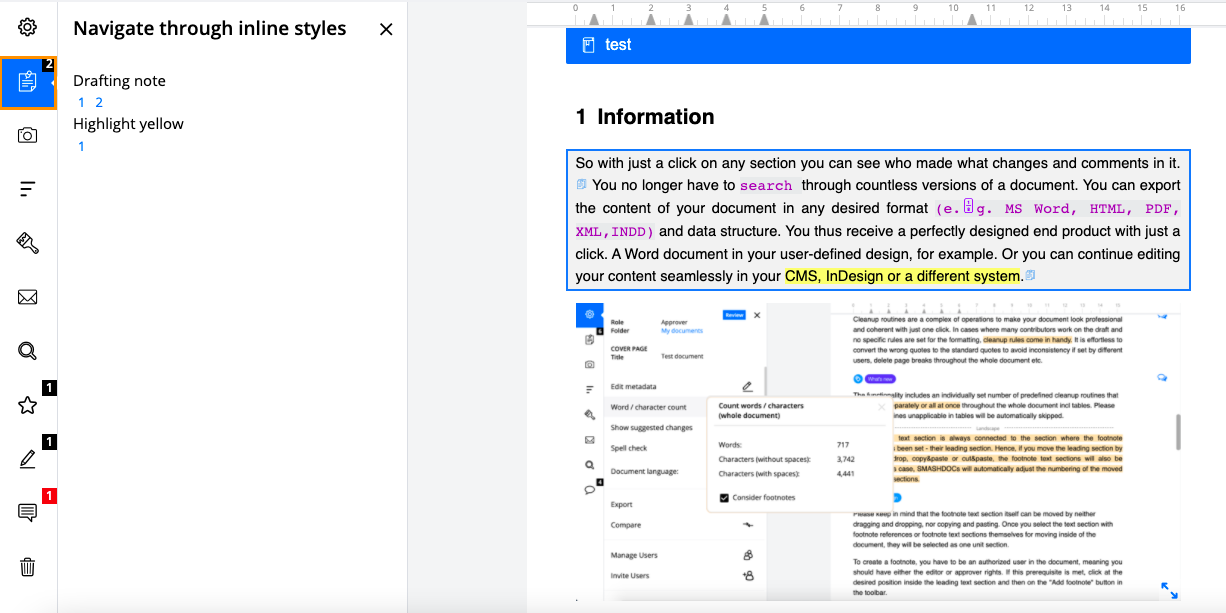
Tab "Navigate through inline styles" including Drafting note style highlighted
As in the example above, where the components are formatted with "Drafting Notes", paragraph styles are listed in the separate list and thus, can be easily filtered and tracked.
4.1.27.5Various formatting attributes
In SMASHDOCs a user can determine different formatting attributes or additional properties for each text components. These properties make it possible to structure a document content or to apply a predefined attribute like font size to a component. This is also applied when the user wants to turn document content into headings, numbered headings or lists.
A text component has the following additional properties:
●Standard text component
●Heading without outline numbering
●Heading with outline numbering
●Text with outline numbering
●List with bullet points
●Numbered list
A standard text component does not have any additional properties and is displayed and processed purely as text.
Text components with the property "Heading without outline numbering" can be served as structuring elements for example of a chapter and are displayed in bold and a different font size than standard text components.
The property "Headings with outline numbering" turns a text component into a heading and adds a numbering. When moving such a component, the numbering is adjusted automatically to the logical document structure.
"Text with outline numbering" adds a numbering to text components. Together with numbered headings, those components form the complete numbering structure of a document.
Text components that are formatted as lists either contain bullet points (unnumbered lists) or numbers (numbered lists). The numbering of lists is independent of a document's outline numbering. Each sequential number is treated as an individual text component. When the components' order changes, the numbering is adjusted automatically.
4.1.27.6Additional properties for paragraph styles
It can be individually configured for a paragraph style, whether a text component that contains this paragraph style is:
1.A read-only component - the content of component cannot be changed. Basically, it behaves like a locked component, but there is no message for the user about it. The user is still able to change the paragraph style of the component.
2.A movable component - these types of text components should not be changed and not moved.
3.A component that requires content:
●when the user deletes all content and wants to save or click outside, an error message is shown;
●when the user works on an empty component and tries to change the paragraph style for this one, an error message is shown.
4.1.27.7Formatting of numbered lists
Numbered lists can be placed on 6 levels.
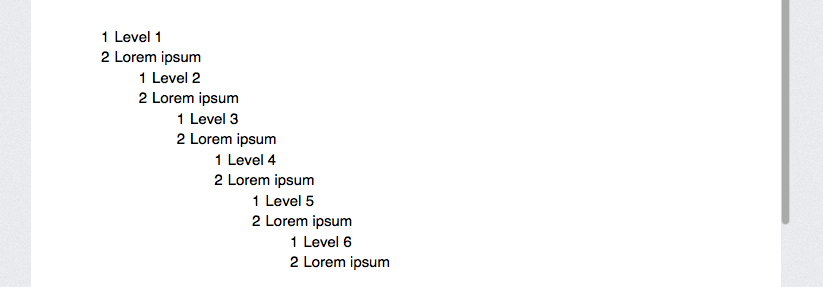
Numbered lists highlighted
There are advanced options for formatting numbered lists (see Image 161), available for subscribed users upon request. For further information do not hesitate to contact Toppan Merrill.
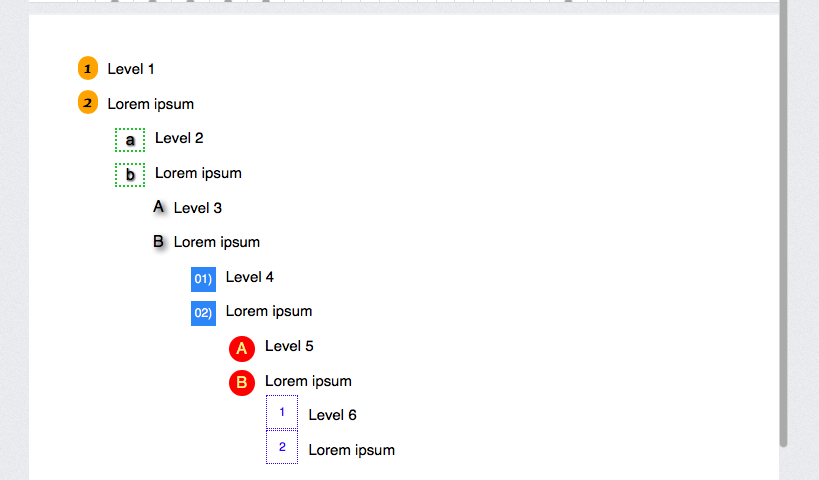
Advanced design for numbered lists highlighted
4.1.27.8Formatting of unnumbered lists
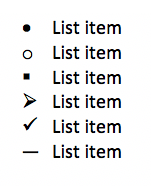
Different signs are used for formatting unnumbered lists on different levels:
Unnumbered lists with different level types highlighted
Also, there is an advanced option to configure the signs of unnumbered list with the help of special decorators. This option is available only for subscribed users upon request. Feel free to contact Toppan Merrill for further information.
List of available signs for unnumbered list highlighted
4.1.27.9Restart numbering
Once you apply numbering with both numbered and unnumbered lists, at some points of your document you may need to restart numbering. This function means that you will not continue numbering of your lists, but start it from the very beginning in any parts of your document.
To do this, open the context menu in a numbered component and choose the option "Restart numbering".

"Restart numbering" highlighted
After you click it, you will have such an outlook of your list, that it is numbered from the very first point of numbering.
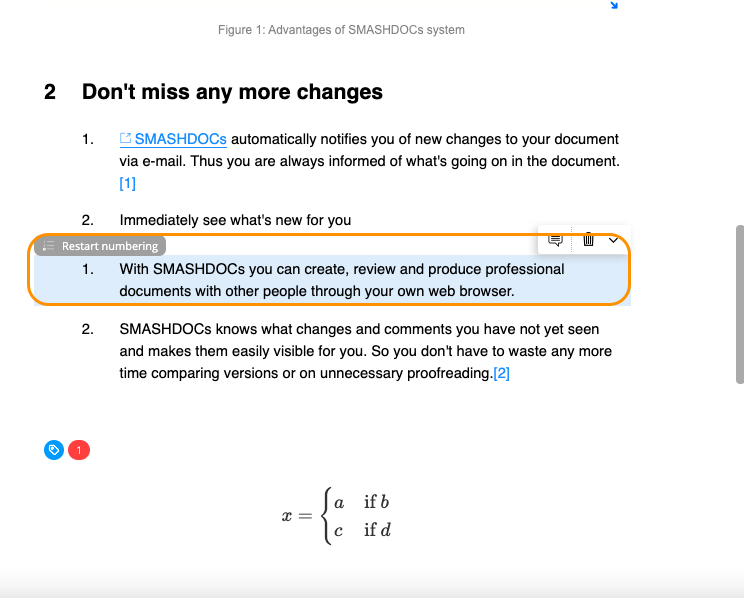
The outlook of the list with applied restart numbering
4.1.27.10Selecting a formatting attribute
Formatting attributes can be activated and changed as desired via the respective icon in the formatting bar. To format a component, select it by clicking at a random spot within the component. A user can now assign a formatting attribute with a click on the respective button. Change or deactivate the formatting by clicking on another or the same button once again.
Buttons for formatting text components highlighted in the formatting bar
For every formatting attribute, there is a default setting. After activating it, SMASHDOCs applies this default setting to the respective component.
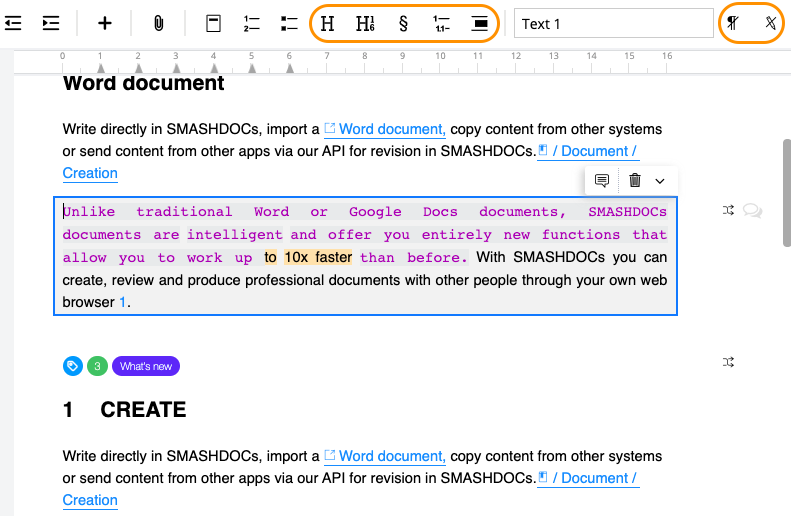
4.1.27.11Remove formatting from a component or part of the text
There are two options with the help of which you can remove inline styles and paragraph decorators from the text. These options are "Clear format" and "Remove paragraph style" and can be found in the upper toolbar on the right.
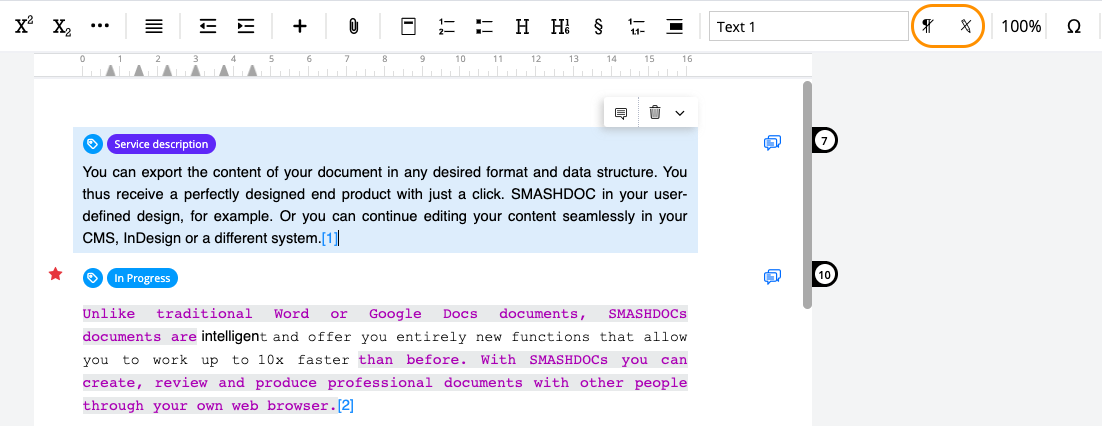
Options "Clear format" and "Remove paragraph style" highlighted
If you need to remove an inline style from the text, you need to click inside the formatted word or select formatted part of text and then perform the option "Clear format".
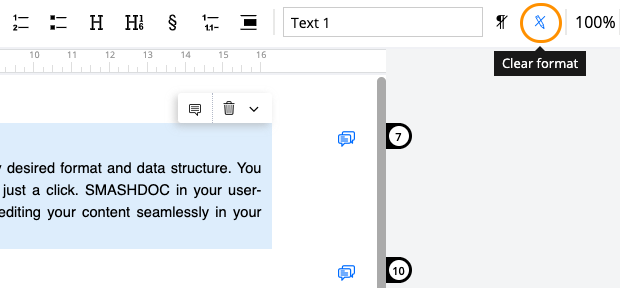
Option "Clear format"
In case you want to delete a paragraph style from a component, click inside a respective component and select the option "Remove paragraph style".
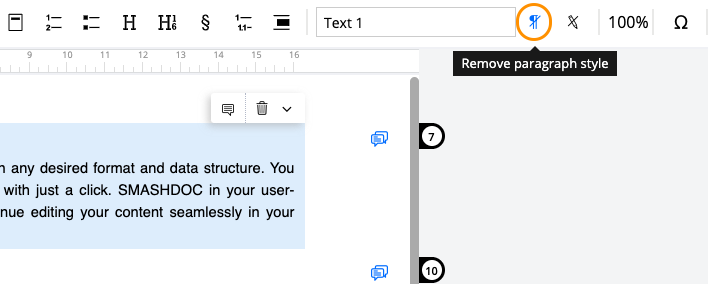
Option "Remove paragraph style"
4.1.27.12Word / character count tab
It is possible to get the report of how many words and characters are placed in the document. You can receive this report of both the whole document and selected components only. To have an overview of the number of words/characters, go to the left toolbar and click the option "Word / character count".
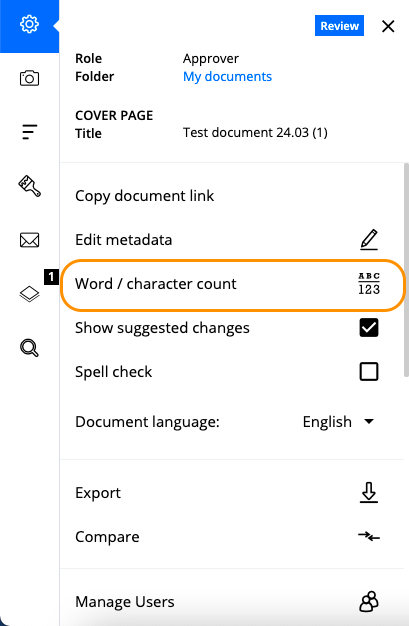
"Word / character count" highlighted
As soon as you click this option, you will get a modal window with the report of the amount of words, characters with and without spaces.
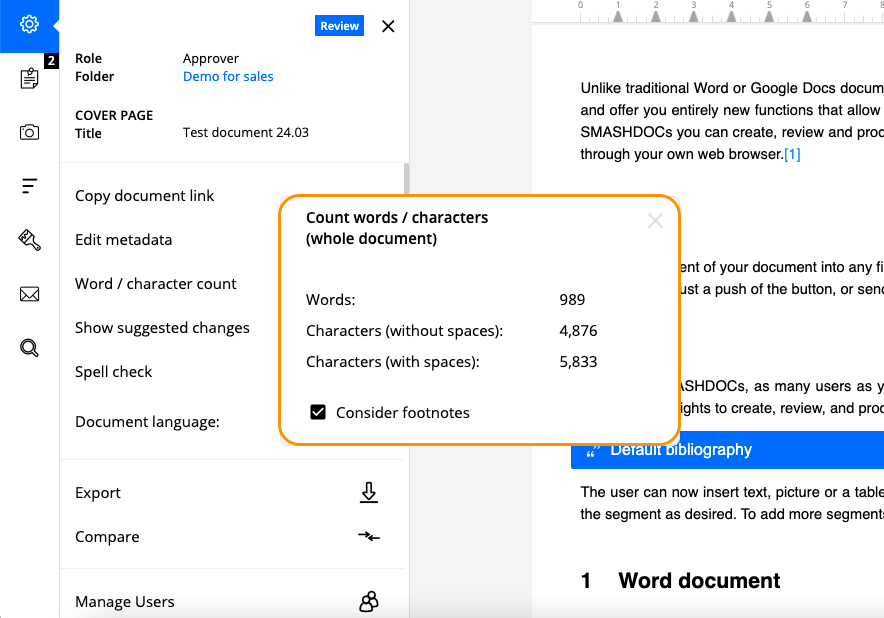
Words/characters count report highlighted
If you have deleted a word, but have not accepted this deletion, word count will consider it as already deleted word anyway, therefore, there will be displayed less counted words after deletion.
To get the word/character count report of chosen components only, click 'Word / character count', then select appropriate components, and you will receive the information of corresponding components.
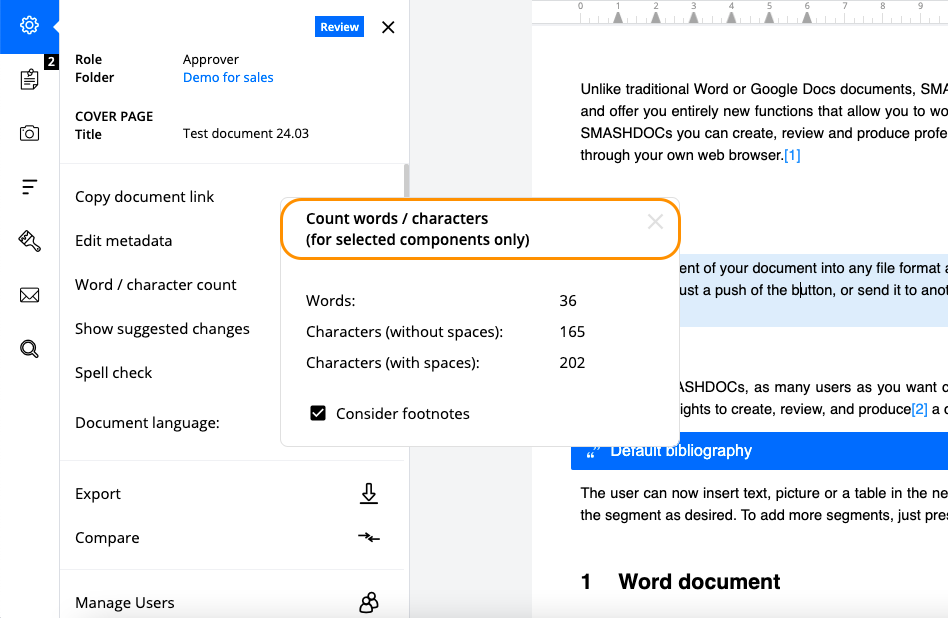
Count words and characters for selected components only
The checkbox "Consider footnotes" is switched on by default (see Image 172). In case you do not need to count words and characters in footnote-components, you can disable this function in the checkbox.
4.1.28Editing image components
Image components in SMASHDOCs do not hold any formatting options or additional attributes besides a size adjustment.
In order to edit the size of an image in the document, click on the little blue arrows in the lower right corner of the inserted image, hold the mouse key and move the image to the desired size. In this way, the user can enlarge or reduce the size as required. Changes of the image size are saved automatically, as soon as the mouse key is released.
Enlarging or reducing the size of an inserted image button highlighted
You can also see the image in original size. Click on the option "Show in original size" inside the picture, and it will be opened in a new tab in larger resolution.
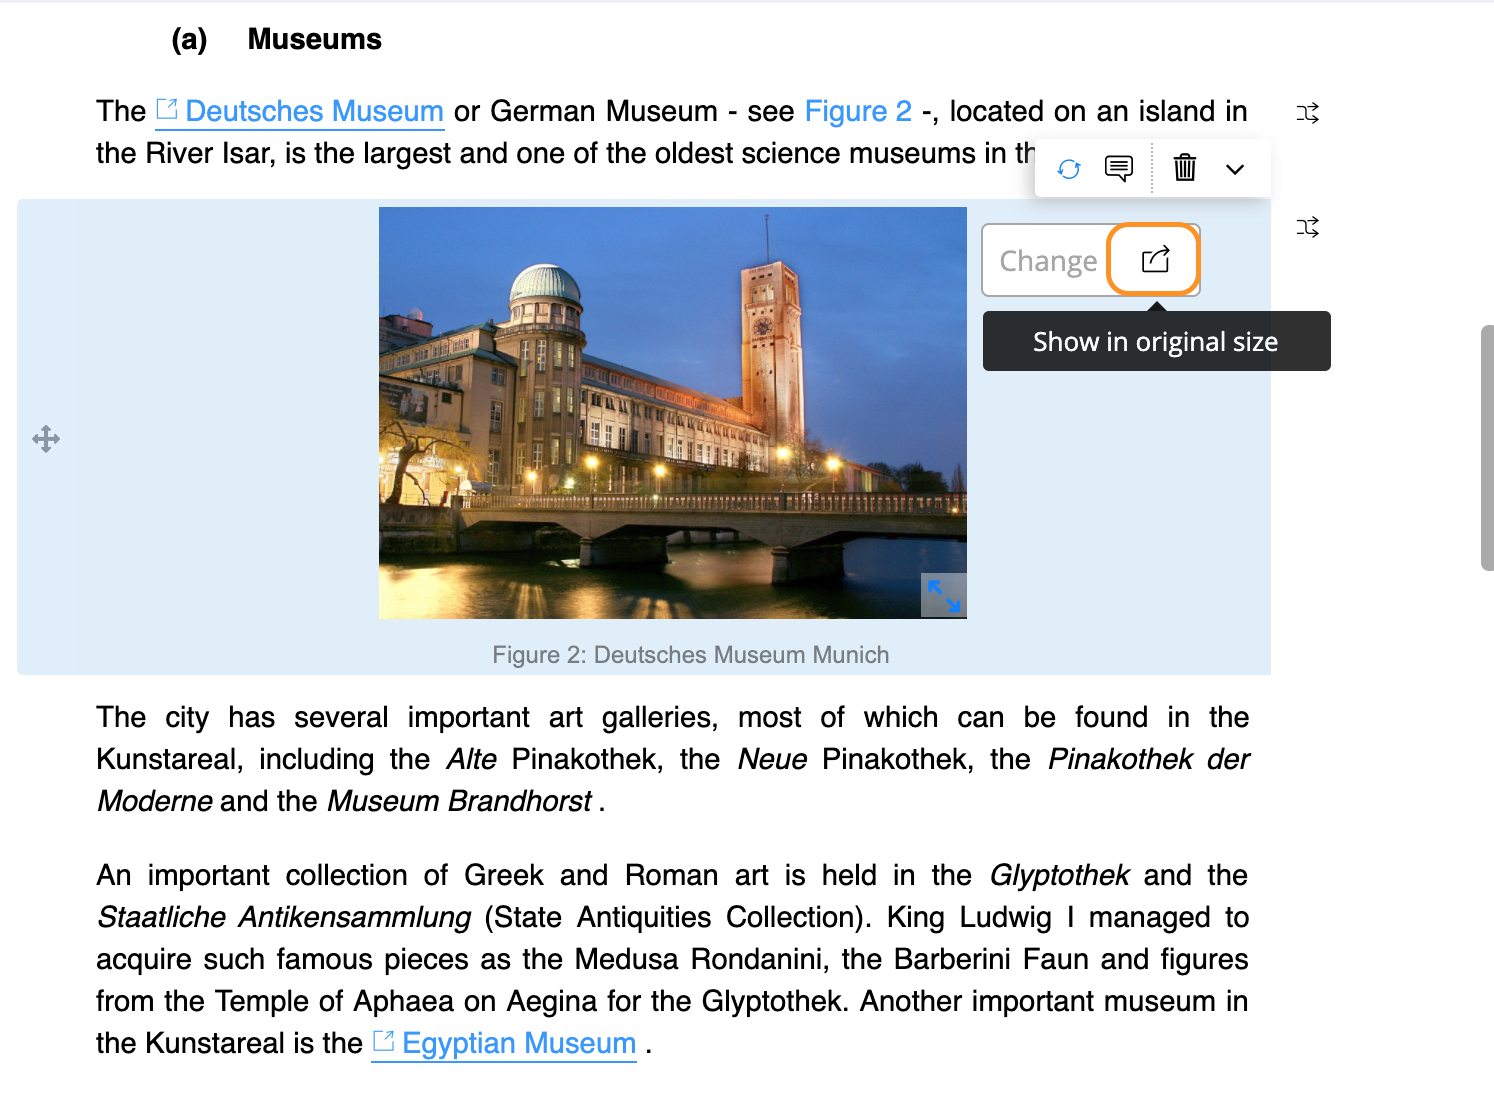
"Show in original size" link highlighted
4.1.29Formatting tables
Tables in SMASHDOCs hold various formatting options. They appear after opening the dialog box for editing tables.

Formatting options for tables highlighted
The following options are available:
●Undo
●Redo
●Row headers
●Column headers
●Display text bold, italic, underlined or struck trough
●Display text with superscript, subscript, transcript, small caps
●Unordered/ordered list
●Clear formatting
●Insert weblink/cross-reference
●Add footnote
●Add inline image/inline equation
●Align text left, right, centered or justified
●Align text to the top, middle or bottom within the cell
●Type of frame
●Colour of frame
●Font size
●Background color
●Background intensity
●Table width
4.1.30Component alignment
A user can align text components as well as images and tables individually, using the following options:
●align left
●center
●align right
●justify
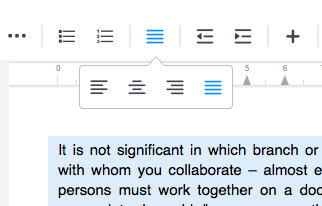
Alignment options highlighted
A user can also use shortcuts for alignment:
| Alignment | Windows | Mac |
|---|---|---|
| Centered | Ctrl + Alt + C | CONTROL + Alt + C |
| Left aligned | Ctrl + Alt + L | CONTROL + Alt + L |
| Right aligned | Ctrl + Alt + R | CONTROL + Alt + R |
| Justify text | Ctrl + Alt + J | CONTROL + Alt + J |
Shortcuts for alignment
4.1.31Inserting a page break
For inserting page breaks via the component context menu the user should select the option "Add page break" in the menu or use the shortcut (Ctrl + Shift + P) for Windows / (CONTROL + SHIFT + P) for Mac.
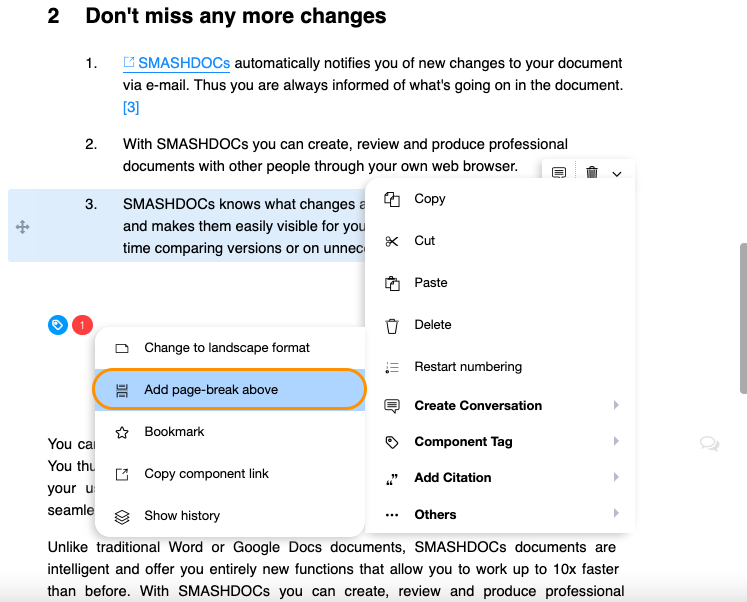
Add page break option highlighted in the context menu
The page break appears above the selected component. As a SMASHDOCs document is not displayed pagewise, the break only shows as a marking. When exporting the document (e.g. Word) the page break appears at the respective position.
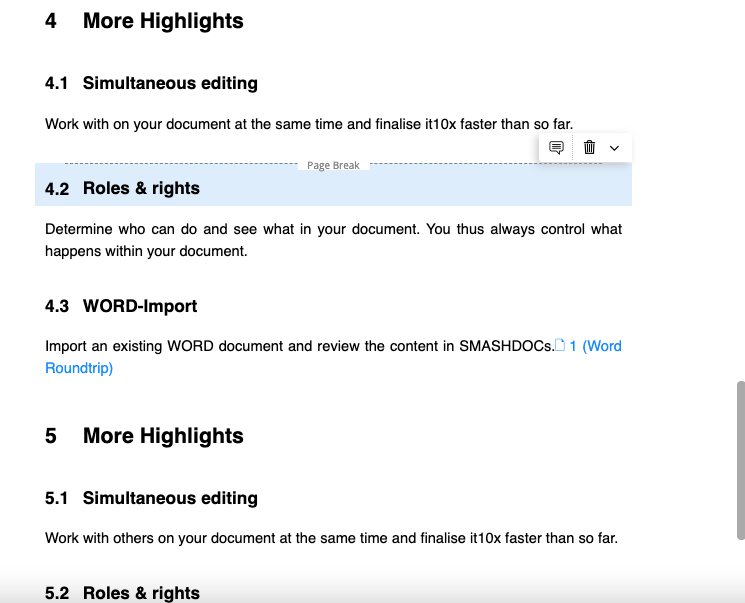
Display of the page break highlighted in the document
To delete page break, select "Delete page break" in the component context menu.
4.2Formatting options
4.2.1Moving components vertically and horizontally
SMASHDOCs allows to change a component's position within a document without disrupting the correct outline numbering.
4.2.1.1Moving components in draft mode
When clicking into a component in a draft document, a "Move" button appears on the left side of the component.
The "Move" button highlighted in a draft document
Click on the button and hold the mouse key to move the selected component to any position within your document. Let go of the mouse key to fixate the component at the desired position.
After having relocated components or groups of components, the outline numbering is adjusted automatically.
4.2.1.2Moving components in review mode
A user can also move components in review mode via the "Move" button.
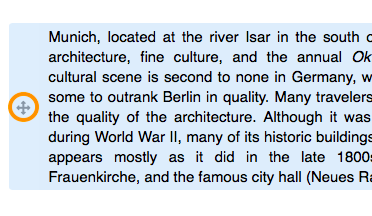
The "Move" button highlighted in the review mode
4.2.1.3Moving components horizontally
A user can also move components horizontally via the "Indent" button in the formatting bar or by pressing the Tab key.
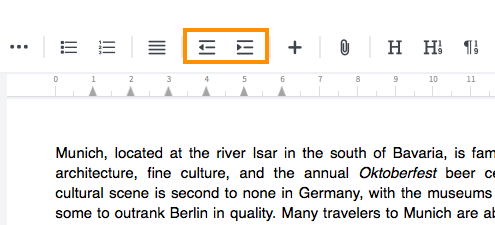
"Indent" and "Outdent" buttons highlighted in the formatting bar
This indents the selected component to the next possible level.
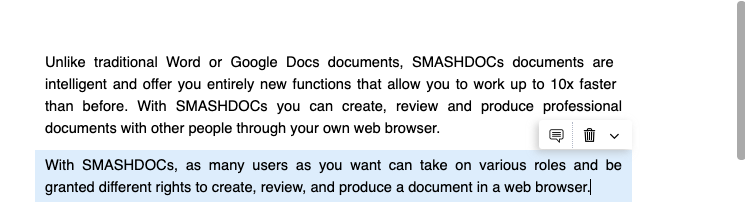
Text component without an indentation highlighted
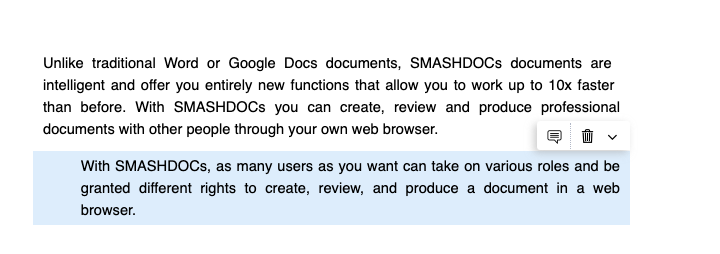
Text component with an indentation highlighted
A user can outdent components by pressing Shift + Tab.
4.2.2The table of contents
SMASHDOCs' table of contents shows all text components with the format "headings" or "numbered headings" at a glance.
It also lets a user easily locate specific components and provides quick access to the respective position in the document.
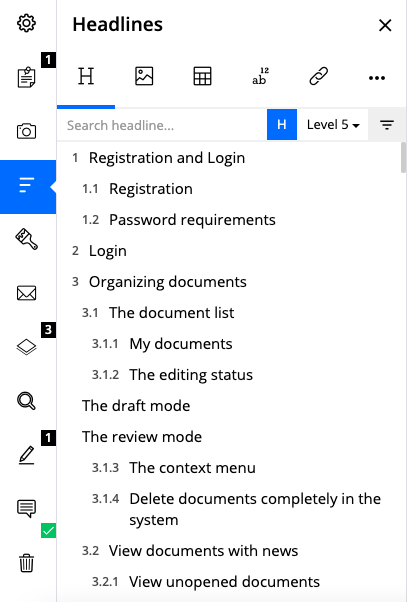
Table of contents highlighted (an example)
As per default, only headings with outline numbering are displayed in the table of contents. Clicking the "H" in the upper right corner adds unnumbered headings (if existing).
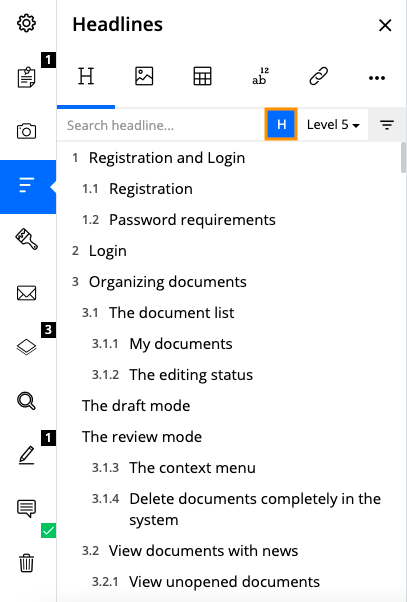
Table of contents with unnumbered headings highlighted
When you add numbered components or change the numbering or outline level within a document, the table of contents is updated automatically.
Image components, tables, and other elements are also displayed in the table of contents. The user can access the overview by clicking on the respective tab in the header and under the three dots button.
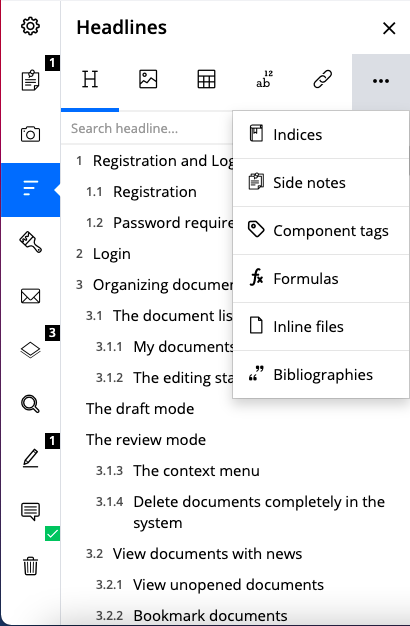
Table of contents highlighted
The table of contents exists in draft as well as in review mode.
4.2.2.1Search in table of contents
Search in a table of contents is dynamic, meaning the more specific you get with your search term, be it a text or a number, the narrower search results you receive. E.g. if you input "test", you immediately get a number of the components containing it. If you then proceed and change it to "testing", you'll get the respective outcome.
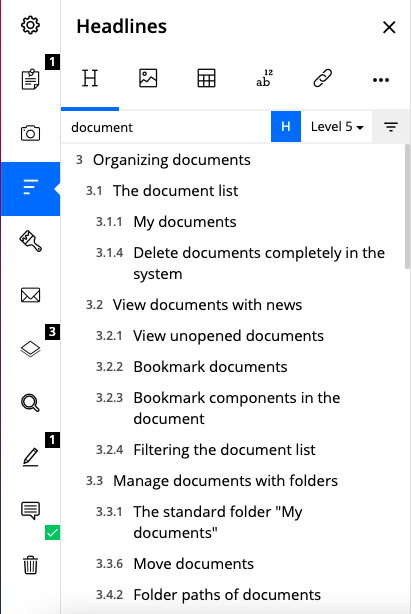
Search in table of contents highlighted
4.2.3Free positionable directories
Free positionable directories mean the lists of all objects of one type belonging together, thus ordered according to their position in the document as the table of content, list of figures and list of tables can be added anywhere in the text. Besides, directories can also be moved to any other spot later on the same as the ordinary text component.
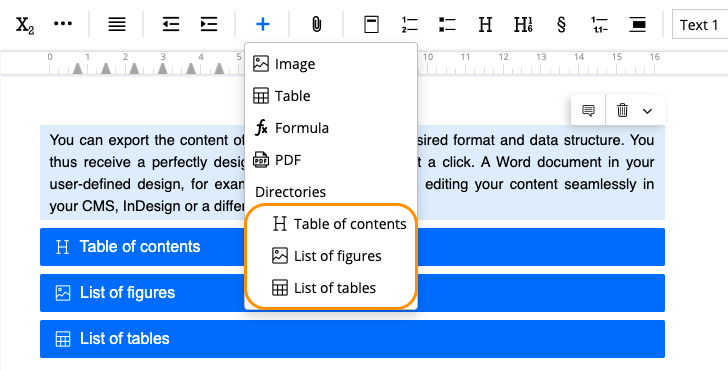
The tab for adding free positionable directories highlighted in the formatting bar
One click on the directory opens it on the left side of the tab bar with all the relevant content inside. E.g. clicking on the list of figures directory opens it in the "Show directory" tab.
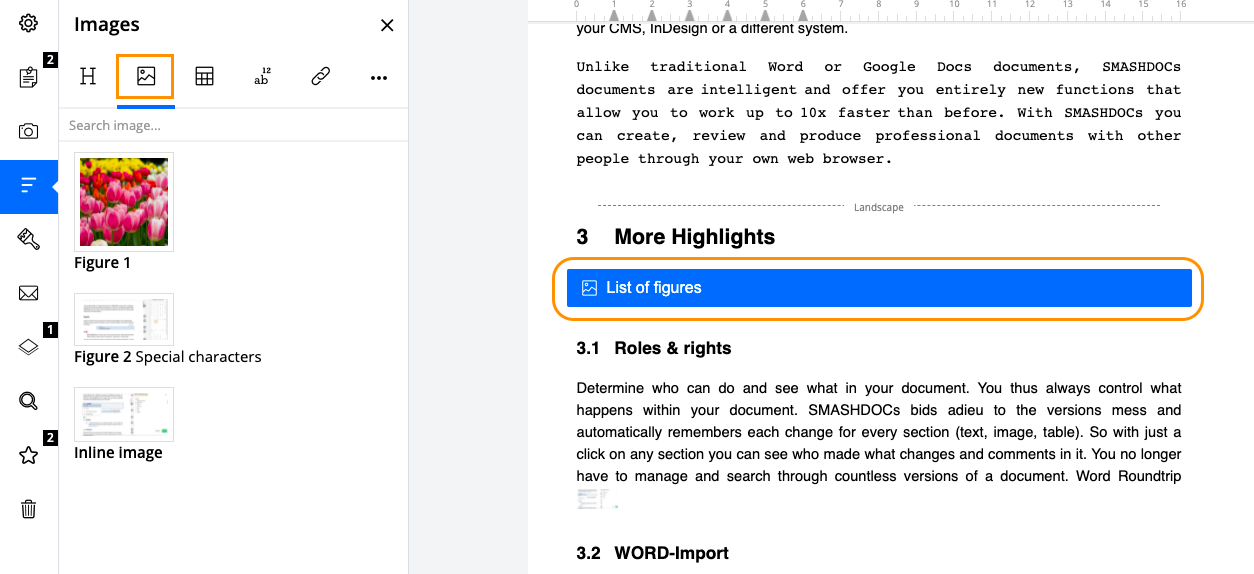
The result after clicking on the list of figures free positionable directory highlighted
Note that inserted free positionable directories will always appear in the exported document unlike standard table of contents that can be deactivated for the export version.
Additionally, for each index that you have created in the document, an index directory will be inserted in the list of directories automatically. After you click on the list of indices in the document, the full list of indices will be displayed in the left tab bar.
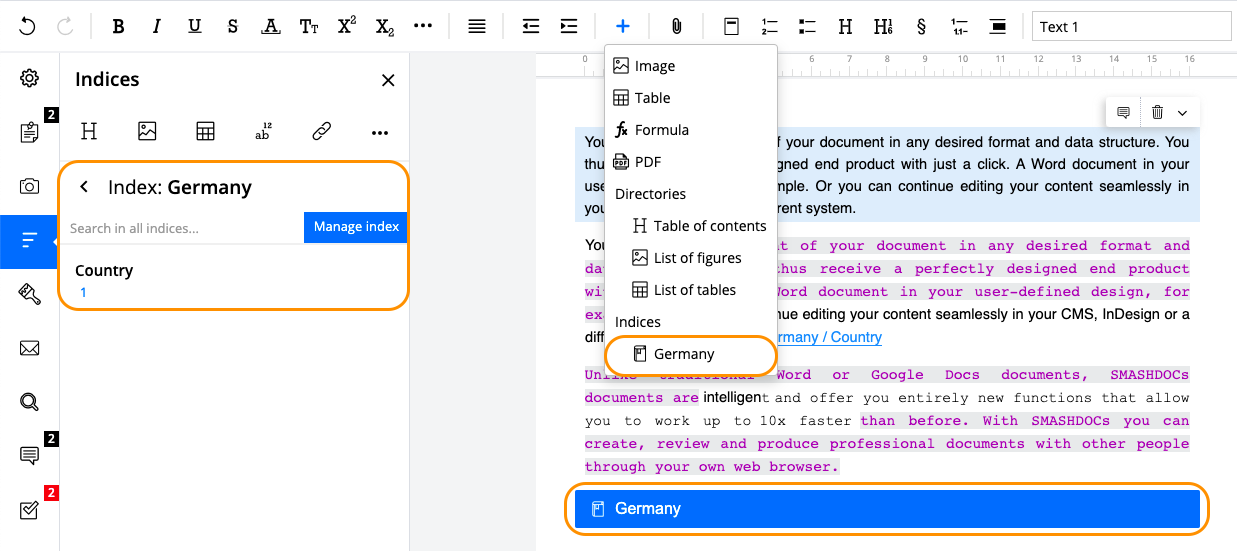
List of indices highlighted
4.3Reviewing a document
4.3.1Setting a document to review
Only the creator can set a draft document to review.
It is possible to add users to a document when sharing the document for review and at any later point in time. To send an invitation user has to insert a person's e-mail address. Users with whom the creator already cooperated within SMASHDOCs can easily be found by searching for their first / last name or e-mail address.
In review mode, all changes and decisions for every component are tracked, and recent changes are displayed in the change view. New changes as well as approved or rejected suggestions are highlighted in colour, provided that a user has not seen or marked them as seen yet.
The creator of the document can start the review mode directly from within draft mode.
To set the document for review the author should click on the "Share" button on the right side of the page header. In this case, a dialogue window appears for starting the review mode, too. A user can also use the shortcut (Ctrl + Shift + E) for Windows / (CONTROL + SHIFT + E) for Mac.
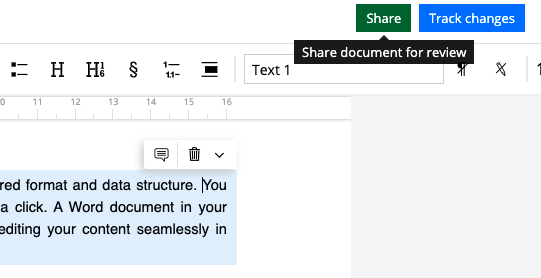
"Share" button highlighted in a draft document
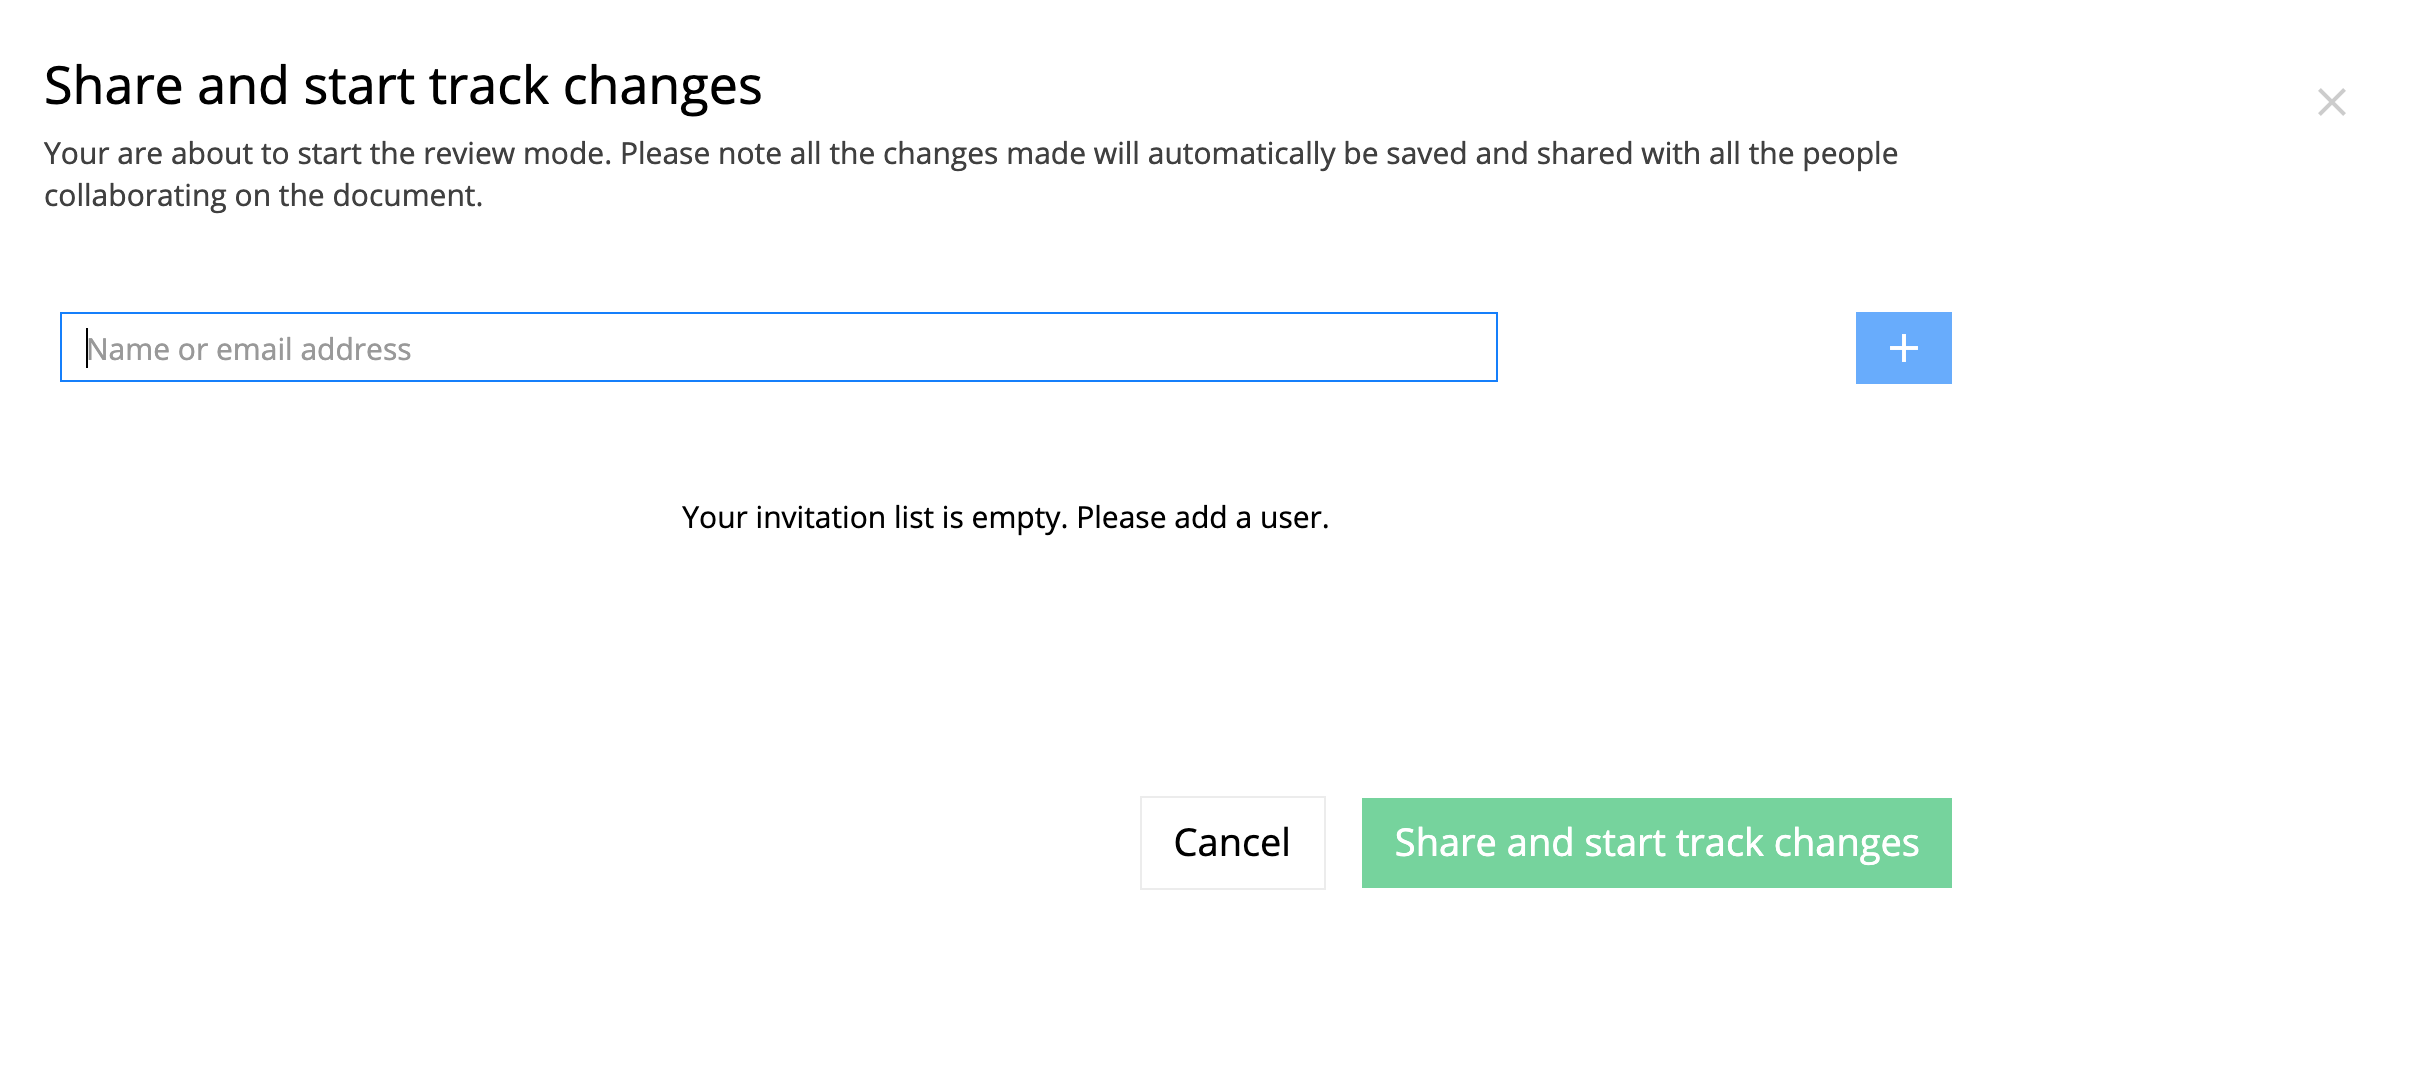
Dialogue window "Share and start track changes" highlighted
4.3.2Editing a text component and saving changes
NB: To edit components and saving changes, a user needs to at least have the role of "Suggest". In order to save new changes in the component a user can apply the shortcut (Ctrl +S) for Windows / (COMMAND+ S) for Mac.
4.3.2.1Starting the editing mode
A document's content can also be edited after having started the review mode. A user can edit each component individually by clicking into it, after this changing the content is possible. It is not possible to edit components simultaneously: once the user started the editing mode for a component, no other participants can edit this component until one user finishes.
4.3.2.2Making changes in editing mode
Once the editing mode was started, the user can make changes in the desired component, while the changes are displayed immediately.
It is possible to change the component's content in two different ways:
●Add text using the keyboard
●Copy & Paste or Cut & Paste text into the component
The text can be passed from other SMASHDOCs documents as well as from external sources (e.g. websites or Word documents).
4.3.2.3Saving and discarding changes in text components
All changes are saved automatically, even when you click outside the component. Alternatively, the user can click on the green "Save" button or use the hotkeys STRG+S (for Mac: CMD+S). Subsequently, the editing mode closes and the component updates, integrating the changes.
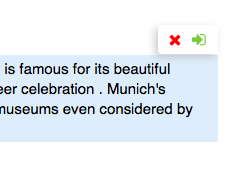
The buttons "Save" and "Discard" highlighed in the editing mode
To exit the editing mode the user should click on the red "Discard" button or press ESC to exit the editing mode. All changes to the content will be discarded and can not be restored.
4.3.2.3.1Possible errors during saving changes in a component
Sometimes due to problems with the Internet- or WLAN-connection the latest changes in components cannot be saved properly. Users are notified about this error by a red warning triangle in front of a corresponding component, which has been affected. Reloading the page often helps in solving this issue.
4.3.2.4Saving editor view settings on Backend, not in browser
If a user changes default settings for some features e.g. display of indices in the document, and goes into another browser/reloads the page, these changes are saved after reloading the page or moving to another browser. The list of settings that are saved on Backend is the following:
●Show suggested changes
●Spell check on/off
●”invisible blank spaces”
●Indices
●Side notes
●Bibliography
4.3.2.5Show suggested changes
If other users have edited the document shared for review, you can see all of suggested changes they've made. In order to do so, the function "Show suggested changes" should be activated with a tick in the "Show document options" located on the left side of the tab bar. Afterwards, you can either accept/reject all of them or decide on each suggested change separately.
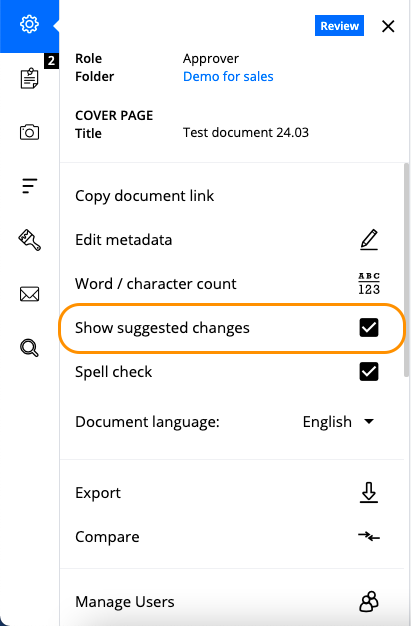
The option "Show suggested changes" displayed
If the function "Show suggested changes" is off, the document will have the so-called "clean view".
4.3.2.6Divide review component
A review component can also be divided. To do so, the user must click anywhere in a component (but not at the beginning or end of the component) and press the "Enter (RETURN)" button. The small dialog box asking "Would you like to split the component? Yes, No" will appear.
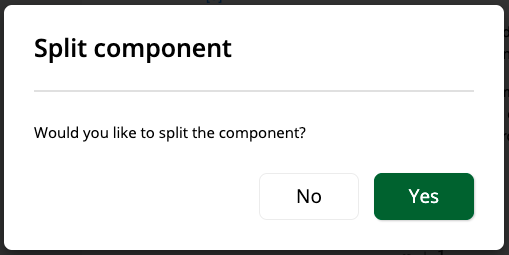
The pop-up window after users try to split the component highlighted
If the user clicks "Yes", the component will be split and the contents after the cursor position will be set to "suggested for deletion". A new draft component will be created and the content of the previous component suggested for deletion applied. If it is a numbered component, the numbering will be set automatically after the split.
The divided component highlighted
4.3.2.7Select several components at the same time
Click on the component where you want to start the selection and Shift-click on the component up to which the selection should be applied (can be applied by Windows and Mac users).
All components that lie between the two selected components will be selected (text components/images/tables).
Unfortunately it is not possible to select several components from different parts of the document.
By selecting several components you have the possibility to do a lot of actions at the same time:
●Move the components (within the document)
●Share for revision (for draft components)
●Accept or reject changes
●Create lists (numbered)
●Apply formatting
●Copy
●Delete
4.3.3Editing an image component and saving changes
4.3.3.1Editing an image component
A user can change an existing image component and replace the image via the context menu or dropdown menu.
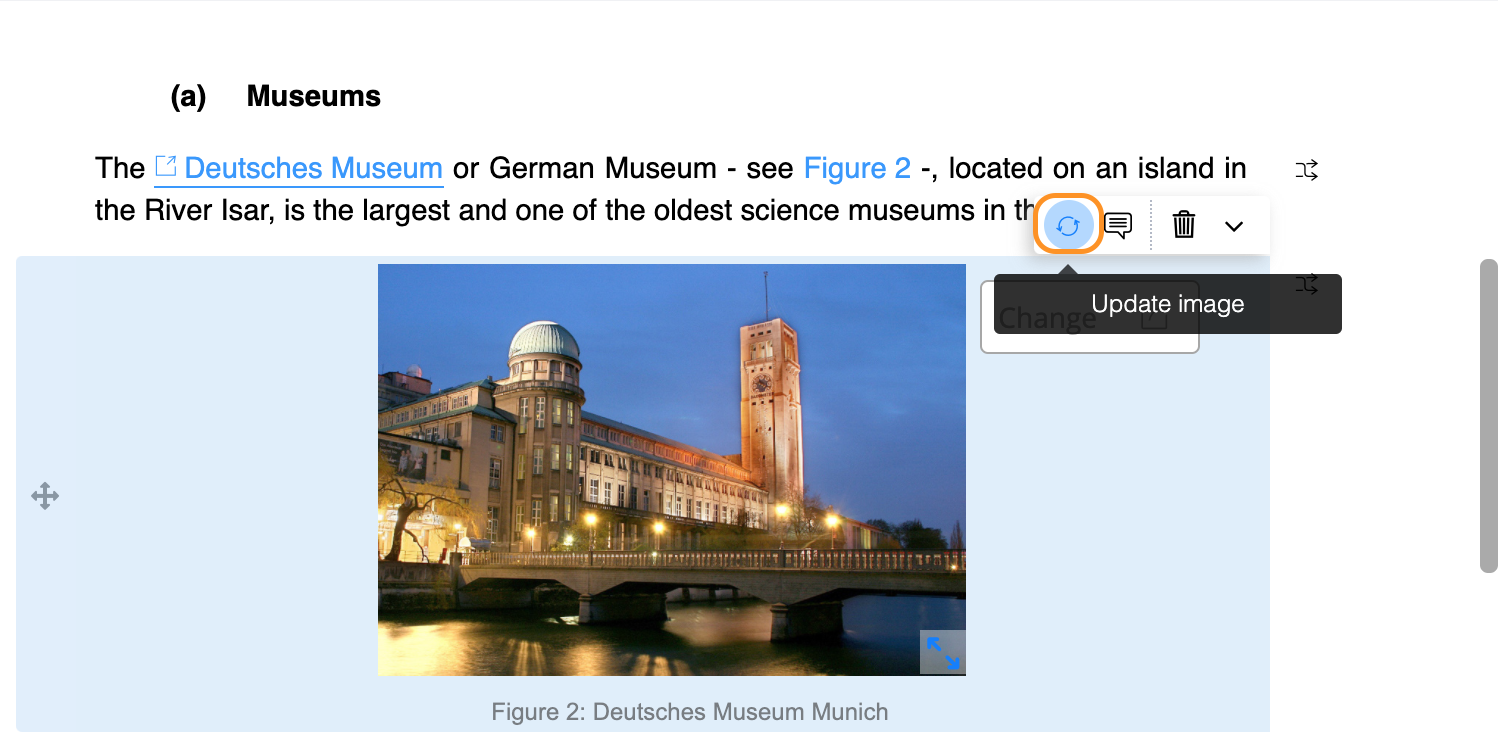
"Update image" button highlighted in a context menu of an image component
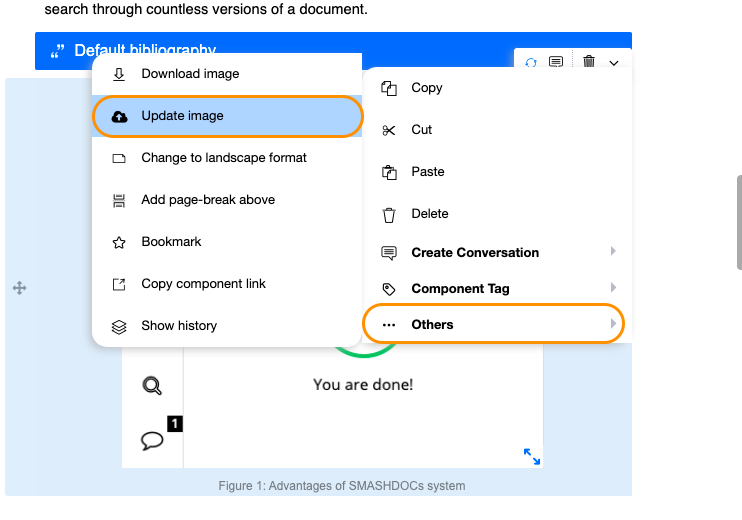
Update image through the dropdown menu
Click on the button in context menu, select the required option in dropdown menu or double-click on the image to open a dialog window. Here the user can either replace the existing image by adding a new one via Drag & Drop or search for a new image in local data.
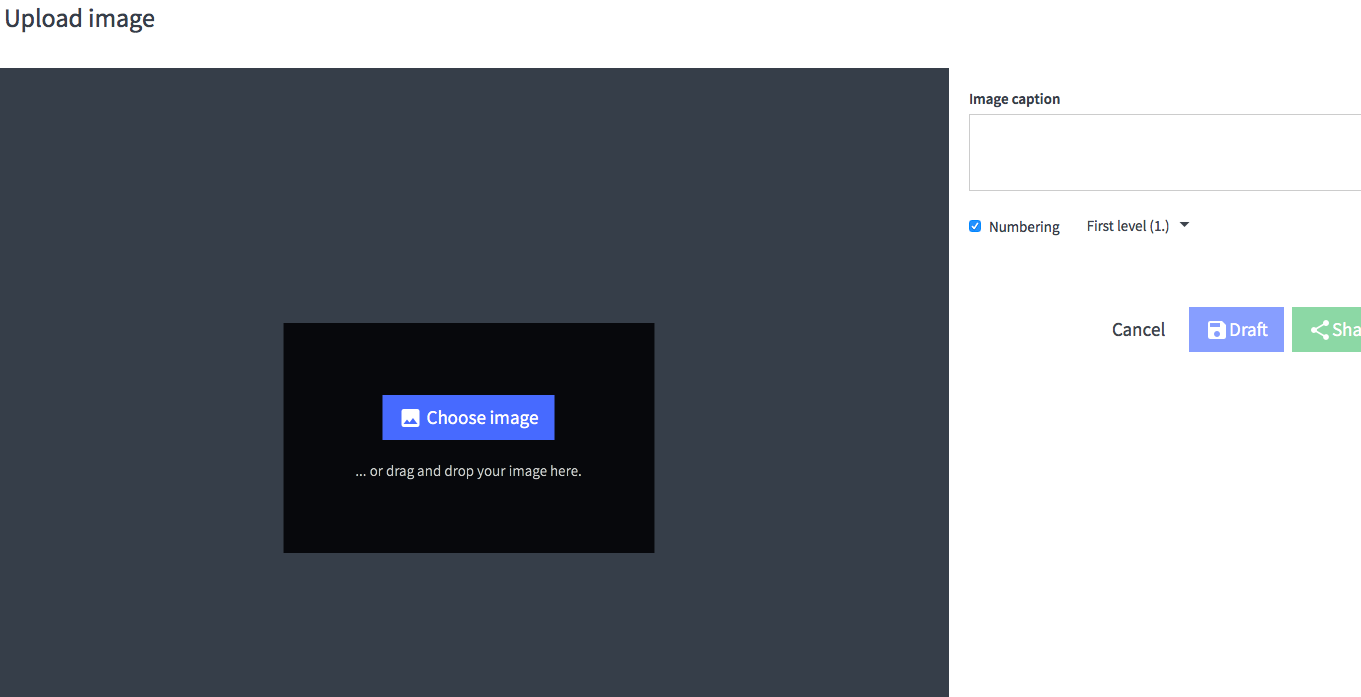
Dialogue window "Upload image" highlighted in draft mode
To delete the image a user can either press the "trash can" button or use the Backspace key.
Downloading image is also possible through the dropdown menu (see Image 198) or by opening image in original size (see Image 174), right-click and selecting the option "Save Image as".
4.3.3.2Saving or discarding changes in image components
To save a newly inserted image, click on the "Save" button or use the shortcode CMD + S (STRG + S). SMASHDOCs integrates and saves the new image in the component.
Click anywhere outside the dialog window or on "Cancel" to exit the editing mode. All changes will be discarded, and the image component remains unchanged.
4.3.3.3Adding a new image in review mode
When adding a new image in review mode, a user can either save it as draft first (others can see but not replace or comment on it) or share it for review right away.
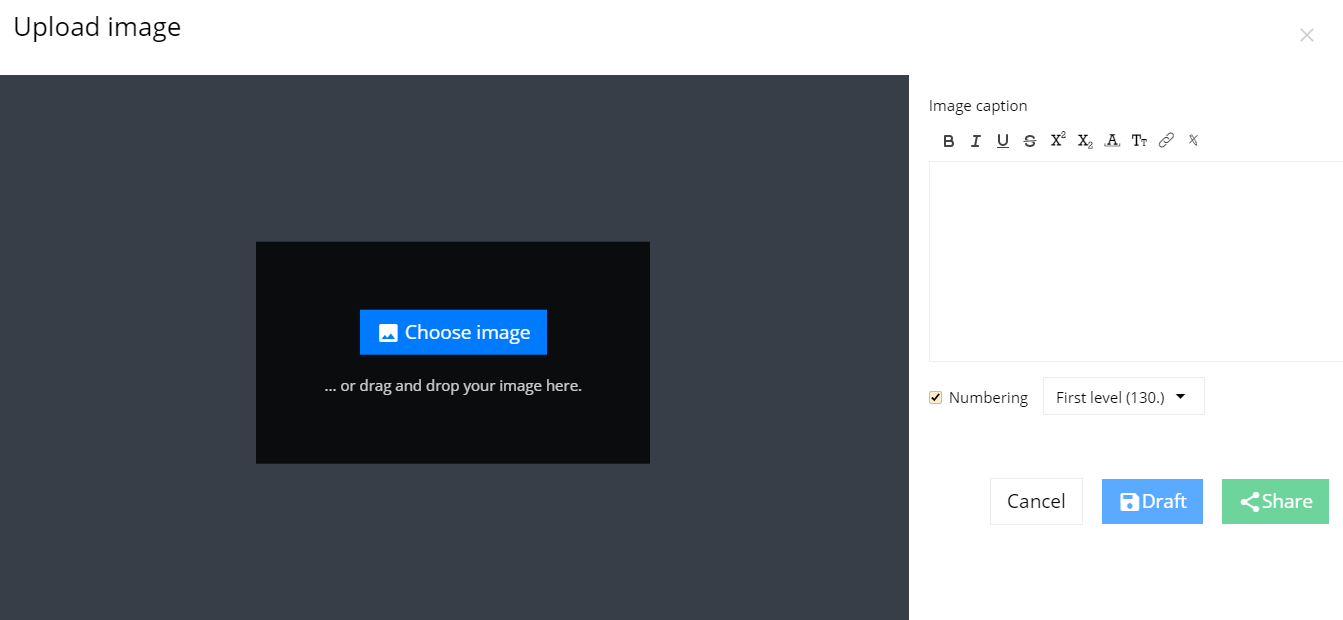
Adding a new image in a review mode
Note: In order to be able to delete an image, the user has to have the rights of "Approver".
4.3.4Editing a table and saving changes
4.3.4.1Editing a table
A user can edit a SMASHDOCs table by double-clicking on it or via the "Edit table" function in the context menu.
In the appearing dialog window, the user can make changes to the table's content, add, merge or delete new rows and columns, change the table's title or adjust its size.
There are 2 modes while editing the table:
●Standard editing mode
●Enhanced editing mode
The standard editing mode is activated, if a user just clicks into a cell and starts typing.
The following keys have the following actions:
●Return: selects the cell below
●Tab: selects the cell to the right
●Shift + Tab: selects the cell to the left
●Formatting: effects all content in a cell
●Arrow to right: selects the cell to the right
●Arrow to left: selects the cell to the left
The enhanced editing mode will be started after one of the following actions in a selected cell:
●user double-clicks into a cell
●user pushes Shift+Return in a cell
●user selects ordered or unordered list format/weblink/footnote
The following keys have the following actions when enhanced editing mode is activated:
●Return: creates a new line below (line break) in the cell
●Tab: indents in the cell
●Shift + Tab: outdents in the cell
●Formatting: effect all content in a cell
When enhanced editing mode is activated all formatting options just work for the content in the cell which has been selected by the user.
The enhanced editing mode can be ended by
●clicking in another cell
●pushing the ESC key
4.3.4.2Saving or discarding changes in tables
If you want to discard changes, either click on "Cancel" or anywhere outside the dialog window. The table will be reset to the former version.
To save changes either hit "Save" or use the shortcode CMD + S (STRG + S).
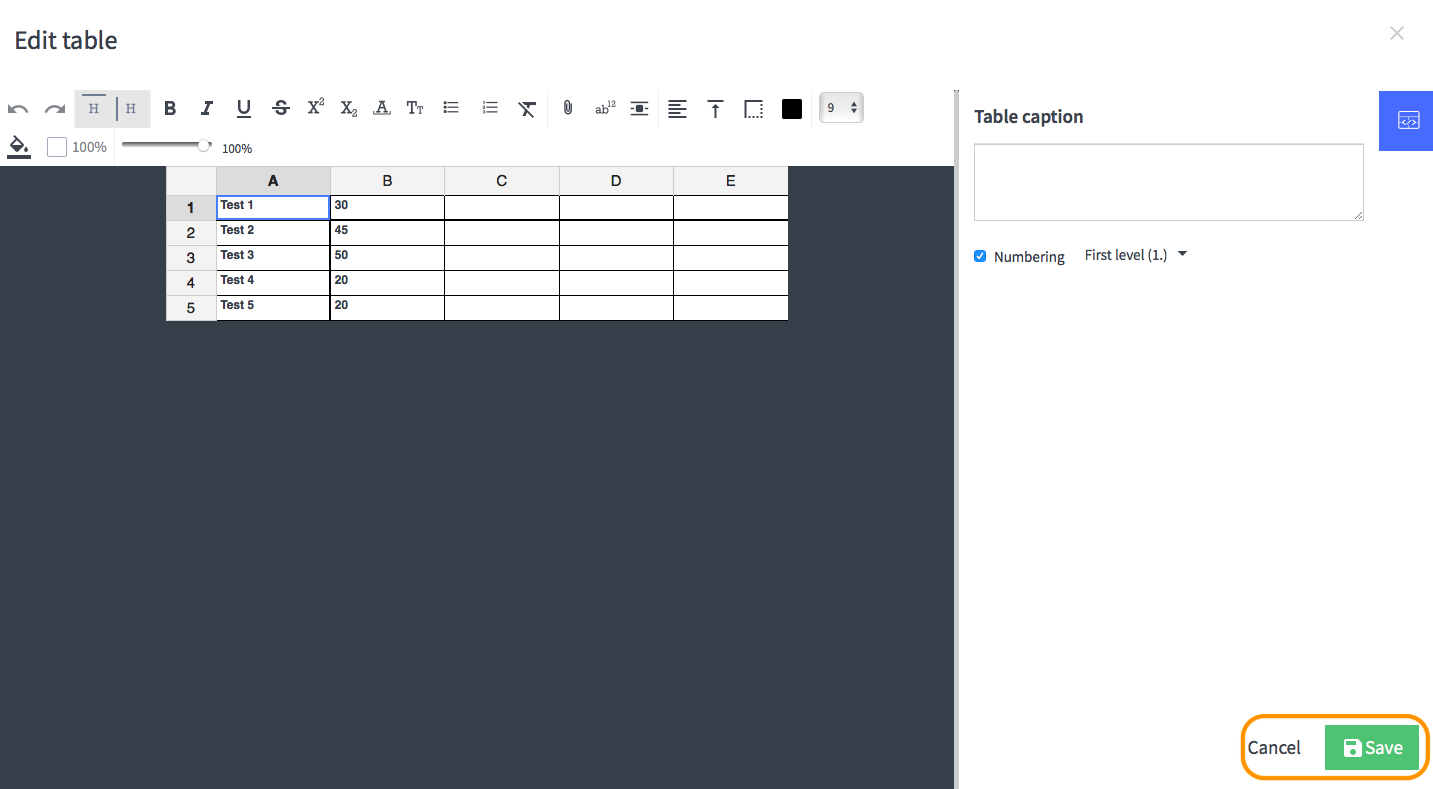
"Cancel" and "Save" buttons highlighted in the table editor
To delete the table a user can either press the "trash can" button or use the Backspace key.
4.3.4.3Adding a new table in review mode
Like images, a user can save newly added tables as draft or share them for review.
4.3.5Importing tables from Word
Importing tables in SMASHDOCs that have been created in Word document is also available. After import, you can edit this table the same way, as a table created directly in SMASHDOCs editor. The following styles of table borders are supported, as well:
●solid;
●dotted;
●dashed;
●double.
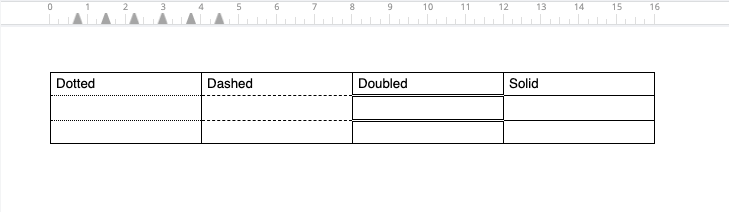
Table with different border styles imported from Word
Note: for now it is impossible to apply or edit border styles in SMASHDOCs editor.
4.4Adding new components in review mode
4.4.1Creating one or more draft components in review mode
To create a new component, user has to click on an existing component and press the ENTER button.
After the user makes the selection, a new component is inserted as a draft below the focused component.

New draft component in a review document as seen by the creator highlighted
The user can insert text, picture or a table in the newly created draft component, or format the component as desired. To add more components, just press the Enter key.
The avatar on the left side of a draft component shows the component creator.
Draft components can be repositioned within the document just like checked-in components, but only by the draft component's creator.
NB: The button "New component" is only displayed when the user holds at least the role of "Suggest".
4.4.2Managing draft components
All created draft components are summed up in the list "Draft components". Look it up in the tab bar on the left side. The black number shows how many draft components the user has created in the document.
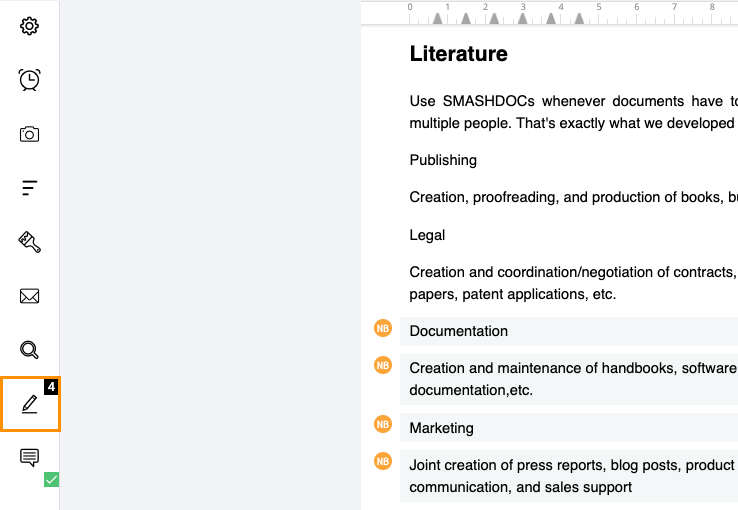
Tab "Draft components" highlighted in the tab bar
In case you do not have any of your own draft components, only those of other users - the tab for the list of draft components in the left toolbar will be displayed without black number.
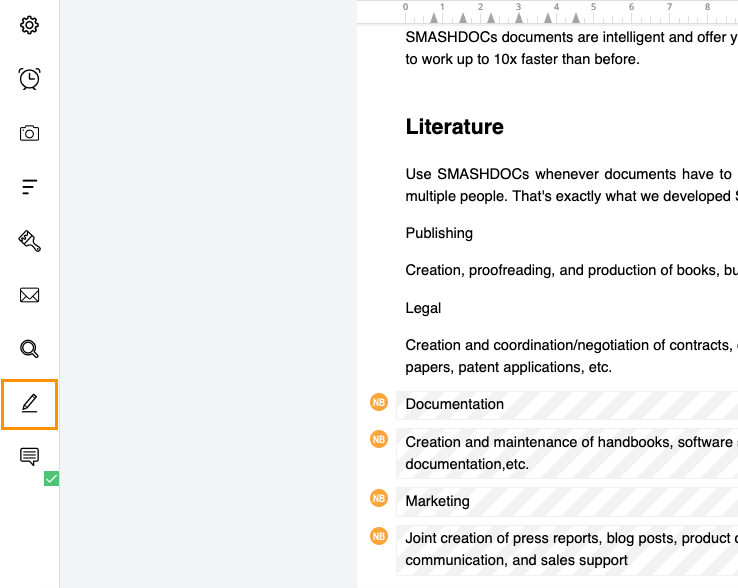
Outlook of the tab "Draft components" if there are only draft components of other users
In the tab "Draft components" there are filters "Users", "My" and "Other users" for you to follow your own draft components, as well as components, added by other users in the document.
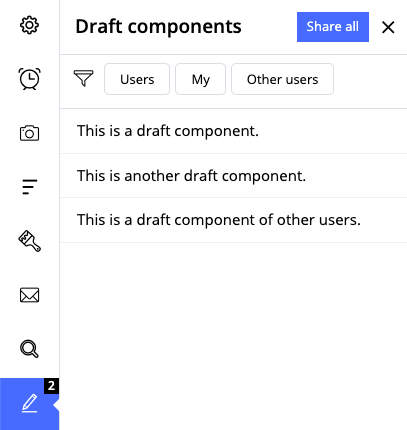
Filters in the list of draft components
Once you open the list of draft components, you will see all drafts created by you, your name displayed in the blue frame, the option "Re-select" and filter sign.
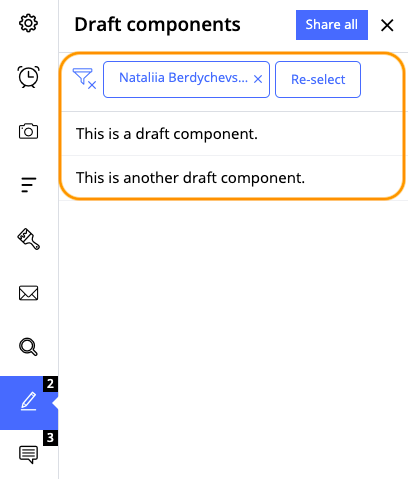
Opened tab "Draft components"
If you click on the filter sign, your name will be removed from the list and there will appear all draft components that have been added in the document, as well as filters "Users", "My" and "Other users".

The list of all draft components in the document
Activating the "Users" filter redirects you to the list of users, clicking on "My" shows only your draft components, "Other users" - shows drafts added by other contributors in the document.
By clicking the option "Re-select" (see Image 207) you will be redirected to the list of users who have added their draft components in the document.
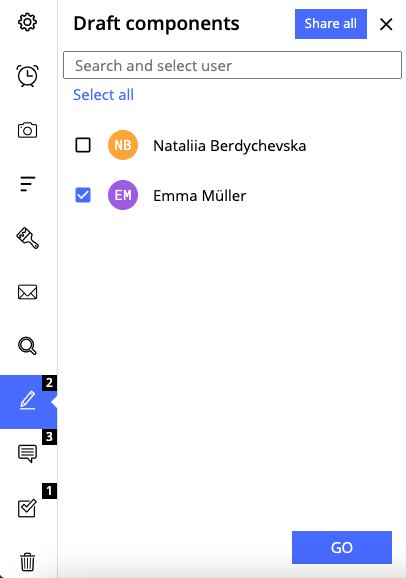
The list of users who have added draft components
There you can select the user, whose drafts you need to see. Click "Go" and the list of draft components of indicated users will be displayed. In case you deselect all users, the button "Go" will be disabled.
In case there exist only drafts of other users in the document, after opening the list of draft components, the filter "Other users" will be activated and all draft components added by other users will be displayed.
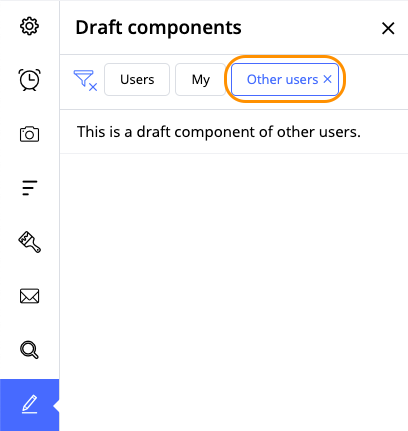
Activated filter "Other users"
If there are only your drafts in the document, in the opened list of drafts the filter "My" will be activated and all your draft components will be displayed.

Activated filter "My"
Click on a component in the list, and you will be redirected to the corresponding component in the document. Additionally, the user can set the draft component for review with a click on the blue button.
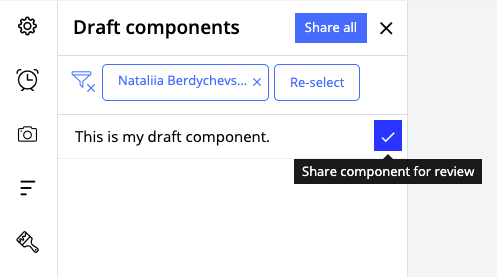
Button for setting a draft component for review highlighted
Users can also set their own draft components for review all at once by clicking on the blue button "Share all". After clicking on it, the confirmation dialog box opens.
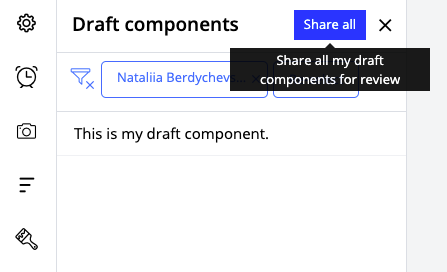
Button for setting all draft components for review highlighted
4.4.3Saving or discarding draft components in review mode
A user has two options for proceeding with newly created draft components:
●Share for review
●Cancel (delete component)
Clicking anywhere out of a component or stopping to write automatically saves a new component as draft, meaning it is not possible to review it just yet. Other users can see and read these draft components in the document, but are not allowed to edit them. The components are marked with the creator's avatar as well as a background is highlighted in grey color.
To discard changes or delete a newly created component, click on the "Delete" button in the context menu.
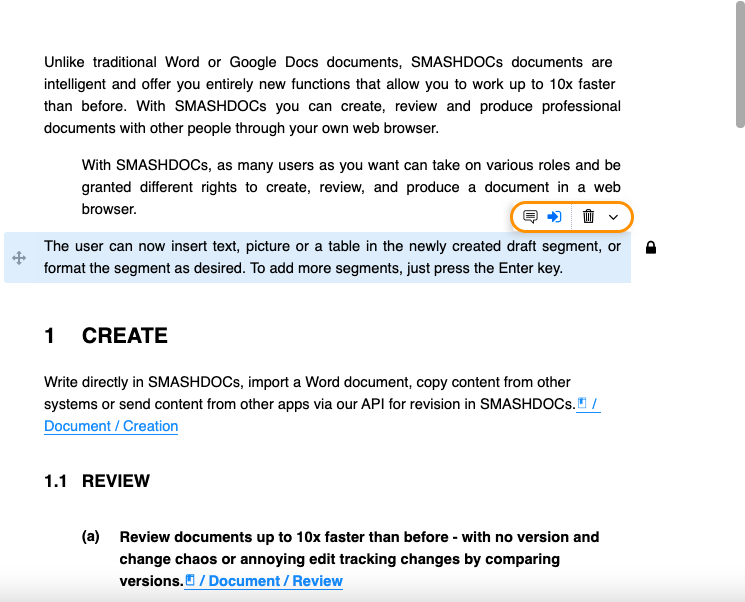
Context menu of a newly drafted component highlighted
4.4.4Identifying other users' draft components
SMASHDOCs visually enhances newly created draft components within a document to distinguish them from reviewable components.
The creator of a component sees them with a solid coloured background while other users' draft components are displayed with a hatched background. Additionally, the creator's avatar is displayed left of a draft component.

Draft component as seen by the creator highlighted
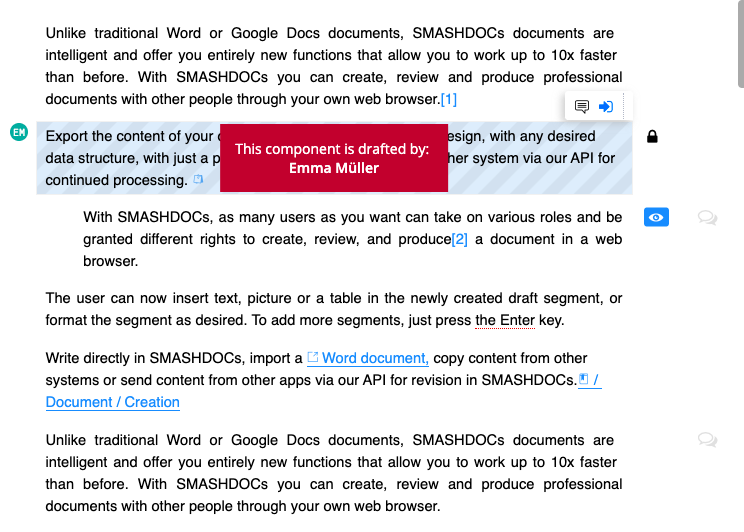
Draft component as seen by other users highlighted
As soon as a draft component is shared for review, the background, as well as the creator's avatar are not shown anymore.
Furthermore, empty draft components can be deleted at any time, even if they have been created by other users and (still) haven't been set for review. As soon as the editor begins to type, this is no longer possible.
4.4.5Sharing draft components for review
Components saved as drafts can not be edited, until the creator shares them for review by clicking on the blue "Share for review button". The shared component is then displayed as a newly inserted component in the change view. For all users other than the creator, it is highlighted as "unseen".
NB: if a user is admin and/or has the role "Approver" in a document, they can also set other people's draft components to review or delete them beside their own draft components!
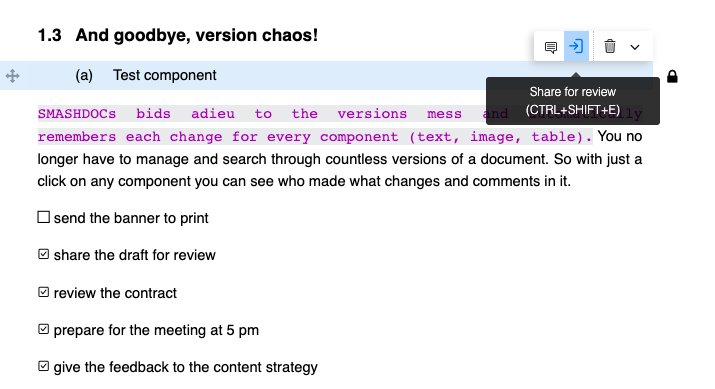
Button for sharing the draft component with other users as seen by the creator highlighted

Newly created component shared for review as seen by the creator highlighted
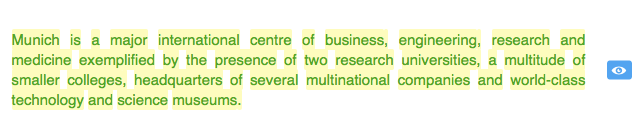
Newly created component shared for review as seen by other users highlighted
4.5Approving changes
4.5.1The tab bar with open changes
All open changes to the document are displayed in the tab bar on the left. All pending changes mean all open changes in the component about which the user has not decided yet. If there are pending changes, the meter in the tab bar left turns grey.
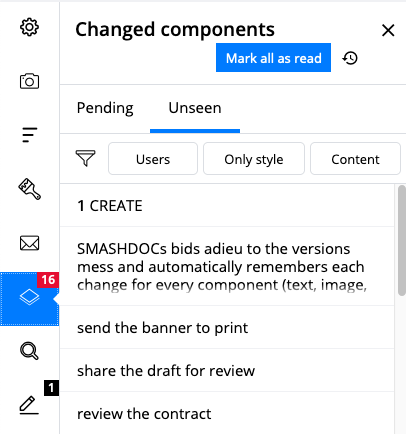
Unseen changes tab highlighted on the left side of the tab bar
If the user has decided on all changes, changed components are marked as done and the tab for "Show open document changes" in the tab bar on the left disappears.
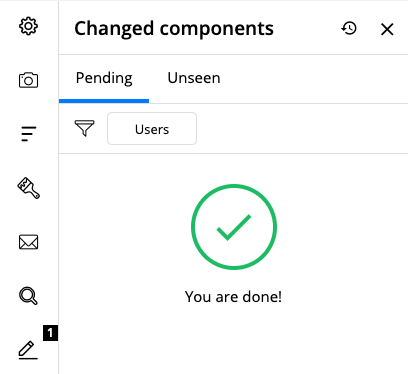
Changed pending components marked as done highlighted
You can also activate the "Open history view on click by default button" under Changed components. When it is enabled and you click on the change, the component history to the changed entry will automatically open.
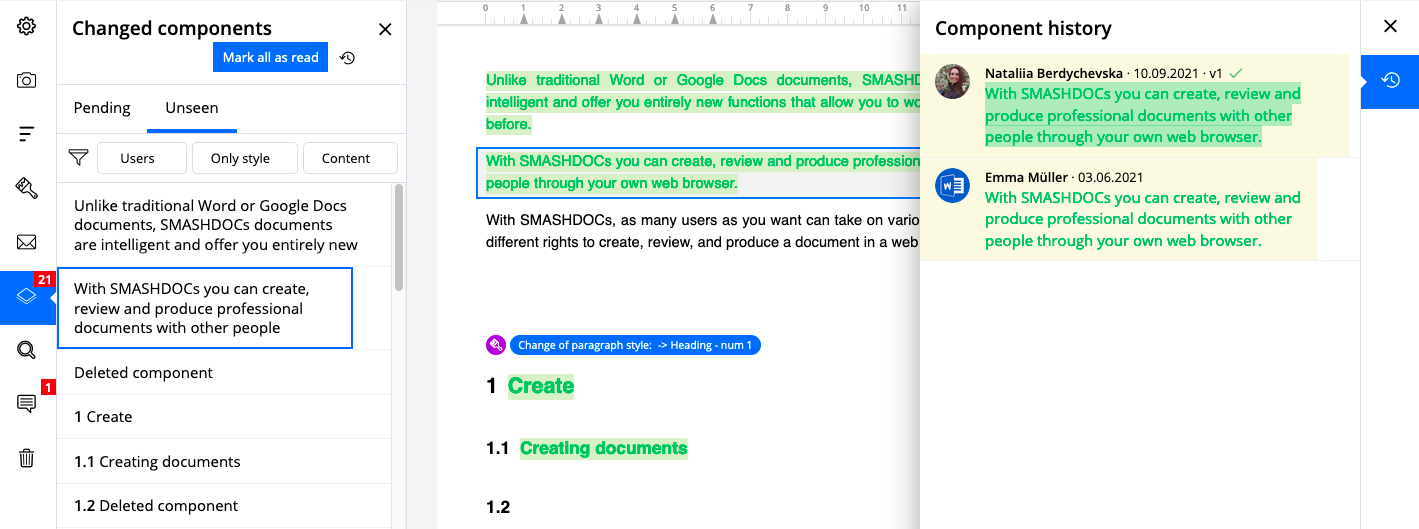
"Open history view on click by default" button highlighted
4.5.2Approving all changes in a document
As a document can contain numerous changes during its review process, it can be helpful to approve all changes at the same time, meaning accepting or discarding them all at once.
Therefore, there are buttons "Accept all" and "Reject all" button in the page header of a document. It is only shown for users, that have at least role "Suggest" in the document.
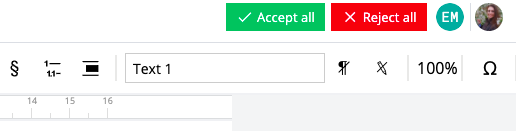
Button to accept/reject all changes within a document
They document is adjusted according to the selected option.
4.5.3Approving changes in a component
Accepting or rejecting changes of a component works the same way as approving all changes in a document, provided that the user has the required role.
As soon as there are changes in a document, the user can use the "Accept" or "Reject" buttons in the context menu to decide upon those changes. User can also use the shortcut (Сtrl + Alt + Y) for Windows / (CONTROL + ALT + Y) for Mac for accepting new changes and (Сtrl + Alt + N) for Windows / (CONTROL + ALT + N) for Mac for rejecting them.
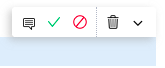
"Accept" and "Reject" buttons in the context menu
There are two ways how pending changes in a text component are being approved:
●Default setting "Approve all pending changes in a text component with one click"
When choosing one decision button, this option is applied to the whole component. Depending on the user's choice, all changes within the component get accepted or rejected. It is possible to retrace all decisions on a component in component history.
The user can select this mode in their user settings by deactivating the standard setting "Do not allow all open change proposals in a component to be decided with one click".
●Don't allow to approve all pending changes in a text component with one click
In this mode, a user cannot approve all pending changes in a text component by just clicking somewhere in the component. User should either select one word or several words suggested for changes individually. Only then the decision buttons will be displayed. The selected suggested changes will be accepted or rejected depending on the chosen decision button.
If the selected words do not contain any change proposals or the user clicks outside any word in the text component, the decision buttons will not appear.
A user is able to activate this mode in their user settings.
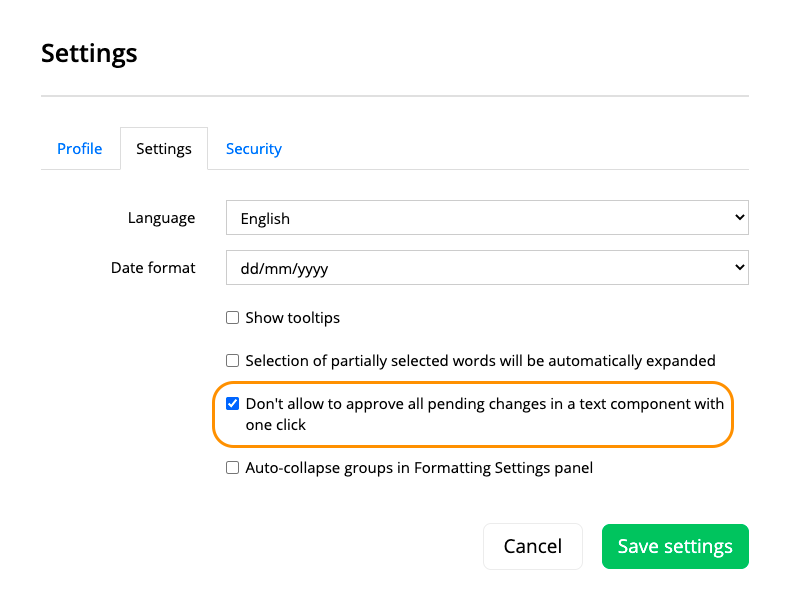
Default setting "Don`t allow to approve all pending changes in a text component with one click" highlighted in the user settings
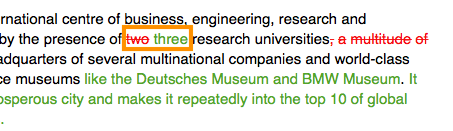
Individual changes to be decided on highlighted in a component
4.6Tracking unseen changes
4.6.1Identifying unseen changes in text components
SMASHDOCs highlights all unseen changes in a document like insertions and deletions of words or whole components in color. The SMASHDOCs technology makes this possible, as it tracks every user's last login to a document and all changes that have been added since then.
When opening a document, the user only sees the changes and decisions, that they have not marked as "Seen" by clicking on the eye symbol yet. The same goes for comments and questions. Unseen changes are highlighted as follows:
●Unseen change suggestions which have not yet been decided upon, are highlighted in green (insertion) or red (deletion) on a yellow background.
●Unseen decisions are highlighted in green on green background (accepted insertion) or in red on red background (accepted deletion).
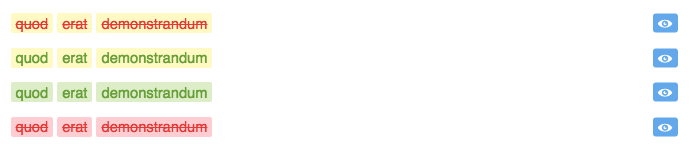
Display of unseen changes
Furthermore, a blue eye symbol is displayed right of the respective component. With a click on the eye, a user confirms that they have seen and taken not of the change in question.
All changes in a component can always be tracked in the component history. If a component contains unseen changes, the respective entry in the change history gets highlighted with a yellow background.
4.6.2Identifying unseen changes in image components
Apart from unseen changes in text components, SMASHDOCs also highlights updated versions of image components individually for each user.
Like unseen and undecided changes in a text component, newly added images are highlighted in yellow and marked with a blue eye next to them.
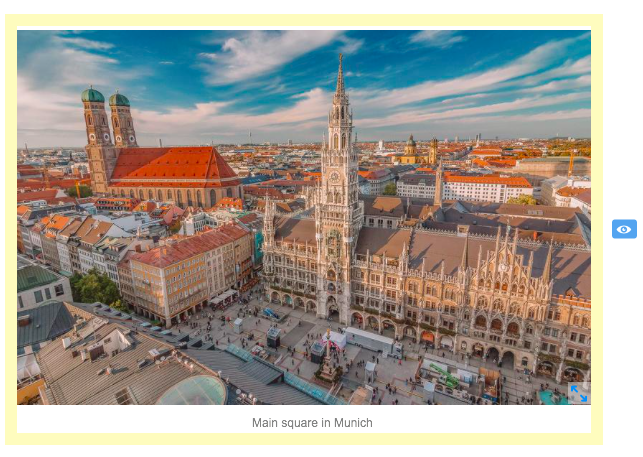
Unseen image component
4.6.3Identifying unseen changes in tables
Unseen tables or changes in tables are highlighted the same way, with a yellow background and the blue eye.
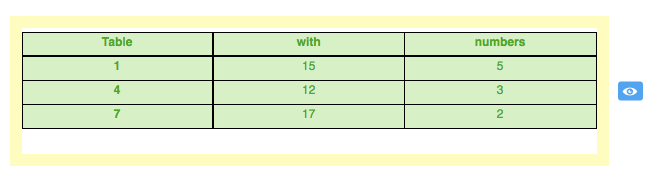
Unseen yet table highlighted
4.6.4Identifying unseen changes in formatting
Unseen changes in formatting, namely changes of paragraph and inline styles, are being tracked and highlighted. Changes in paragraph styles are being tracked in text components, while changes in inline styles both in text and table components.
Unseen changes in paragraph formatting are instantly visible, whereas style changes are shown in the message above the component.
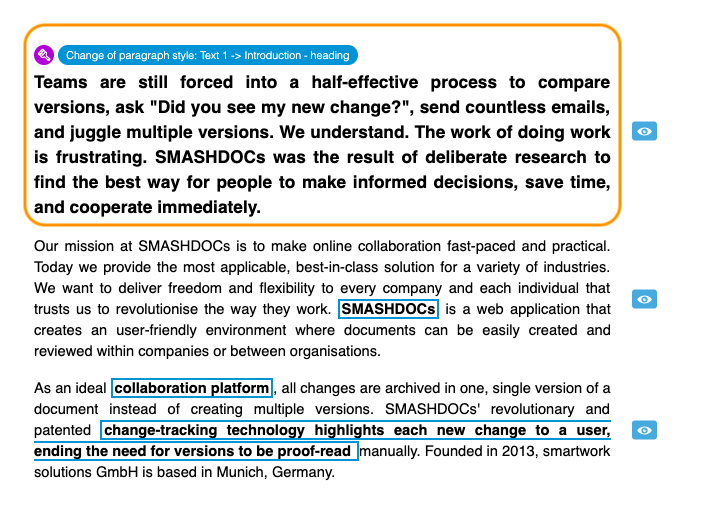
Changed paragraph style of the component highlighted
Change of inline style is also easily traceable. Separate words with changed inline style get framed in blue. If the inline formatting of the whole text component has been changed, it gets blue borders. Similarly, changes in inline formatting are tracked in table cells.
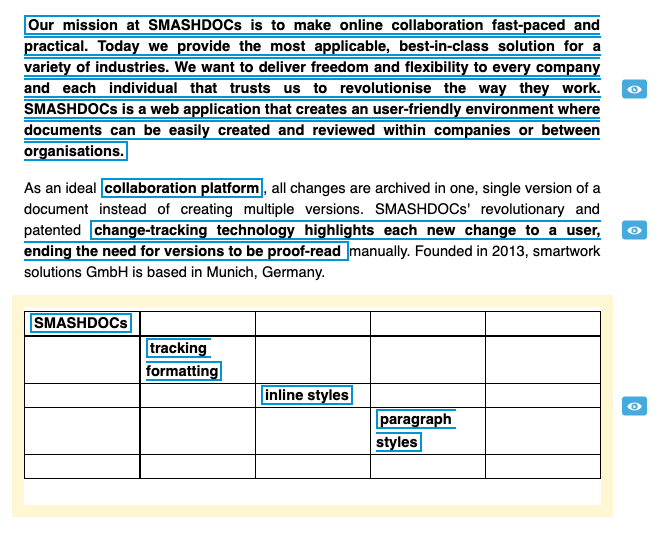
Changes in inline formatting highlighted
Also, changes both in paragraph and inline styles are traceable in component history.
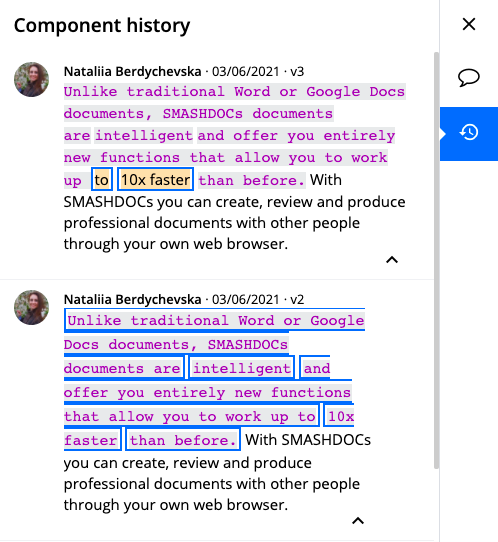
Changes of paragraph and inline style highlighted in the component history
Furthermore, the new filter "Only style" has been added to filtering changes functionality. Since changes in formatting cannot be decided upon, this filter is only available for unseen changes. When processing changed components, you can activate this filter individually or combine it with either "Users" or "Content" filter.
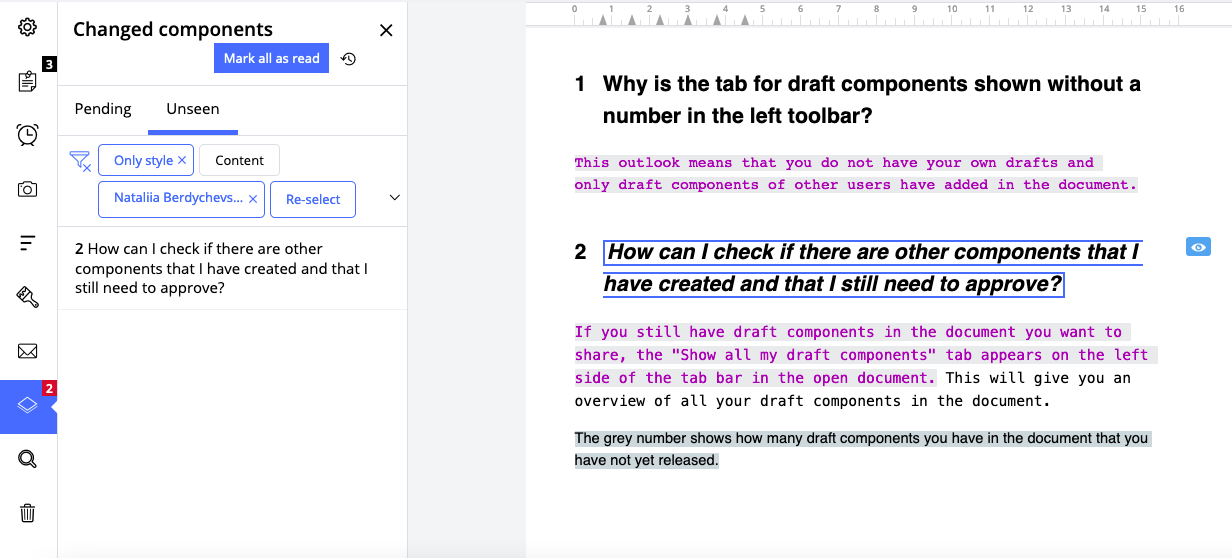
Filter "Users" combined with filer "Only style"
4.6.5Process unseen changes
As SMASHDOCs tracks changes for each component separately, a user can quickly see which components got reviewed.
SMASHDOCs creates and continuously updates a list with all changes for the user. Especially in large documents it is possible to review components with just a few clicks.
The list is displayed in the tab bar on the left, as soon as there are unprocessed changes.
If there are unseen changes, the number of those unseen changes is displayed with a red counter.
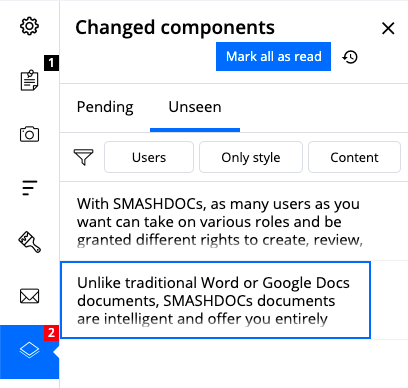
Tab "Changes" with unseen changes
As soon as you have processed all changes, the tab disappears.
4.6.5.1Displaying the list of changes
Clicking on the tab "Changes" displays the complete list. As per default, the filter is set to "Unseen", provided that there are still unseen changes in the document. If there are no unseen changes, the filter switches to "Pending", displaying all changes, which have not been decided upon yet.
When choosing an entry from the list, the document navigates to the respective component.
4.6.5.2Tracking changes per component
To identify unseen changes in a document in a better way, the blue eye symbol is displayed in the list of changes as well as next to the respective component.
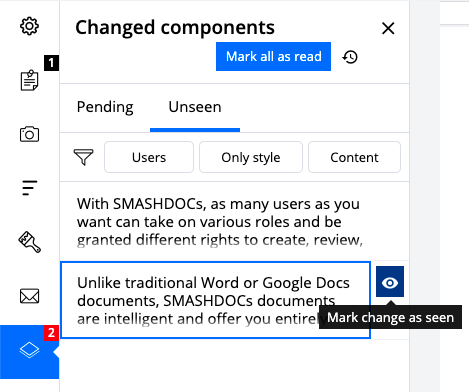
Eye symbol in the change view
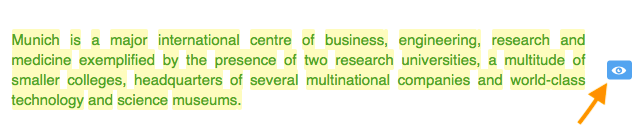
Eye symbol next to the component
Regardless of the role a user has, the system checks which changes have been added to a document since a user's last login. All those new changes get highlighted and marked with the eye symbol.
Clicking on the symbol marks the changes in a component as seen, the eye and the yellow background disappear.
When clicking on a change in the list of changes, a user can choose to show component history at the same time. There are more details about who changed what and when. The changes are partially displayed and can be extended.
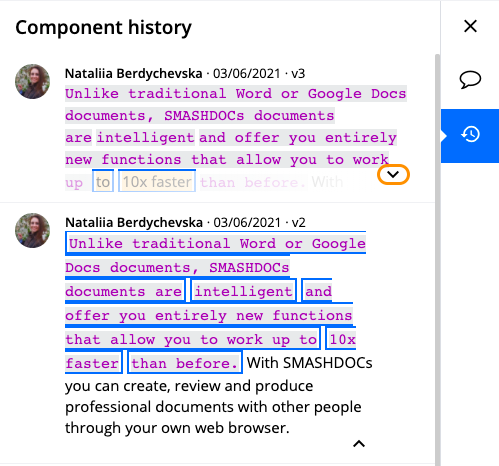
Component history of the highlighted unseen changes with the "expand" buttons
4.6.5.3Approve open changes
NB: To be able to approve open changes, the user has to have the role "Approver". All other user roles do not allow to approve changes.
There are 3 possibilities to approve component's changes:
●Via the buttons in the list of changes
●Via the buttons in the component's context menu
●Via the "Approve all" function
When approving via the list of changes, all changes within a component are accepted or rejected.
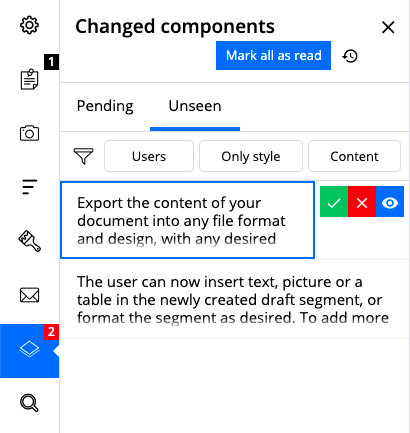
"Accept" and "Reject" button in the change view
When approving via the context menu, the user can either accept or reject all changes or approve each change separately. Select the words you want to approve and accept or reject the change. All other changes in the component remain unprocessed.
The "Accept all" and "Reject all" functions at the top of the document lets a user accept or reject all changes in a document at once.

"Approve all" function in the document's header
4.7Filtering document changes
Processing changes under the tab „Changed components“ has got a two-level structure.
The first level is choosing between pending and unseen changes in the document.
The second level depends on what tab - „Pending“ or „Unseen“ - has been chosen. Overall, processing changes on the second level can be done in two ways:
1.All at once
2.By using special filters
When none of the filters is activated, all changes, be it in content, styles or users that made them, are shown in one common list.
If you want to process changes following a specific logic, you can choose one of the following filters:
●Users
●Only style
●Content
If you chose pending changes, only filter „Users“ is accessible. As under the tab „Pending“ you can only find content changes, the filter „Content“ has been intentionally omitted. Changes in style, on the other hand, cannot be decided upon. Thus, formatting changes are only being tracked and can be marked as seen.
If you chose unseen changes, all three filters are present. You can activate each filter separately or combine filter „Users“ either with „Content“ or „Only style“. Combining filters „Content“ and „Only style“ is not possible to prevent confusion, having empty components result list. So, if you initially activate filter „Content“ and then press on filter „Style“, they will not be combined but filter "Content" deselected.
Here is the step-by-step scheme, on how changes can be tracked and processed:
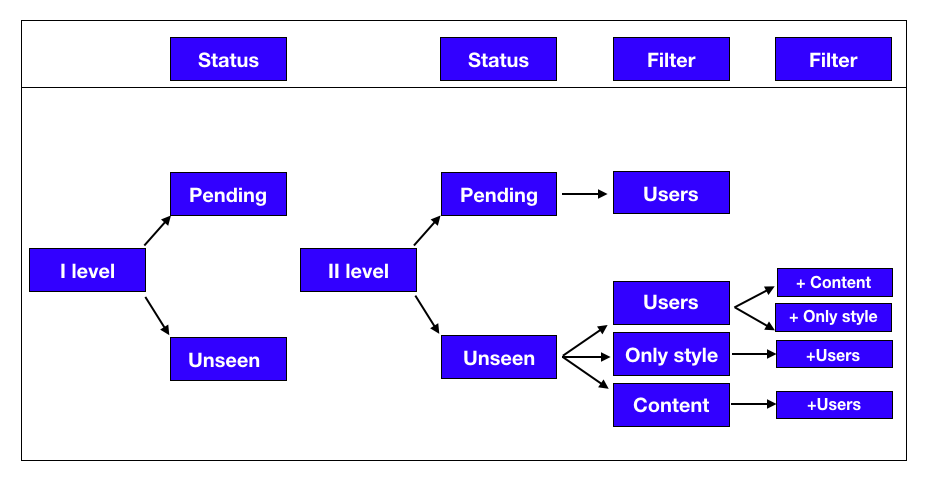
Scheme of processing document changes
Let’s have a closer look at each of the filters.
4.7.1Filter changes by users
The user can filter changes by the user that made them. Looks like this:
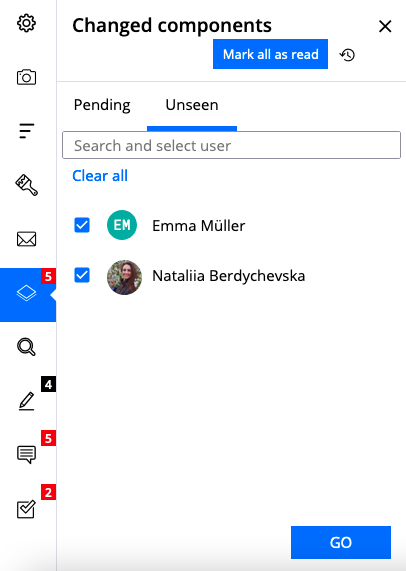
Filter "Users" highlighted under the "Changes components" tab
Every time the user opens the document, all users that have made at least one change in the document are being automatically preselected. In order to deselect one, just click on the checkbox near the respective user and click "Go". The list of changes will be adjusted accordingly.
Changes of selected users will be shown in the list without specification who made what change. But this information can be tracked down anytime in component history.
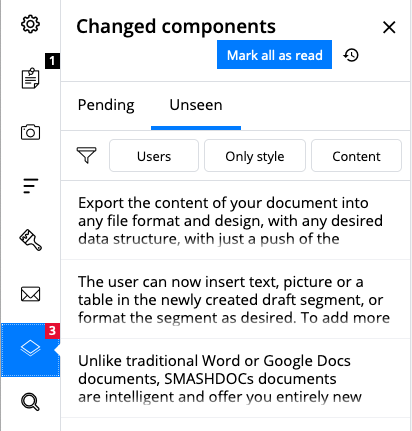
Changes of selected users highlighted in the list
Note: if the user has been deactivated or deleted from the document, they still will be displayed among the users that made changes. Hence, their changes will be displayed only if they are selected.
Only entries of the selected users are shown in the list of changes. The same rule is applied if the user wants to mark one/all changes as seen, decide on a single/all components in the document.
If the user deselects all the users that have made changes in the document, the button "Go" will be disabled, and you will not be able to proceed.
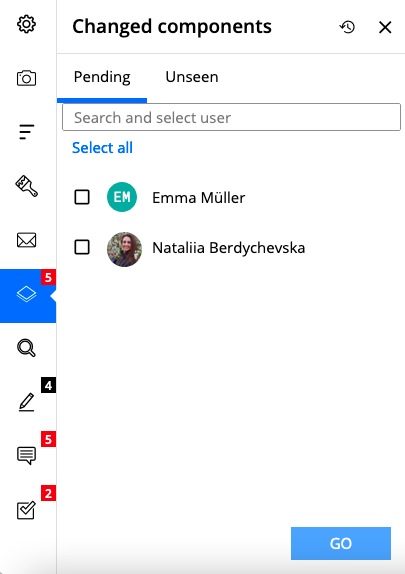
The result after deselection of all users highlighted under the pending components tab
Regarding the component history, entries of deselected users will be greyed out from the list of component versions. Nevertheless, the option to restore any version, also made by the deselected user, remains.
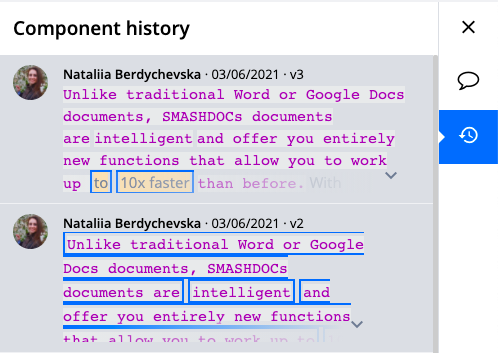
The greyed out component of the deselected user highlighted in the component history
4.7.2Filter only by style
This filter allows a user to track changes in formatting, namely in changed paragraph and inline styles.

Filter "Users" combined with filer "Only style"
Change of paragraph style gets instantly visible, whereas style changes are shown in the message above the component.

Changed paragraph style of the component highlighted
Changes in paragraph formatting are also tracked in component history. Each change of the paragraph style creates a new version of the component.
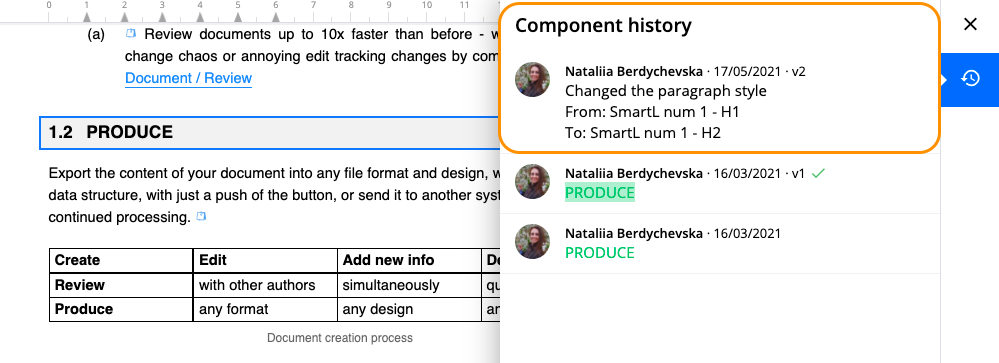
New version of the component with changed paragraph formatting highlighted
Change of inline style gets instantly visible, whereas word with changed style in a text component gets framed in blue. If the formatting of the whole component has been changed, it gets blue borders. Changes in formatting are also tracked in tables similarly to text components.

Changes in the inline formatting of the text and table components highlighted
Also, changes in inline styles are traceable in component history. Each change of the style creates a new version of the component. The component history of inline style changes displays them without additional messages of what inline style has been changed and which new one has been applied. For instance, if the plain text has been made bold, it is graphically recognizable in component history. If the user applies the style „Underlined“ on top of bold, component will stay bold plus get underlined in a new component version.
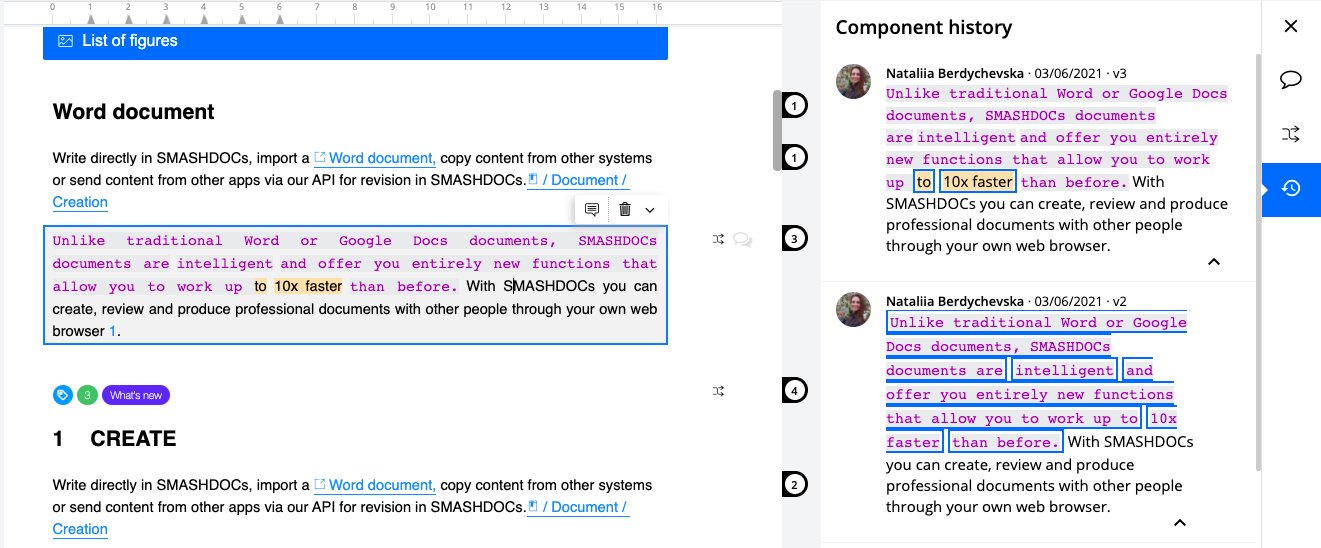
Tracking changes of inline styles highlighted in component history
Furthermore, changes both in paragraph and inline styles are displayed in the comparison report when comparing two or more documents, where at least one has got changes in formatting.
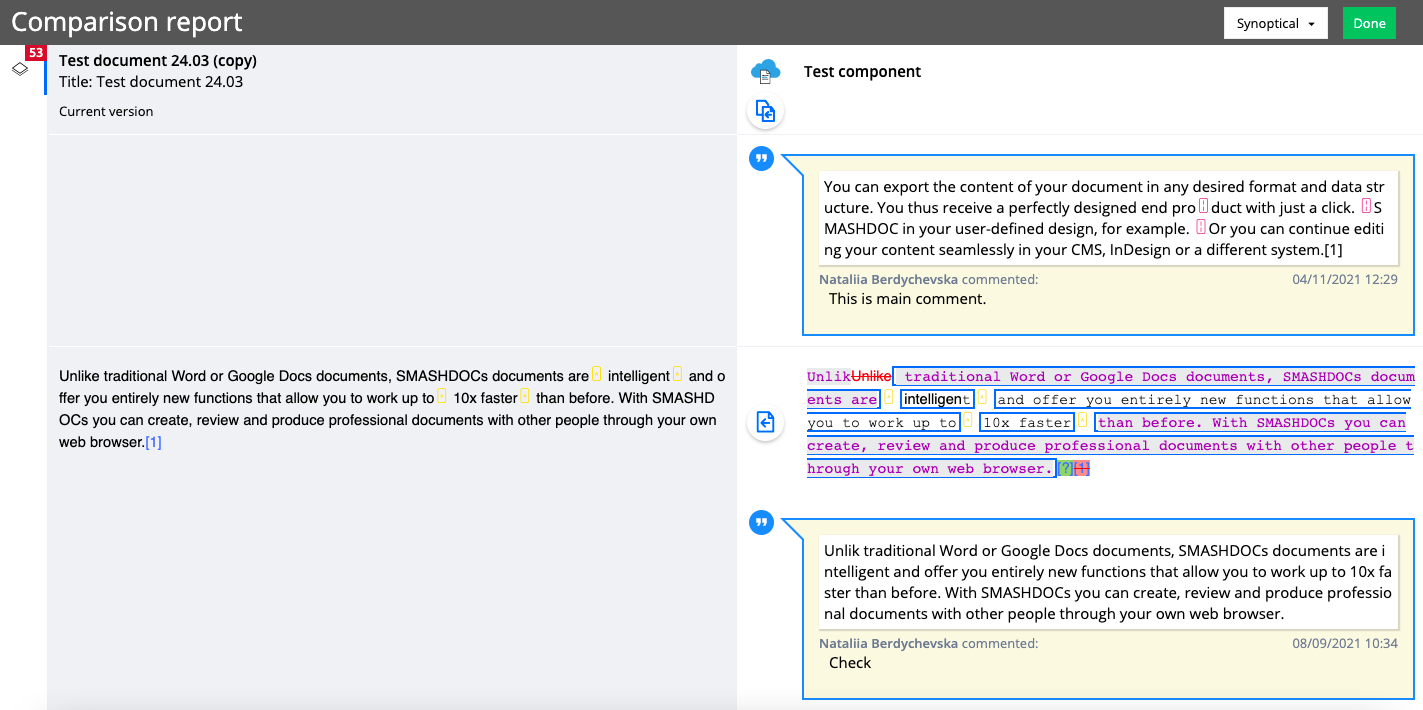
Changes in formatting highlighted in the comparison report
Also, note that by disabling the user who made style changes, the message above the component with the changed paragraph style and blue frames identifying the changes to the inline styles will disappear.
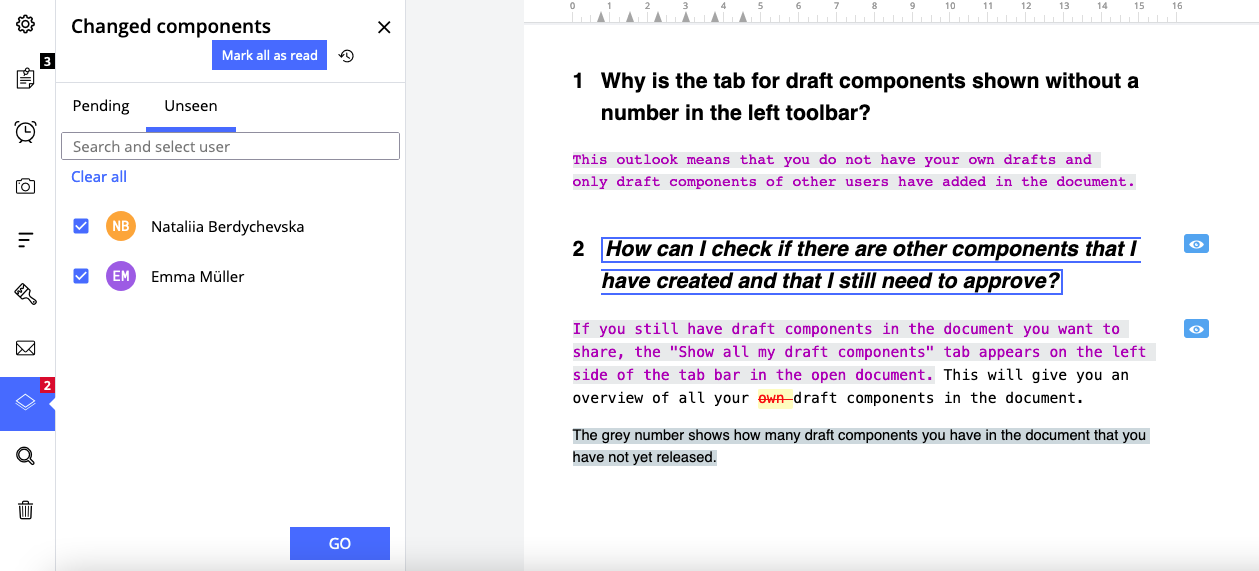
User that made changes in formatting selected
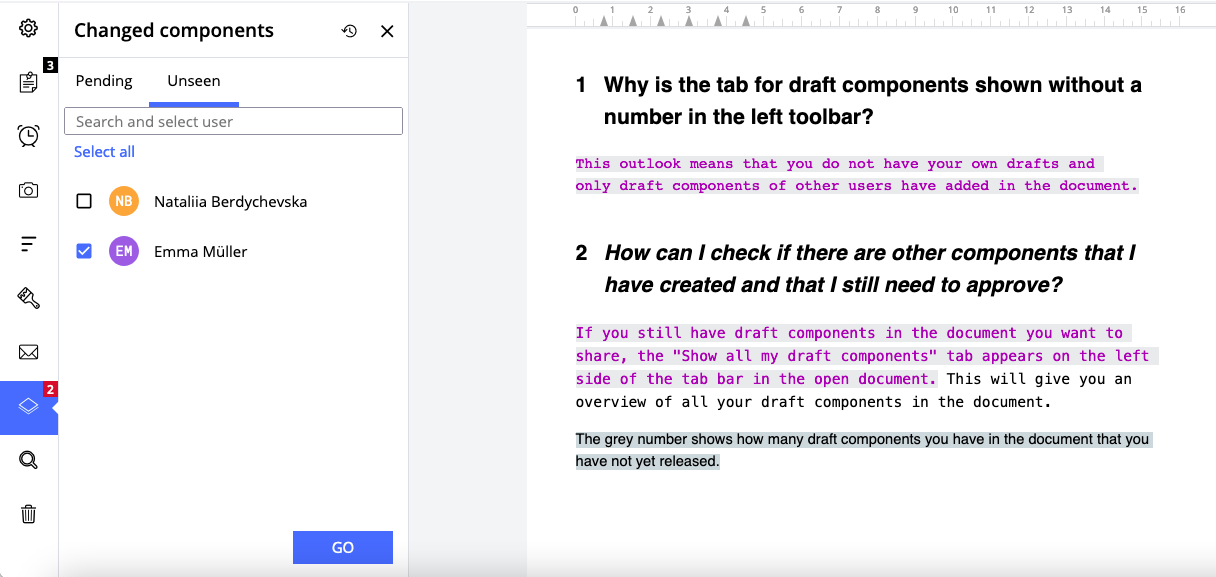
User that made changes in formatting deselected
4.7.3Filter by content changes
Under this filter all components are shown, which have content changes, independently of whether they also have style changes or not.
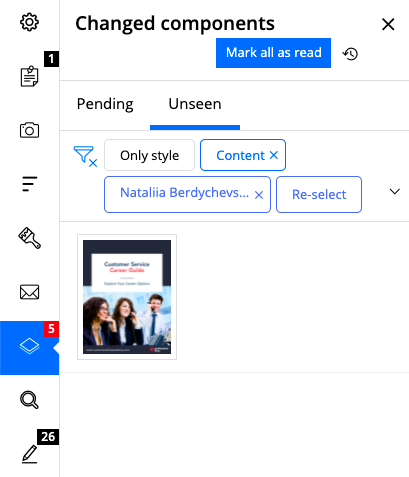
Filter "Users" combined with filer "Content"
4.7.4Marking all components as seen while one of the filters is activated
Similarly to text components changes in formatting are also tracked in tables. The selection of components that are marked as seen is connected to the choice of components that are filtered under the tab "Show open document changes". Thus, if the filter "Only Style" is selected, button "Mark all as read" will mark all components with only changes in style as seen.
4.8Component history
4.8.1Tracking all changes in the component history
Each component in SMASHDOCs has its component history, where all changes in that component are displayed chronologically. Each user can exactly retrace what changed in a component and who made the changes.
As long as there are no changes in a component, the history can only be accessed via the context menu.
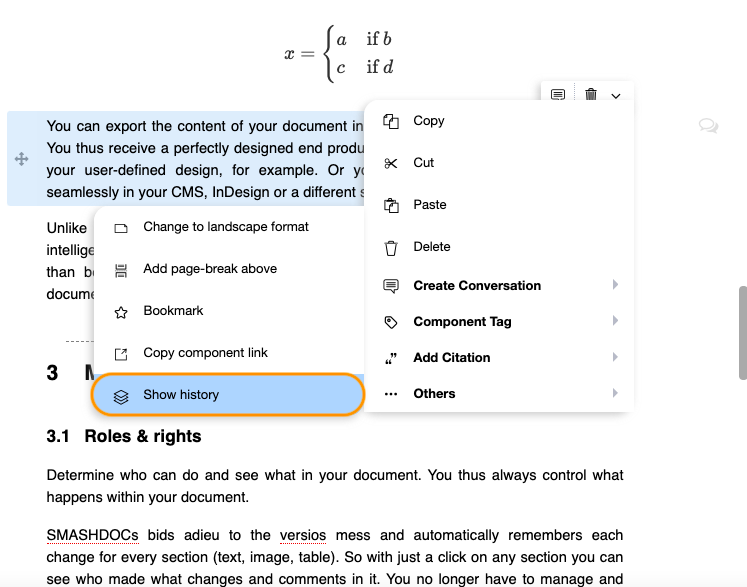
Component history for an unchanged component
When there are already changes in a component, the user can also access the history via the version number of the respective component. This number indicates the number of changes in a component. Regardless of the extent of the change, each editing process is counted only once, meaning that it does not matter if a single word or more text was changed.
The component history also shows if a change was accepted or rejected. Depending on the decision, a green check mark (for accepted changes) or a red "denied" symbol (for rejected changes) is displayed in the header of the history entry.
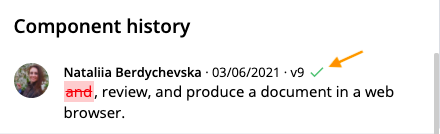
Accepted changes in the component history
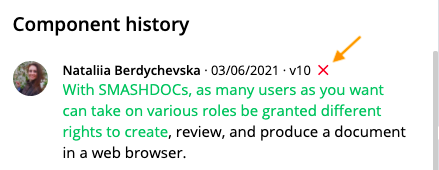
Red "denied" symbol (for rejected changes)

History and version number of a component
4.8.2Display of changes in the component history
The redline is also shown in the component history, unseen changes also come with a yellow background.
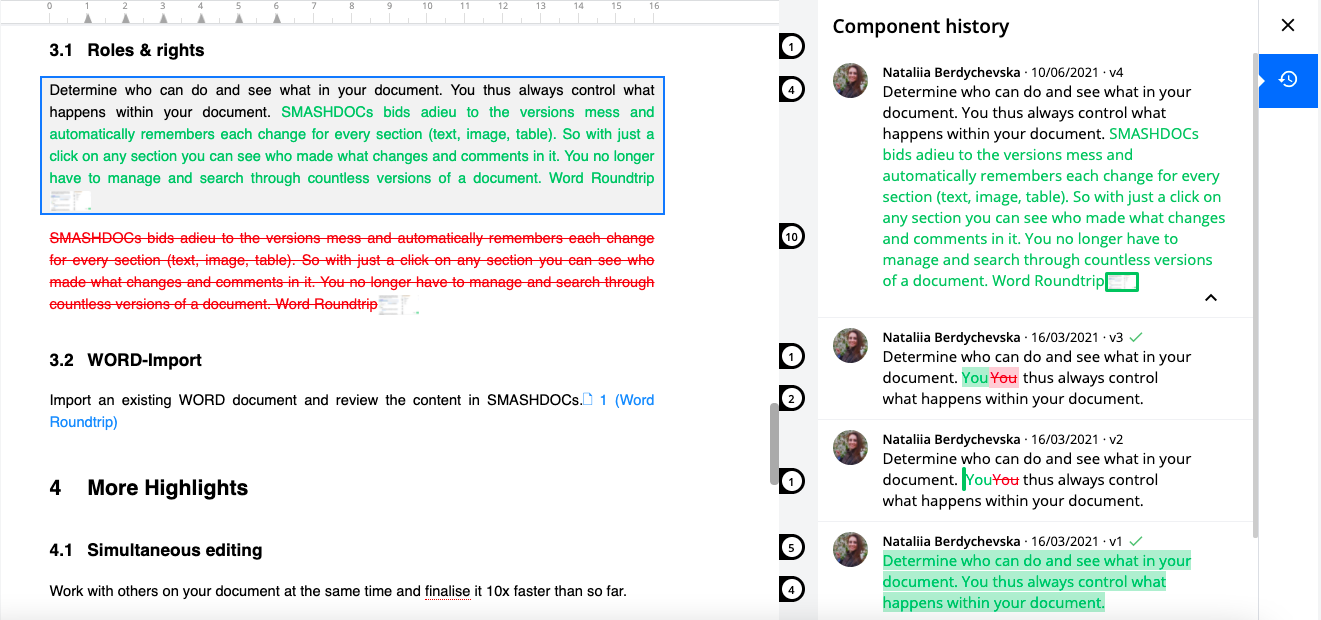
Component history highlighted near the text component with changes
4.8.3Display of change history
A user can access the component history with highlighted unseen changes via the list of changes in the sidebar.
To display the change history of a component, tick the respective box in the list of changes. Clicking on a change from the list then shows you the edited component in the document along with the component history on the right side of the component. Unseen change entries are highlighted with a yellow background.
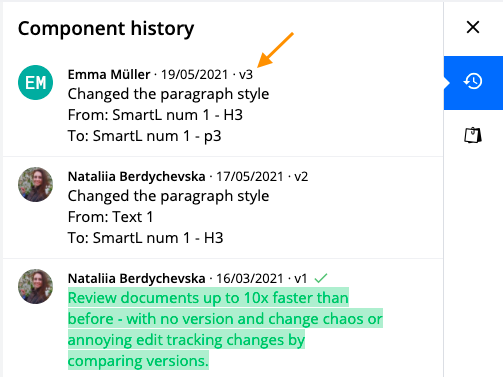
List of versions highlighted under the component history tab
4.8.4Restoring an old version
For every component with at least one previous version, a user can restore and turn this old version into the latest again.
For every history, users who have at least the role "Suggest" can use the "Rewind" button to restore this entry.
Click on the button to open a dialog for restoring the selected version.
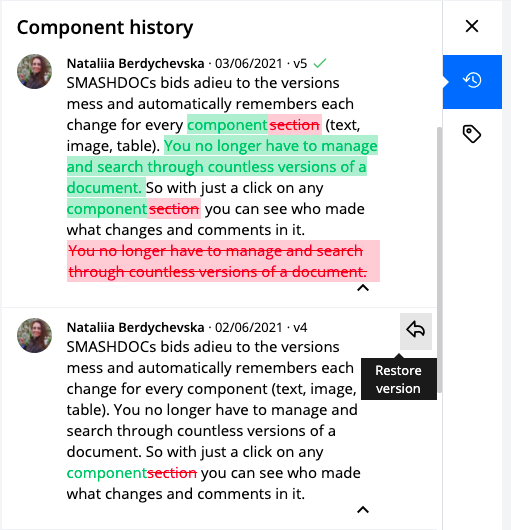
"Restore version" option highlighted under the component history tab
On the left side, there is the current version of the component, while on the right there is a preview of the version to be restored. Click on "OK" to restore the selected version. Restoring component versions is also tracked in the history.
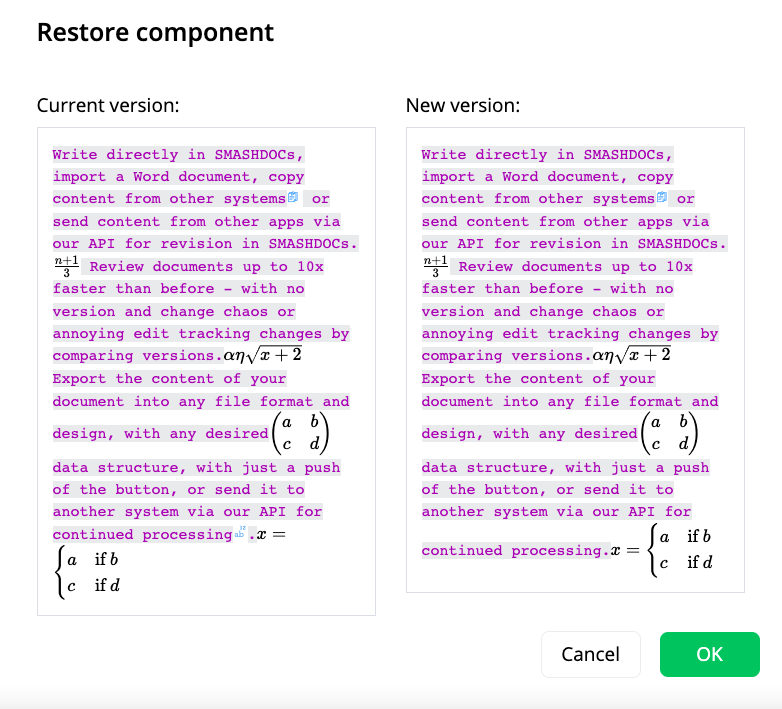
Dialog for confirmation of restoring versions
The option "Restore version" is available for components containing footnotes, as well. However, in some cases there you will get notifications that restoring version can cause some issues with saving content.
The first case is when the current version of your component contains a footnote, and you try to restore the version without footnote. Before restoring, you will get a message that footnote will be deleted in this case and the presentation of the text will be adjusted accordingly. In this notification you can click "Delete" to proceed restoring or "Cancel" to discard the action.
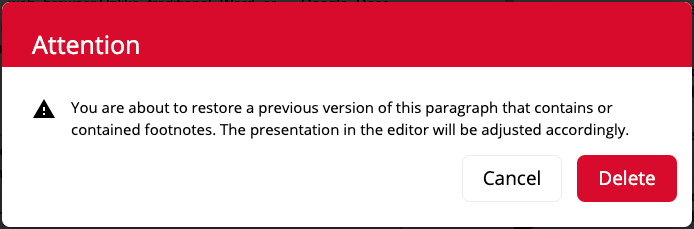
Notification while restoring versions
The second condition is when a footnote component has been added by one user and is still in draft mode, but the other user tries to restore version of a leading component. In this case a notification appears that the footnote is locked and should be firstly shared for review or deleted.
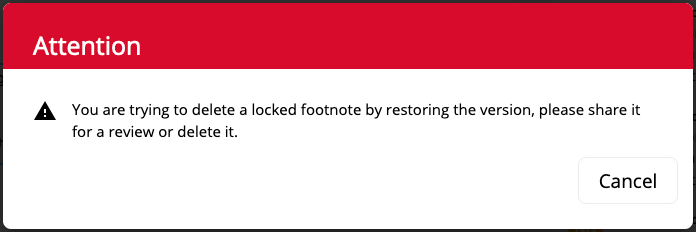
Notification about locked footnote
In all other cases components with footnotes can be quickly restored without any notifications.
Note: by restoring a version of a leading component with footnote only content of a corresponding leading component will be restored. To restore version of a footnote component you have to open component history of a corresponding footnote and click rewind-button in the required version.

Restoring version of a footnote component
4.9Search and replace within the document
SMASHDOCs offers quick access to specific text content / style / content + style with the help of search / replace function.
4.9.1Search text within the document
A user can find a specific word or phrase easily.
Click the "Search / Replace" button on the left-side bar.
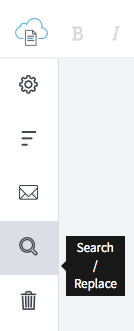
"Search / Replace" button highlighted
The dialog window appears with text-box, where the user can type in specific phrase or word for search.
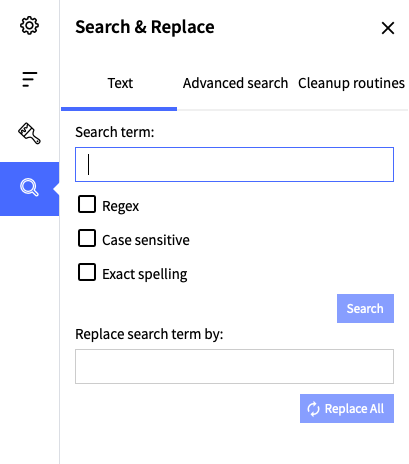
Dialog window for "Search / Replace text" highlighted
The results will appear after clicking "Search" button.
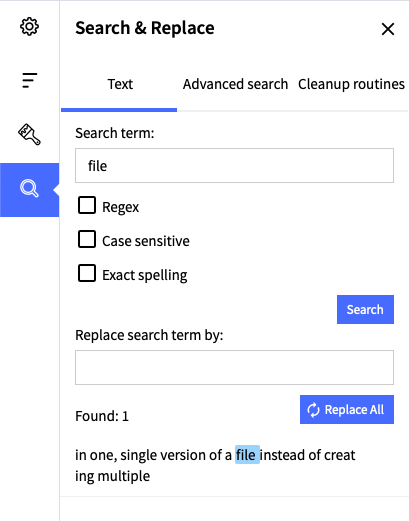
The results of search for a word highlighted
To make search more accurate users can use next parameters:
●Case sensitive
●Exact spelling
If the parameter "Case sensitive" is on, the upper- lower-case letters will be considered as different symbols.
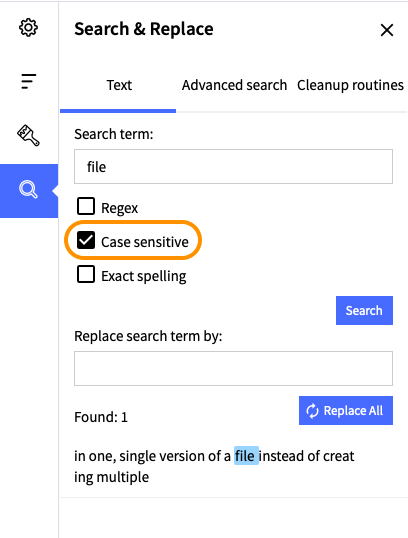
Search and Replace function with an activated "Case sensitive" option highlighted
If the parameter "Exact spelling" is active, the search results will fully correspond to the text in the search-box: the spaces, upper- lower-case letters and identical spelling will be taken into account.
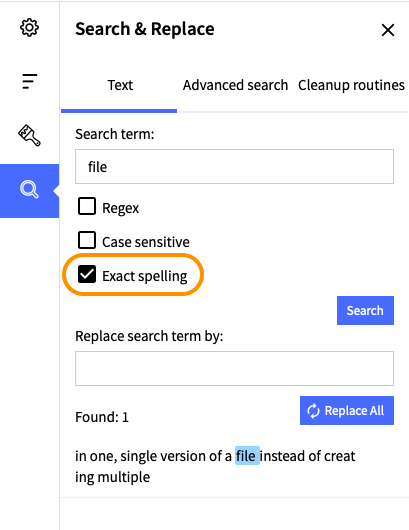
Search and Replace function with an activated "Exact spelling" highlighted
4.9.2Replace text within the document
In order to replace the results of the search with another text user can type in the desirable word or phrase in the text-box below.

"Replace search term by" highlighted under Search and Replace tab
User can replace all search results at once or decide on each individually.
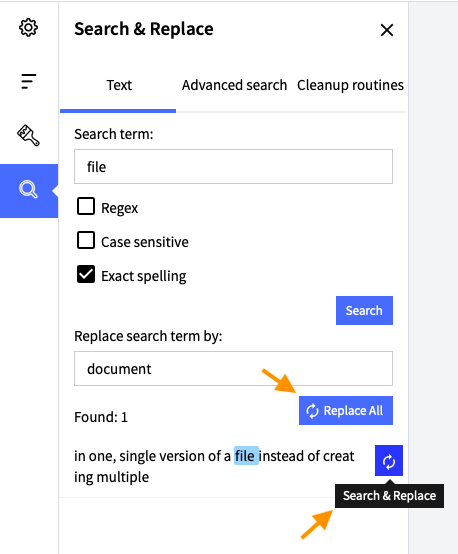
Replace options highlighted
Note: if you input a search term, leave the "Replace search term by" field empty and press "Replace all", indicated search term will be deleted everywhere in the document.
If you have decided to change the search term after inserting a word in the string "Replace search term by", in this case after pressing "Search" with a new term and then - "Replace all", a confirmation window will appear.
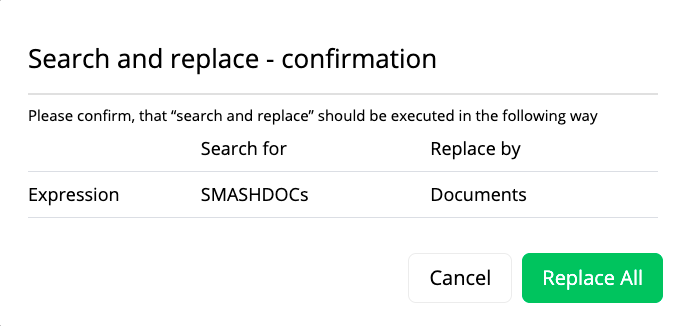
Confirmation window for performing "Search & Replace" function
Here you can agree with the described process of replacement and click "Replace all" or cancel the process.
4.9.3Search and replace text within the table
Search and replace function also offers quick access to specific text content within the table in the document.
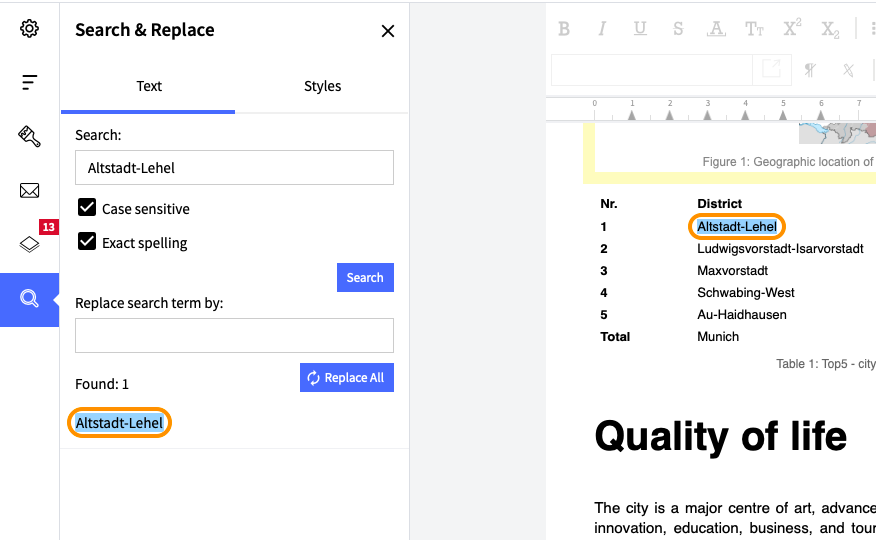
Search and Replace text in tables highlighted
4.9.4Advanced search within the document
Using the advanced search, the user can search for:
●search term
●paragraph style
●inline style
●paragraph style + inline style
●search term + paragraph style
●search term + inline style
●search term + paragraph style + inline style
Also, the following parameters can be applied to make the search results more precise:
●Case sensitive
●Exact spelling
If the parameter "Text sensitive" is on, the upper- lower-case letters will be considered as different symbols.
If the parameter "Exact spelling" is active, the search results will fully correspond to the text in the search-box: the spaces, upper- lower-case letters and identical spelling will be taken into account.
Here is an example on how it works:
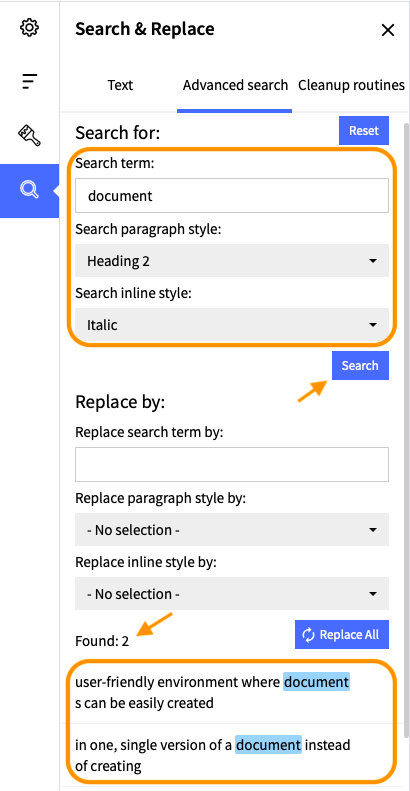
Search for search term + paragraph style + inline style highlighted
The results appear after clicking on the "Search" button.
4.9.5RegEx
In the field "Search" there is a clickable checkbox called "RegEx". Once you check it and left-click on the "Search field", a dropdown with 3 predefined regular expressions will appear. Then you can either select one of the proposed regular expressions to start a corresponding search or fill in the field manually with the desired regex.
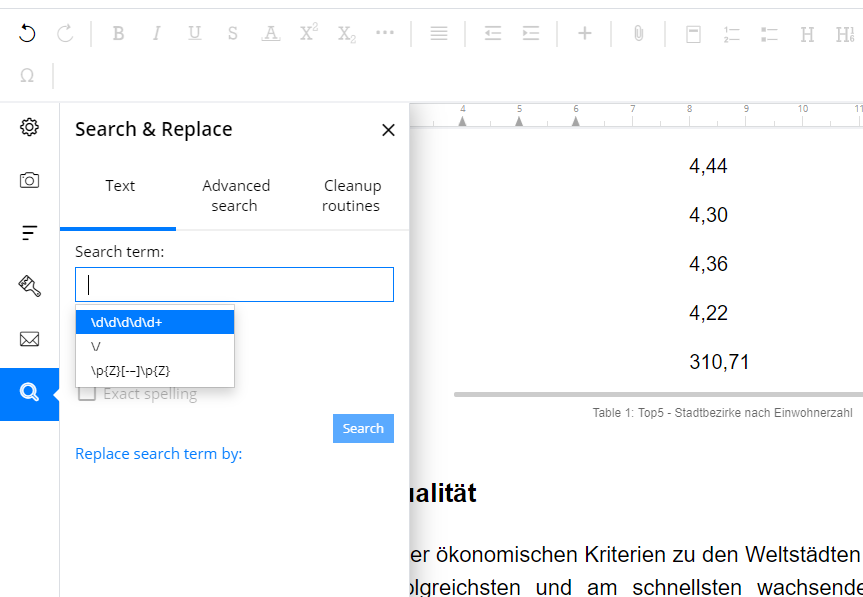
Predefined regular expression highlighted in the search field
Regular Expression, or regex or regexp, in short, is extremely helpful when searching and manipulating text strings, particularly when processing text files. One line of regex can easily replace several dozen lines of text strings if you use them rightfully.
Let`s have a look at a few examples:
●\d+, where \d is a digit (a character in the range 0-9), and + means 1 or more times. So, \d+ is one or more digits.
●\p{Z}\p{Z}+, where p{Z} stands for any kind of whitespace or invisible separator
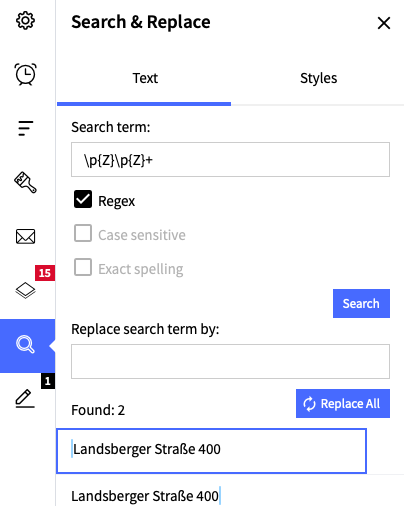
\p{Z}\p{Z}+ regular expression search highlighted
Replacing found search results with \p{Z}\p{Z}+ regex will delete all white spaces or invisible separators.
4.10Advanced replacement within the document
In order to replace the search term, the user can enter the desired term in the "Replace search term by" field and choose the desired paragraph and/or inline styles in the drop-down menus below. Hence, the user can replace all search results at once or decide on each individually.
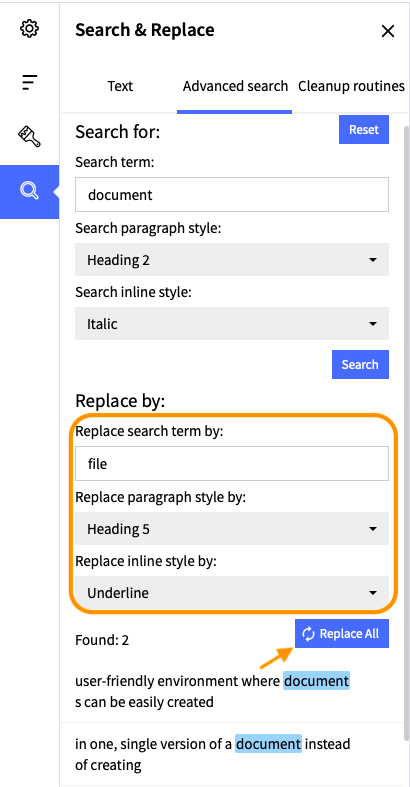
Replace fields highlighted
After pressing the "Replace All" button, the respective search term will be replaced with the desired search term everywhere in the document. The "Replace All" button will then be faded out and "No results" message will be displayed.
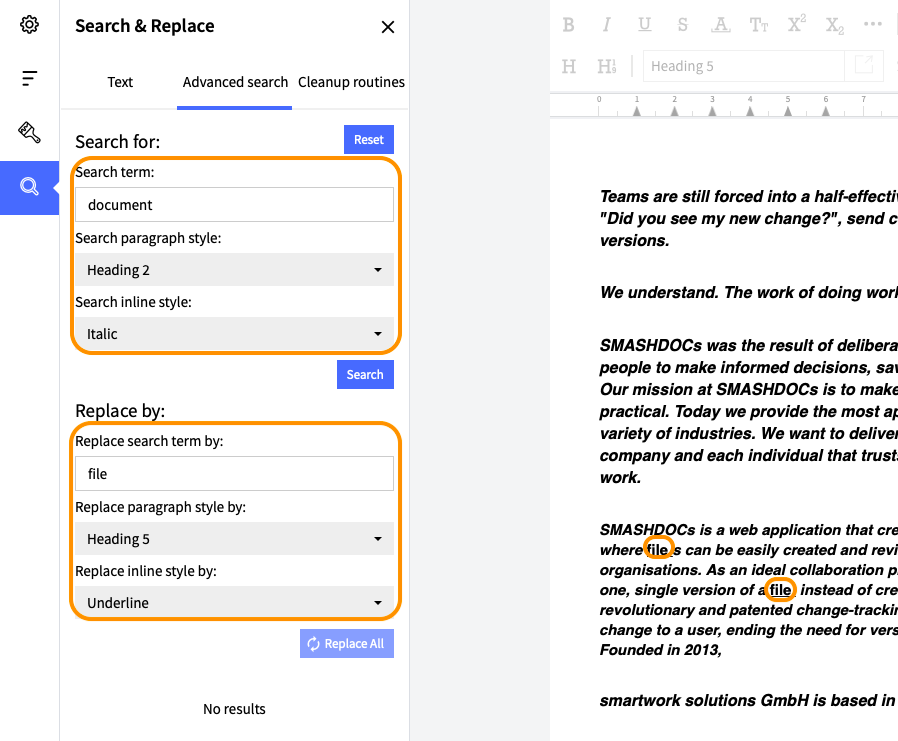
Replaced search term highlighted in the document
In order to start a new advanced search session, click "Reset".
5Announcements
Apart from communicating via comments, user can also write an announcement from a document.
Unlike comments, an announcement is not shown in a document but is e-mailed to the recipients. The e-mail also contains a link to the document.
Announcements are helpful for communicating further details during the editing and consolidation process, for example concerning new changes or the progress of a document. The creator of the announcement can manually choose the recipients.
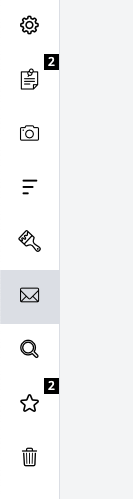
Tab for writing an announcement highlighted
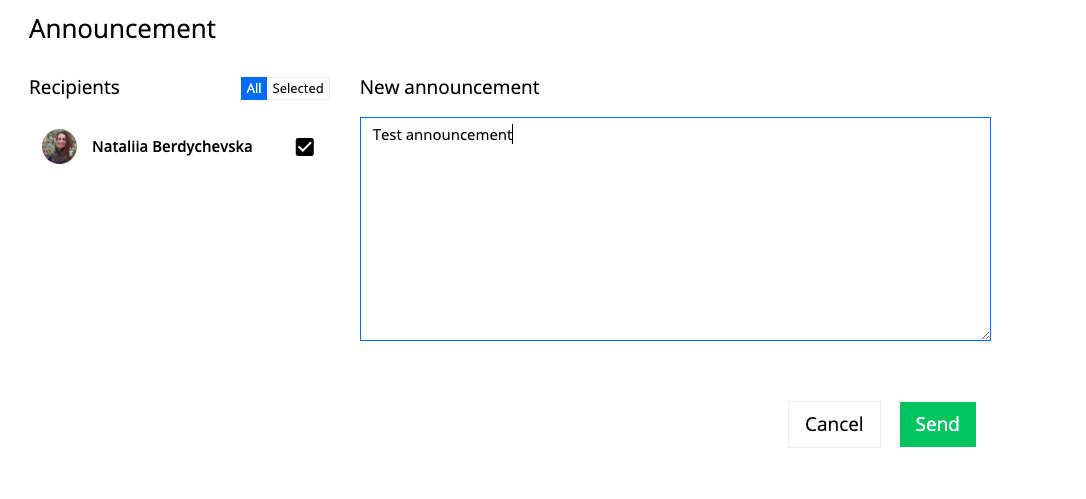
Dialogue for creating an announcement highlighted
The default setting for recipients is "Selected". You'll need to choose at least one user from the list to be able to send the announcement. You can send the announcement to all document users by either selecting them from the list or by clicking the "All" button. To send an announcement user can also use the shortcut (Tab + Return) for Windows / (TAB + RETURN) for Mac.
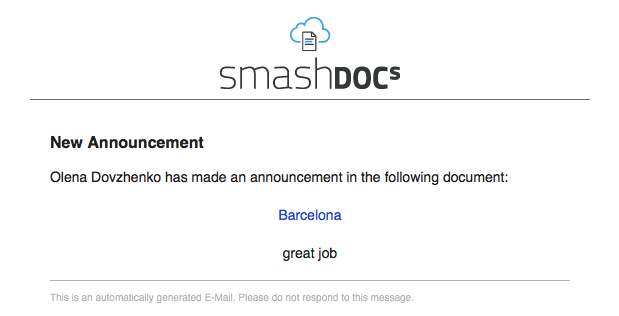
Example for an e-mail announcement highlighted
6Support Communication
Users can send us all kinds of support requests via the support button right next to user avatar in the upper right corner. Clicking on the button opens your local e-mail application. You then send your detailed description by e-mail to the support address stored there: support.smashdocs@toppanmerrill.com. In the subsequent communication, simply reply to the e-mail you receive from our service team.
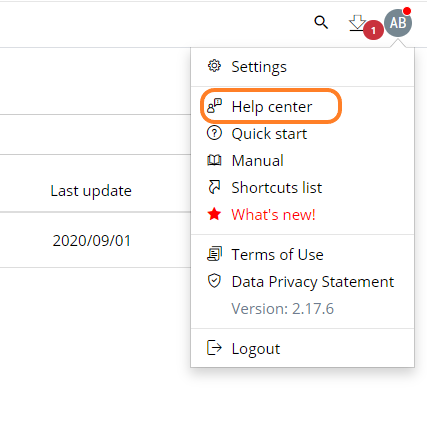
Support button in the page header highlighted
In case no local email application is installed on your device, please send your support requests with the detailed description of the problem from your email account directly to the support address: support.smashdocs@toppanmerrill.com.
6.1What`s new
A red dot near the user`s avatar and option "What`s new" in the menu below signify that there is a new feature release. "What`s new" directs the user to SMASHDOCs blog with the latest release notes.
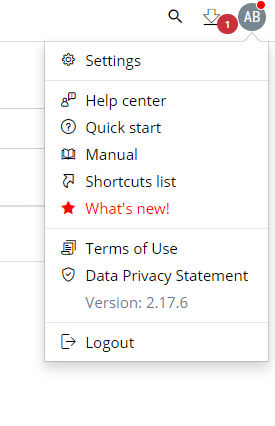
Option "What`s new" highlighted
Once the link "What`s new" has been opened, red signs disappear.
7User management
7.1Authorizations, roles and additional rights
7.1.1Authorizations of the document creator
The document creator is the only one with access to a document when it is in draft mode. Other users cannot see the document, so only the creator can start the review mode and invite more users to the document.
7.1.2Inviting users to collaborate
7.1.2.1Inviting users when starting the review mode
As soon as the creator starts the review mode they can also add other users to the document.
The creator has two options for sending out invitations. They can invite new users via their e-mail address or search for them by name. The second option only works if the user has already worked with these users in the past. SMASHDOCs shows search results once you start typing the first letter. The user can then be added to the invitation list with a click on the blue "Plus" button.
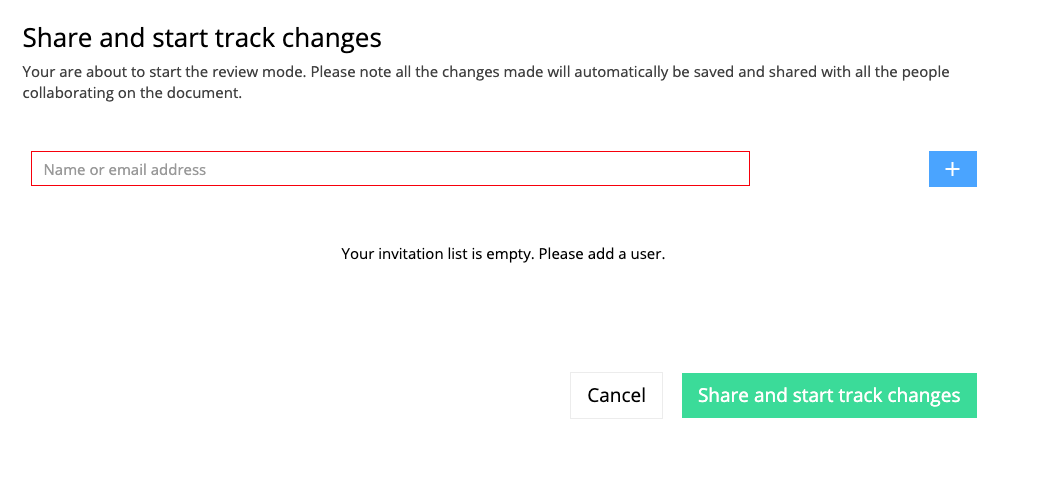
Dialogue for inviting users to a review document highlighted
As a creator, you can also assign roles under the tab "General" and control additional rights of the invitees under the tab "Rights" during the invitation. Also, you can add a message to your invitation. Then click on "Share and track the changes" to start the review process. Your document view changes accordingly from draft to review mode.

Tab "Rights" highlighted during user invitation
You can also start the review mode without inviting other users. Of course, you can still invite them later on.
7.1.2.2Inviting users after having started the review mode
You can add users to a document in review mode at all times.
Go to "Options" choose "Invite users" to proceed. This is only possible if you have the additional right to invite other users.
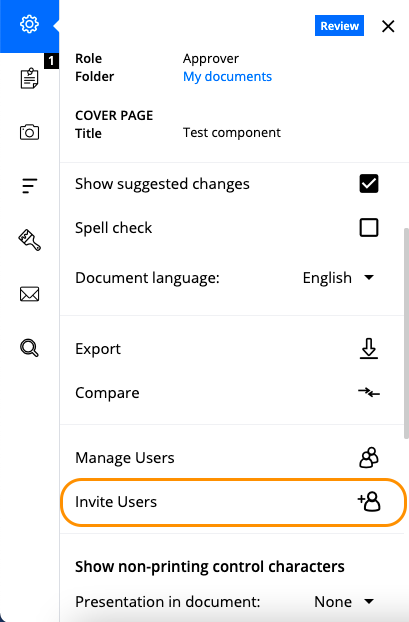
Dialog for inviting users after having started the review mode highlighted
7.1.2.3Control user rights before an invitation to the document
User rights are controllable as soon as the user has been invited to work in SMASHDOCs for the first time. During the user invitation, you can go to the "Rights" tab and only leave the relevant rights activated for the particular invitee. Initially, all the rights are being activated for all the users.
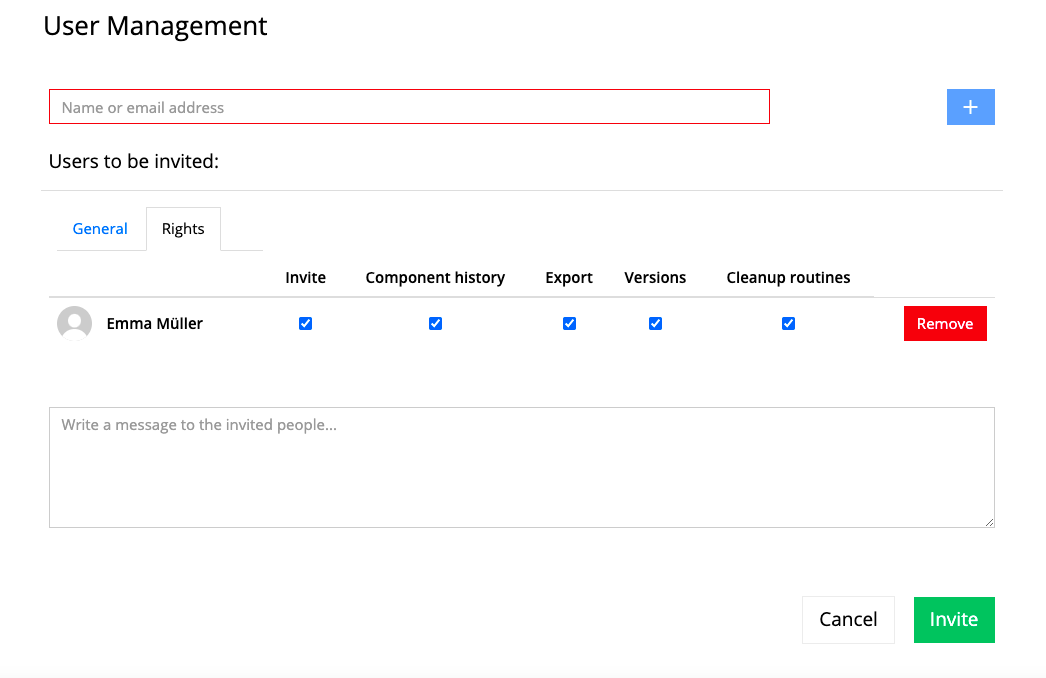
Tab "Rights" highlighted during user invitation
7.1.2.4E-mail address of the user is displayed when adding to the document
If the user wants to invite another user to the document, they may start entering the particular name (in case they has already shared something with the recipient) or a particular e-mail address. In addition, when inviting the user, the entered e-mail address will always appear in the drop-down menu if that user has previously participated in the review process of any other SMASHDOC document.
7.1.3Roles and additional rights
In SMASHDOCs it is possible to attribute roles and additional rights for each user and document separately. Depending on their role, a user has a varying degree of editing rights for a document. The additional rights provide the user further possibilities concerning the management of a document. The document creator automatically holds the role of "Approver" and all additional rights.
7.1.3.1Roles
The following roles can be attributed to SMASHDOCs users:
●Reader
●Commentator
●Suggest
●Approver
A "Reader" can only access the document without editing any content, posting or replying to comments and questions.
As "Commentator" one can post questions and comments, and also reply to conversations posted by other users.
As "Suggest" you can create conversations and also edit a document's content. This includes creating, changing and deleting text, as well as adding or changing images and tables.
In order to be able to accept or reject changes in a document, you need the role of "Approver". Only approvers can decide upon suggested changes, edit content themselves, including to delete images or tables, and create conversations.
7.1.3.2Display of the role in the document
The role is displayed in the settings.
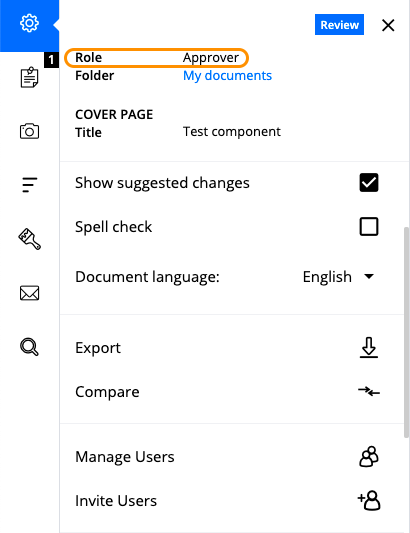
Displaying of the users role highlighted
7.1.4Activate and deactivate user
First of all, invited users are listed in the document as "active". That means, they can work in the document according to their assigned roles and rights. However, users can be deactivated from the document when required, so that they don't have any access to the document anymore.
To deactivate a user, simply select the “User list” of the respective document (see chapter 7.3) and remove the tick mark next to "Active". The only condition is that you are the document administrator.
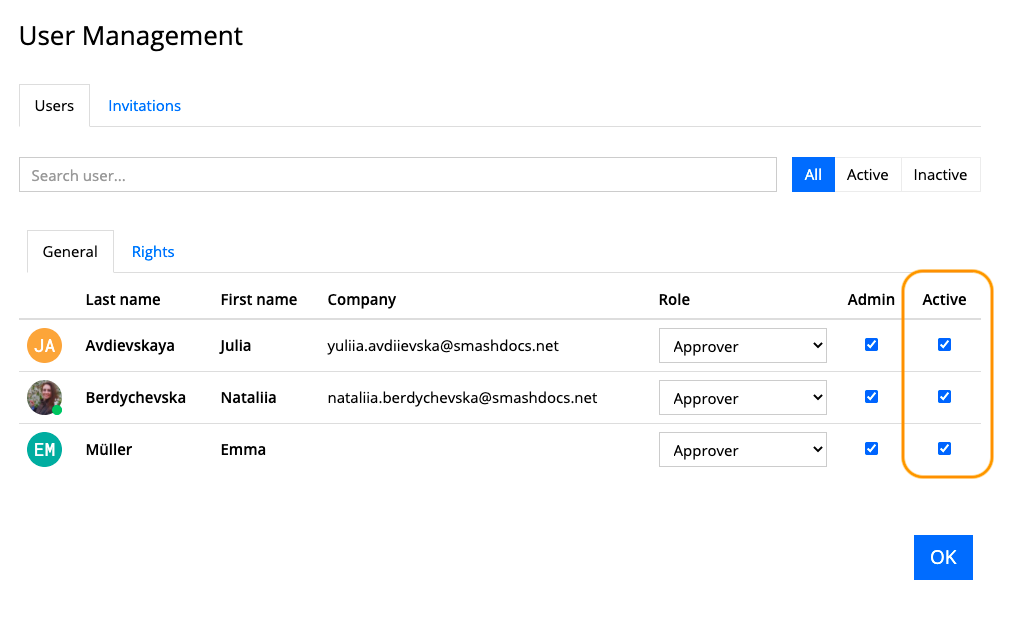
User list with active users highlighted
Deactivated users will be immediately notified by email and no longer be able to see the document in their document list. In case a user opened a document while being deactivated, they won’t be able to work on the document anymore and will be informed about the deactivation in a dialog window. A deactivated user cannot find the document using the search function and isn’t able to access it via the document link.
Please note, document admin users can only be deactivated if there is at least one document admin user left after the deactivation. Nevertheless, SMASHDOCs prevents that automatically.
Deactivated users immediately disappear from the list “Active” and are displayed only in the list “Inactive” from then on.
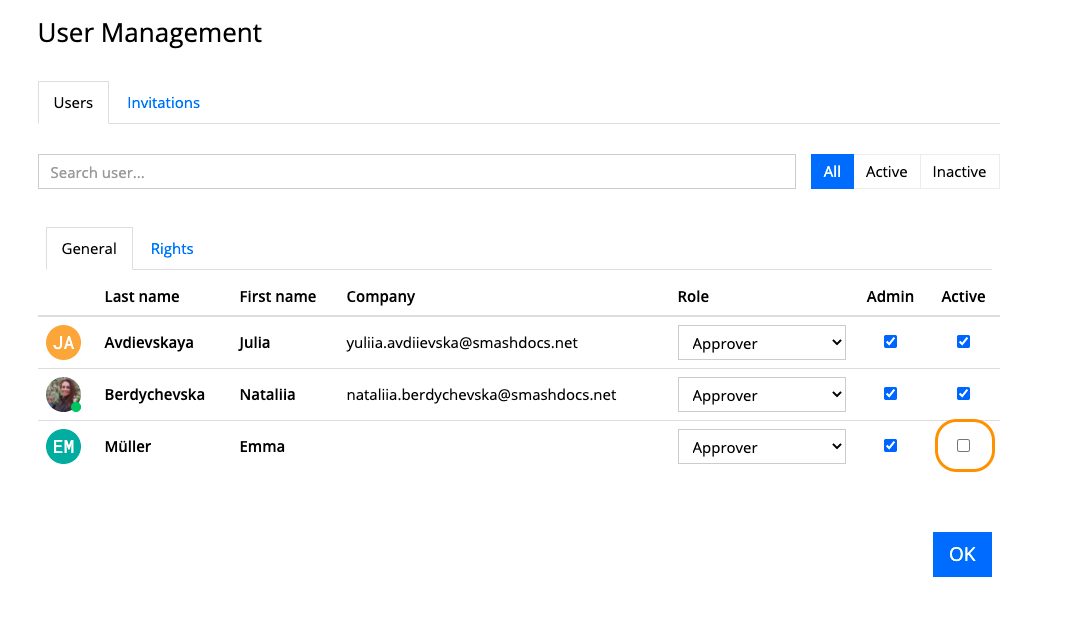
List with all inactive users highlighted
There you can again reactivate a deactivated user by putting a tick next to "Active". Then the reactivated user appears in the list “Active” again and will be automatically notified per email. The user is now able to see the document in their document list again and to open it.
Of course, you can deactivate yourself as well, but please be aware that only a document admin user can reactivate you again.
7.2Additional rights
On top of the roles there are five additional rights existing in SMASHDOCs.
●Admin
●Invite
●Component history
●Export
●Active
The additional right "Admin" allows a user to change the roles and additional rights of other users.
To invite further users to a document, you need the right "Invite". It also enables you to attribute roles and additional rights to the invitees, however only up to your level. A user with the role of "commentator" can hold the right to invite others, but cannot invite them as "editors" or "approvers". This limitation is also applied to additional rights.
To see the component history of a document, one needs the additional right "component history". Without this right, it is not possible to follow the changes made to a component.
The user with the "Admin" role additionally has control whether the user they invite sees the "Export" option in the document or not. If an admin changes the rights setting while this user is already working in the document, the change will take effect immediately.
If the right to export no longer exists, then the user can also no longer duplicate it.
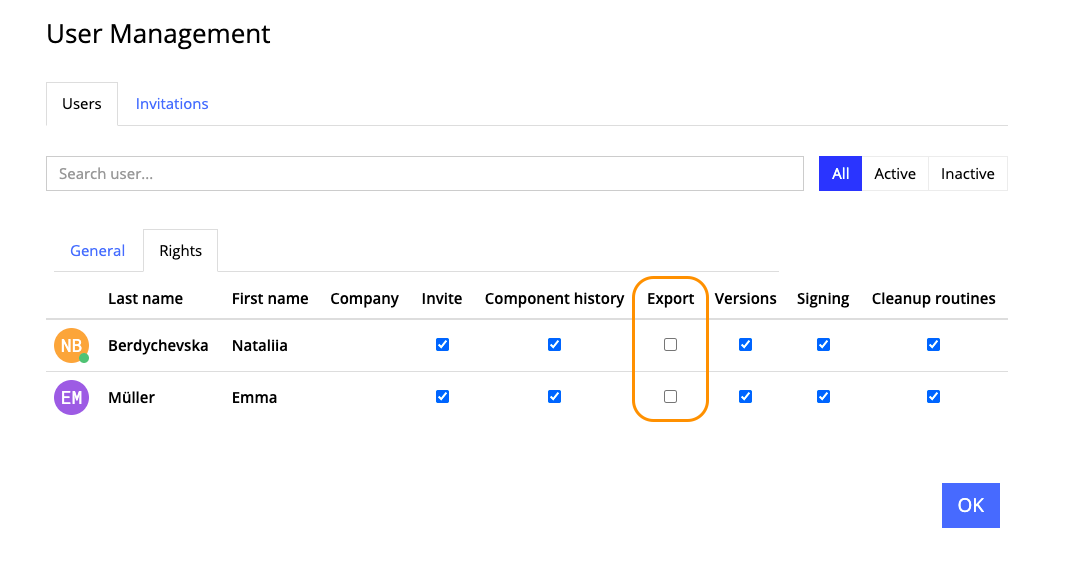
"Export" right highlighted amongst additional user rights in the user management window
The two rights "Admin" and "Invite" need to be attributed at least once for a document. One user can either hold both or two users each hold one right.
7.3Display of user list
For an overview about all users working together on a document, click “Manage users” in the "Options" of the document. In this list all users are listed with their user role, additional rights and activity level.
7.4Active users toolbar
For the sake of enabling other users working on the document to know who is currently editing the document as well, the user avatars on the top right of the document are shown. As it is called active user toolbar, active users marked with the small green sign are shown first in the list.
Note: green dot in the lower corner of a user avatar is shown only when user is active in the document, that means the user makes changes in the text or settings of the editor. In case the page with document is opened, but no actions are performed, in about 30 minutes green dot will disappear from the avatar of a corresponding user.
If there are many users involved in the document editing, only a few icons will be displayed followed by the "+10" etc. number depending on the user quantity. On the left side of the above-mentioned toolbar there are the control buttons e.g. Share all, Accept all, Reject all, Mark all as read.
The short name of the user e.g. EM for Emma Müller is displayed on the avatar if the user hasn't installed any photo or image. If they did, then the user should mouse over the avatar for the full name of other users to be shown. Furthermore, the click on an avatar opens the "Manage users" window.
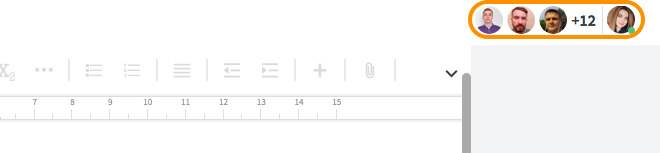
Active users toolbar alongside with suggested changes highlighted
7.5Account settings
7.5.1Edit your master data
In order to edit the master data of your account, click on you avatar and choose "Settings" tab in the submenu.
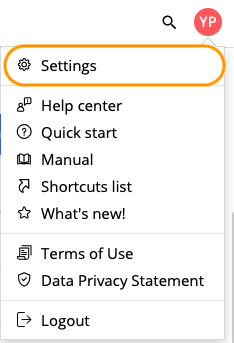
Tab for accessing the master data highlighted
In the dialog box "Profile" you can edit your profile data, such as name, company and position.
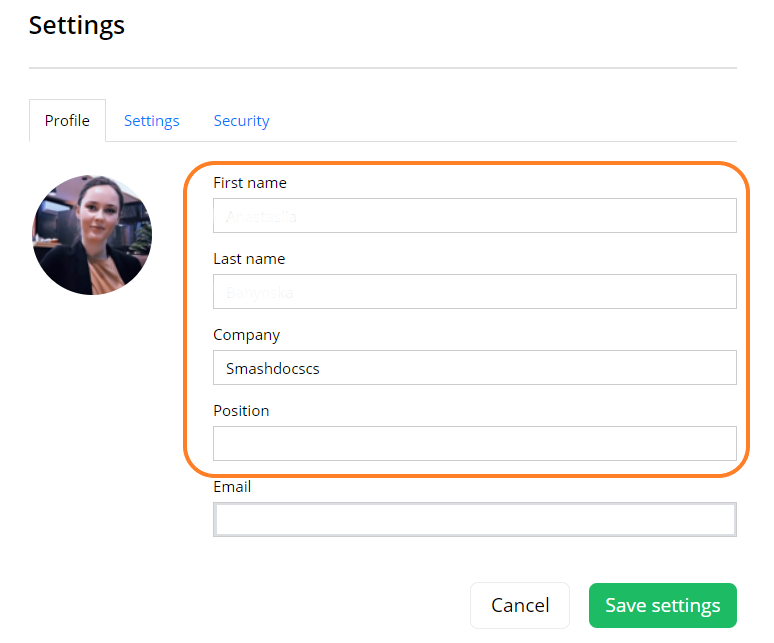
Dialogue box "Profile" highlighted
Save your changes by clicking "Save settings".
NB: It is not possible to change your e-mail address.
7.5.2Upload and change your profile picture
Upon registration, the system creates an avatar for each user, consisting of their initial letters.
For uploading your own profile picture or replacing an existing picture just click on your existing profile picture.
In the following dialog, you can search your local drive for a picture and upload it and adjust the image size.
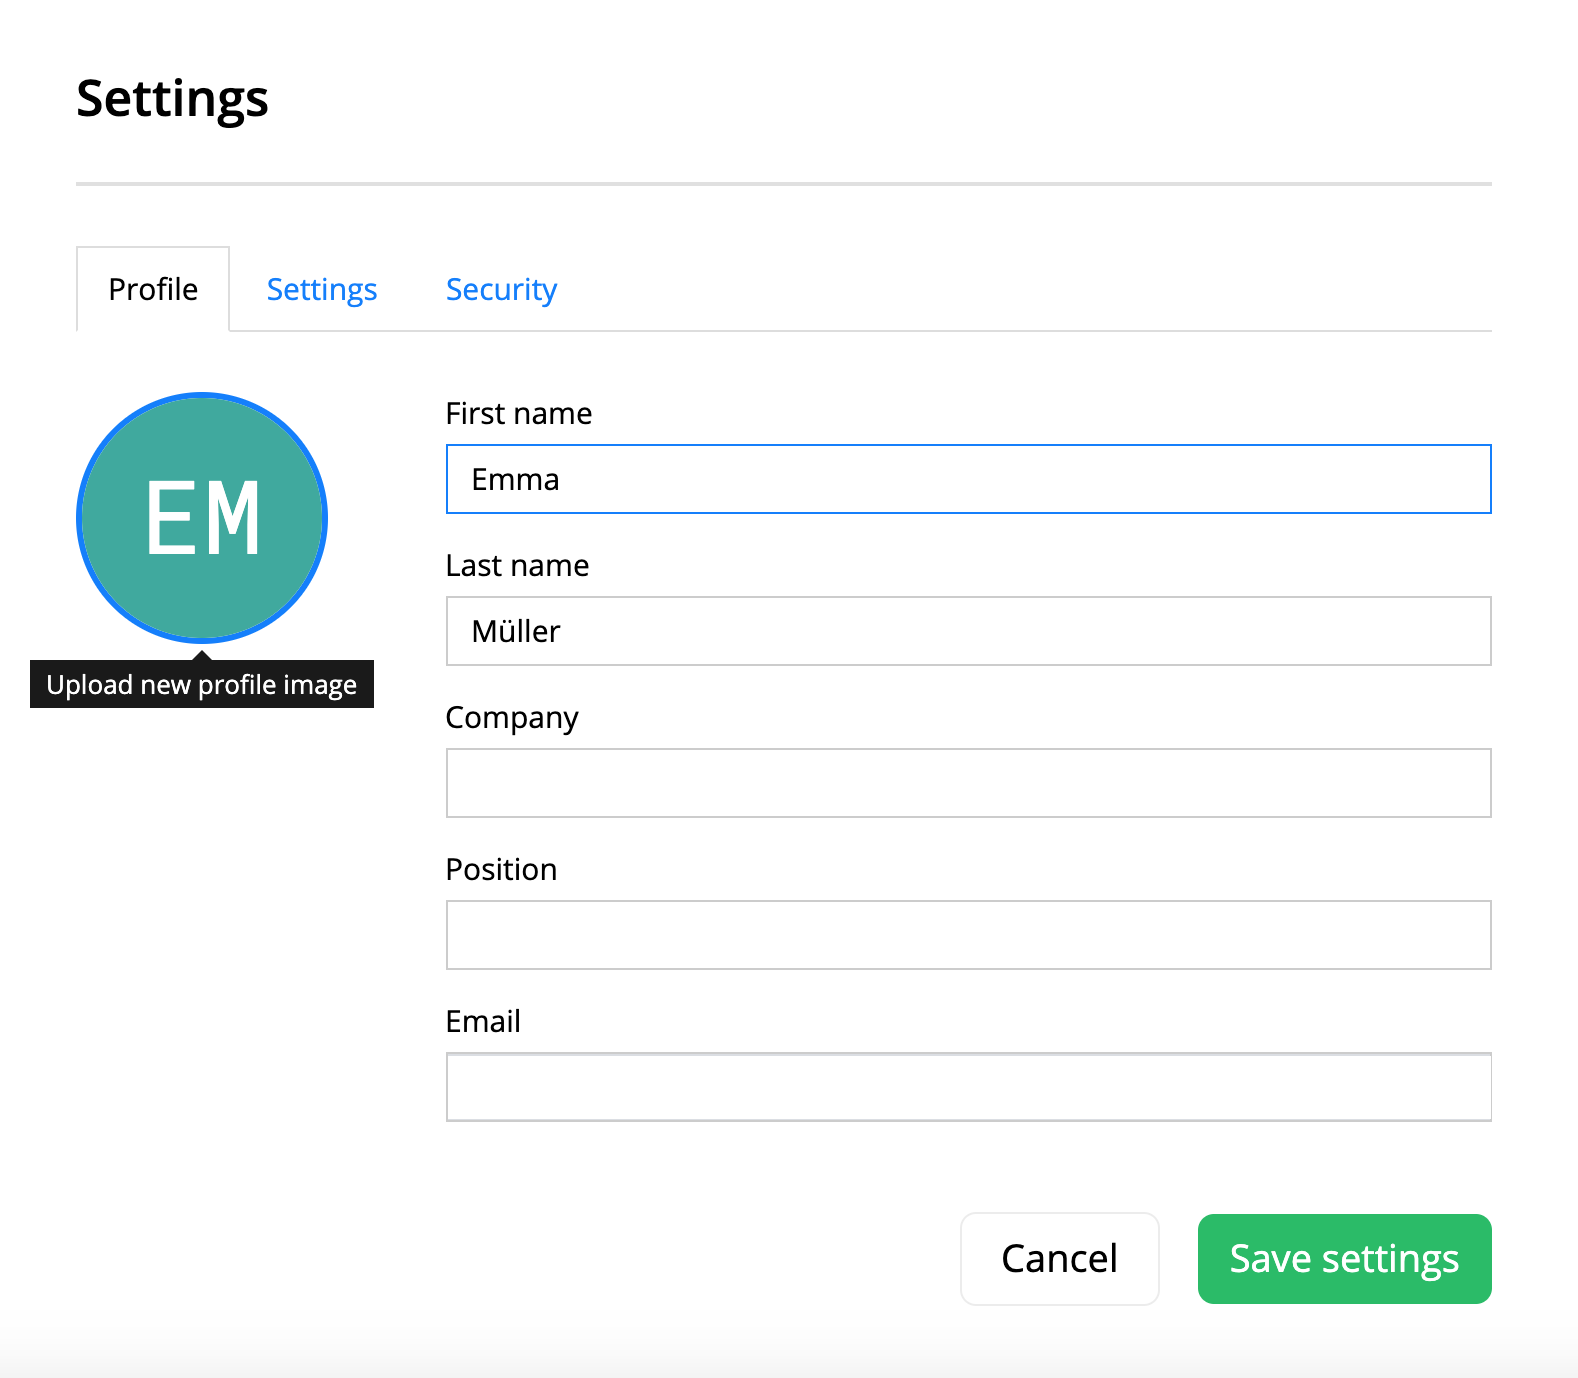
Dialogue box "Account Settings" with selected tab "Profile Picture" highlighted
7.5.3Users name always shown when hovering over an avatar
Everywhere, where there is a user avatar, as in the comments stream, tooltips for draft components, component history, etc. the name of the user is immediately shown if you hover over their avatar. This feature looks like this:
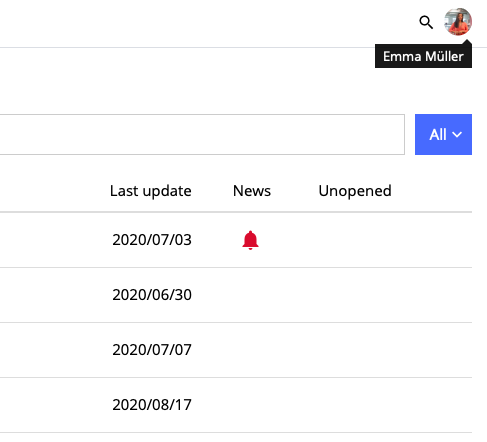
Name of user highlighted after hovering over the avatar
7.5.4Change language
A user can change the language settings even after having registered. Therefore, go to the tab "Settings" in your account settings.
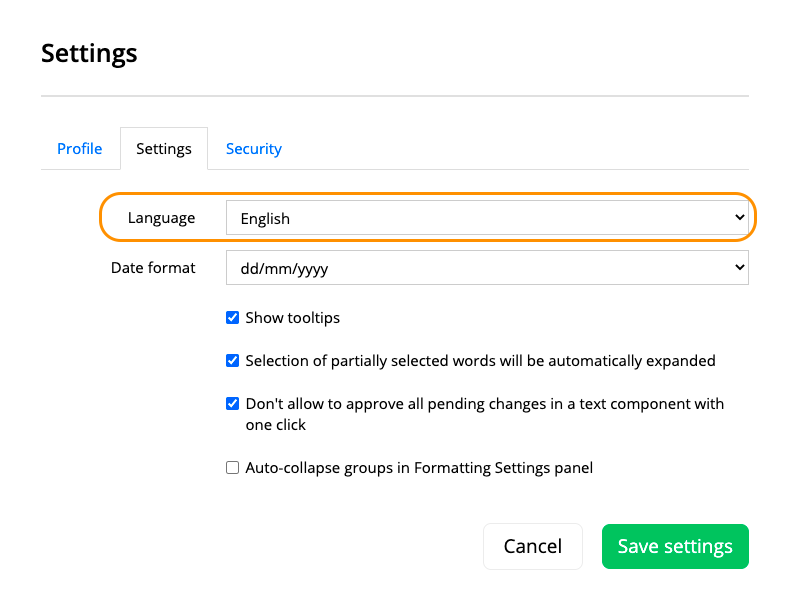
Dialogue box "Account Settings" with selected "Settings" tab highlighted
Currently, SMASHDOCs supports English, German, French, Belgian French, Canadian French, Dutch, Spanish and Russian languages.
7.5.4.1Document language
To set document language open "Show document options" in the left toolbar and find the option "Document language". Choose one of the supported languages for your document.
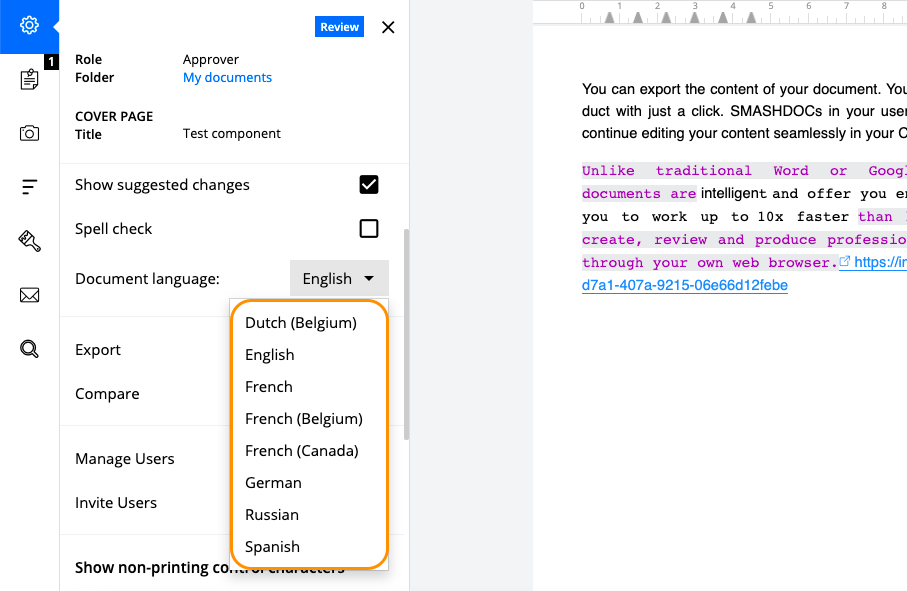
Setting "Document language" highlighted
It is necessary to mention that document language also defines:
●Spellcheck language
●Language by export
●Language of numbering patterns
●Language of text in images, tables and content lists (ToC)
●Language of inline styles names in the menu and toolbar
●Language of the decorators
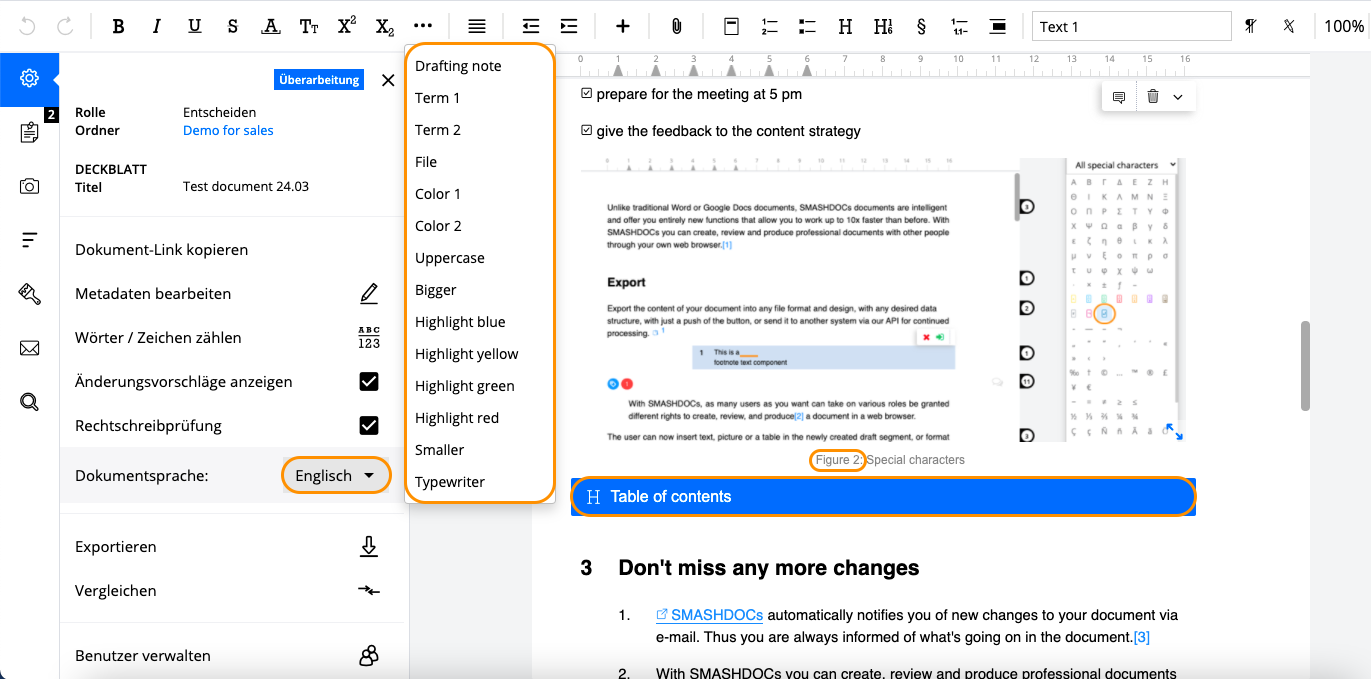
Language of inline styles, text in images and ToC highlighted
Note: The setting for document language is saved per each document individually.
7.5.5Display Tooltips
A user can decide whether to activate or deactivate tooltips in SMASHDOCs. This can be done by unticking the box in account settings.
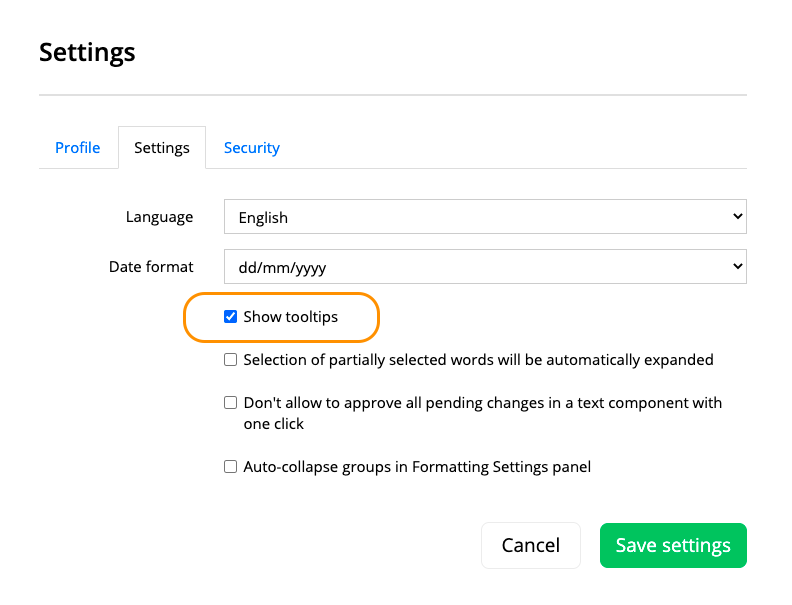
Activated tooltips tab highlighted
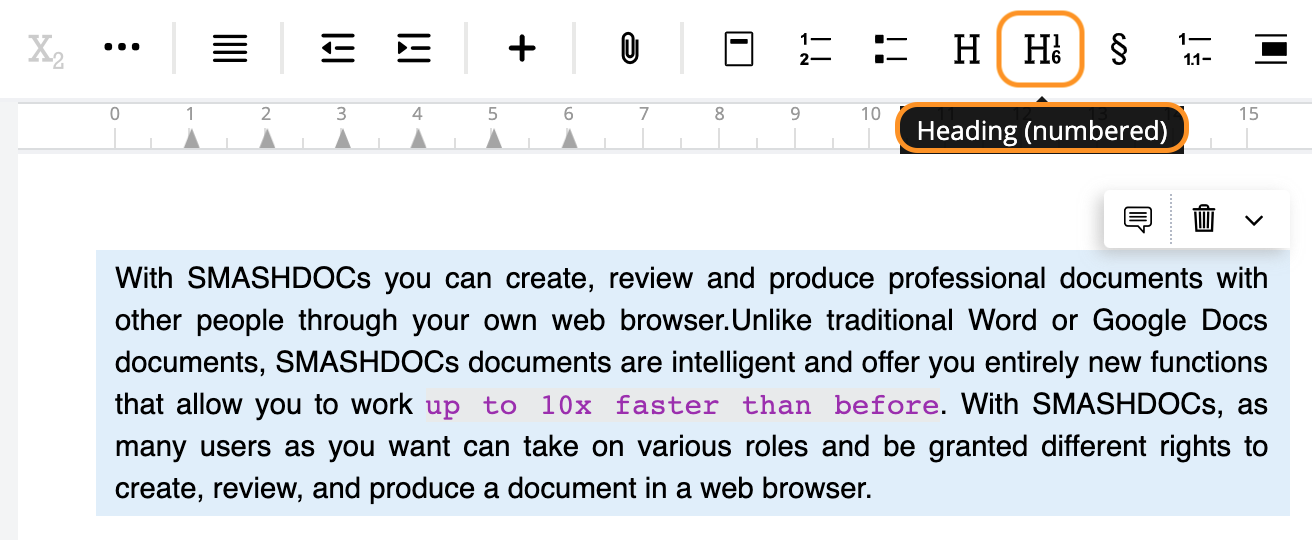
Display of tooltips highlighted
7.5.6Selection of partially selected words will be automatically expanded
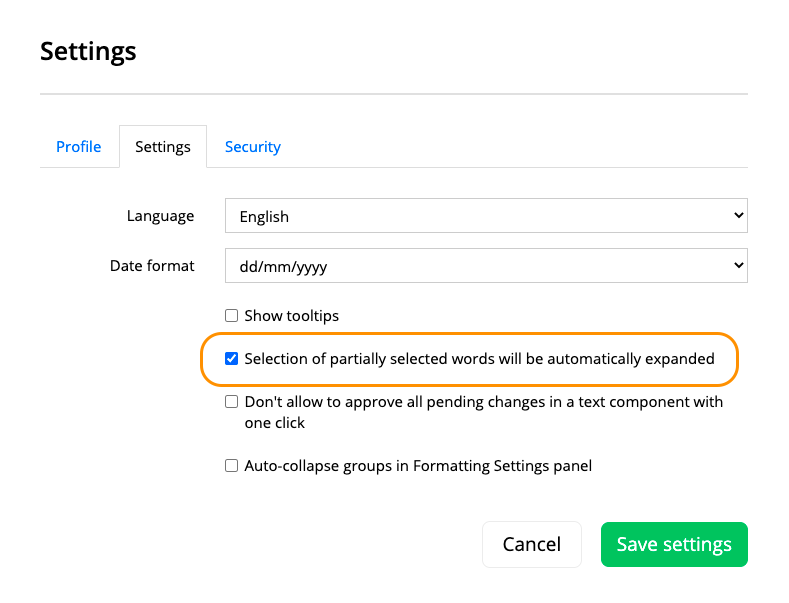
Setting "Selection of partially selected words will be automatically expanded" highlighted
If the setting "Selection of partially selected words will be automatically expanded" is activated, selection only of a part of the word will be expanded by SMASHDOCs to the full name. For instance, selection of "SMASH" in the name "SMASHDOCs" will be automatically expanded to "SMASHDOCs".
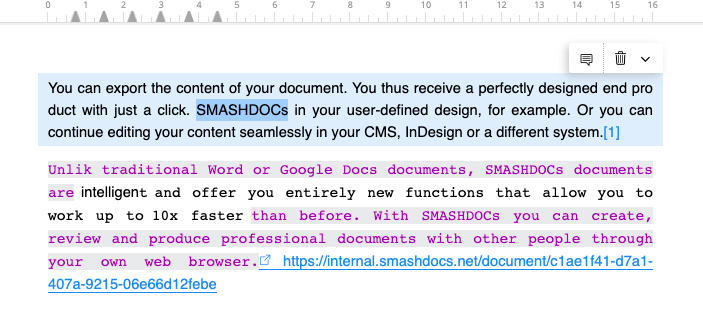
Selected "SMASH" being expanded to "SMASHDOCs"
7.5.7Date display
You can set the date everywhere to be able to follow different stages of working process with a document. The date then will be shown in all important parts of your document (in document list, projects, under the tab "Deleted documents" etc.). The date is displayed like this:
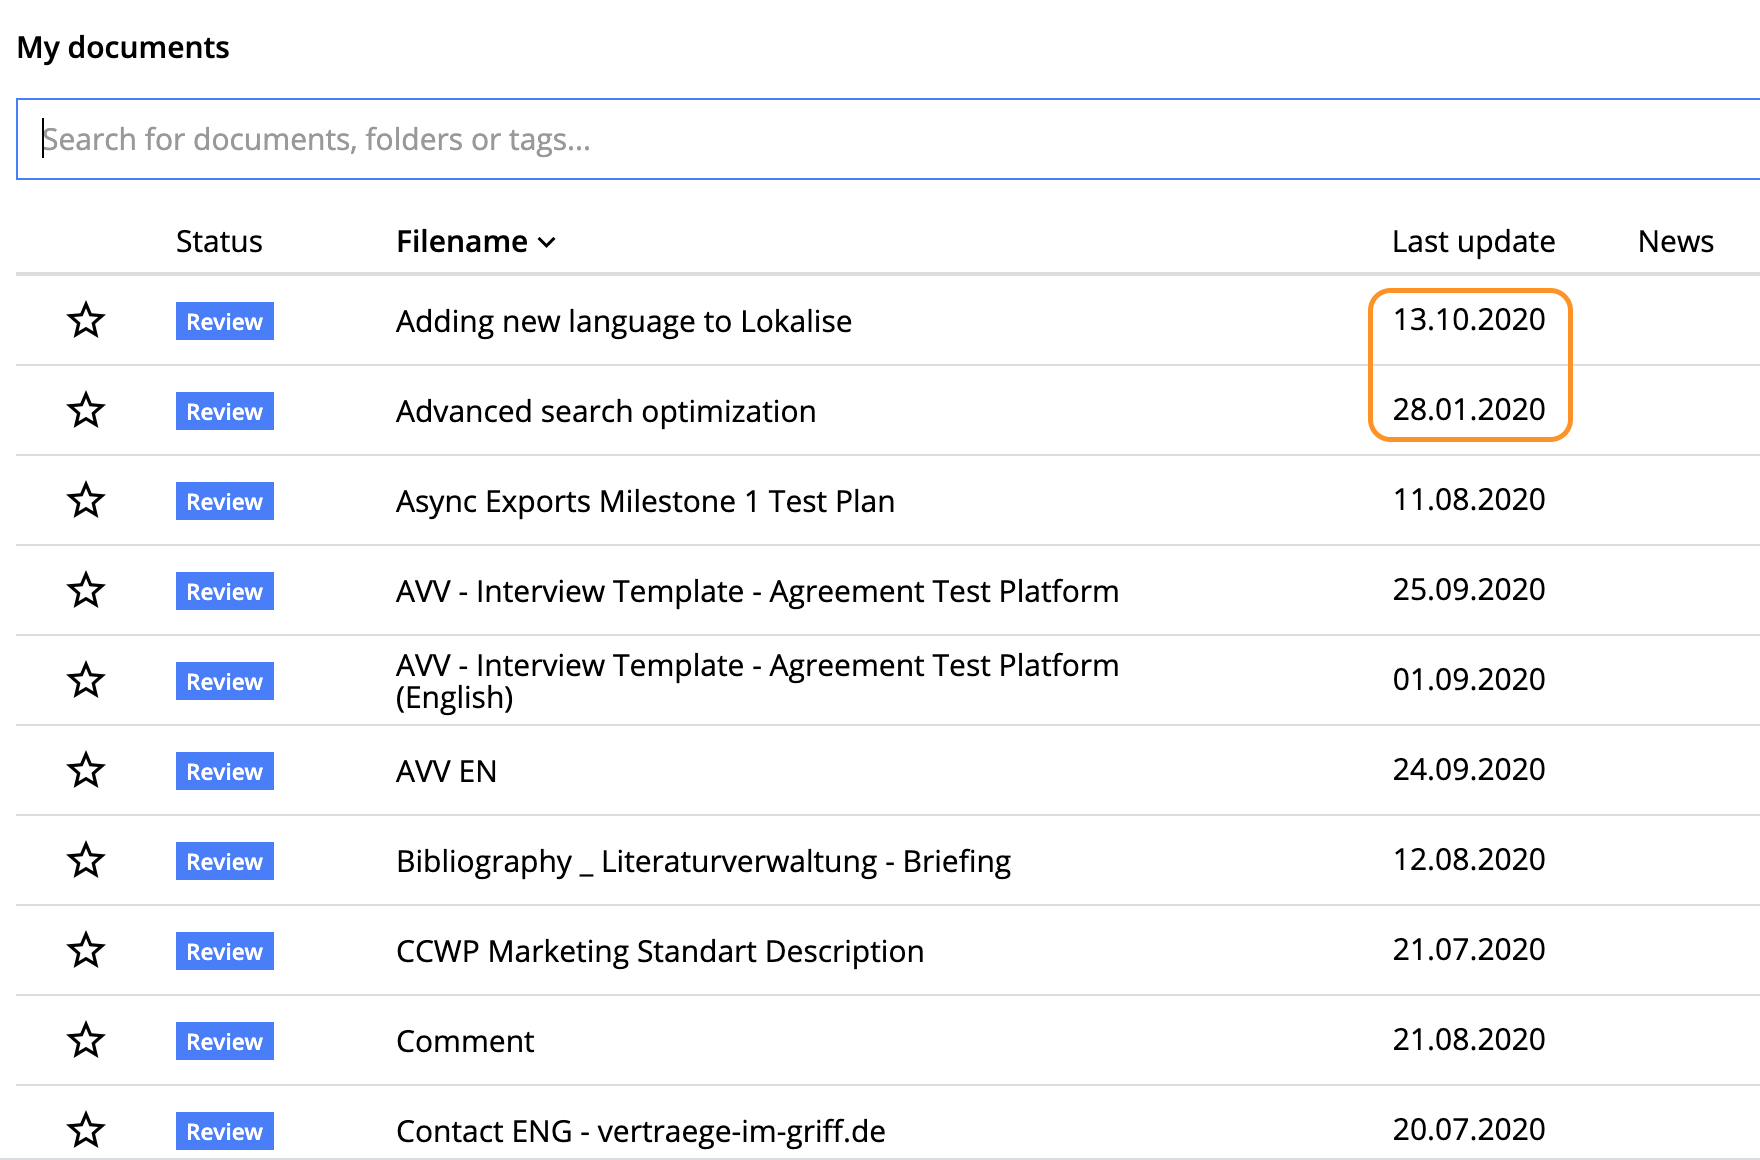
The date displayed in the document list is highlighted
Moreover, you can set the date format yourself. This function is available in profile settings in a tab "Date format".
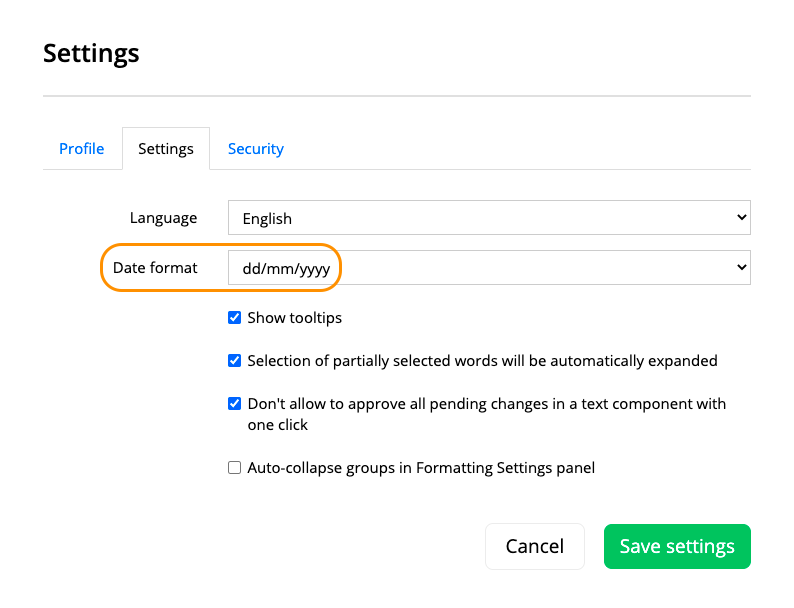
Date format highlighted
You have to click on this tab and choose the format you need.
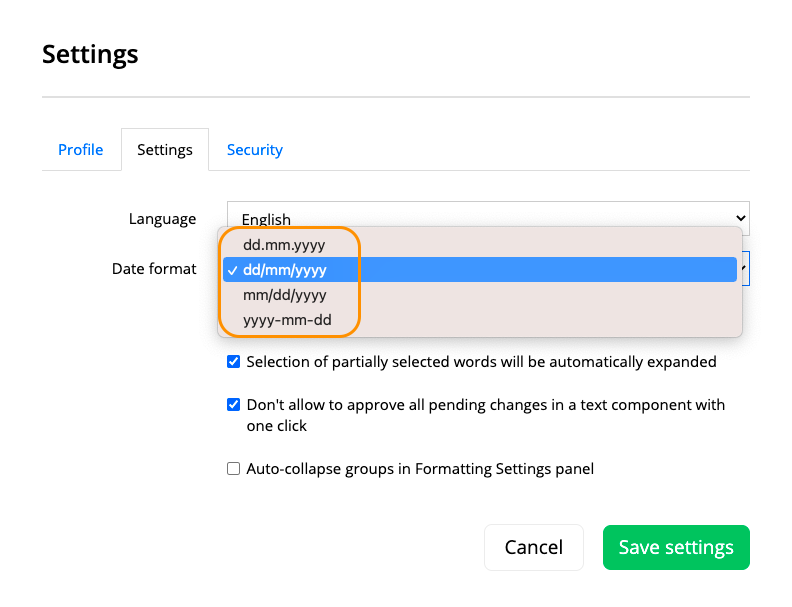
Types of the date format highlighted
These date formats possess specific names:
●dd.mm.yyyy - Numeric
●dd/mm/yyyy - British
●mm/dd/yyyy - American
●yyyy-mm-dd - DIN
With the date display it is much easier work properly and to manage your time successfully.
7.5.8Don't allow to approve all pending changes in text component with one click
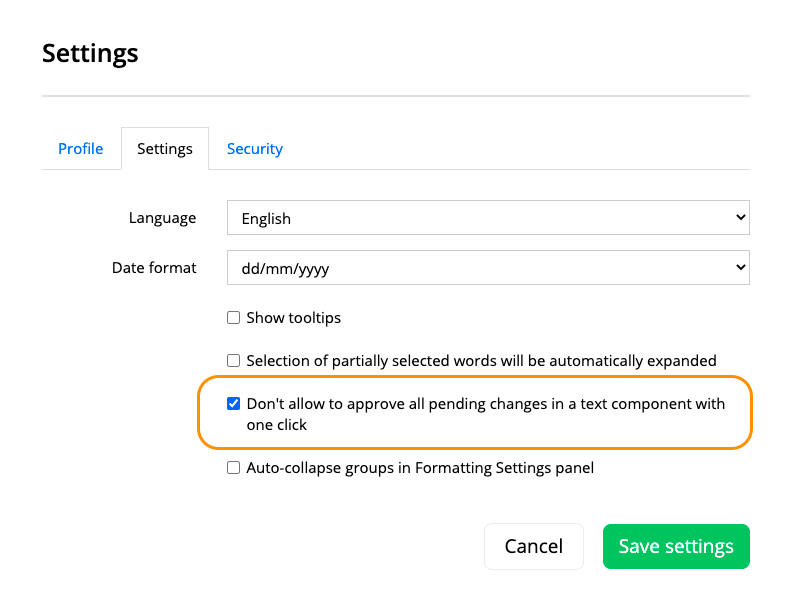
Setting "Don't allow to approve all pending changes in text component with one click" highlighted
If the setting "Don't allow to approve all pending changes in text component with one click" is activated, a user can approve/discard changes partially - only selected by them out of all changes in the component.
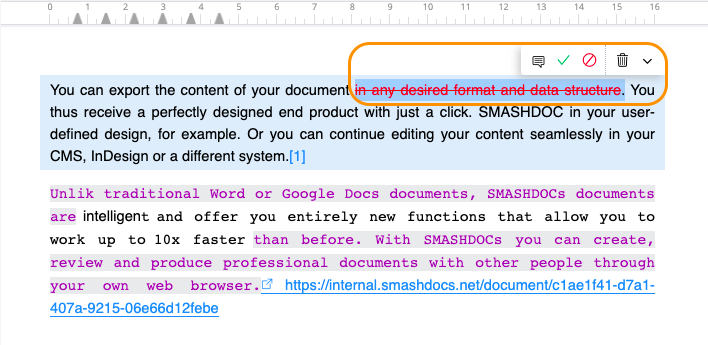
Only selected part will be deleted from the sentence, after clicking on "Approve"
7.5.9Auto-collapse groups in Formatting Settings panel
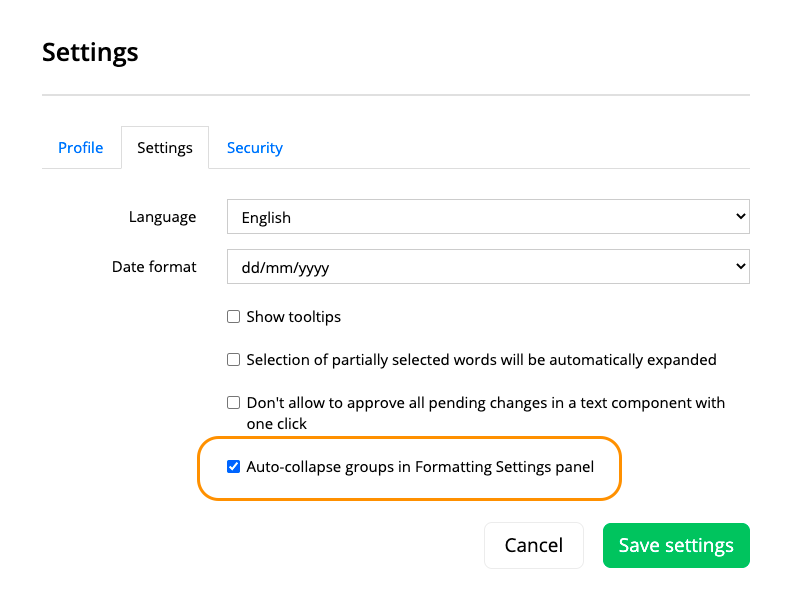
Setting "Auto-collapse groups in Formatting Settings panel" highlighted
If the setting "Auto-collapse groups in Formatting Settings panel" is activated, all formatting groups are being automatically collapsed. Whereas the group that includes the paragraph style applied in a particular component will be collapsed, it’s highlighted in blue. Hence, the specific paragraph style in the collapsed group is being indicated under "Selected formatting".
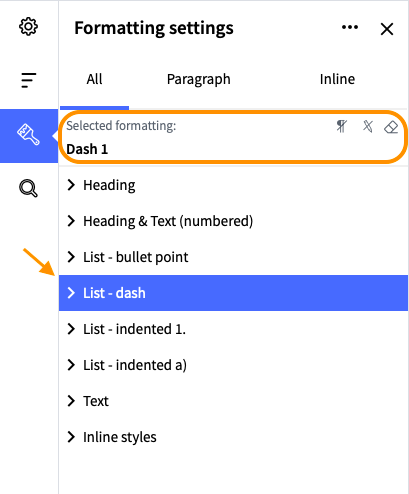
"All groups automatically collapsed" highlighted
7.5.10Change password
7.5.10.1Change password in user profile
When you are logged into SMASHDOCs you can change your password in your account settings under "Security".
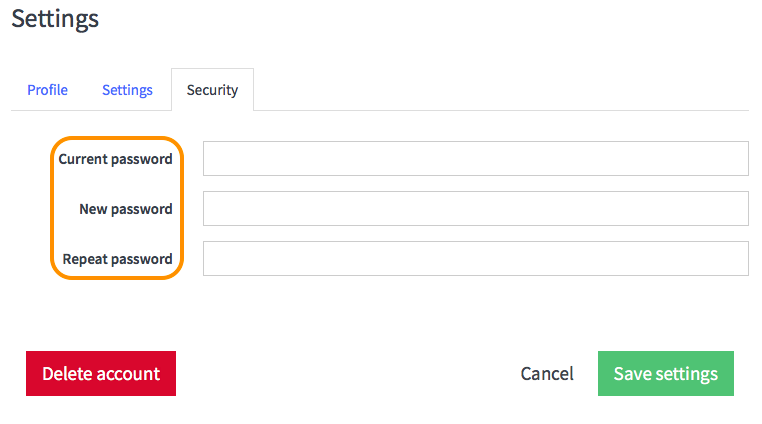
Security tab with option of changing password highlighted in account settings
When changing your password you have to enter your current password, your new password and confirm the new password again. You can also reveal the password in the field by clicking the corresponding option on the right side of the field (see Image 312). The new password must not match previous five passwords. In case newly created password is similar to the previous one, a warning message will appear.
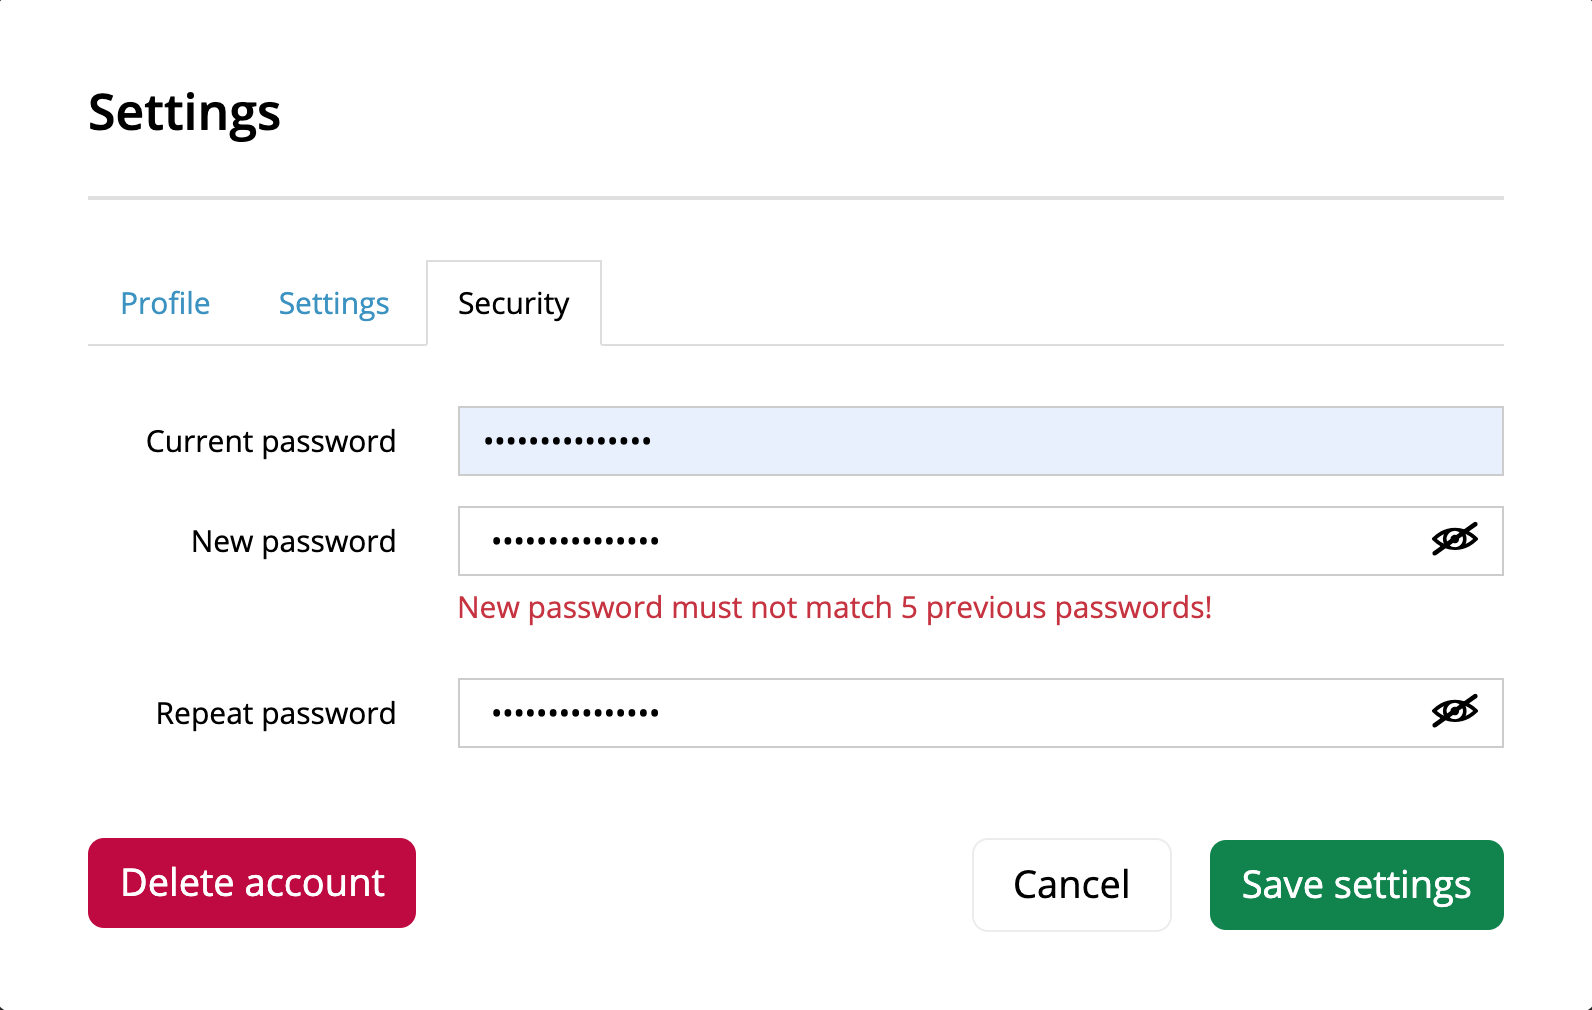
Warning message about changing password
The new password is active upon your next login.
7.5.10.2Change or reset password when logged off
If you want to change your password without logging in before or if you forgot your password, you can request a new one via the login dialog.
Login page with the button "Did you forget your password?" highlighted
After clicking on the link, a new dialog box appears. Enter your email address, solve the reCAPTCHA task and select "Request your new password".
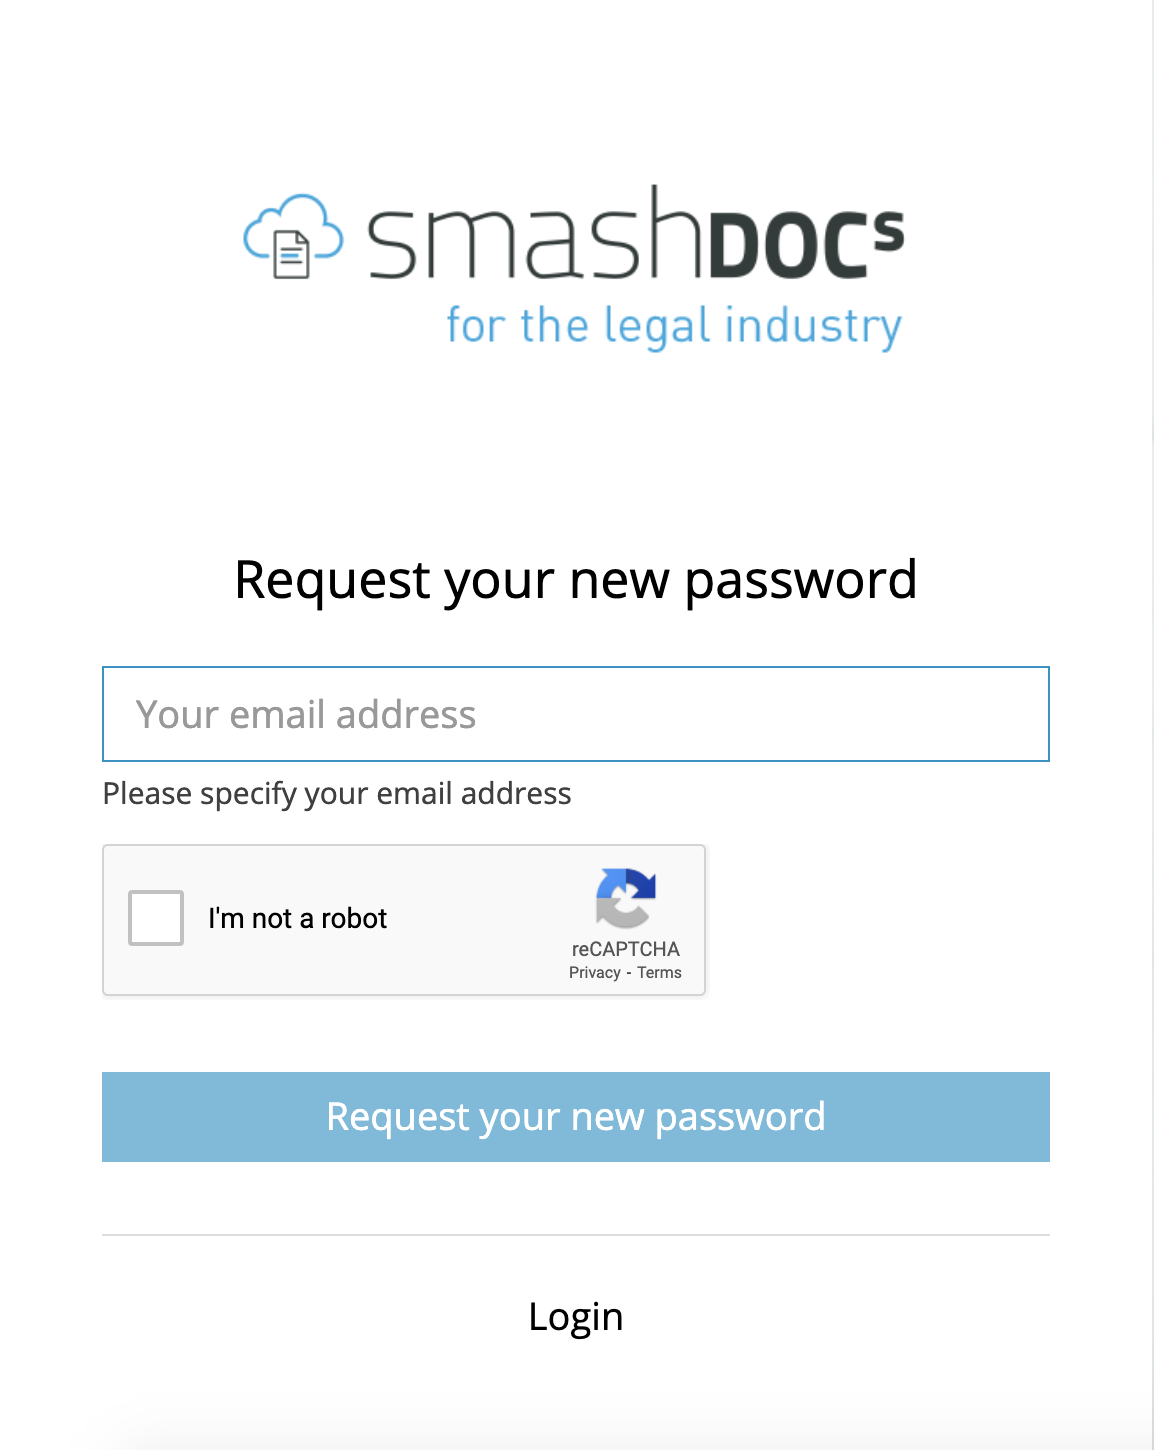
Dialogue box for resetting your password highlighted
You will get then the success message “You will receive the password. Check your email“. Go to your email, open the sent link and perform further steps to set new password.
Note: the success message will appear even if non-existent email has been inserted. So, be sure that you have indicated correct email-address.
7.5.11Delete account
SMASHDOC's account can be deleted at any time after a successful registration. To do this, click on the avatar in the top right corner of the document list and continue with the settings. Then select the "Security" tab and click on "Delete user account" at the bottom left.
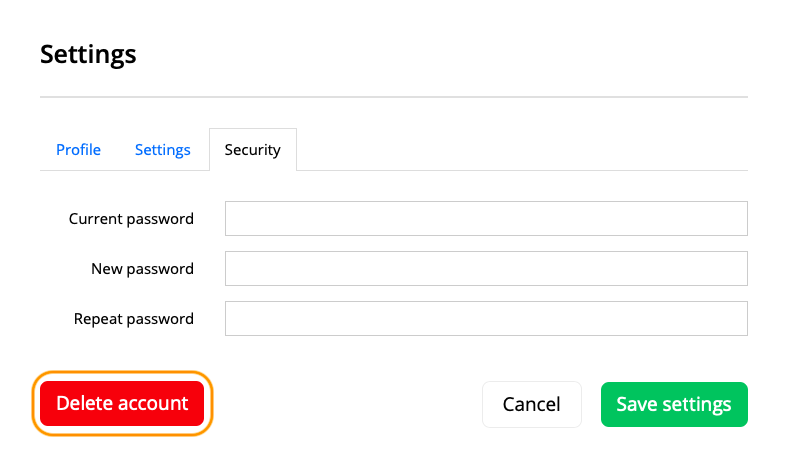
Tab "Delete account" highlighted in the settings menu
8Exporting documents
8.1Exporting as Word document (DOCX)
You can export documents as Word documents at any time, and it does not matter whether the document is in draft or review mode. The export function can be found in the "Show document options" menu.
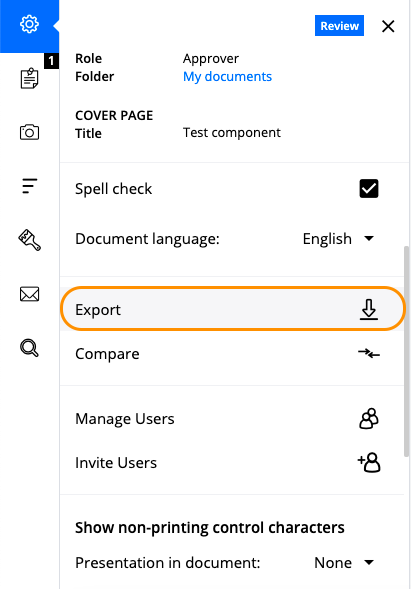
Export function highlighted
Select a design template for the document output. Upon request, SMASHDOCs can create and deposit predefined, custom-tailored templates. Feel free to contact Toppan Merrill for further information.
Formattings such as block headings, figure and table numbering allow you to create document elements such as a table of contents and lists of figures and tables automatically. Just select the respective checkbox in the dialog window.
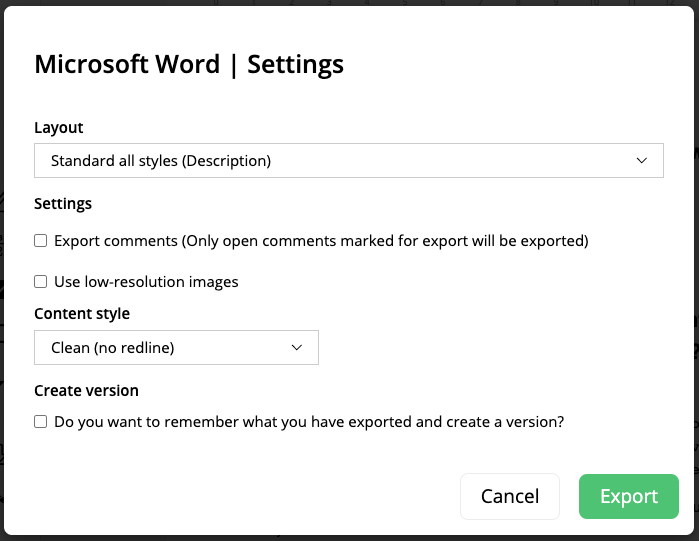
Dialogue box for exporting documents highlighted
Click on "Export", and the document will start exporting in Word format. Later on you can download the exported file onto your computer. You can open it with Microsoft Word or any other software, that processes Word Documents. The settings from the Word formatting templates are taken over.
User can also use a shortcut (Ctrl + E) for Windows / (COMMAND + E) for Mac.
8.1.1Exporting WORD document with comments
You can also determine if and what comments are visible in the exported document. For this, firstly check option "Visible in export" for each comment you would like to export.
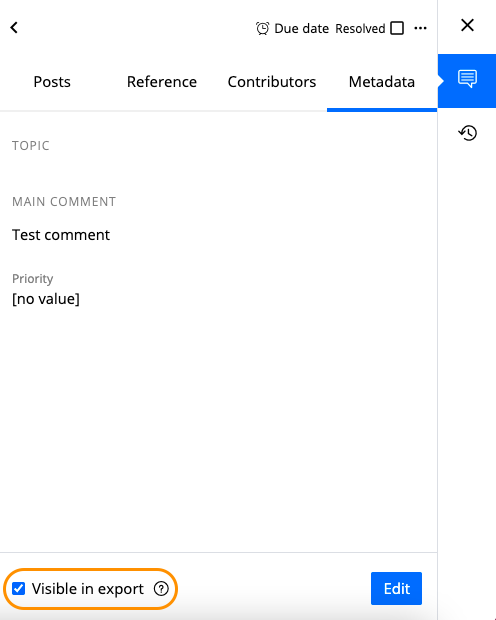
Option "Visible in export" highlighted
Only if the option "Visible in export" is activated in at least one comment, the additional setting "Export comments" will come in handy while exporting to Word and SDOX formats.
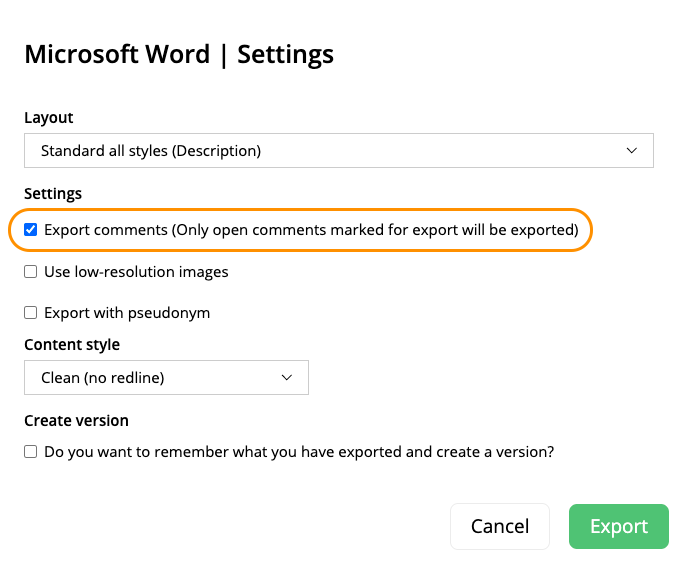
Option "Export comments" highlighted
Please note that if none of the comments got marked with "Visible in export" and you nevertheless activated the option "Export comments" - comments will not be exported. Therefore, the option "Export comments" has a hint in the in parentheses - "Only open comments marked for export will be exported".
8.1.2Exporting WORD document with a pseudonym
You can export your document with pending changes and/or comments to MS WORD under the pseudonym name in case you cannot or do not want to reveal real names of documents editors.
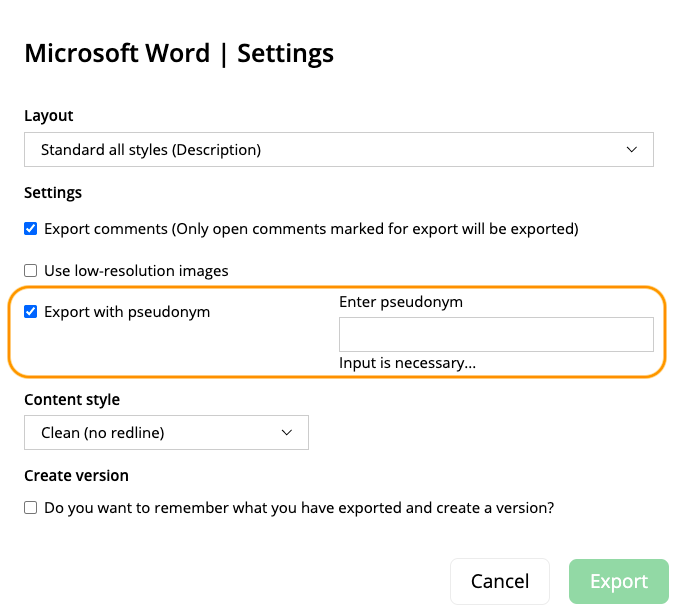
Export with pseudonym highlighted
Please note that this option does only appear after you have checked one of the stable fields, e.g. export comments and/or track changes. Therefore, if there are neither changes nor comments in your document, export under a pseudonym will not be available.
After entering the pseudonym, all comments and changes will be displayed as if the testing team, law firm, etc. has made them.

Comment exported under pseudonym
8.1.3Exporting WORD document with low-resolution images
During the export it is possible to decide, whether you want to export a document using low-resolution images or images with their original size. The main difference between suggested sizes of pictures is that low-resolution ones make the overall size of a document smaller, therefore the exporting process will last much faster in this case. However, in this case the quality of pictures may be worse than of those with original size.

The option "Use low-resolution images" highlighted
So, if you need to export your document quickly and do not need necessarily to get high-quality images after export, you should activate a checkbox near the option "Use low-resolution images" in the export dialog window. Leave this checkbox - and all images in the document will remain in their original size.
8.1.4Content style of the exported WORD document
While exporting a document to Word, you may choose a proper content style. Here are three possible styles: clean (no redline), redline as currently displayed and redline out of a comparison with a version.
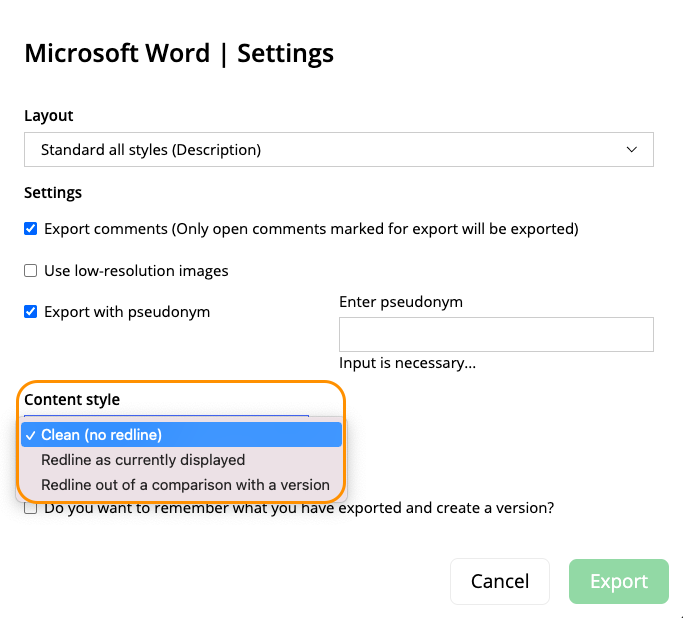
Types of content style highlighted
8.1.4.1Content styles "Clean (no redline)"
If you use content style "Clean (no redline)", the Word-document will have usual text outlook. In case you select "Redline as currently displayed", in the exported WORD document the content shows non-accepted changes highlighted with the redline and deletions marked with a line and described in the mark-up area. The unseen accepted changes will be represented as accepted (black text) and unseen rejected changes will not be included in the Word-document.
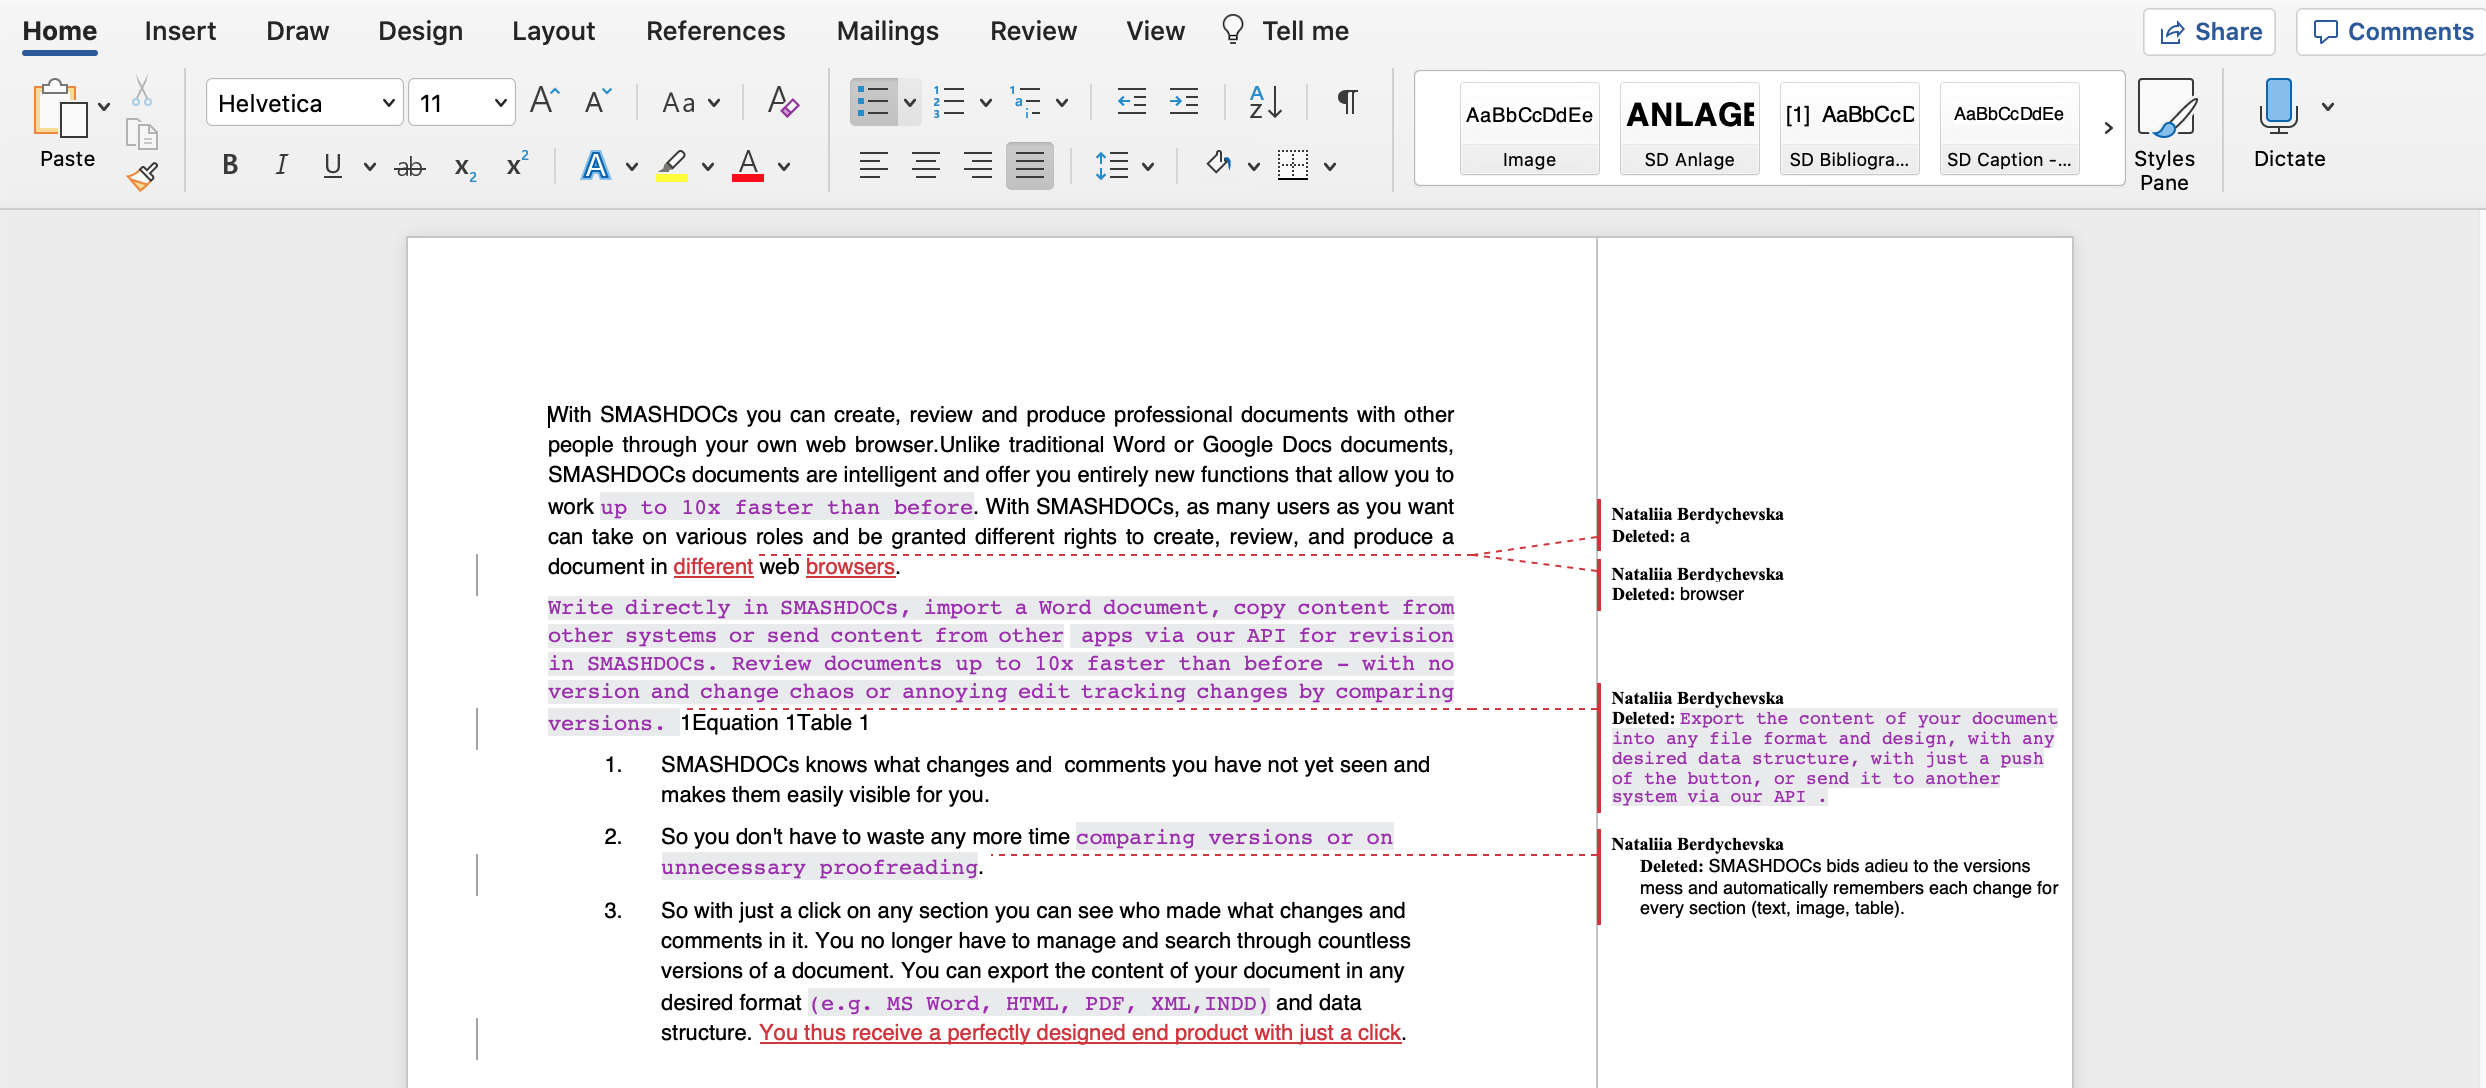
The content style "Redline as currently displayed" in the WORD document
8.1.4.2Content style "Redline out of a comparison with a version"
Once you choose the style type "Redline out of a comparison with a version", you will get an extra line, where you have to choose a version to be compared.
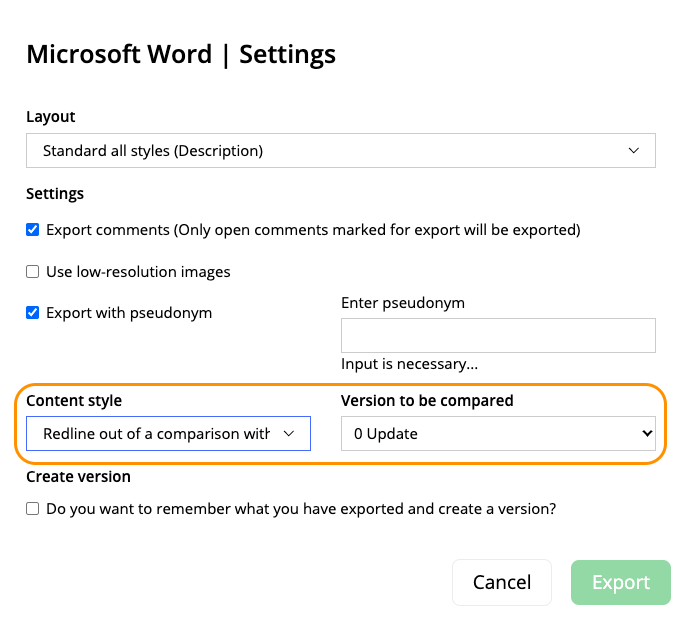
Content style "Redline out of a comparison with a version" highlighted
In Word, you will have an outlook of the document with added parts highlighted with red color and opened mark-up area, where information about deleted parts appears.
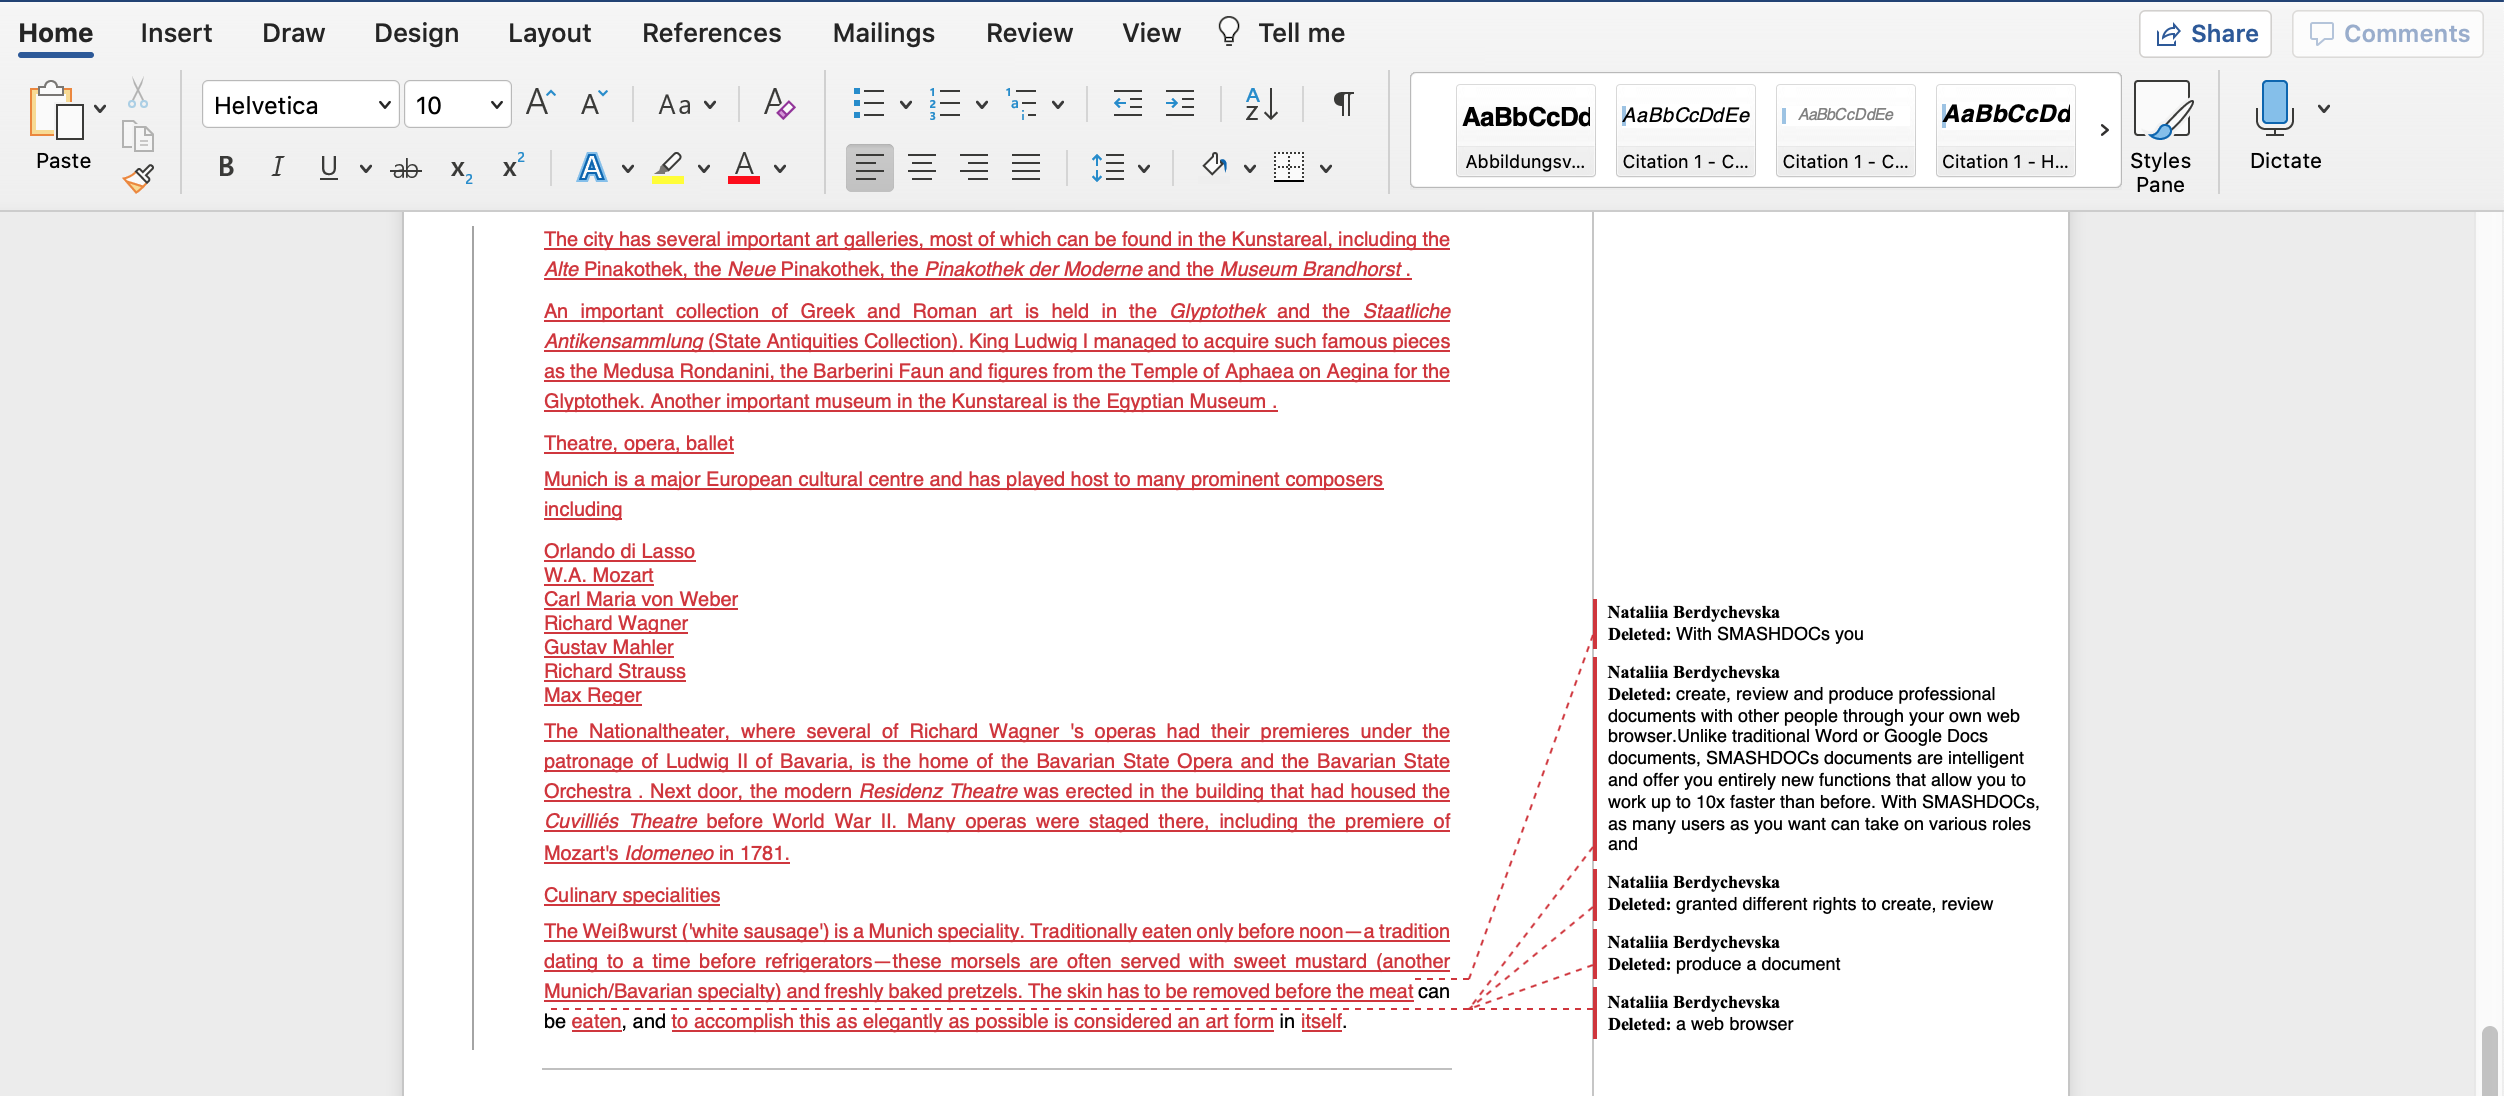
The outlook of the document with content style "Redline out of a comparison with a version"
Content changes in tables, images and equations are also highlighted while exporting document choosing the content style "Redline out of a comparison with a version". For example, when you insert a table in the document, then create a version and after that, make some changes in content of the table - in the exported Word file with content style "Redline out of a comparison with a version" all positions with changes in the table will be marked.
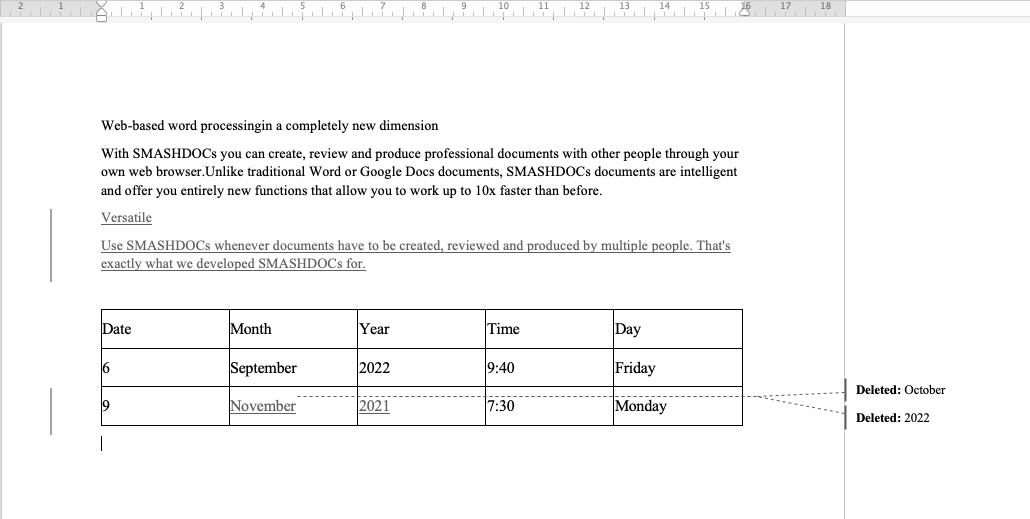
Highlighted changes in the table in Word file exported using the content style "Redline out of a comparison with a version"
8.1.5Creating a version during the WORD document export
When you need to create a version to remember what you have exported, you need to tick the corresponding line in the modal window.

"Create version" option highlighted
After you do this, you will get the lines where you have to insert required version details. Then export your document and in the editor you will see created version in the list of your versions.

Created version during the export highlighted
8.2Exporting as SDOX file
SMASHDOCs documents can also be exported in the form of a SDOX file, which is a unique SMASHDOCs file format. Also, in this case, it does not matter whether the document is in draft or review mode.
The export function can be found in the "Show document options" menu (see Image 316). In the appeared dialog window choose the SDOX format for exporting.
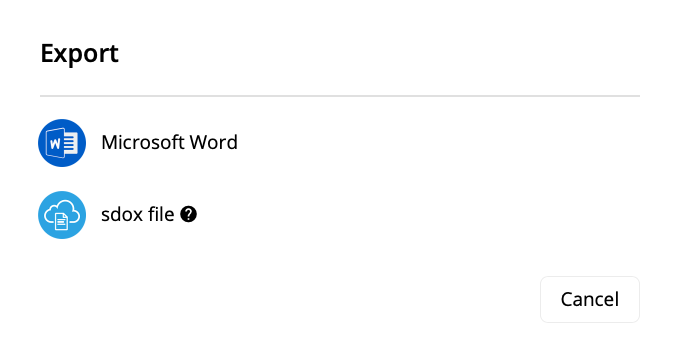
Export as sdox file highlighted
You can also use a shortcut (Ctrl + E) for Windows / (COMMAND + E) for Mac.
If your document is in draft mode, exporting it as SDOX file will not include component history.
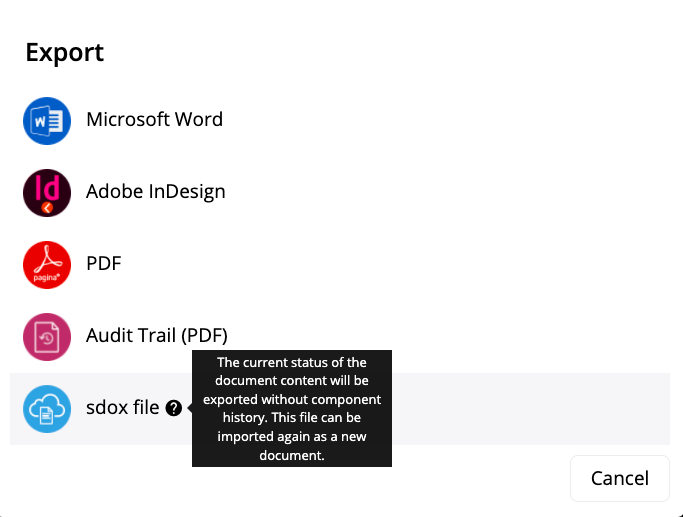
Exporting draft document as sdox file
However, if your draft document contains comments that were marked for export, you can activate option "Export comments" when exporting your document as SDOX file.
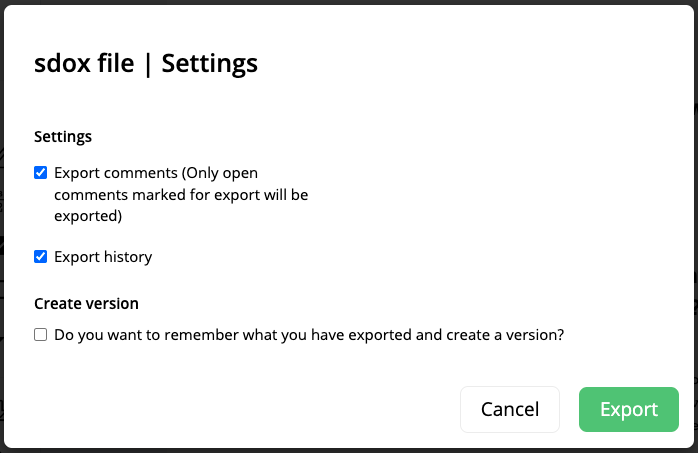
Option for export comments and history highlighted in the export of sdox file
You can also create a version of your document before the export. For that tick the line "Do you want to remember what you have exported and create a version?" (see Image 332). After that there appear lines where you have to insert required information about a created version.
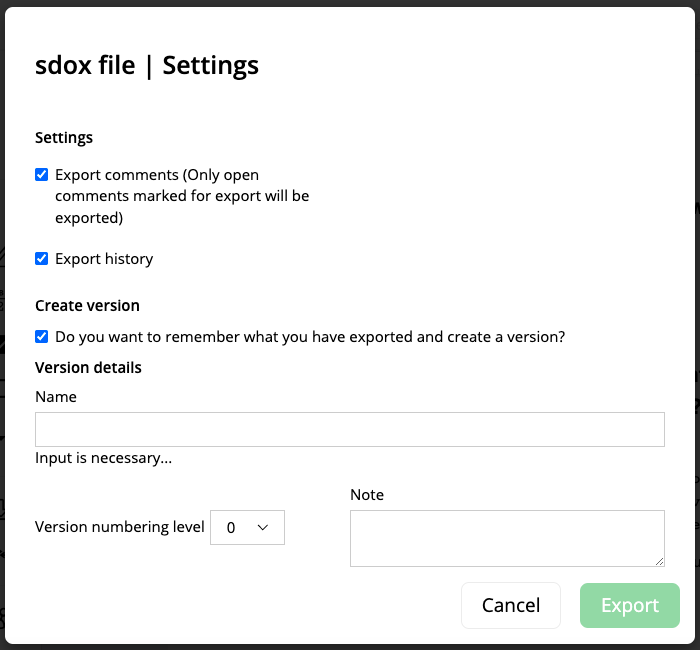
Version details highlighted
If your document is in the review mode, meaning you have activated the tracking changes mode or shared the document with other users, the export of such a document as the SDOX file will enable both options - export of comments and history.
The exported file can be imported in SMASHDOCs again as a new document.
8.3Exporting as HTML file
SMASHDOCs documents can also be issued as HTML pages. To export your file as HTML page you need to open document options on the left side, click "Export" (see Image 316) and then select HTML format in the export menu.

HTML format for export
Then choose the way how you would like to export your file:
●as URL;
●as Zip archive.
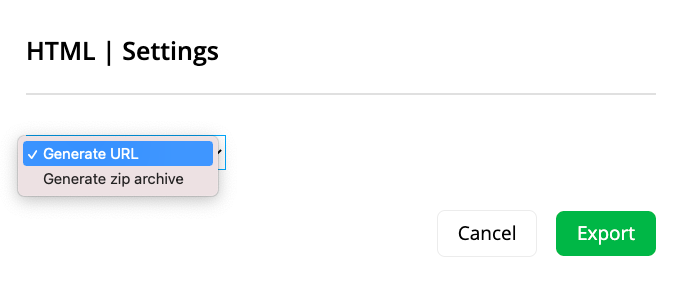
HTML settings
If you select the option "Generate zip archive", your file will be exported as any other exported files. In case you choose "Generate URL", the created link will be kept in URLs list, which you can find at the top right corner of the page.
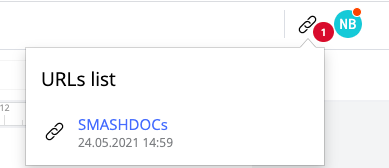
URLs list highlighted
As soon as you click this link, it will be opened as a separate tab in browser. The exported document will look like a web-page.
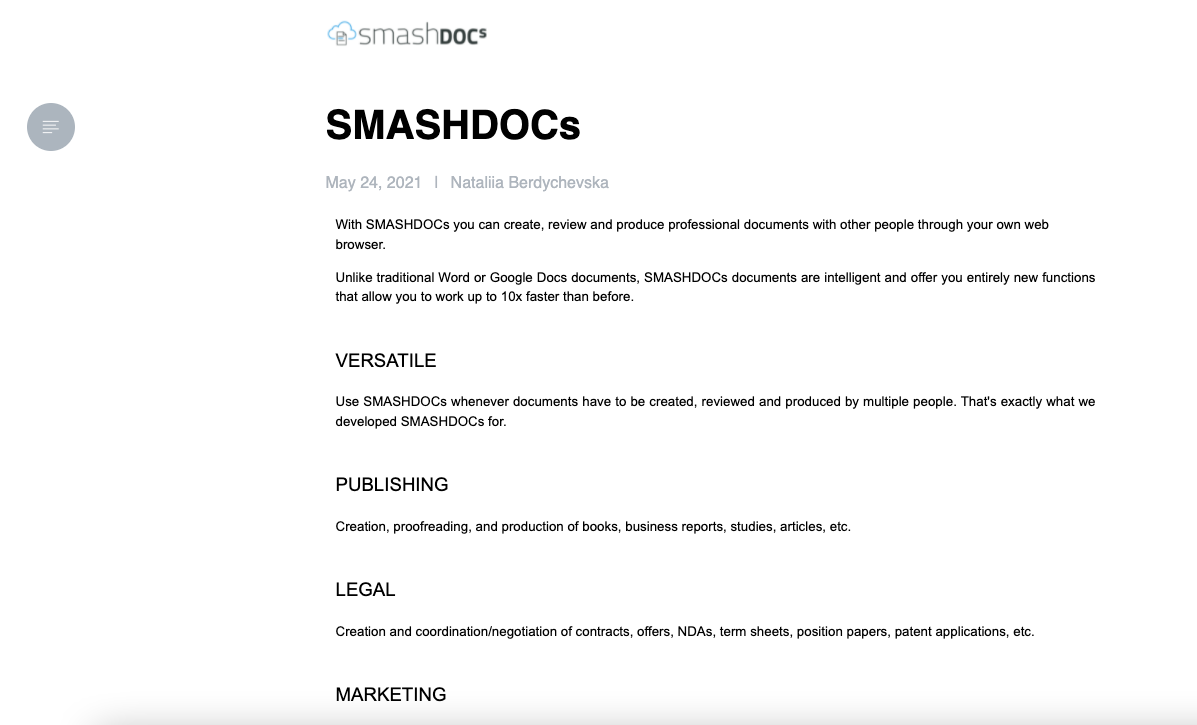
Opened URL of an exported document in HTML format
8.4Exporting file as PDF paginamedia (xpub-suite)
You can export your SMASHDOCs files in PDF, as well. For that choose an option "Export" in the left toolbar (see Image 316) and then a corresponding option in the list of available ones for exporting.
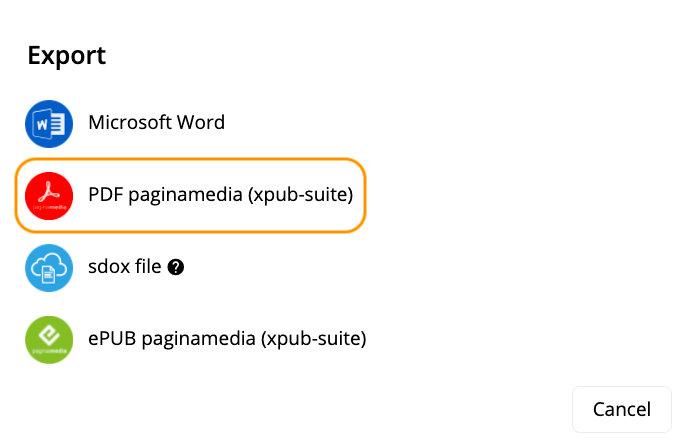
Export in PDF paginamedia (xpub-suite)
After you have selected the PDF paginamedia (xpub-suite) option, you will have to:
●choose the template for the exported document, in case several templates have been set in your system;
●select the PDF format, that you need your exported document to look like.
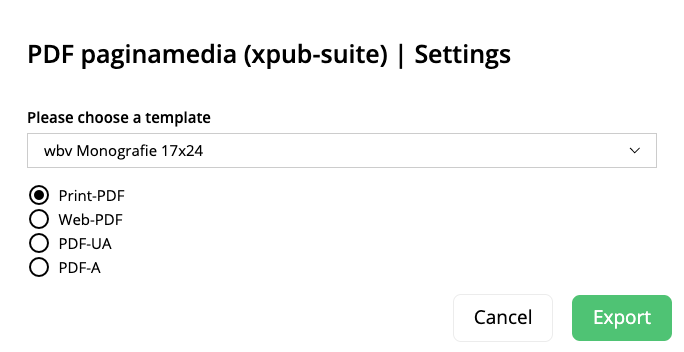
The field to choose a PDF format
Available PDF formats are displayed in the exporting menu with radio buttons. You can choose among the following formats:
●Print-PDF;
●Web-PDF;
●PDF-UA;
●PDF-A.
It is important to mention, that depending on the number of set PDF and Word export templates in your environment, the outlook of exporting modal window, as well as possibilities to choose a template differ. So, in case there are more than one PDF template, you will see the upper dropdown menu "Please choose a template" (see Image 339).
If there have been set more than 1 Word template together with PDF templates, you will get one more dropdown menu "Layout", where you can choose an additional template.
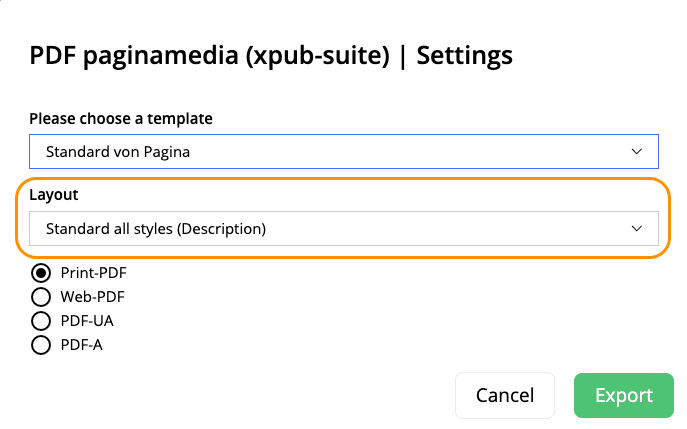
Dropdown menu "Layout" highlighted
When there is only one PDF template and more than one Word templates - only "Layout" dropdown appears, which is for Word templates.
When there are more than one PDF templates and only one Word template - only dropdown "Please choose a template" appears, which is for PDF templates.
If there are only two templates: one PDF and one Word, then only the list of PDF formats with radio buttons will be shown.

The list of formats with radio buttons displayed
Having chosen a required template and format, click "Export" and the exporting process will start.
As soon as the exporting process is completed, you can find your PDF-file in the list of exported documents, click on it and start the downloading process.
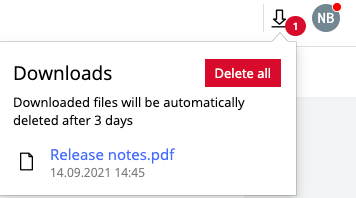
The list of exported files
Note: text of the document should be formatted with any paragraph decorator for headings, for it to be displayed in the exported PDF file.
8.5Exporting as ePUB paginamedia (xpub-suite)
You can also export documents in the ePUB format. To do that, open the exporting menu and select there corresponding format "ePUB paginamedia (xpub-suite)".
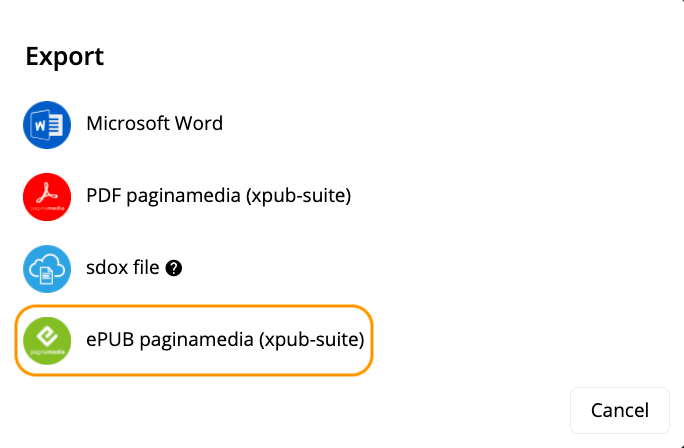
Option "ePUB paginamedia (xpub-suite)" highlighted
There are two ways to proceed:
●choose the layout for the exported document, in case several templates have been set in your system;
●start exporting immediately, in case there has been set only one PDF and one Word template for ePUB export.
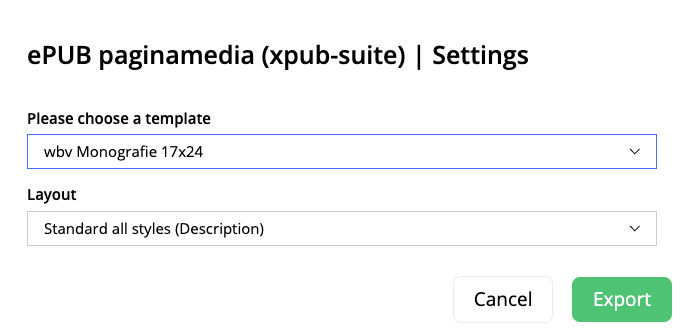
Choosing a layout for ePUB exporting
The principle of displaying the export modal window for ePUB is the same, as described in the previous chapter for PDF paginamedia (xpub-suite) export, see 8.4. Note: unlike the PDF export, no layouts with radio buttons are available in the ePUB export.
Having chosen a template, click "Export" to start the exporting process. As soon as the process finishes, the exported ePUB file will appear in the lists of downloads.
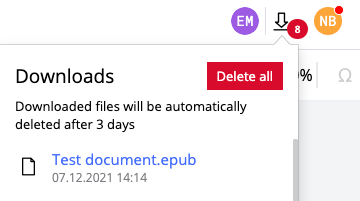
ePUB file in the list of downloads displayed
8.6Exporting as PDF via Publishing API
One more export type is available that allows to get documents as PDF files - PDF via Publishing API. This export type is available, provided required templates are set.
So, to start exporting document as PDF via Publishing API, click the "Export" option in the left toolbar and choose there demanded export type.
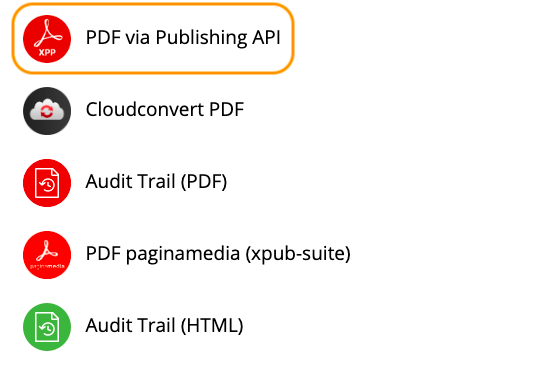
The option "PDF via Publishing API" highlighted
After, modal dialog opens, where you have to confirm or cancel the process.

Buttons to confirm or to cancel the exporting process
As soon as a PDF file is ready, it will appear in the list of downloads in the upper right corner (see Image 342).
8.7Exporting as PDF SRZ
There is also a type of PDF export by SRZ. To export documents in this type of PDF, open the export modal dialog and select the option "PDF SRZ".
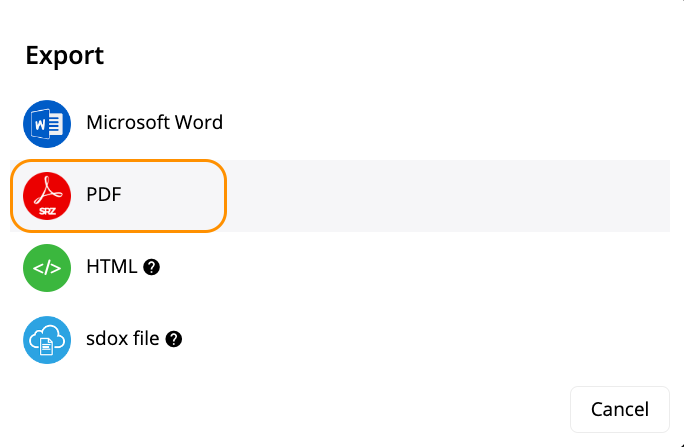
Option "PDF SRZ" highlighted
As soon as you have chosen the option, modal window opens where you have to choose a template and a workflow for the exported PDF file.
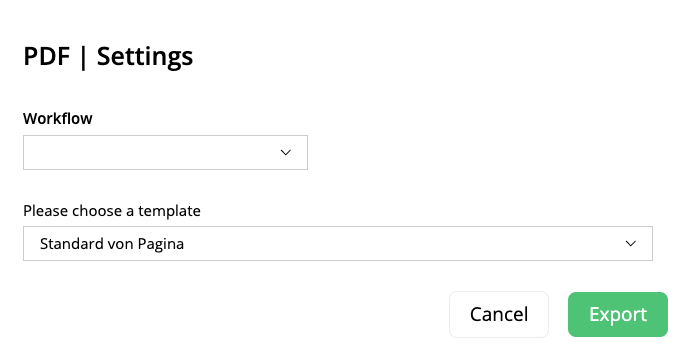
Modal window with settings for PDF export through SRZ
If you leave the field "Workflow" empty, your document will be exported on the basis of a selected template only. However, when you choose workflow, there will appear an option to choose a theme.
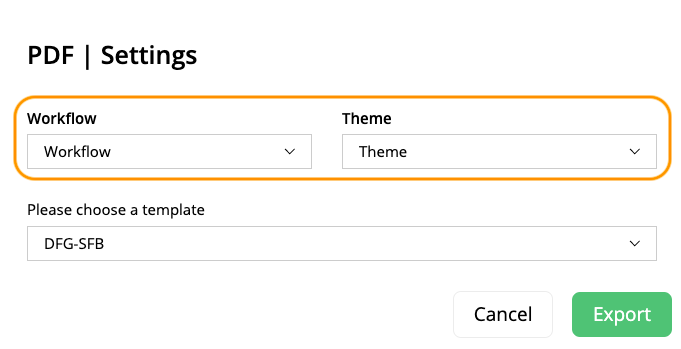
Fields to choose workflow and theme before exporting a document to PDF
As all required points have been selected, click "Export" and your file will be successfully exported in PDF format with the demanded view.
8.8Asynchronous export of files
With the asynchronous export, downloading a file and waiting for download completion does not hinder you from continuing to work on your document. You can start editing your file shortly after clicking on the document export button.
As soon as you have clicked the export button, a new "download icon" will appear near your avatar showcasing that the downloading process has been started. The download icon notifies you when your download will be completed and keeps downloaded files available in the list of downloads for a specific number of days. This number is set individually per system and by default is three days. Within this period, you can still download any of those files.
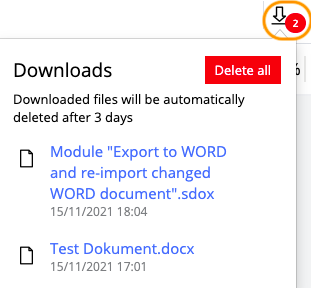
Download icon and list of download files highlighted
As soon as there is an ongoing download process, a spinner and a respective message are being displayed near the download icon. The spinner will keep spinning until the download process has been fully completed.
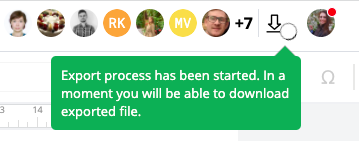
Message about the start of export process highlighted
In contrast, if the download of some files failed, you can also track it down in the list of downloaded files.
Therefore, after clicking on the download icon, the list of downloads will be displayed containing all
●successfully downloaded files,
●files that are currently being downloaded and
●files whose download has failed
You can cancel an ongoing downloading process in the list of downloaded files by hovering the mouse over an entry and clicking the "delete" icon. After that, the file to be downloaded will no longer be displayed in the list.
You can download a successfully exported file by simply clicking on the file name.
You can delete a file from the list of downloads both
1.manually
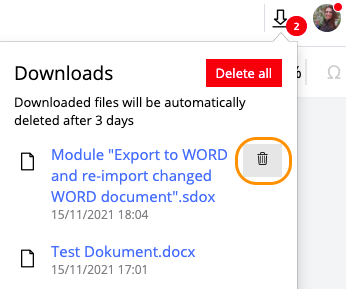
Manual deletion of files highlighted
2.via "Delete all" button or
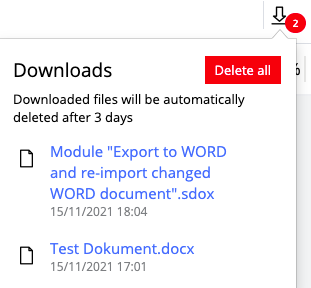
Button "Delete all" highlighted
3.automatically, meaning you have to wait up for the set period of days till your files will be deleted automatically.
Once some files are deleted from the list of downloads, the number near the download icon will be updated accordingly. And once there are no more entries in the list after file deletion, the download icon will disappear.
9System update
As soon as new version of the SMASHDOCs system is released, it is necessary to update all SMASHDOCs workspaces for users to have improved system performance and get new impemented features. However, during the updating process the system is not available up to 30 minutes, so it is highly important to inform all users when the update of their workspaces is planned in order to avoid problems with saving changes in documents, general functioning of frequently used SMASHDOCs features etc.
All users will be notified about date and time of system update with corresponding messages. Approximately 3-5 minutes before update you will get the first yellow message with exact time of update.

Notification 3-5 minutes before update
1 minute before you will get a red notification with a countdown.
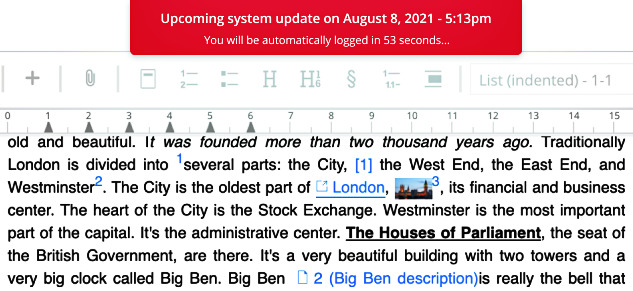
Notification with countdown
As soon as the indicated time has come, you will be automatically logged out and you will see the page with the process of update completion. After update has been finished, you will be turned back to the login page and will be able to enter your account and proceed editing documents.
10Closing confirmation modal
Every time you close the tab or reload the page while editing a document in SMASHDOCs, the closing confirmation window appears for you not to lose important changes in the document.
Closing confirmation modal highlighted
So, this modal is shown every time user reloads or closes the page:
●while editing a document in review mode, where there are review components with unsaved changes;
●on the step of generating new document via "Projects" option;
●while creating a new document via "Start with a template" option;
●during creating an announcement;
●while making changes in user settings;
●during sending an invitation to the document;
●while editing images/tables/equations/PDFs;
●while adding inline elements (cross-reference, inline image, inline file, index, inline equation, citation);
●on the step with inserting document metadata during creating or importing a document.
Note: works in Chrome and Safari browsers.