Mobile app manual (iOS / Android)
1General
Working with documents in SMASHDOCs systems is available for users in mobile app with either Android or iOS operation systems. In this manual you will be able to find a step-by-step guide, how to edit your documents right from your smartphone and where to find all necessary options for this in SMASHDOCs mobile app.
2Login to the system
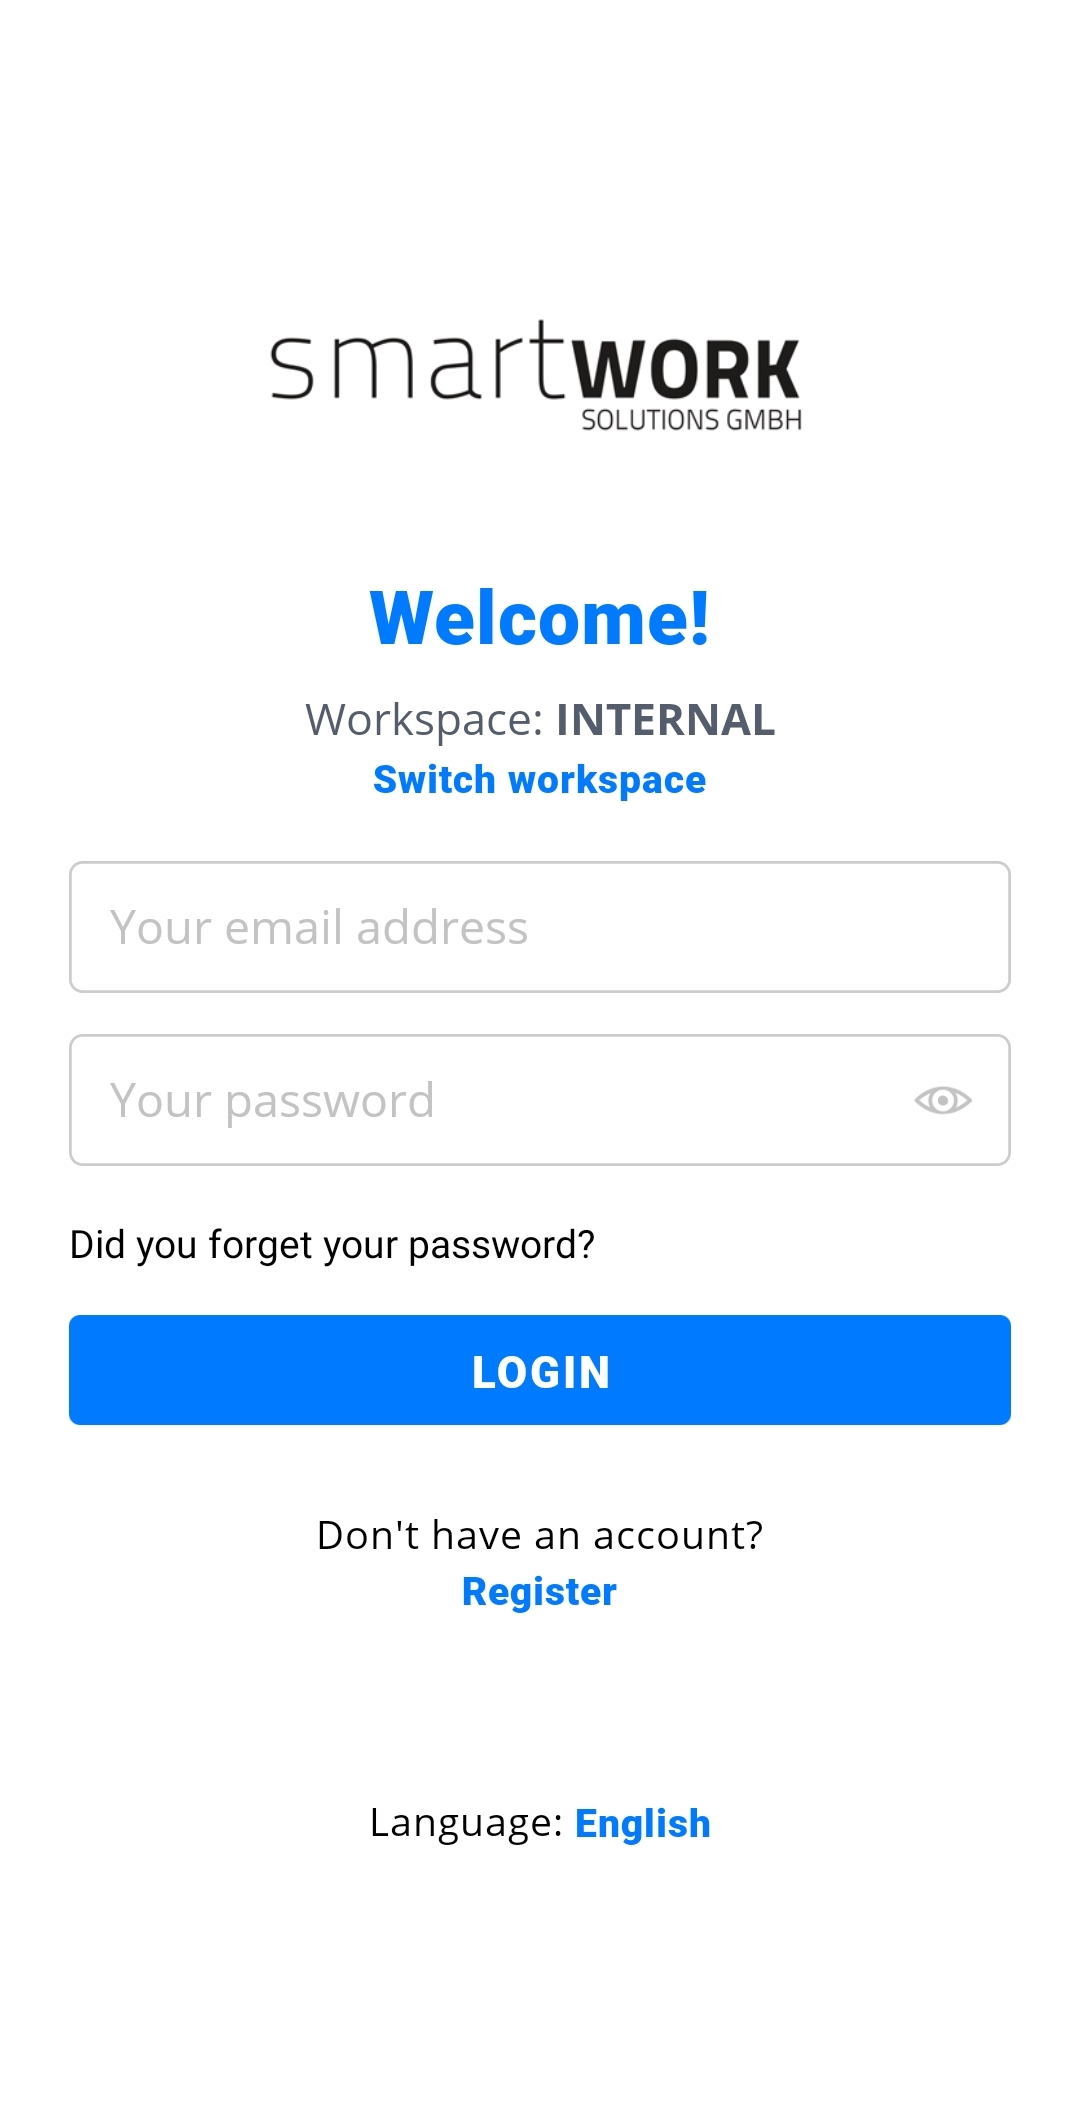
First of all, to start working with SMASHDOCs mobile app you have to install it in your smartphone. For those whose operation system is Android, it is possible to download the app from Play Market; those who work with iOS can download it from App Store. After successful installation you will have to log into the system or register, if you do not have an account yet. The first step is to insert URL of your SMASHDOCs workspace.
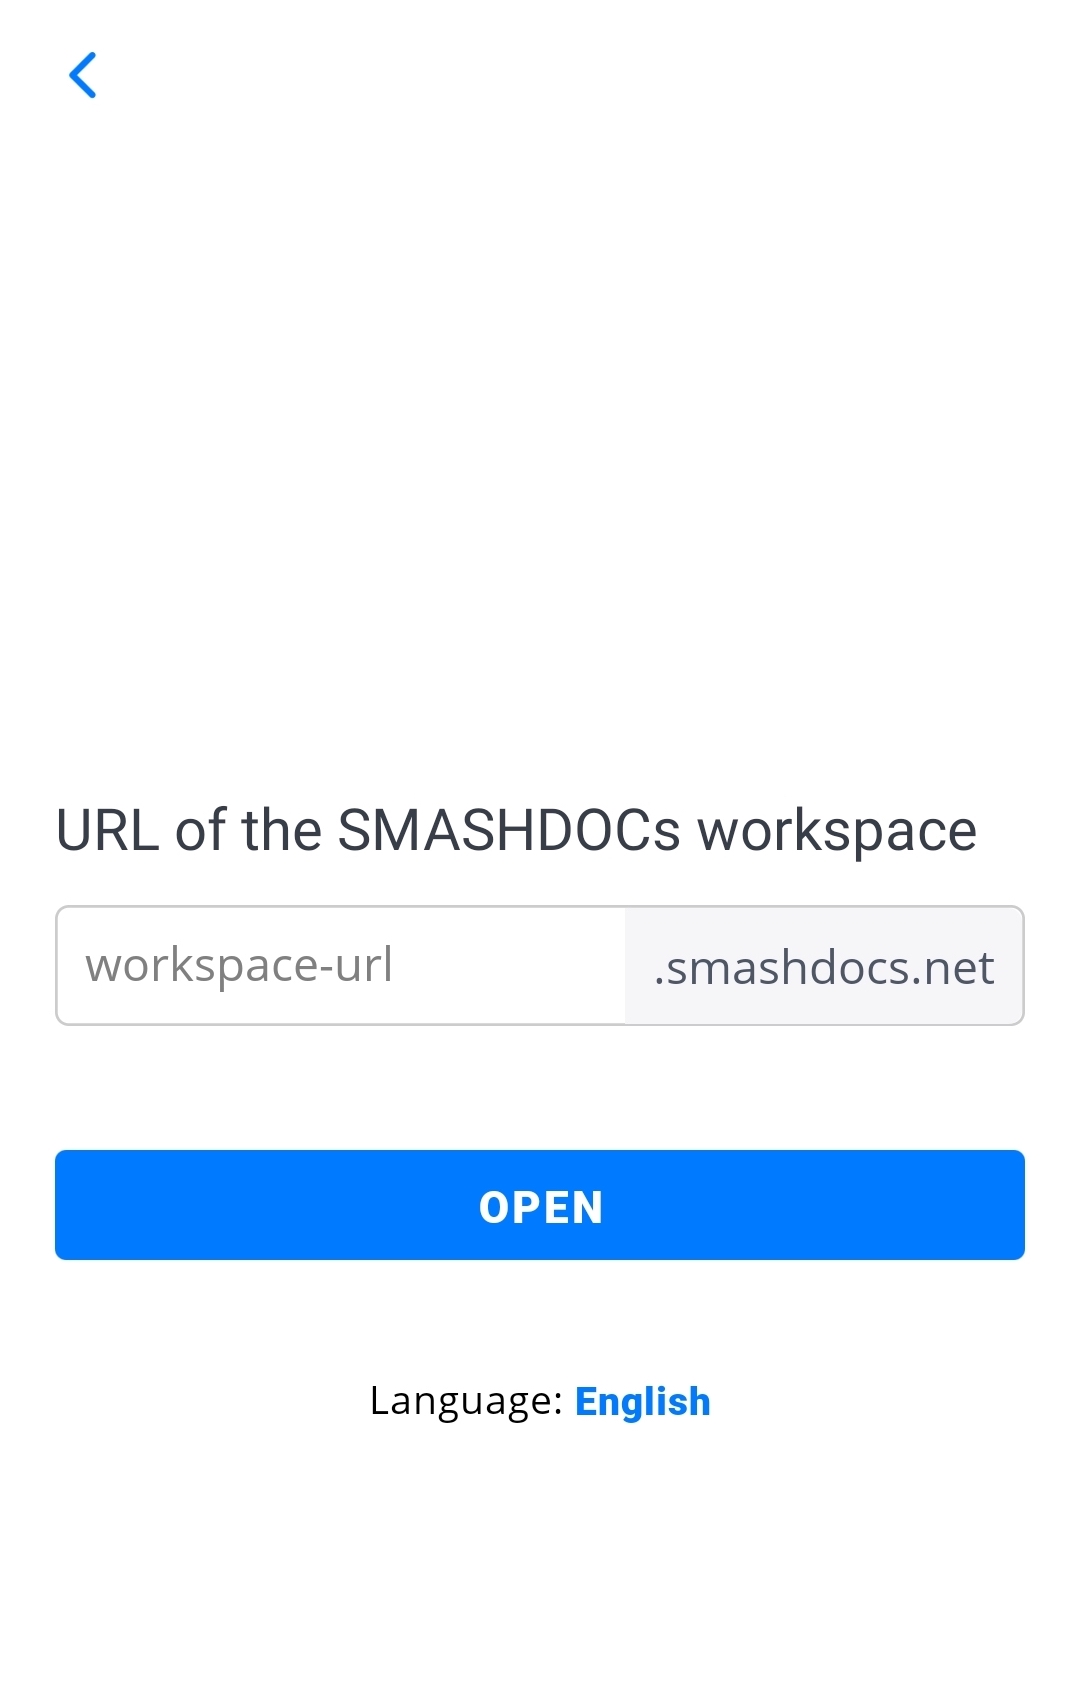
URL of the SMASHDOCs workspace highlighted
Then tap 'Open', insert your e-mail and password and you will be logged into your system. Before tapping 'Open' you can select language, which you would like to proceed with. Tap 'Language' and the list of supported languages will appear.
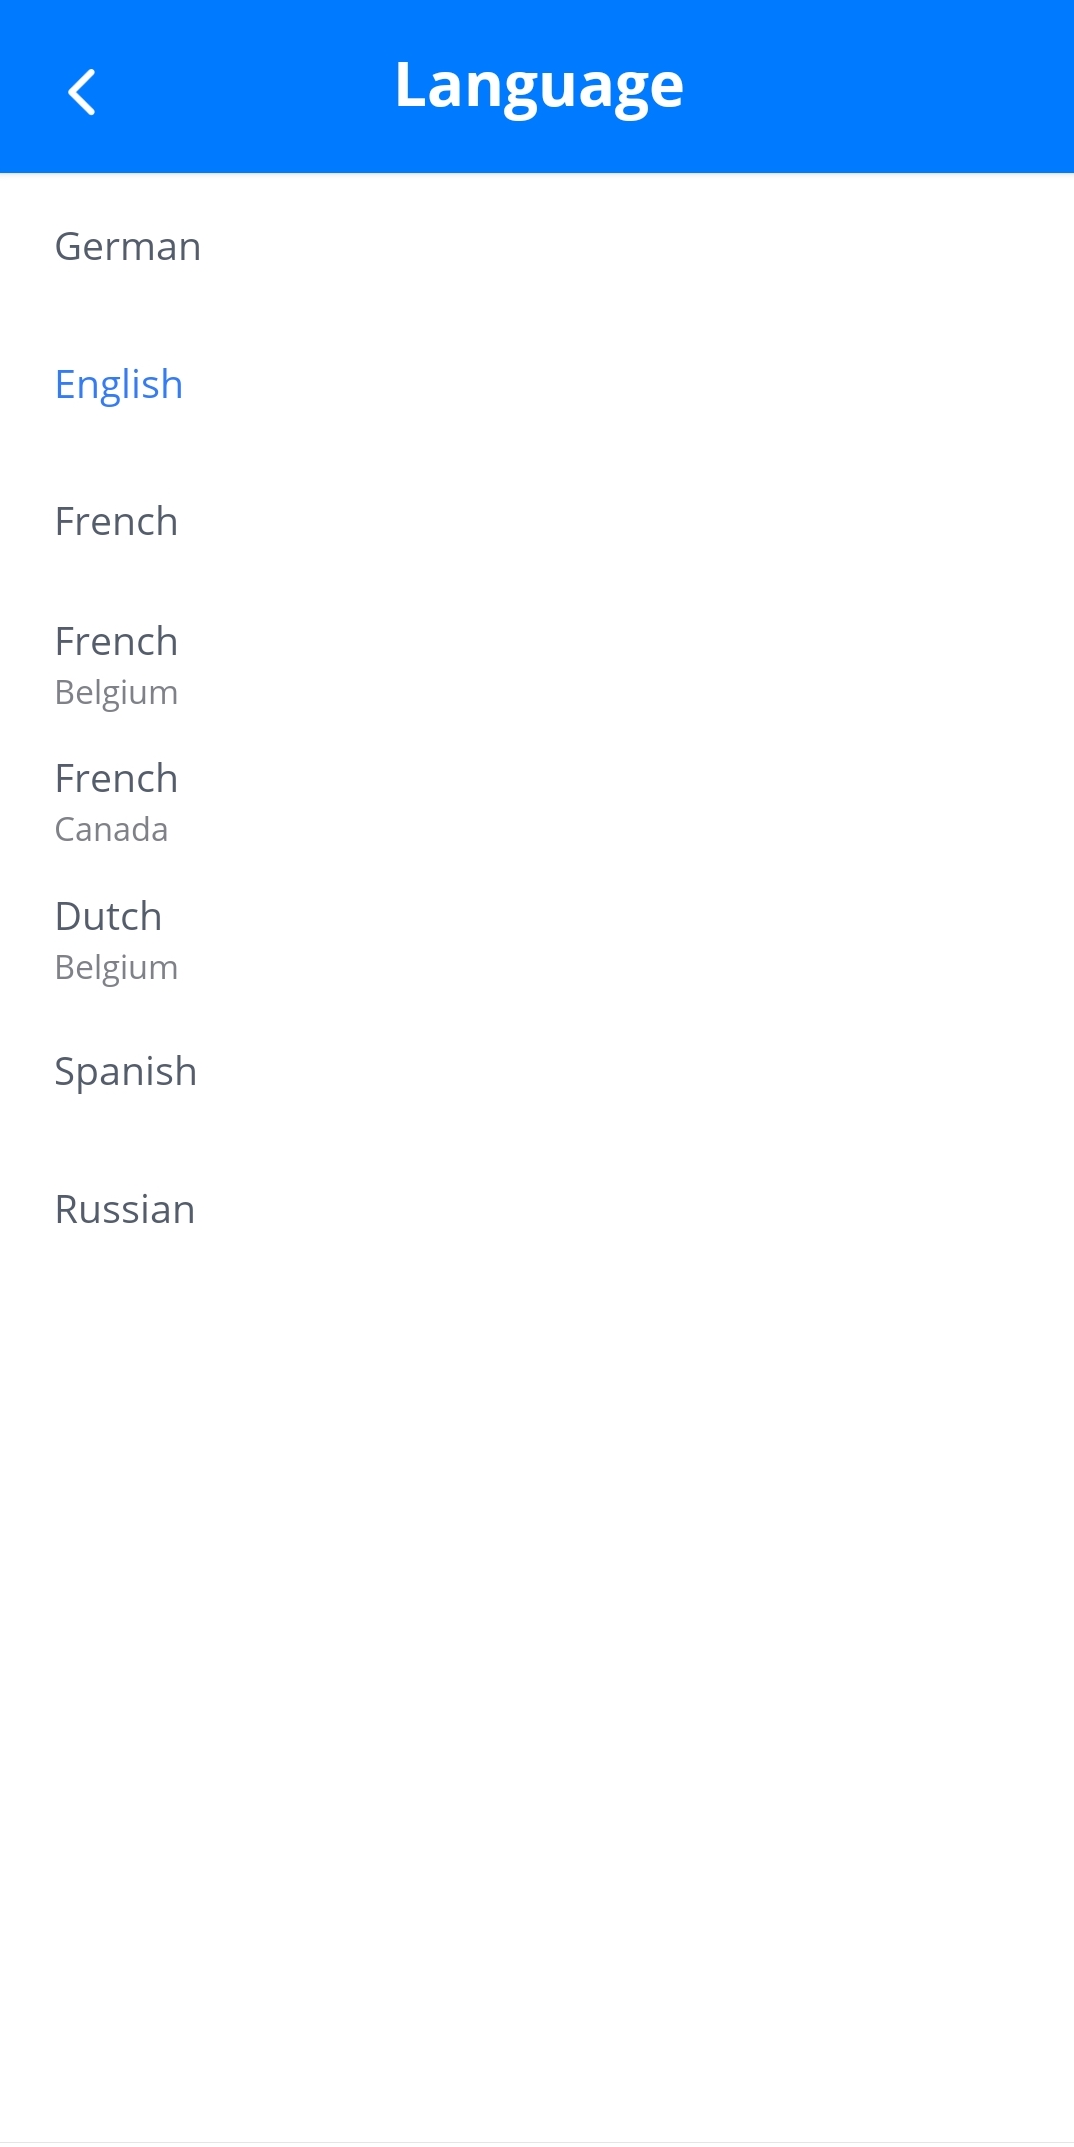
The list of supported languages
In case you do not have an account yet, the first step will be to choose the option 'Register' (see Image 1) and insert all required information (first name, last name, company, e-mail, password).

Create account
After that you will be able to log in.
3Organizing documents
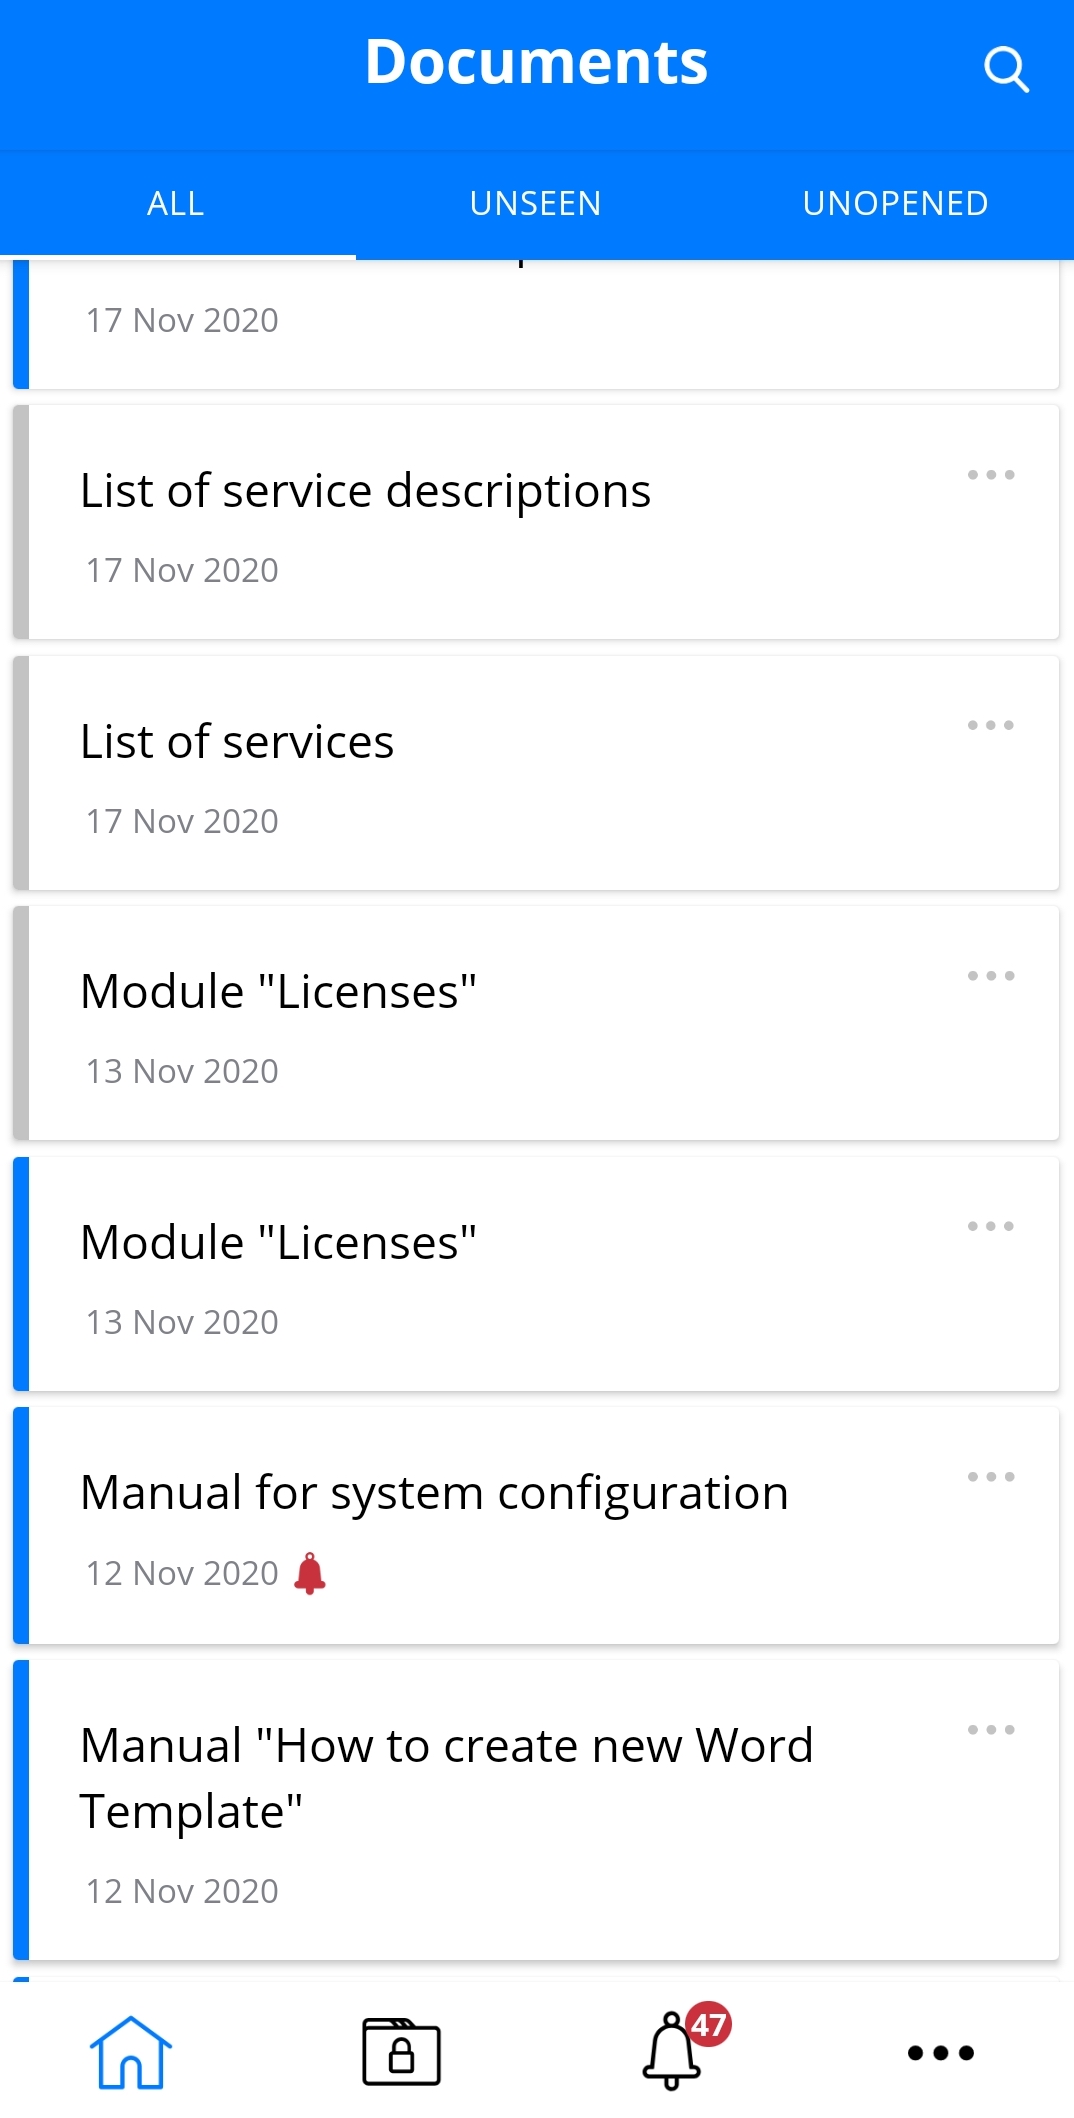
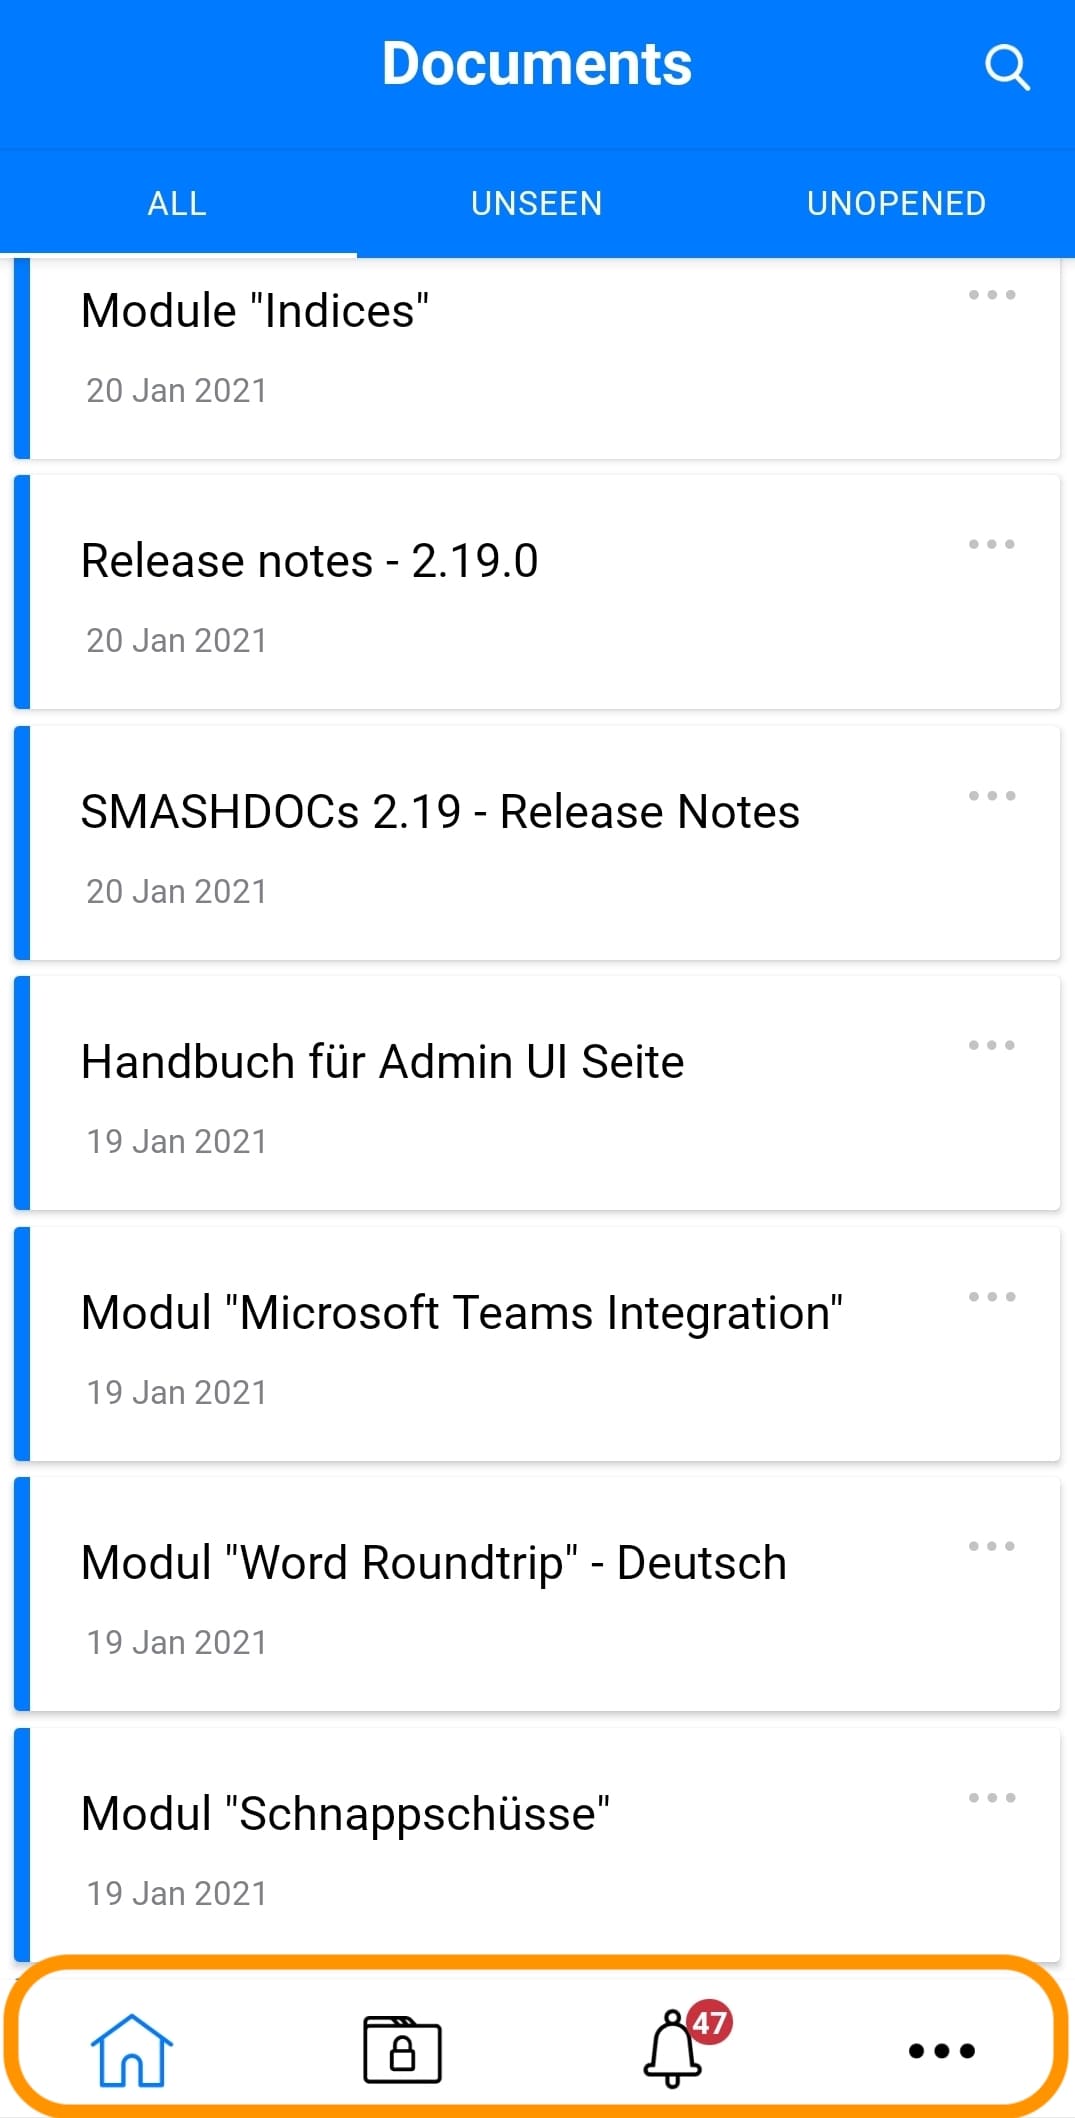
As soon as you log into the system, the list of all your documents appears.

The list of documents highlighted
Documents in the list have such an outlook that in review mode they are shown with a blue vertical line on the left side, in draft mode - with a gray line, unopened - with a blue dot near the date, with unseen changes/conversations - with a red bell icon near the date.
The outlook of documents in the list
At the top of the page apart from all documents, there are also such categories as 'Unseen' and 'Unopened' documents. Choose any of these categories to have clear overview of how many unseen or unopened documents you have. You can also find a field above, where you can search for a document by its title, filename, subtitle and tag (see Image 5).
On the right side of each document in the list there are three dots (see Image 5), by tapping which you can move a document to another folder, mark it as opened (if a document is still unopened), mark all as read (if a document has some unseen changes or/and unseen conversations), duplicate and delete it.
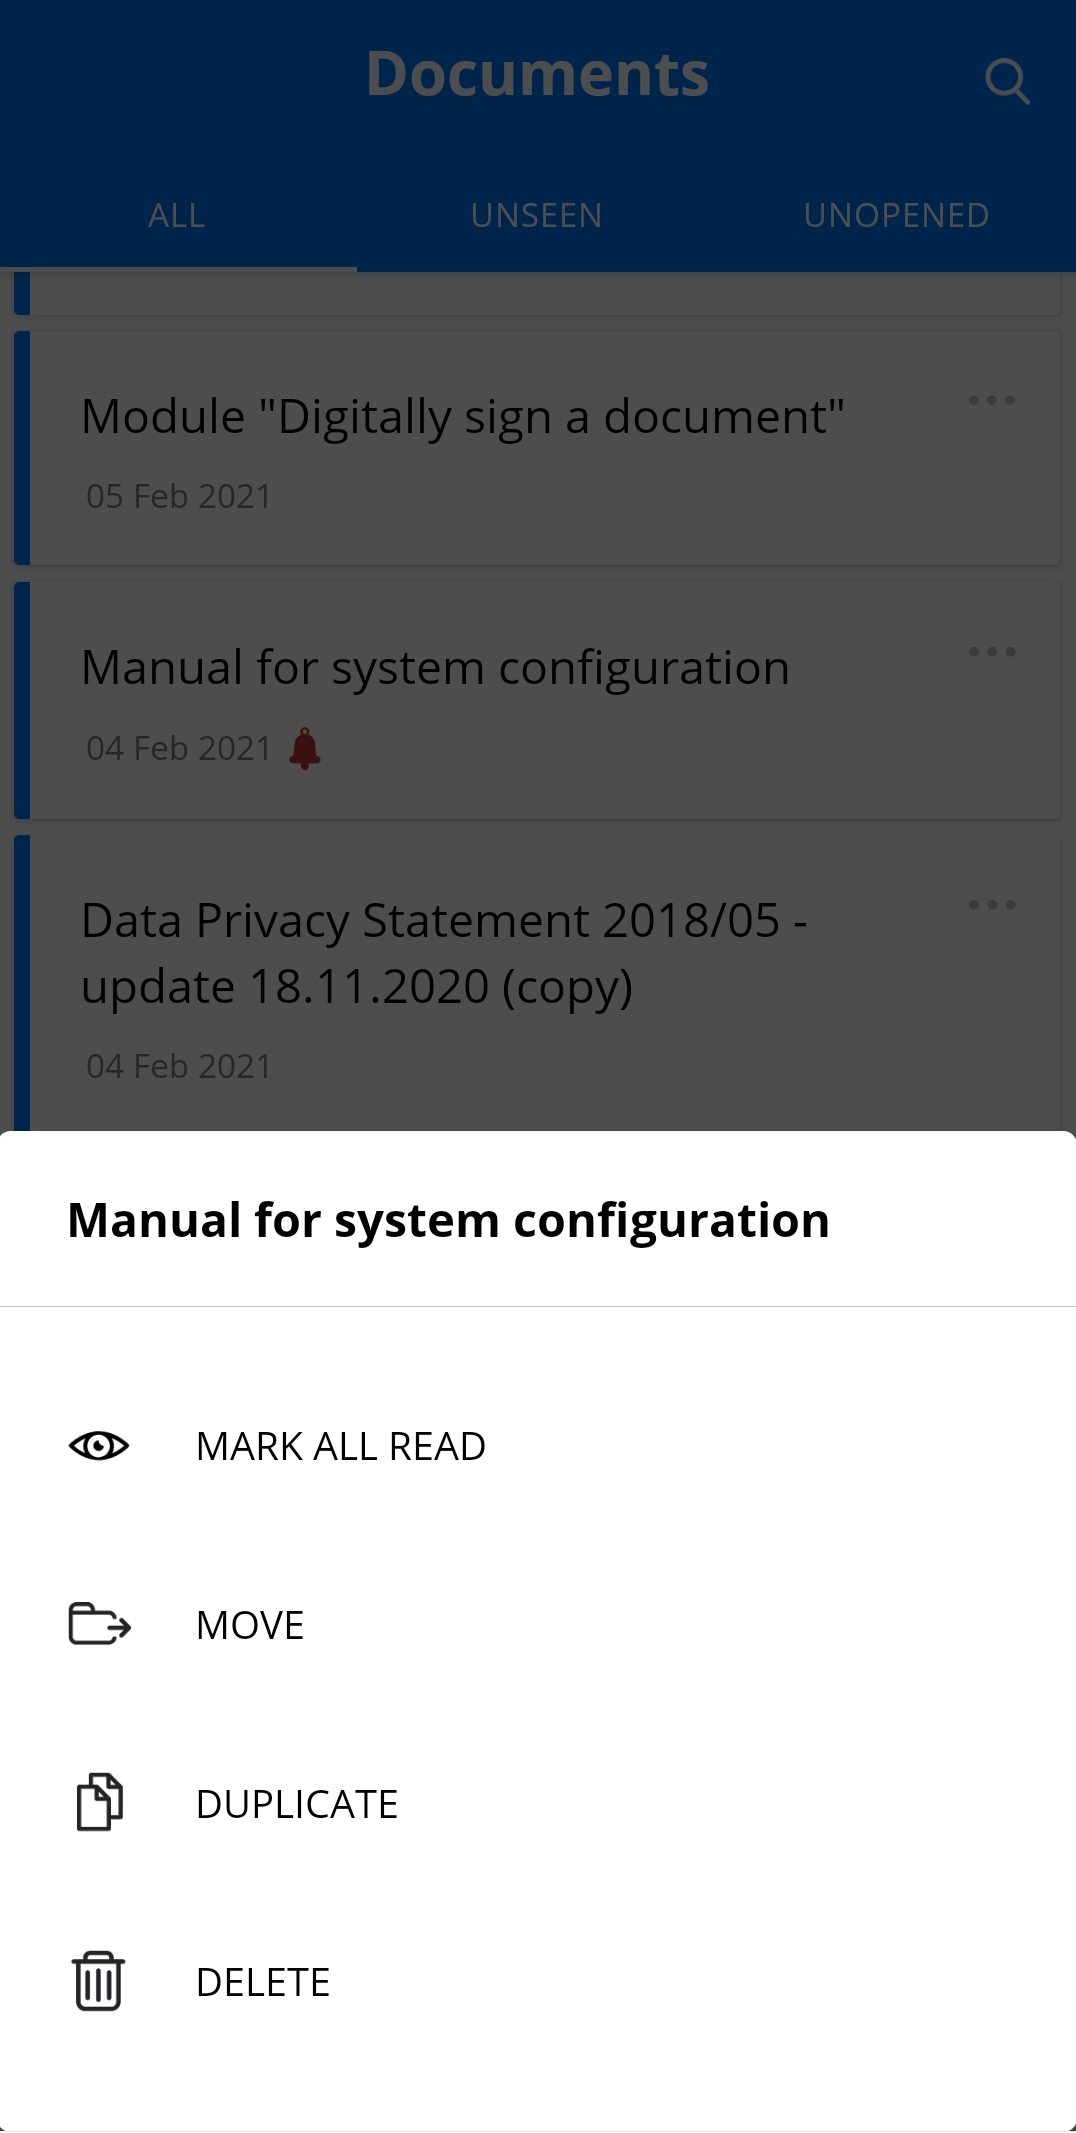
The list of actions to perform with a document
The same options that appear after tapping three dots on the right side of a document you can also find by a long tap on a document.
At the bottom of the page there is the toolbar, where you can find your folders, notification about news in your documents and settings of your account.
Menu at the bottom of the page highlighted
If you select and tap a folder, you will get the list of existing folders, trash where deleted documents are placed and a button to create a new folder.
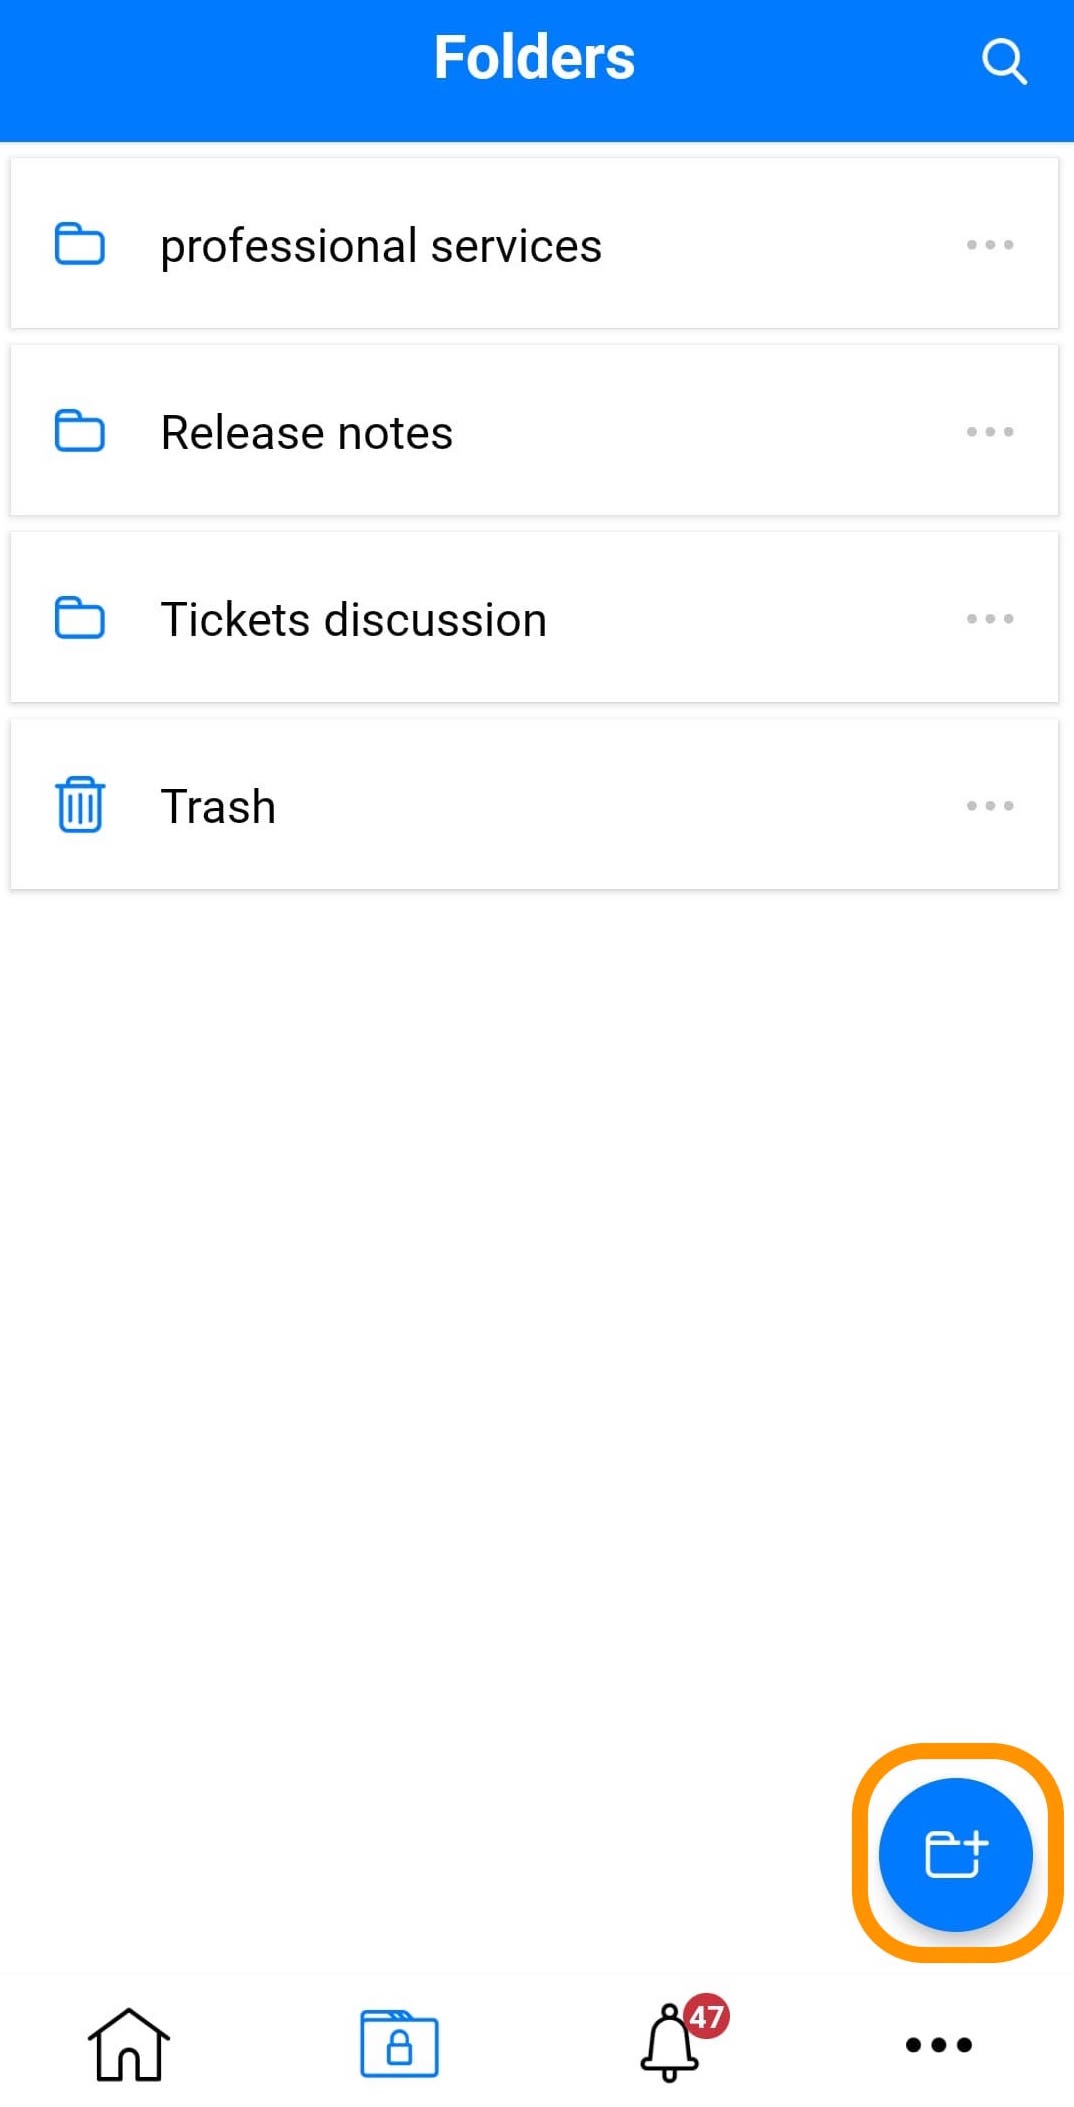
The list of folders and the button to create new folder highlighted
By a long tap on a folder two more options appear - edit and delete a folder.
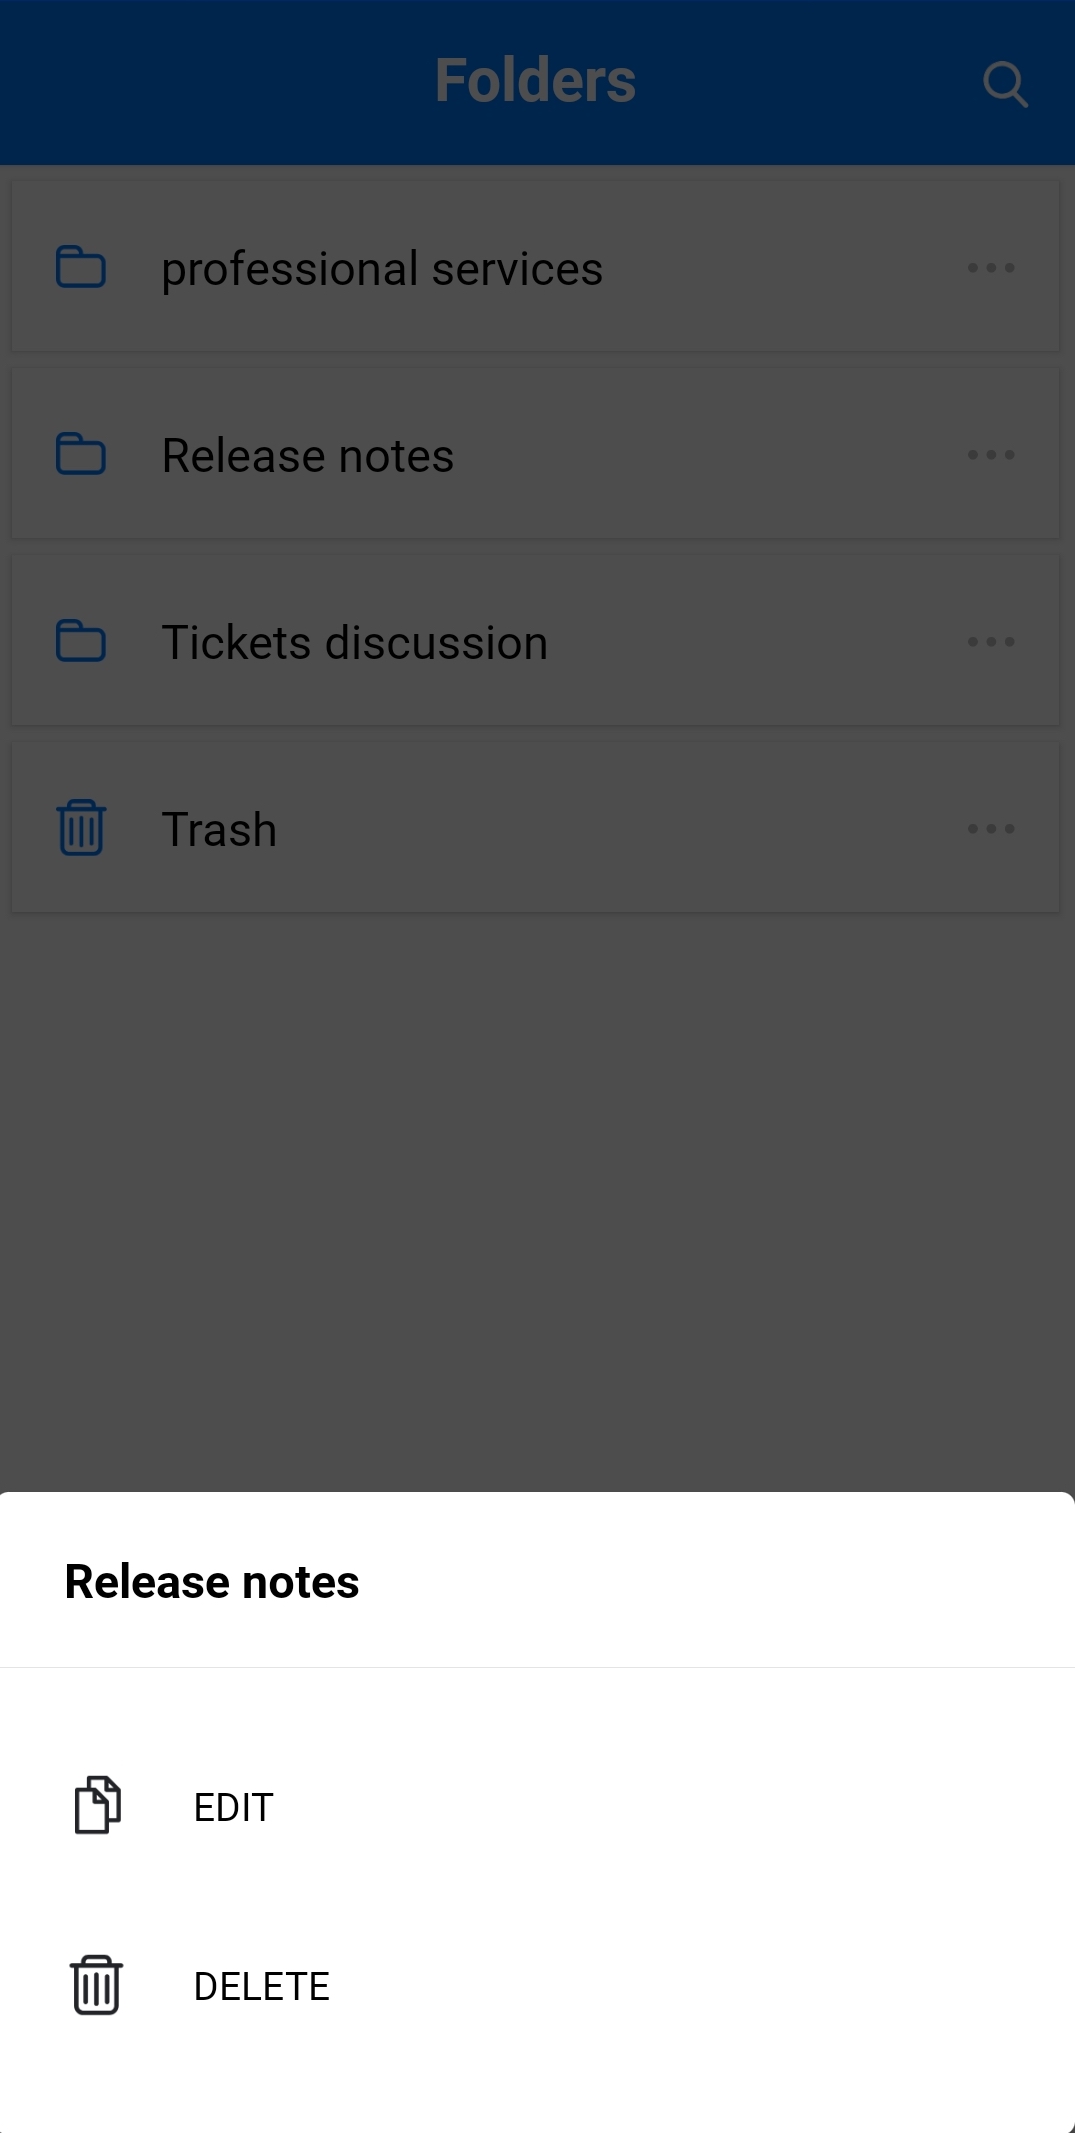
Edit/delete a folder
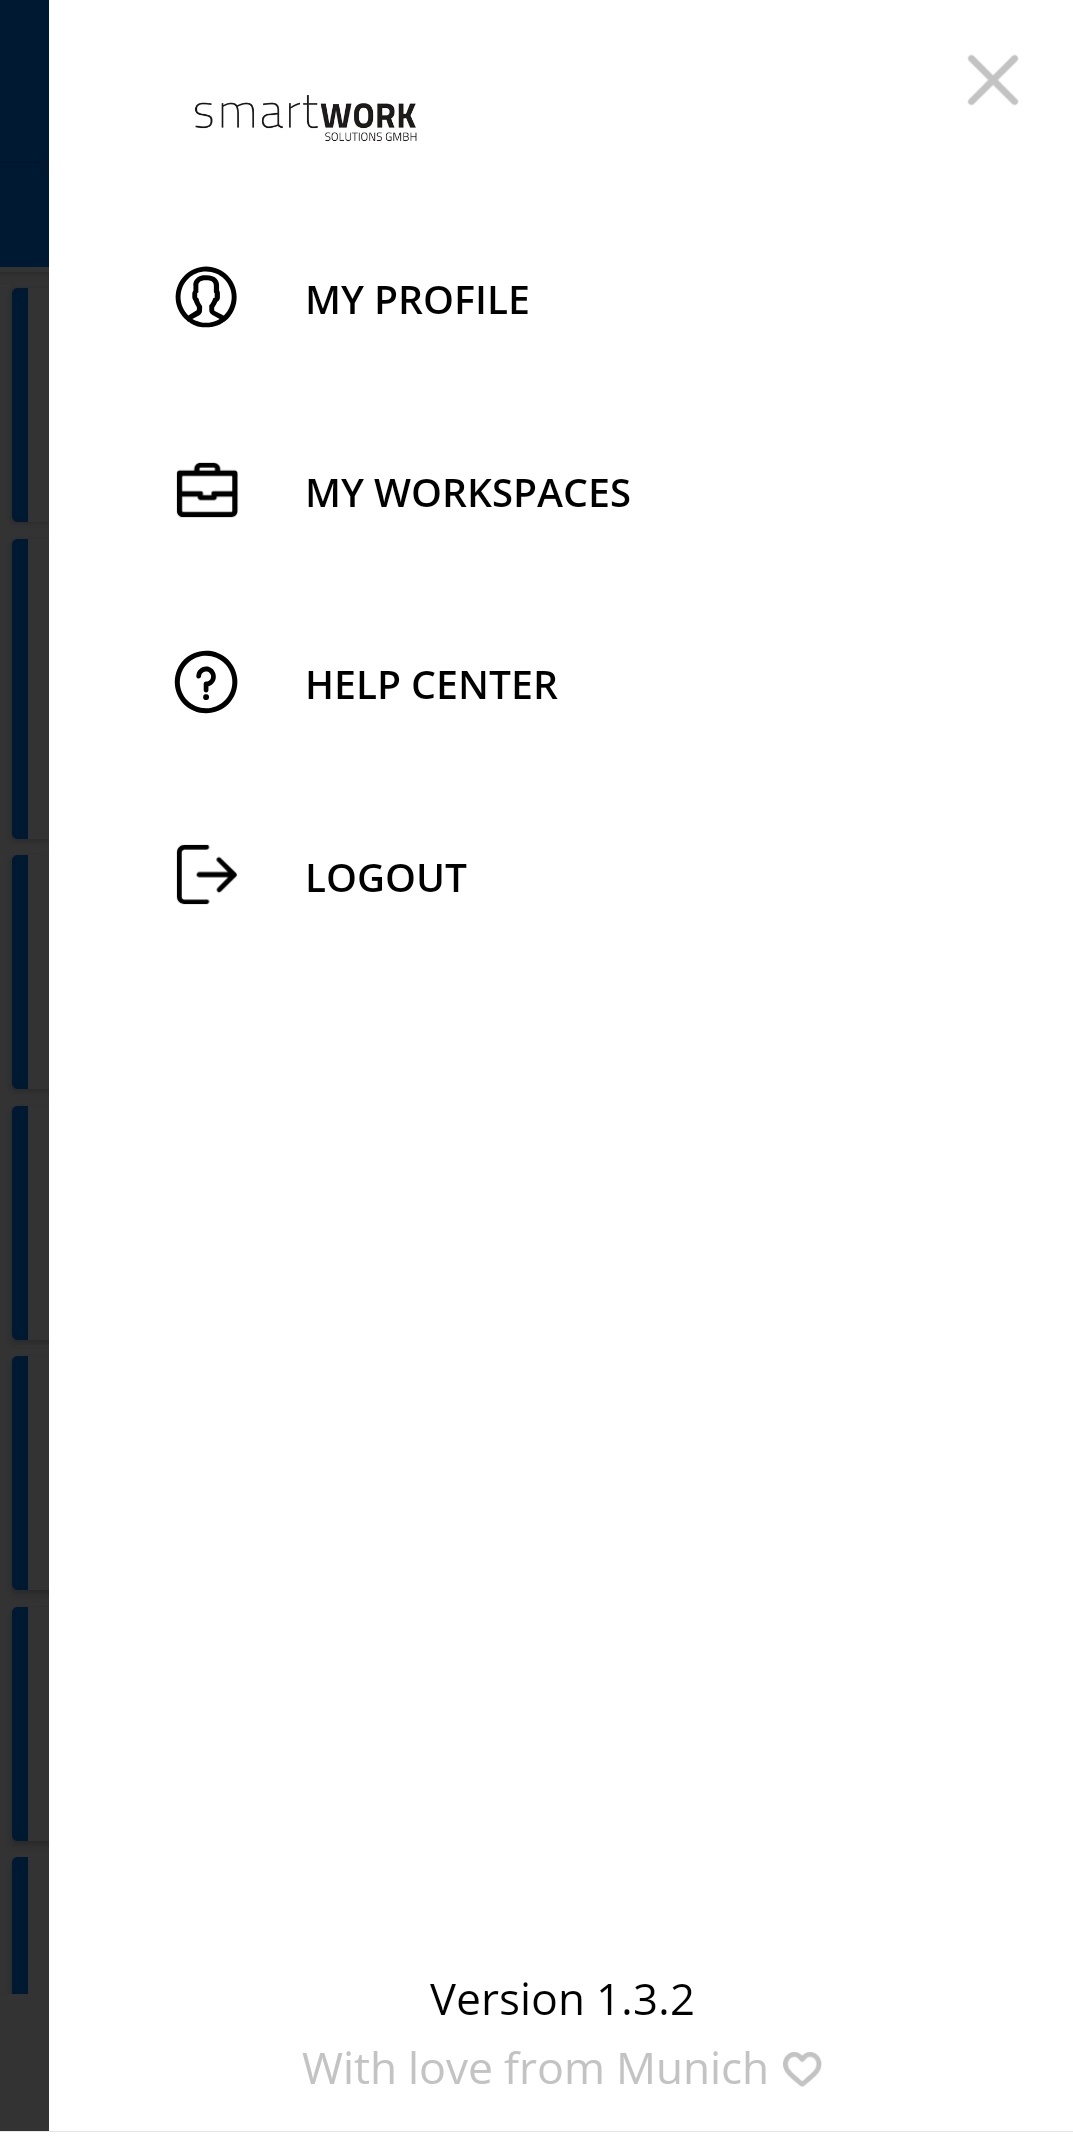
When you press the bell icon, there will appear the list of documents with changes/conversations made by other users, but not seen by you yet. By tapping three dots you will find the information about your profile, workspaces, help center and the option to logout.
Settings of user's profile
You can edit your documents in as many workspaces as you wish in SMASHDOCs mobile app. For that select 'My workspaces' (see Image 10) and you will have an opportunity to add the other system to the list of your workspaces to be able to switch to it quickly and work with documents there.

Adding workspace highlighted
Tap 'Add workspace', then insert URL of the required system, after that - your e-mail and password and you will get the list of documents in this workspace.
Login to the added workspace
After adding several systems you will see them in the group 'My workspaces' and you can switch these workspaces whenever you need. Also, you will be able to see the number of documents with unseen changes/conversations in each of your systems, shown with a red badge on the logo (see Image 11).
4Editing documents
During the work with a document it is necessary for a user to find and apply all options that can help edit a document, as well as to be able to follow various changes made by other users in the document. Now we are going to find out which functions are available in mobile version of SMASHDOCs and where to find them.
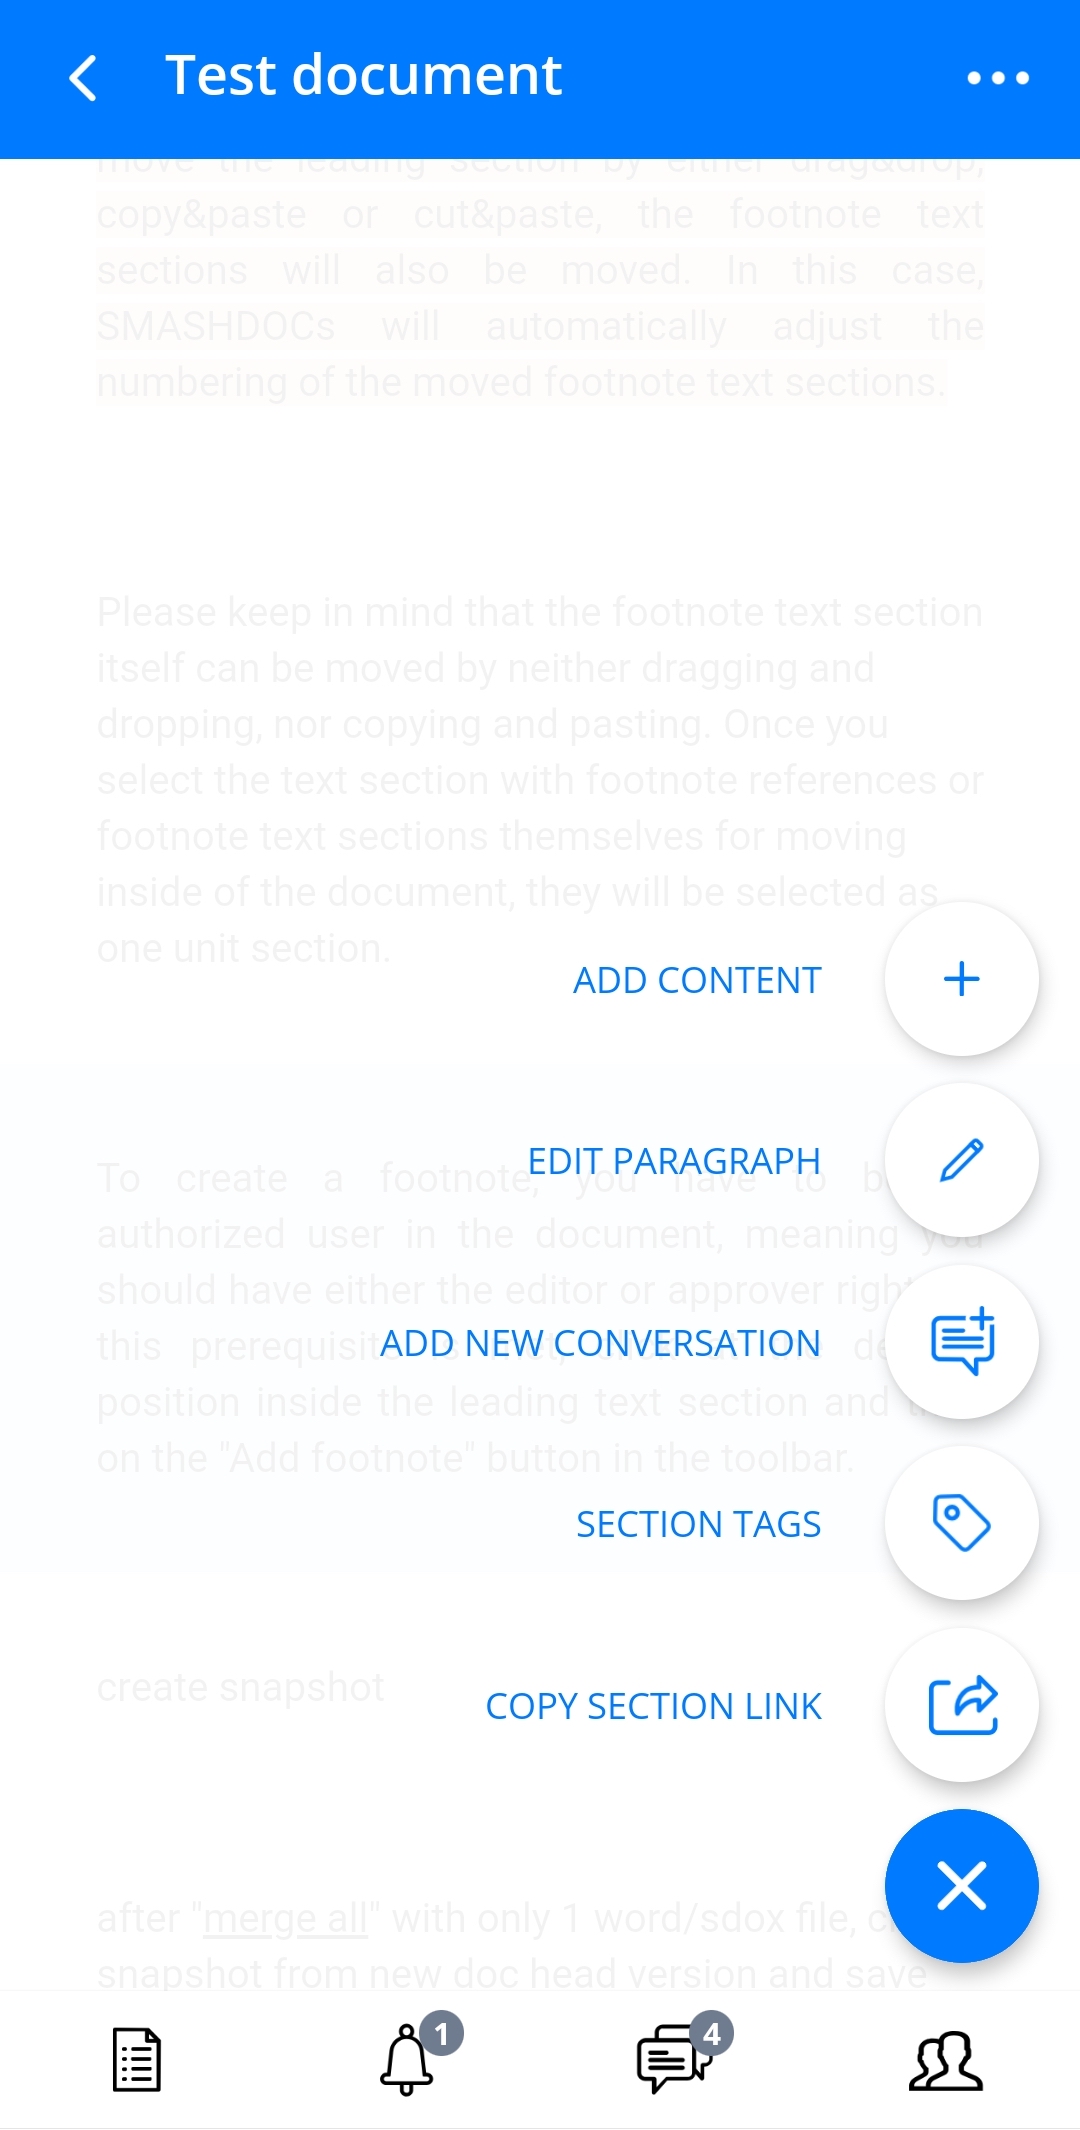
You can perform such actions in the document using SMASHDOCs mobile app as adding content (text component or image), editing content, adding a comment, a bookmark or a component tag and copying component link. To do this, tap a blue plus (see Image 13) and you will get the menu with the list of mentioned options.
The list of options to be performed inside a document
Select one that you need and proceed adding required points and following them in your document.
4.1Add content
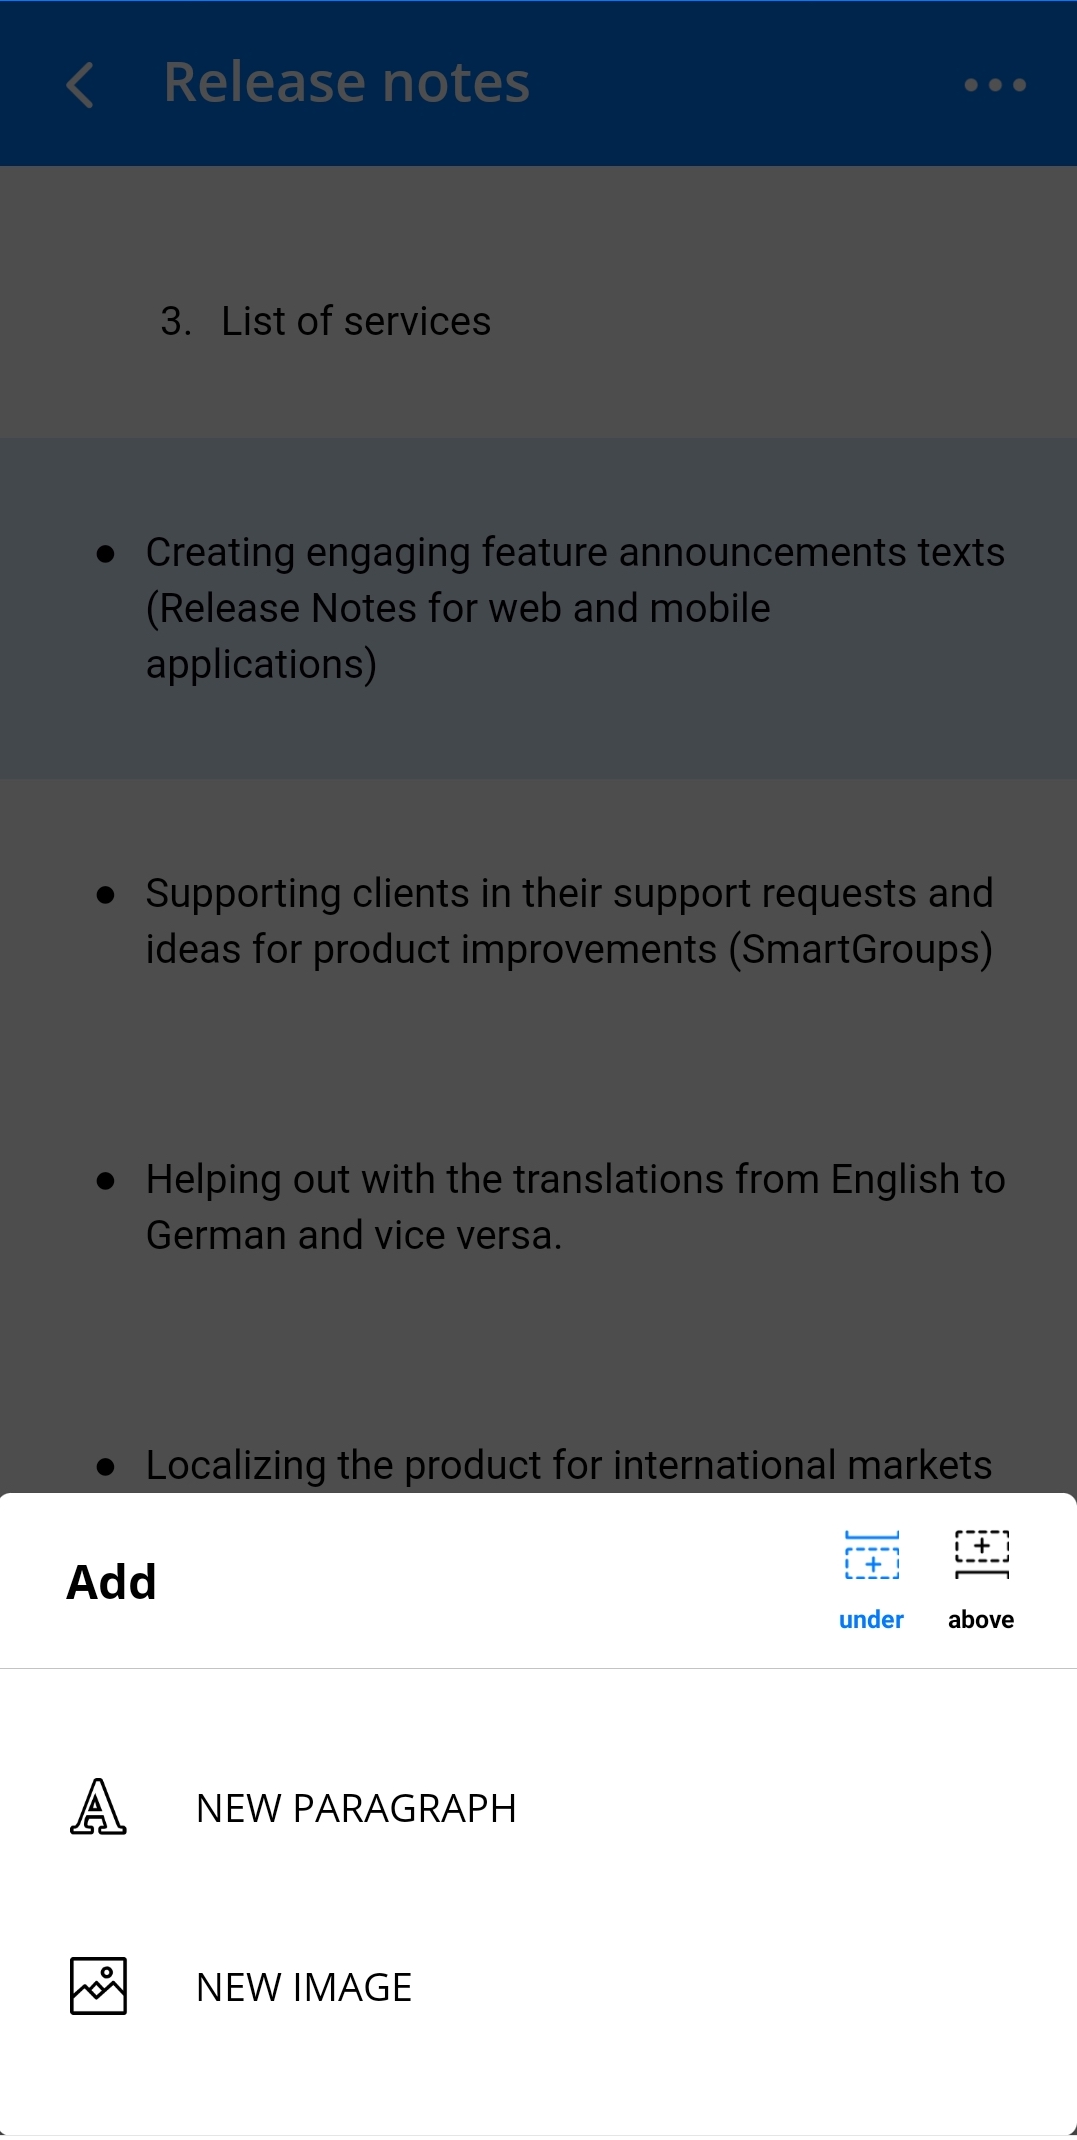
When you choose an option 'Add content', a modal window opens, where you can decide which component you want to add (text or image) and where you would like to place it - above or under the selected component.
Adding new component
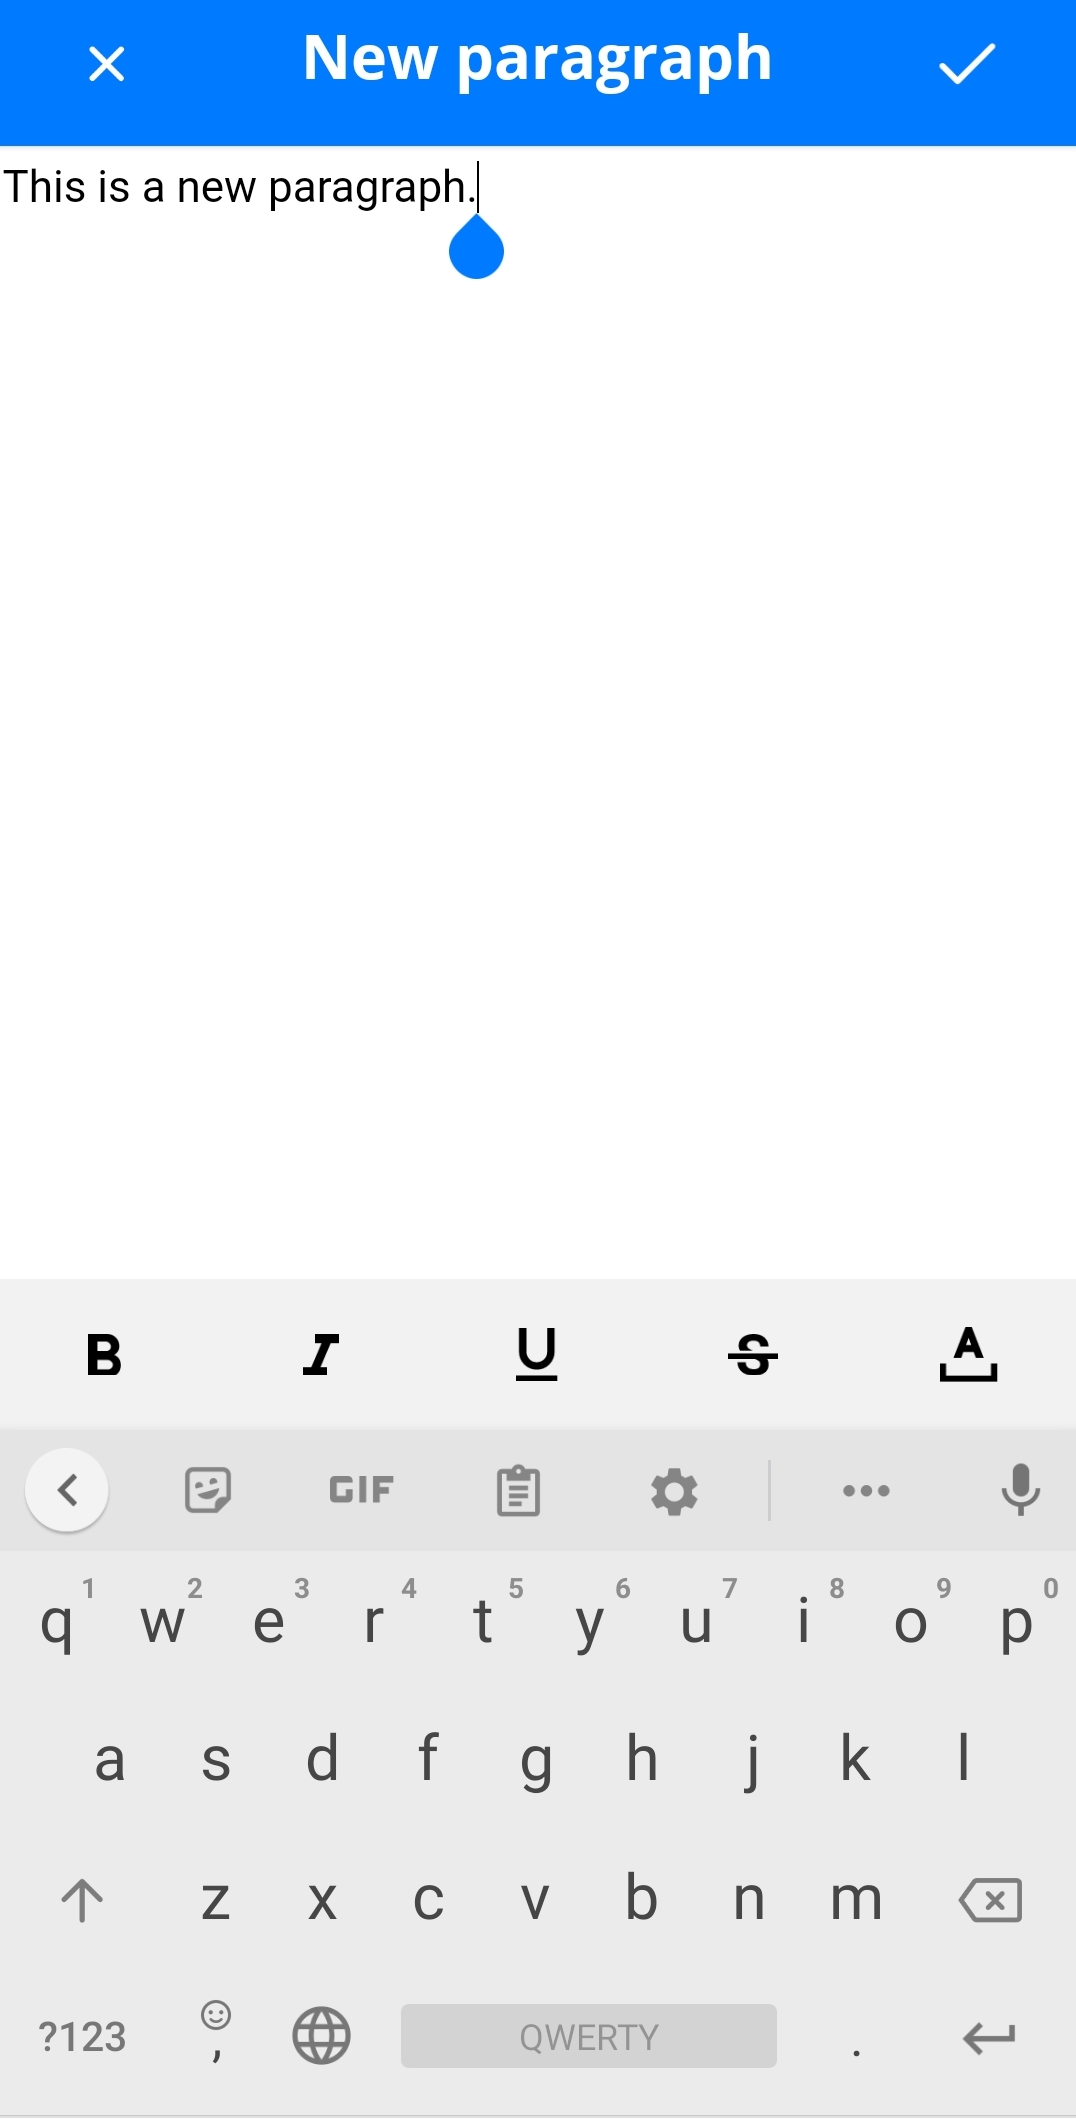
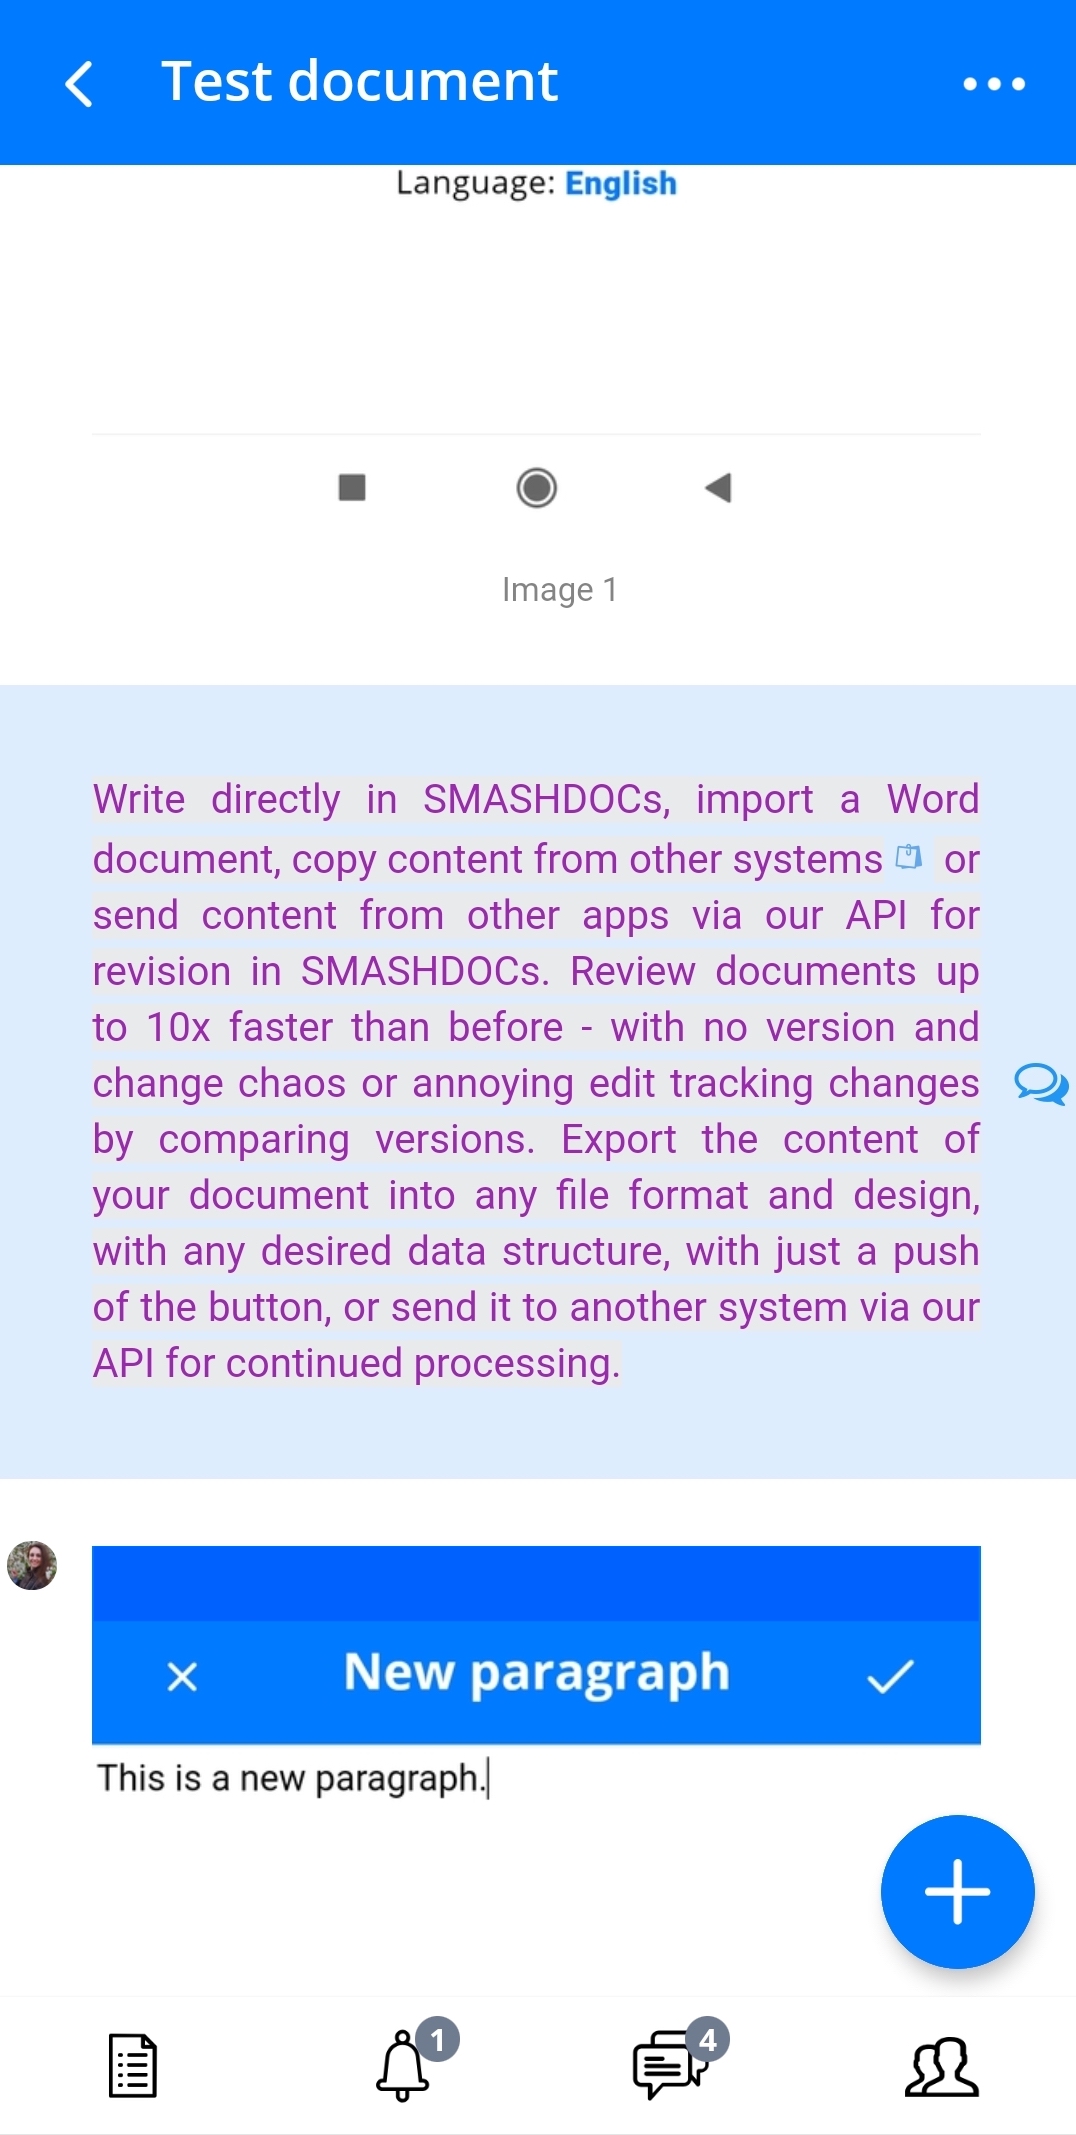
If you need to add a new paragraph, select this option and then you will get the field where you can insert text. Below this field you can also find options that help you change formatting of the text.
Inserting text
Save your text and a new component will be added in the chosen earlier place (under or above the existing component) in your document.
Inserted text component highlighted
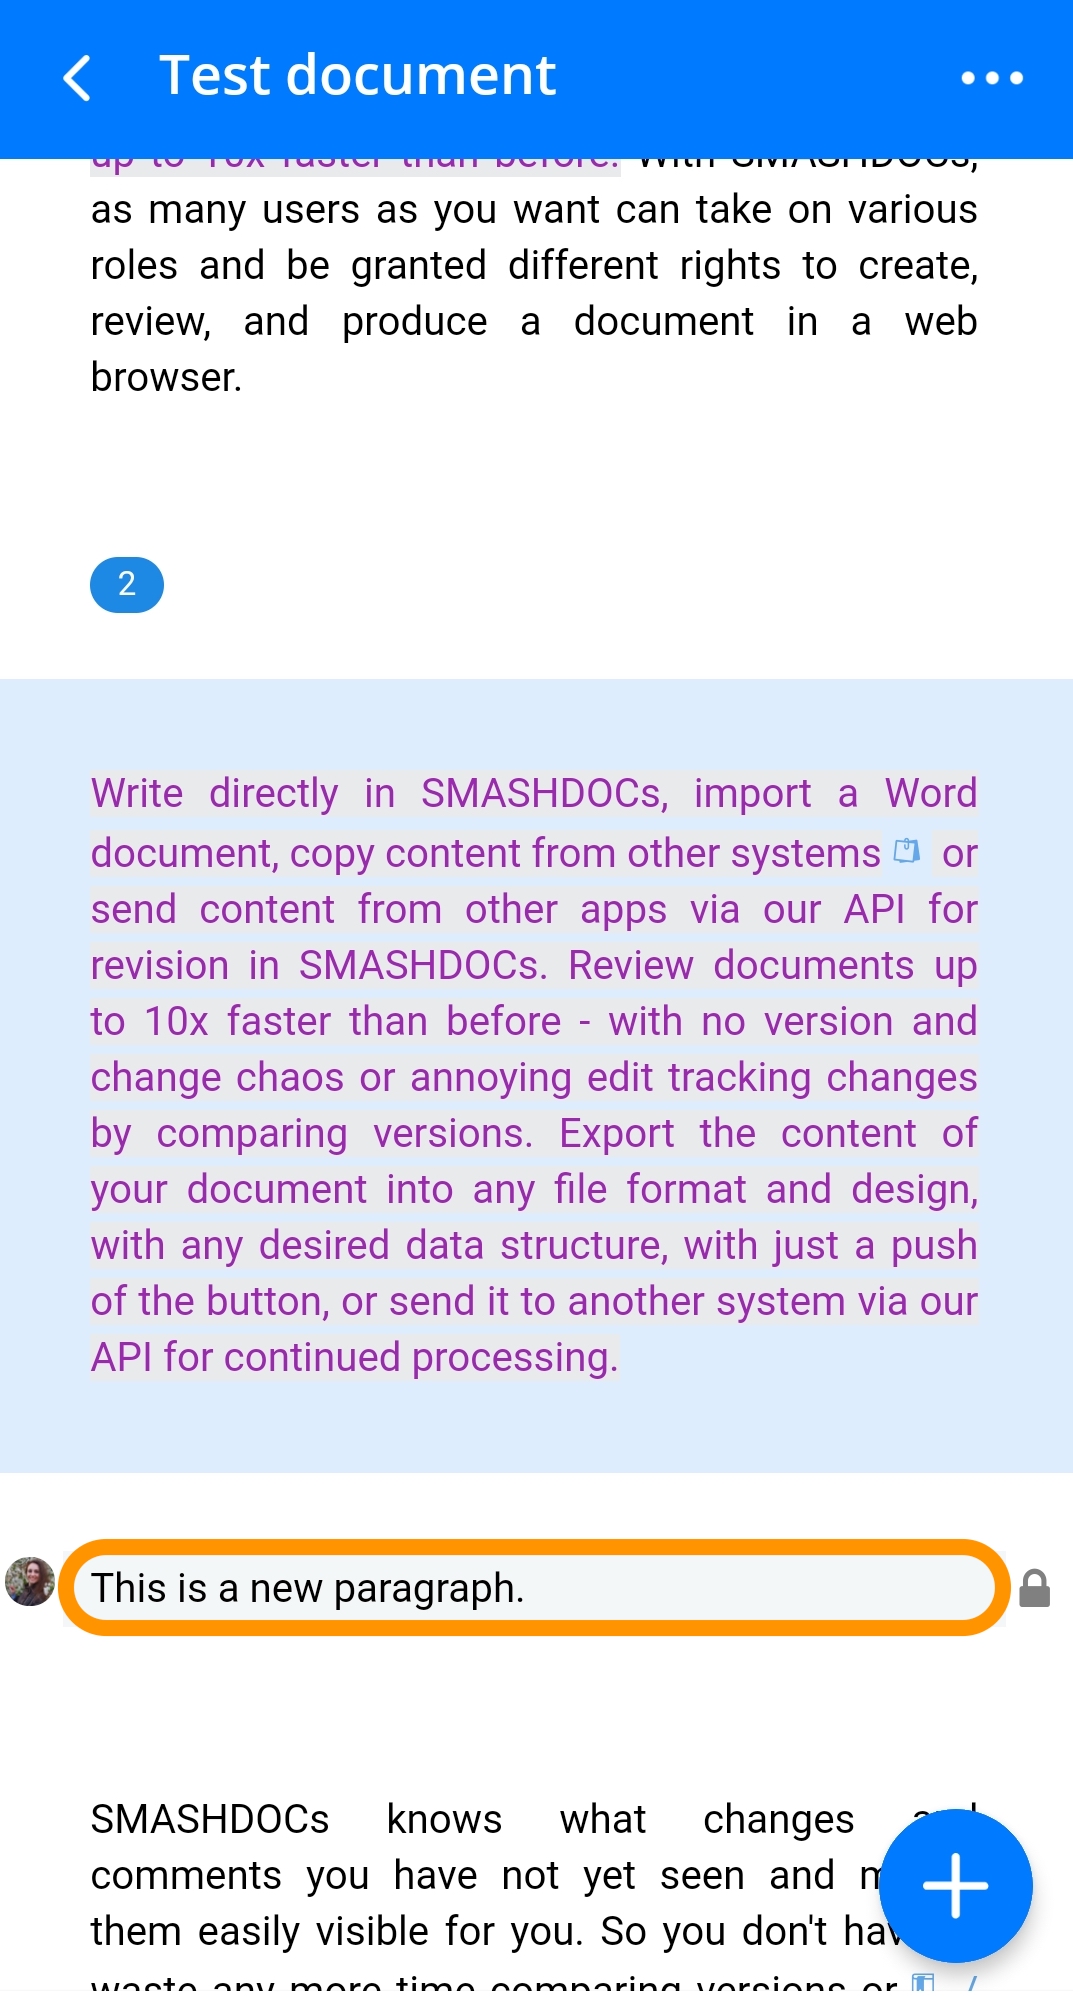
In case you need to add a new image, tap the corresponding option, select where you want to choose an image - from camera or from gallery, set image caption, numbering and save. When you are inserting your image to the document in review mode, you can also decide, whether you would like to add it as a draft or review component, and then tick the required variant.
4.2Edit content
To edit content, you should select a required component, tap a blue plus and choose the option. You can correct existing text in the component, add new content to it or delete some points. Then save changes and you will see then an updated component in your document.
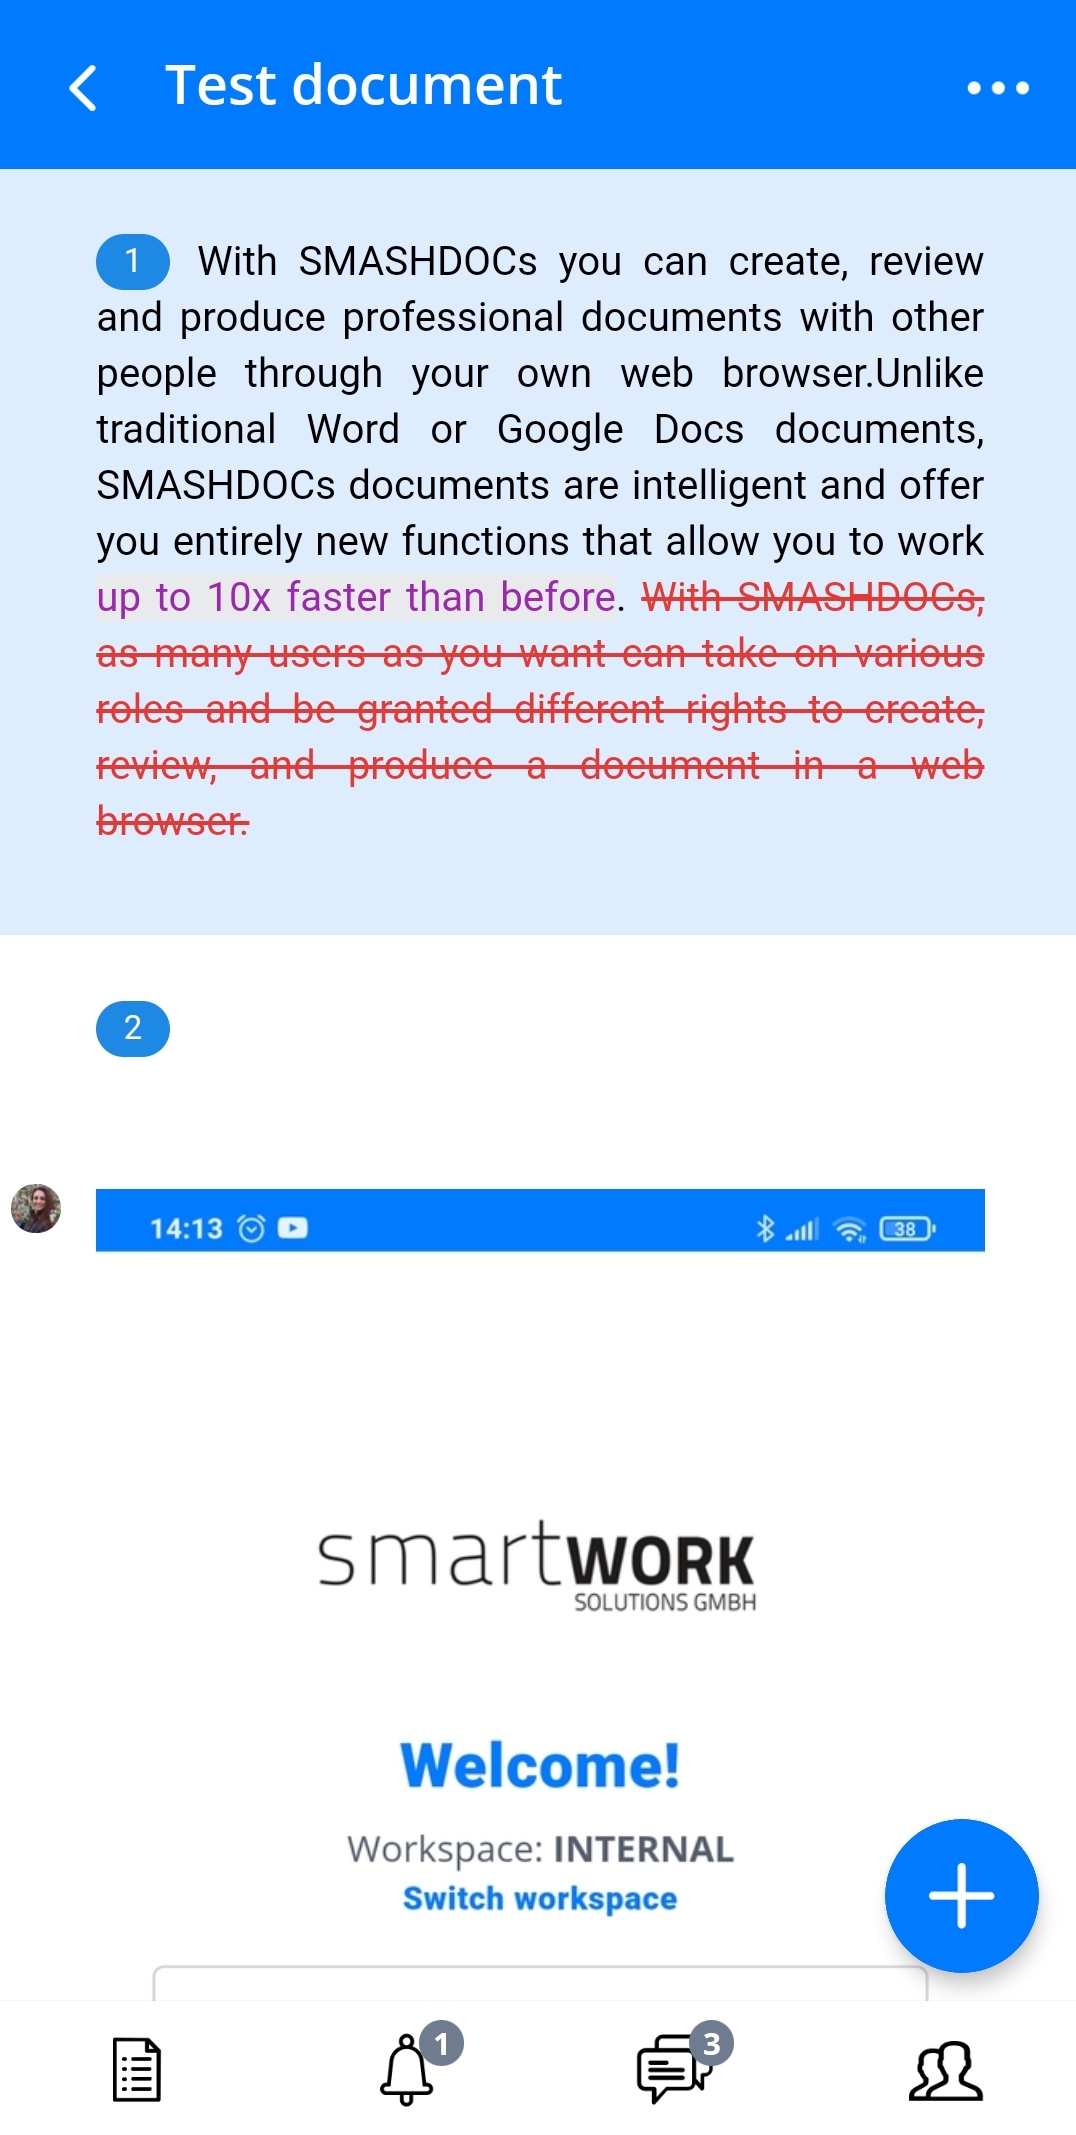
Outlook of an edited paragraph with deleted content
If you or other users have edited the review component at least once, you will be able to follow history of changing. When you select this component again and tap a blue plus, the option 'Show history' will appear. Select it and you will get an overview of the whole component history since it became review.
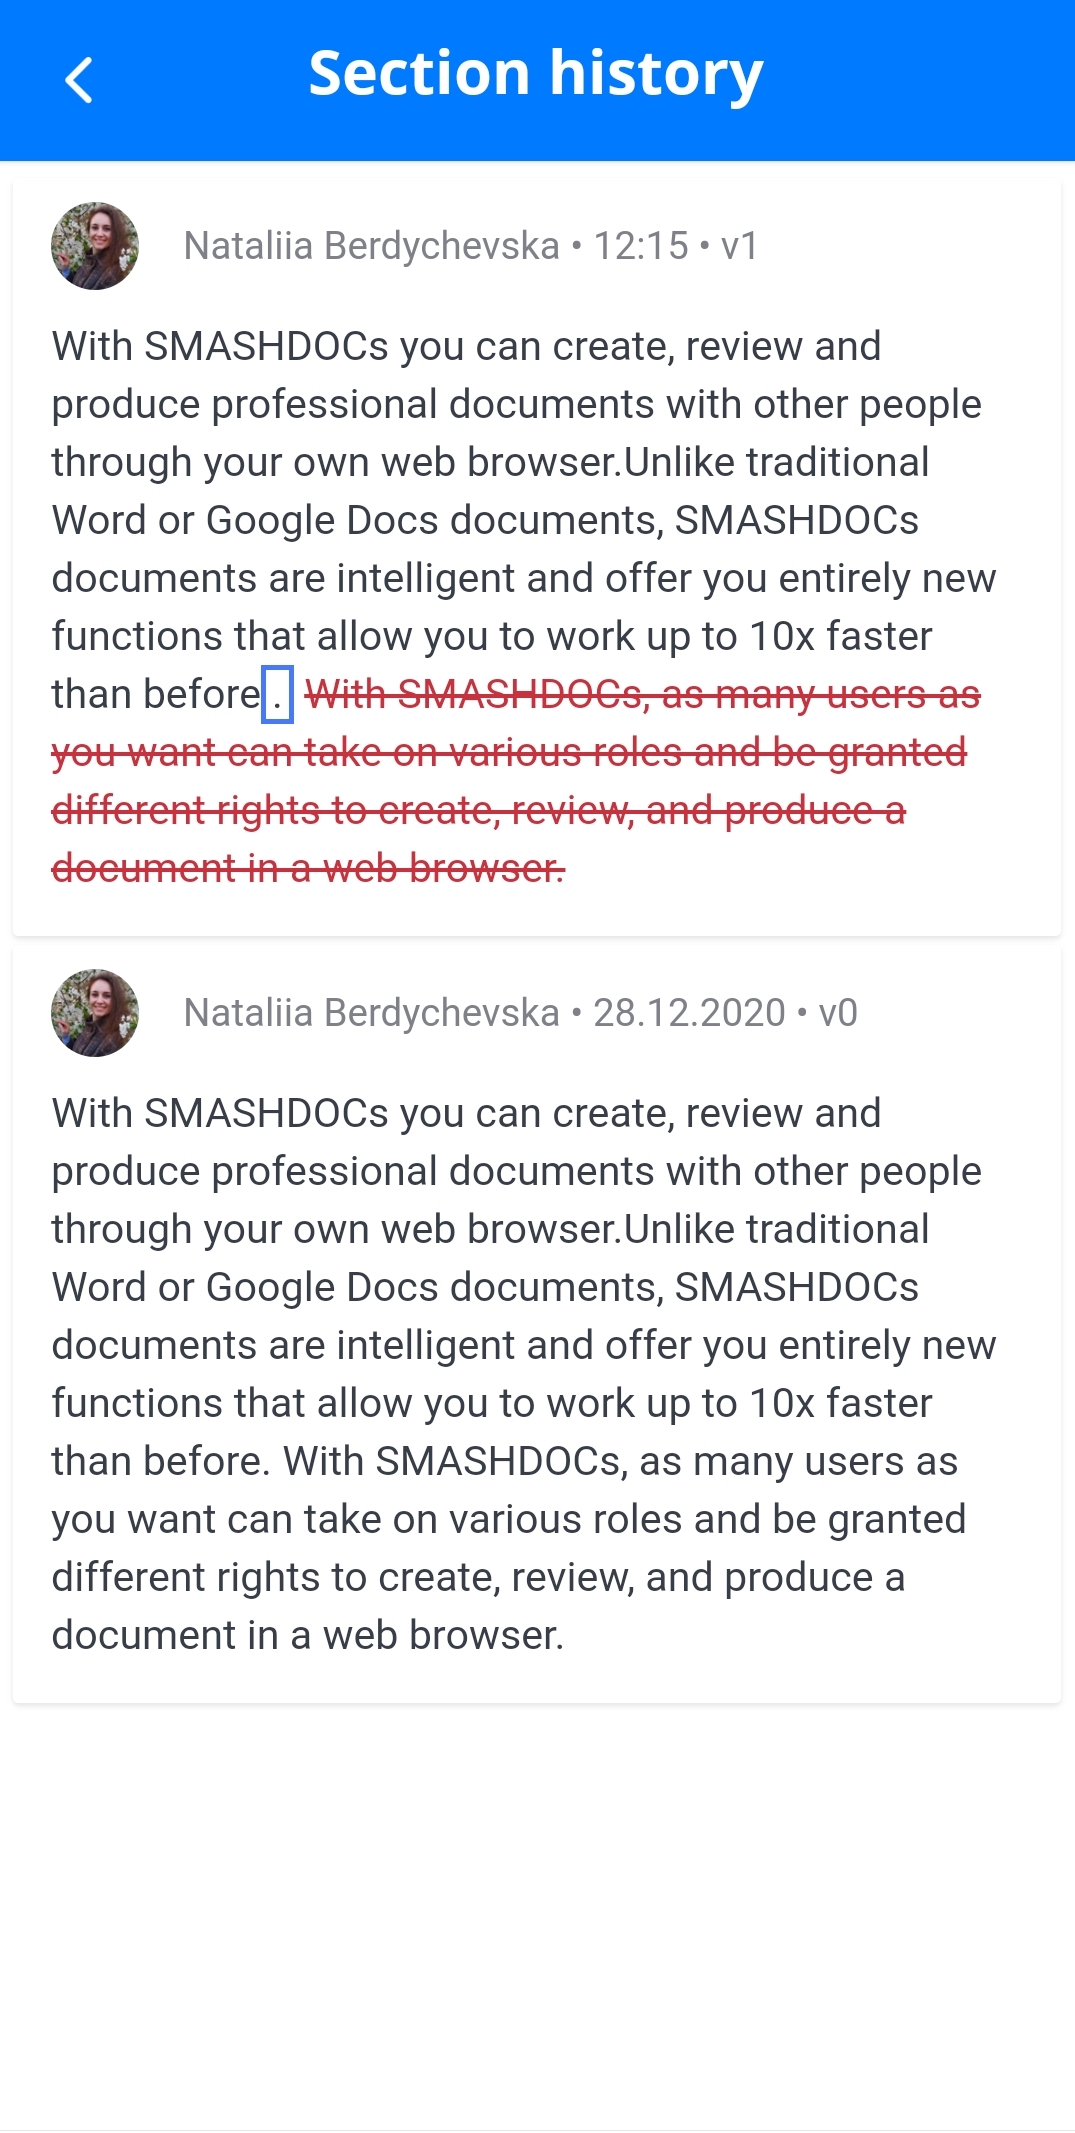
Component history highlighted
4.3Add new conversation
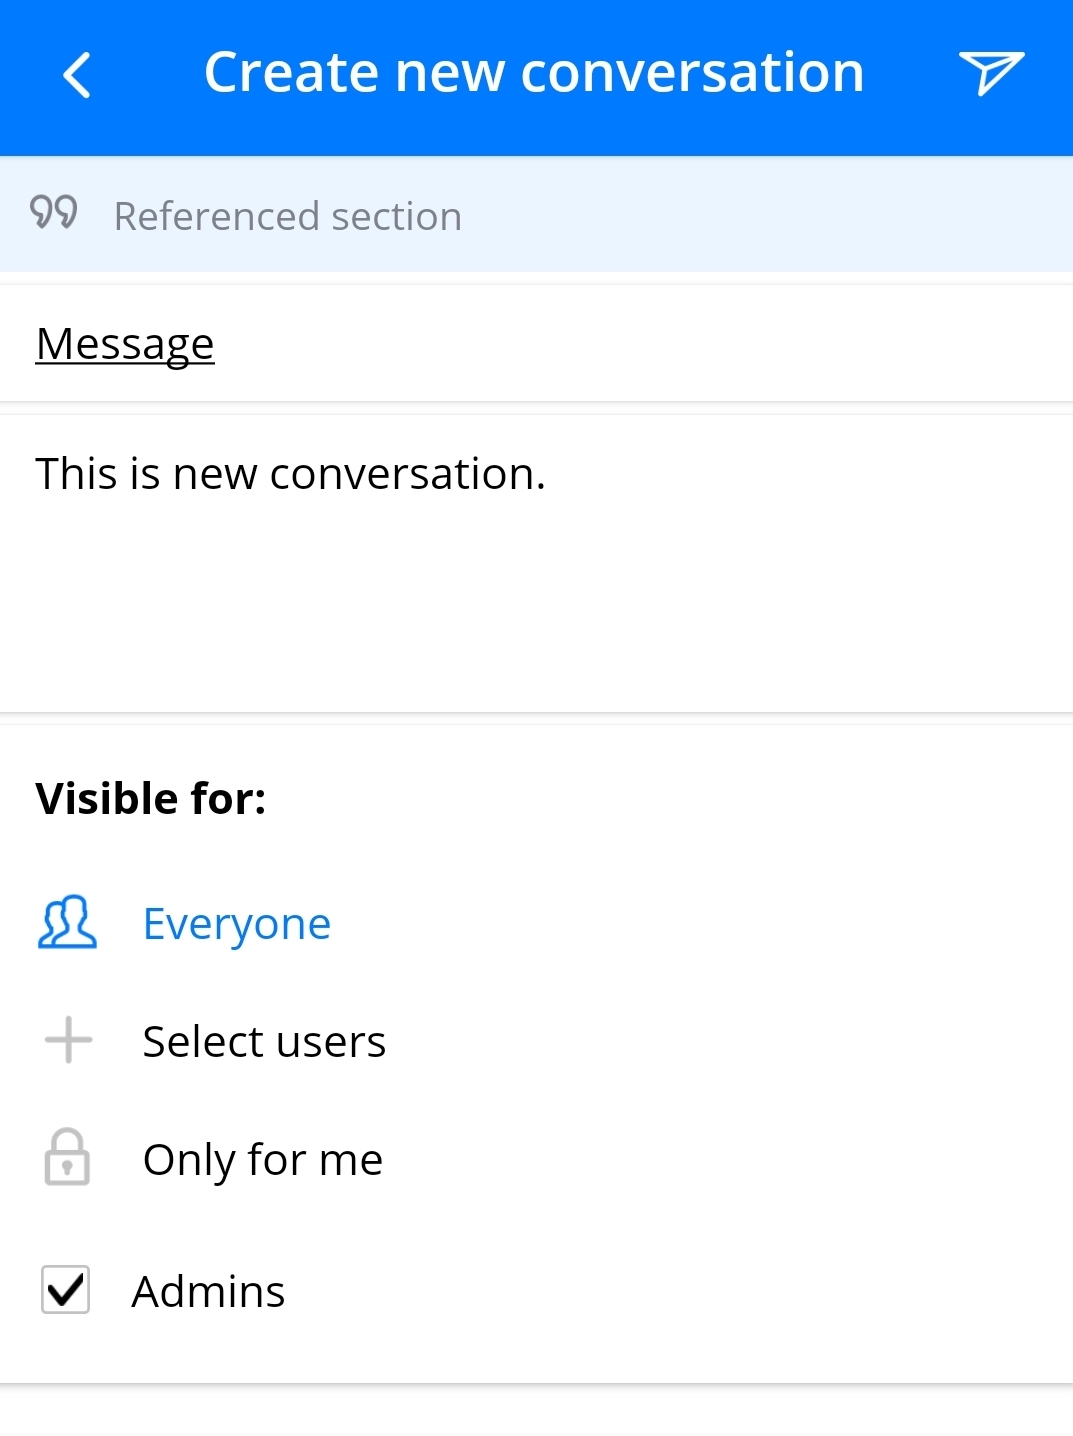
To add a new comment to the paragraph, select appropriate function from the menu after tapping blue plus and then insert topic and message, choose who is allowed to read your comment, select the priority. You can also mark the comment as resolved here.
Creating a new comment to a component
For iOS-users there is one more possible way to create conversations - select some text in a text component and choose the option 'Comment' from the additionally appeared options. Therefore, the added comment will refer not to the whole text component, but to the chosen point in it only. The selected text will be highlighted with yellow color in conversation metadata.
The icon of added comment will appear on the right side of a corresponding component.
Sign of added comment highlighted
Tapping this icon makes it possible to see the left comment and also to create a new one by pressing a special button for that.
Button to add a new comment highlighted
After pressing this button, perform all mentioned above steps of how to create a comment. Also, if there is such a need, you can change your conversation. For that select the corresponding comment, tap it and you will see such categories at the top as 'Content', 'Comment' and 'Metadata'.
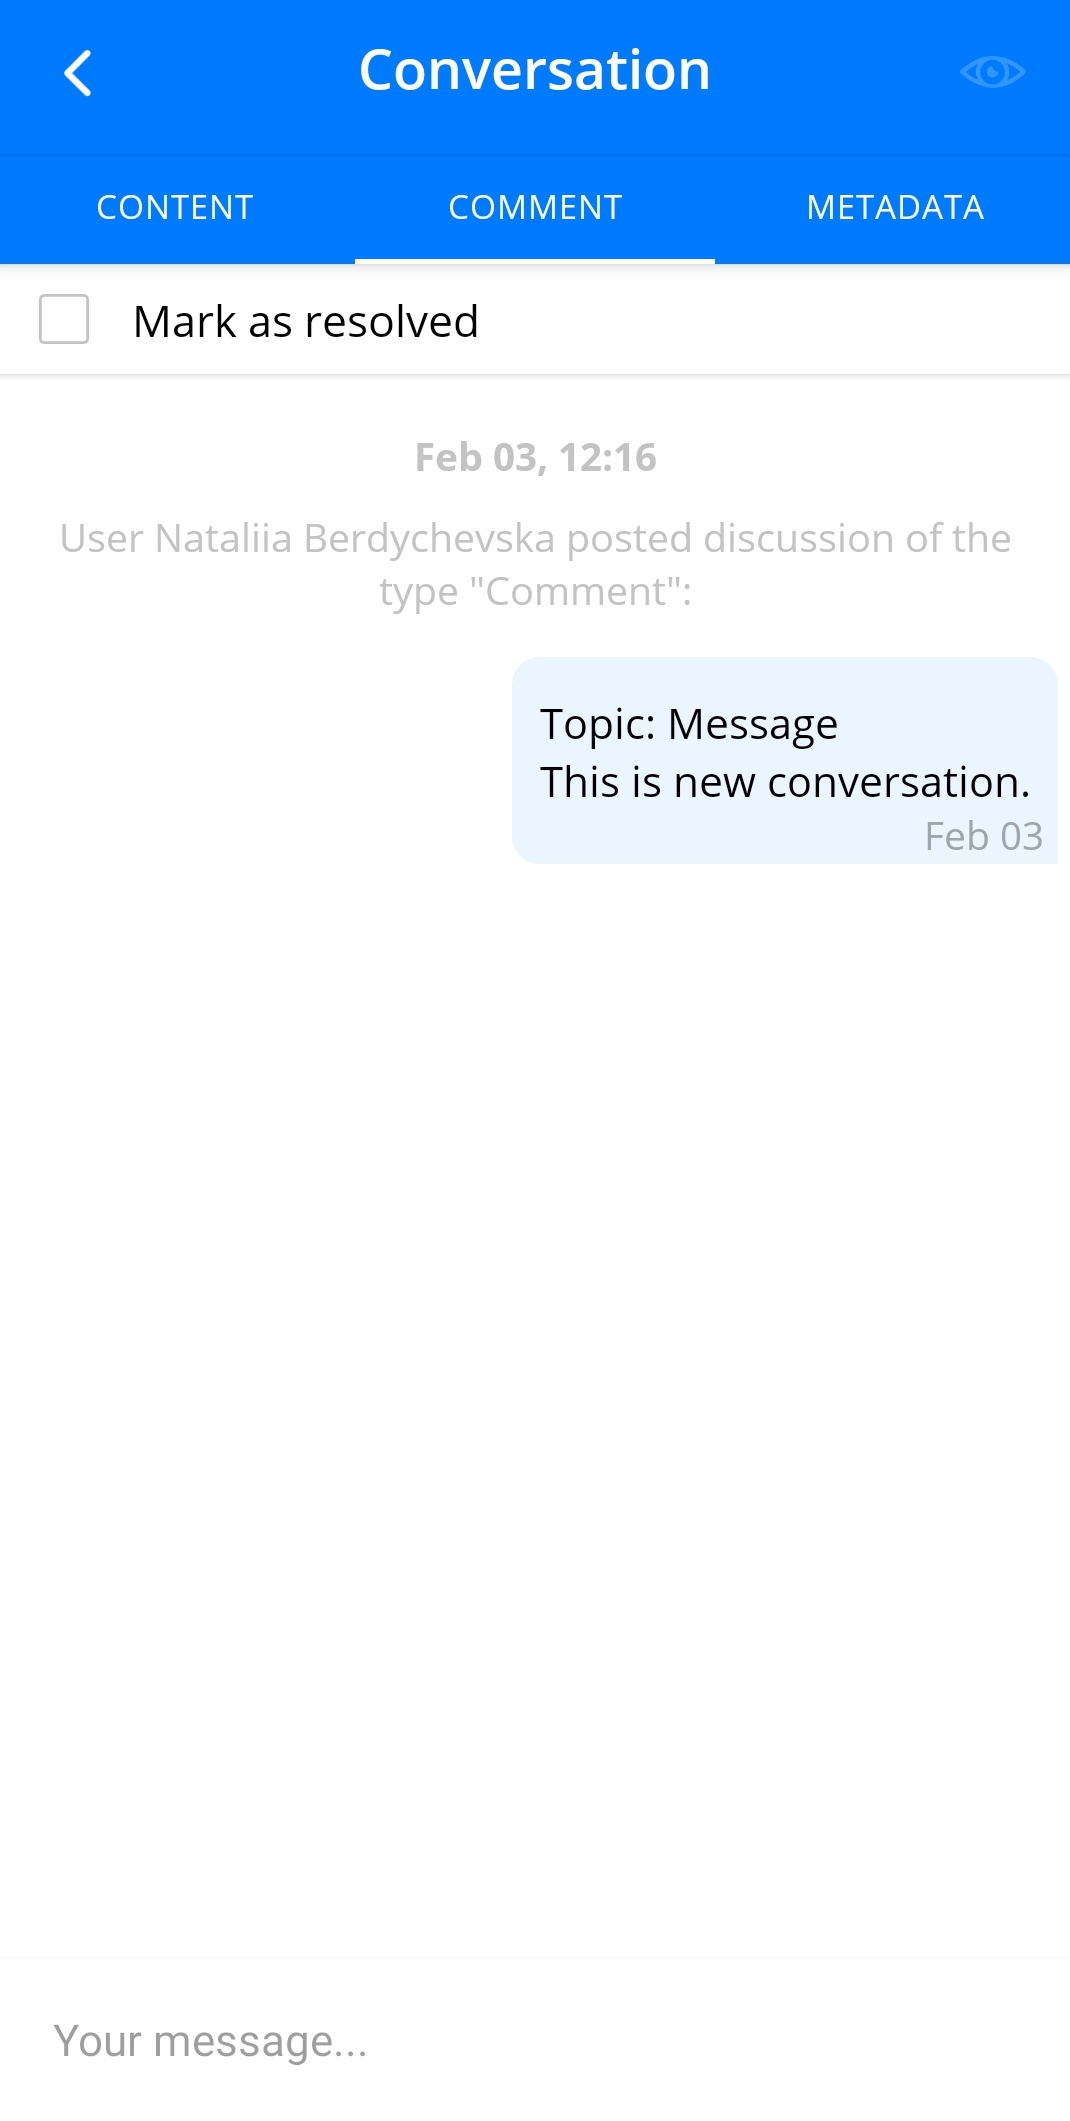
Editing a comment
'Content' here - is a component to which conversation has been started, 'Comment' - is the comment itself, 'Metadata' - topic and message, that you can edit here. Choose 'Metadata' and start editing your comment.
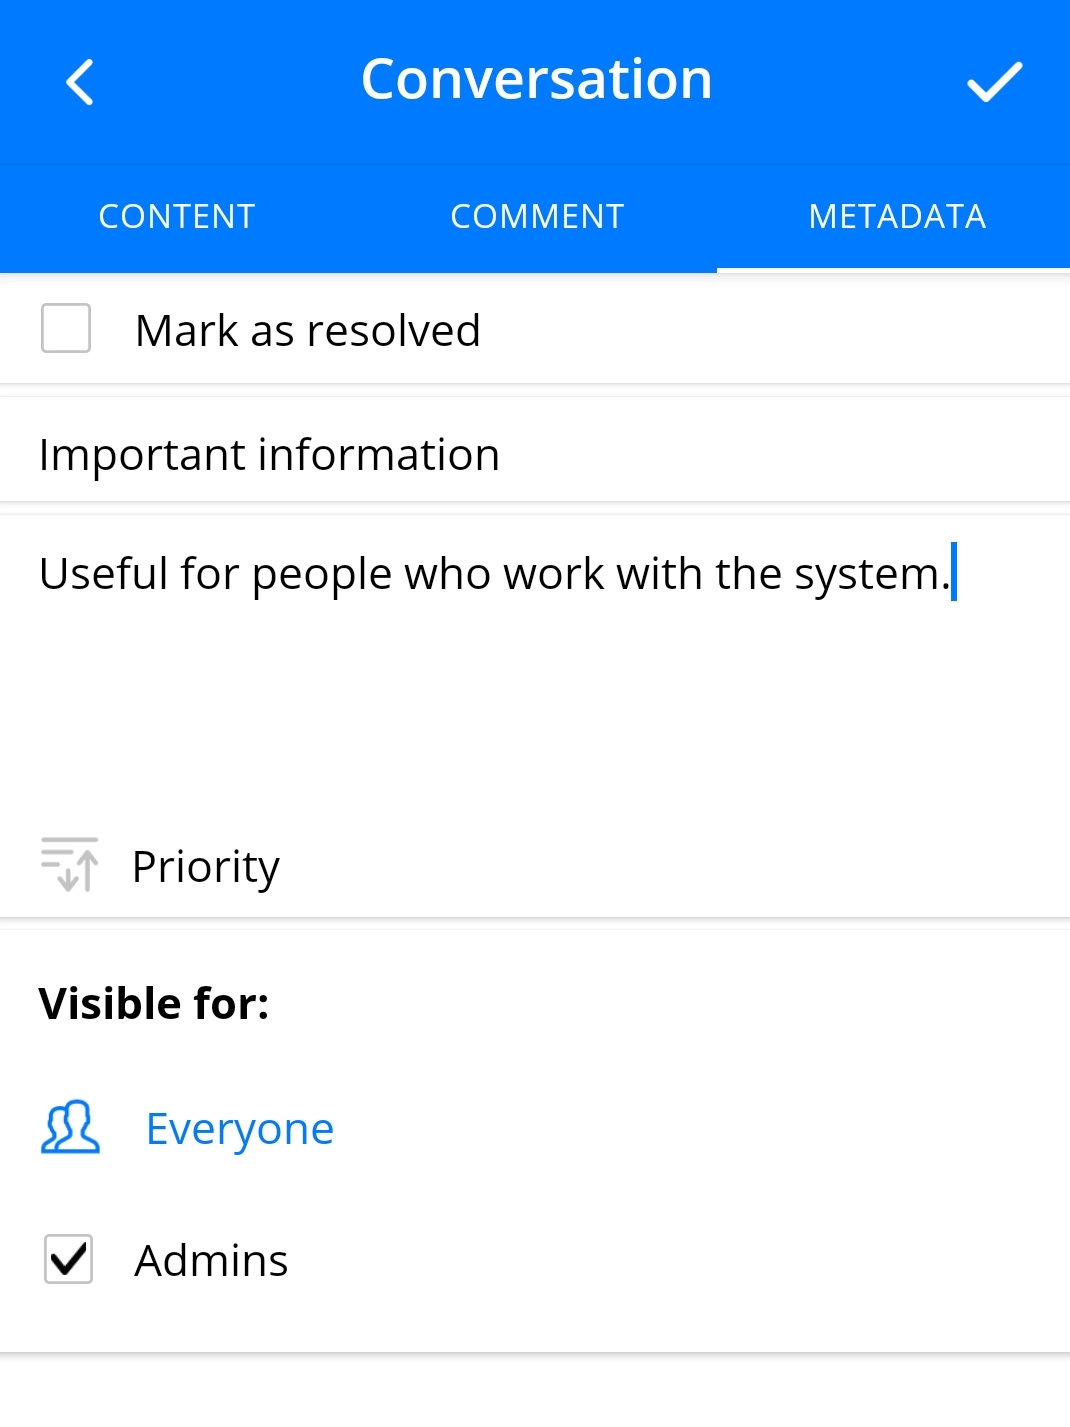
Changing metadata of a comment
Here you can also mark your comment as resolved. Then save changes and you will see the updated comment in the document.
4.4Add bookmark
In SMASHDOCs mobile app is also possible to mark important components in order to find them quickly in the document, if there is such necessity. By tapping a blue plus and choosing the required option you can add bookmark to your components as well as remove bookmarks.
4.5Component tags
To add component tag, choose an appropriate component, tap blue plus, then - the option to choose and add a component tag.
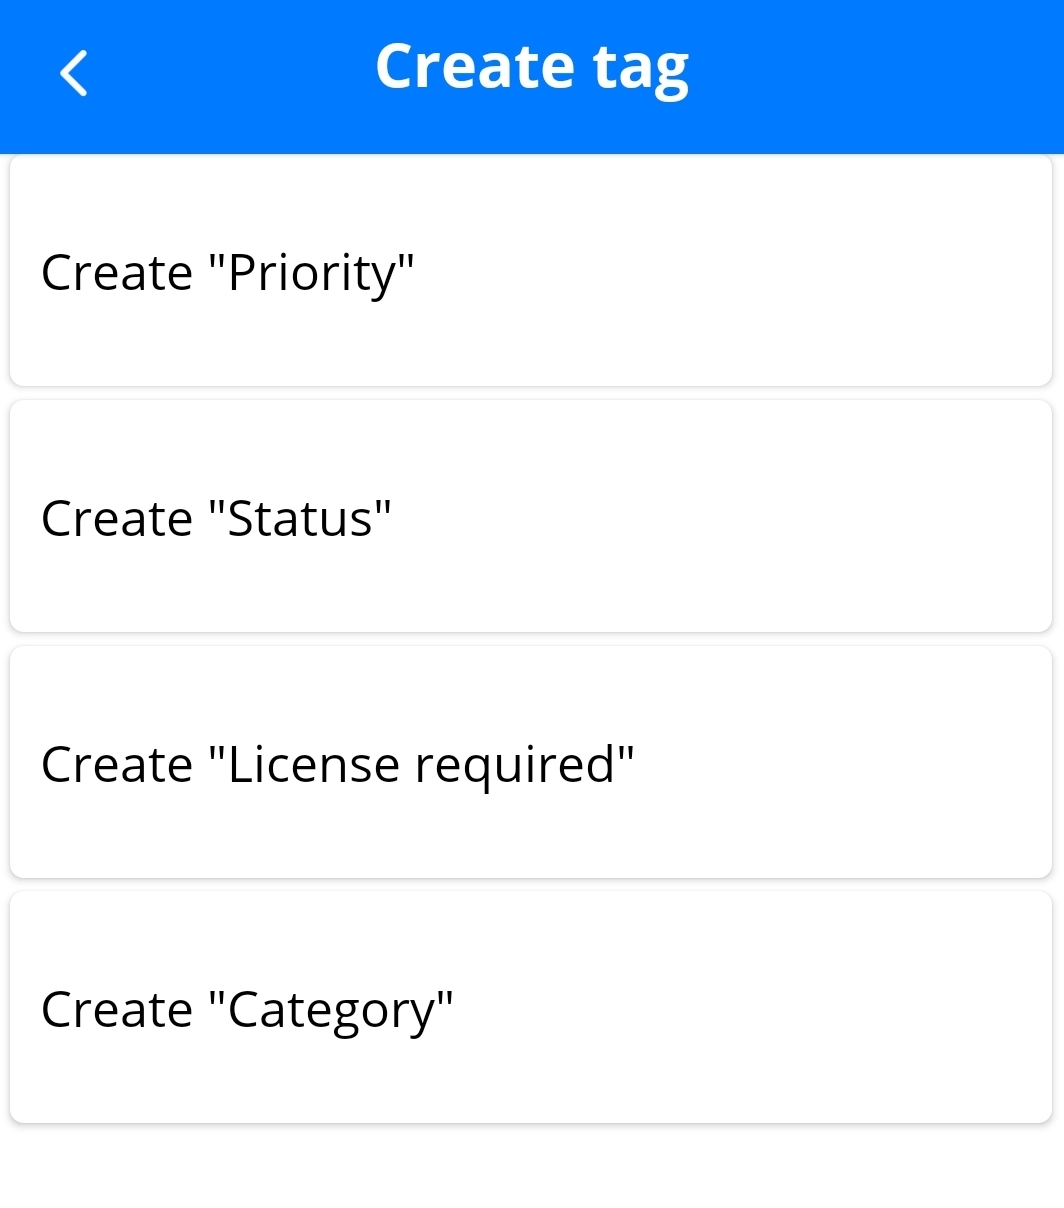
Creating component tags
The required component tag will be successfully added to the component.
Added component tag highlighted
It is also possible to edit or remove component tag from a component, as well as to add one more tag to the component by tapping required options.
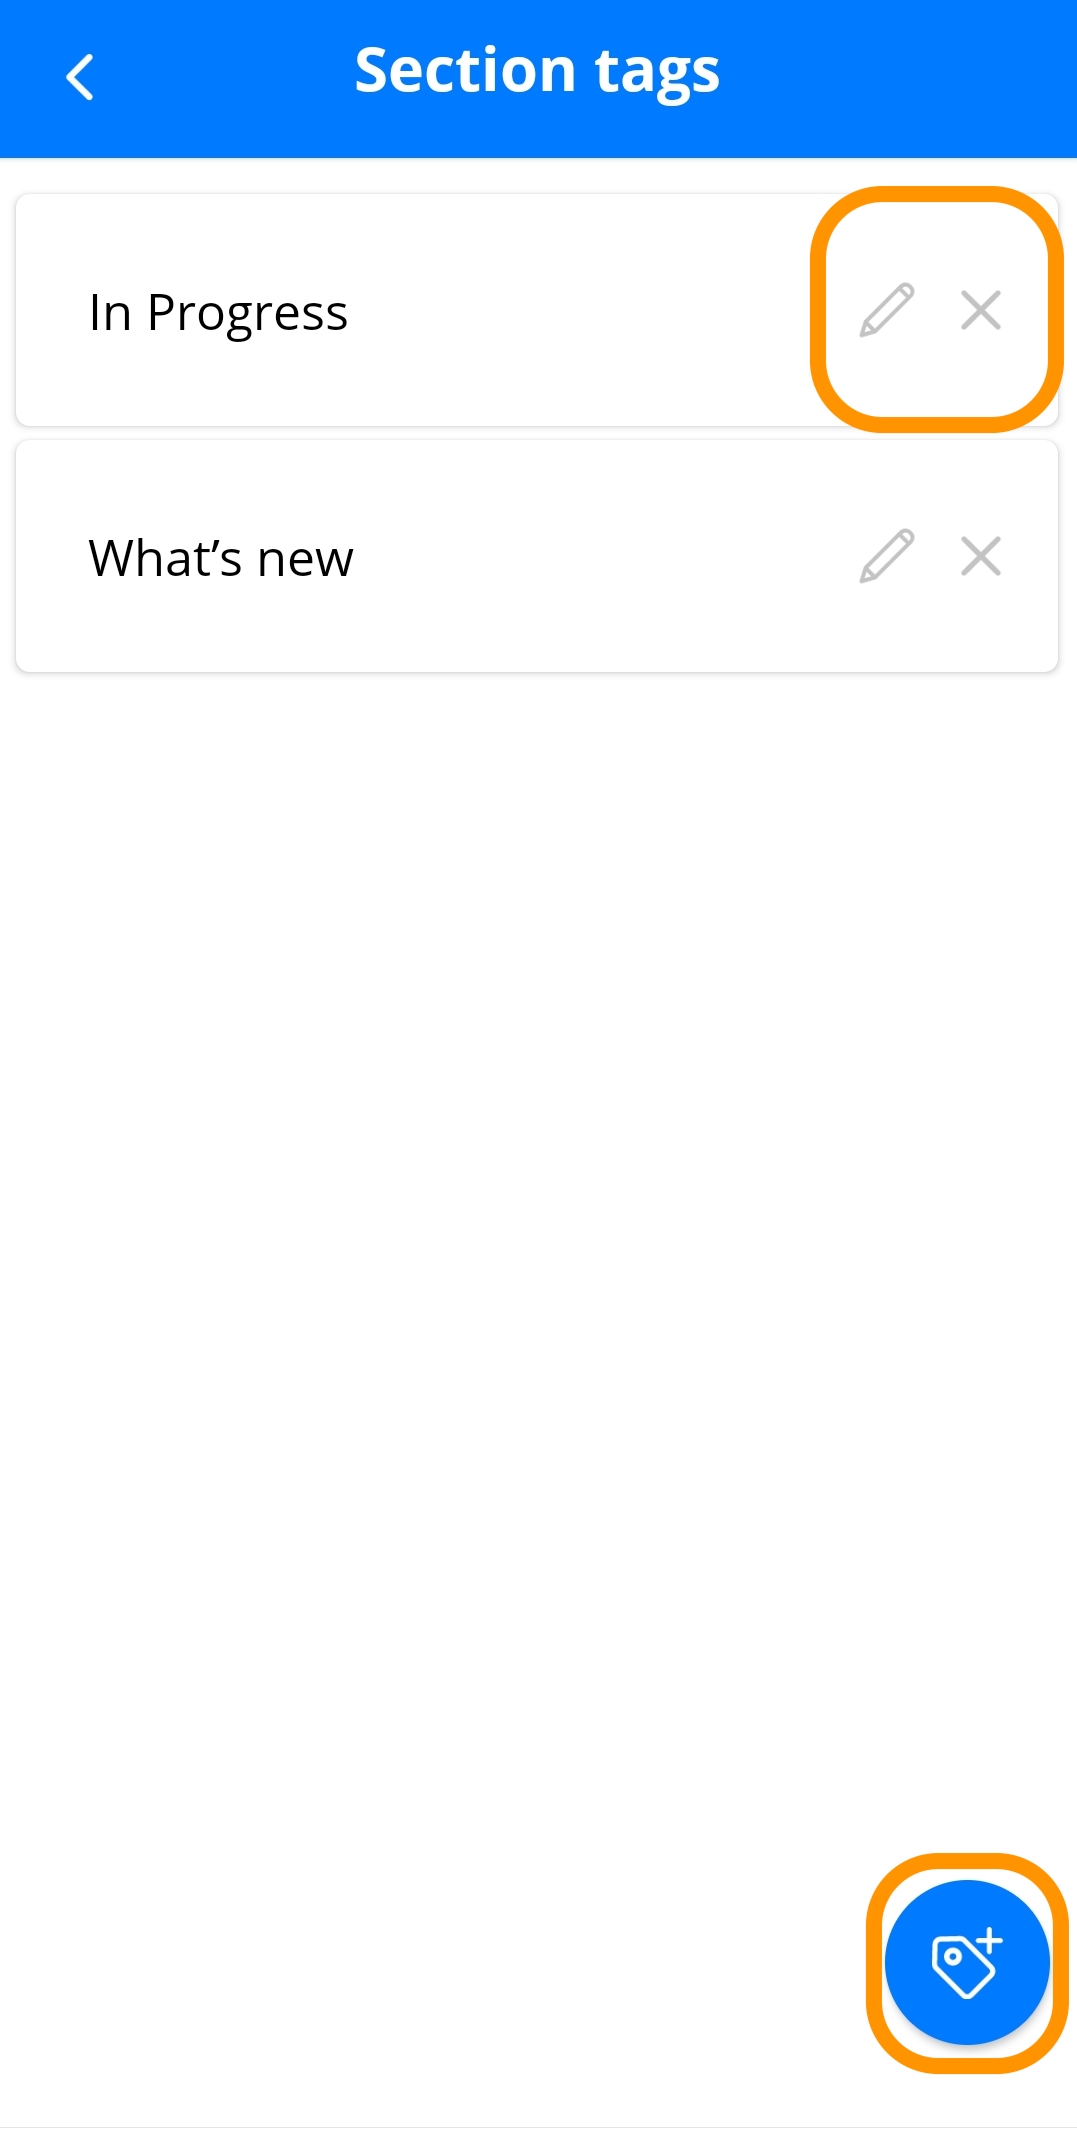
Buttons for removing, deleting and adding one more component tag highlighted
4.6Copy component link
When you choose the function to copy component link, you will be able to send it to the suggested end point straight away. Then by opening this link in any place you have stored it, you will get variants how you would like to open it (with an app or a browser) and the corresponding component will be visible for you.
5Tools within a document
When a document is opened, you can have a quick overview of the toolbar down the page with different options. Those are 'Show directories', 'News', 'Conversations' and 'Users'.
5.1Show directories
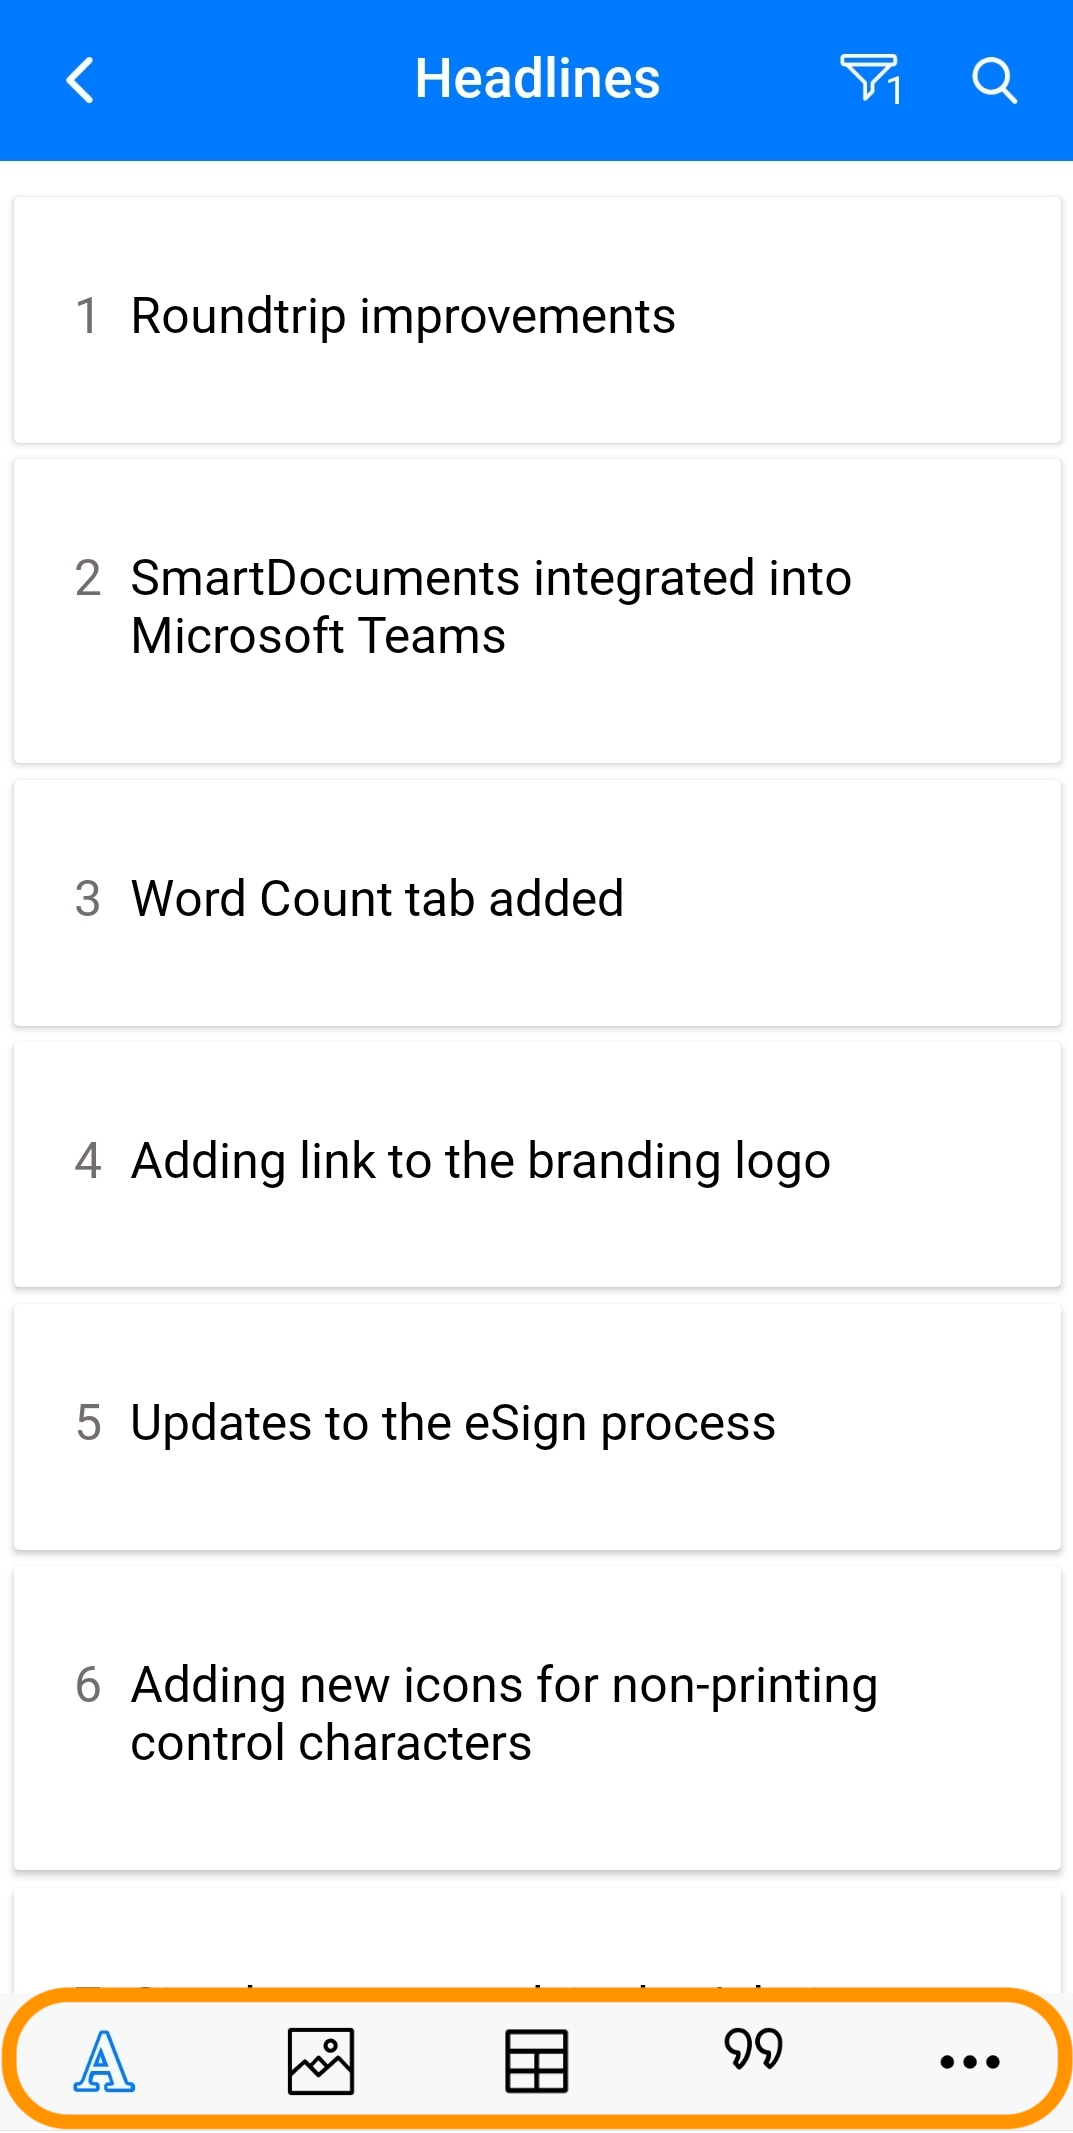
By selecting this option we can search for headlines, images, tables, footnotes etc. within a document.
Toolbar down the page when document is opened
Press the corresponding bottom left icon and there appear one more toolbar down with mentioned points to search.
Tab bar of different points to search highlighted
If you press three dots in the right corner, you will get the list of all directories.
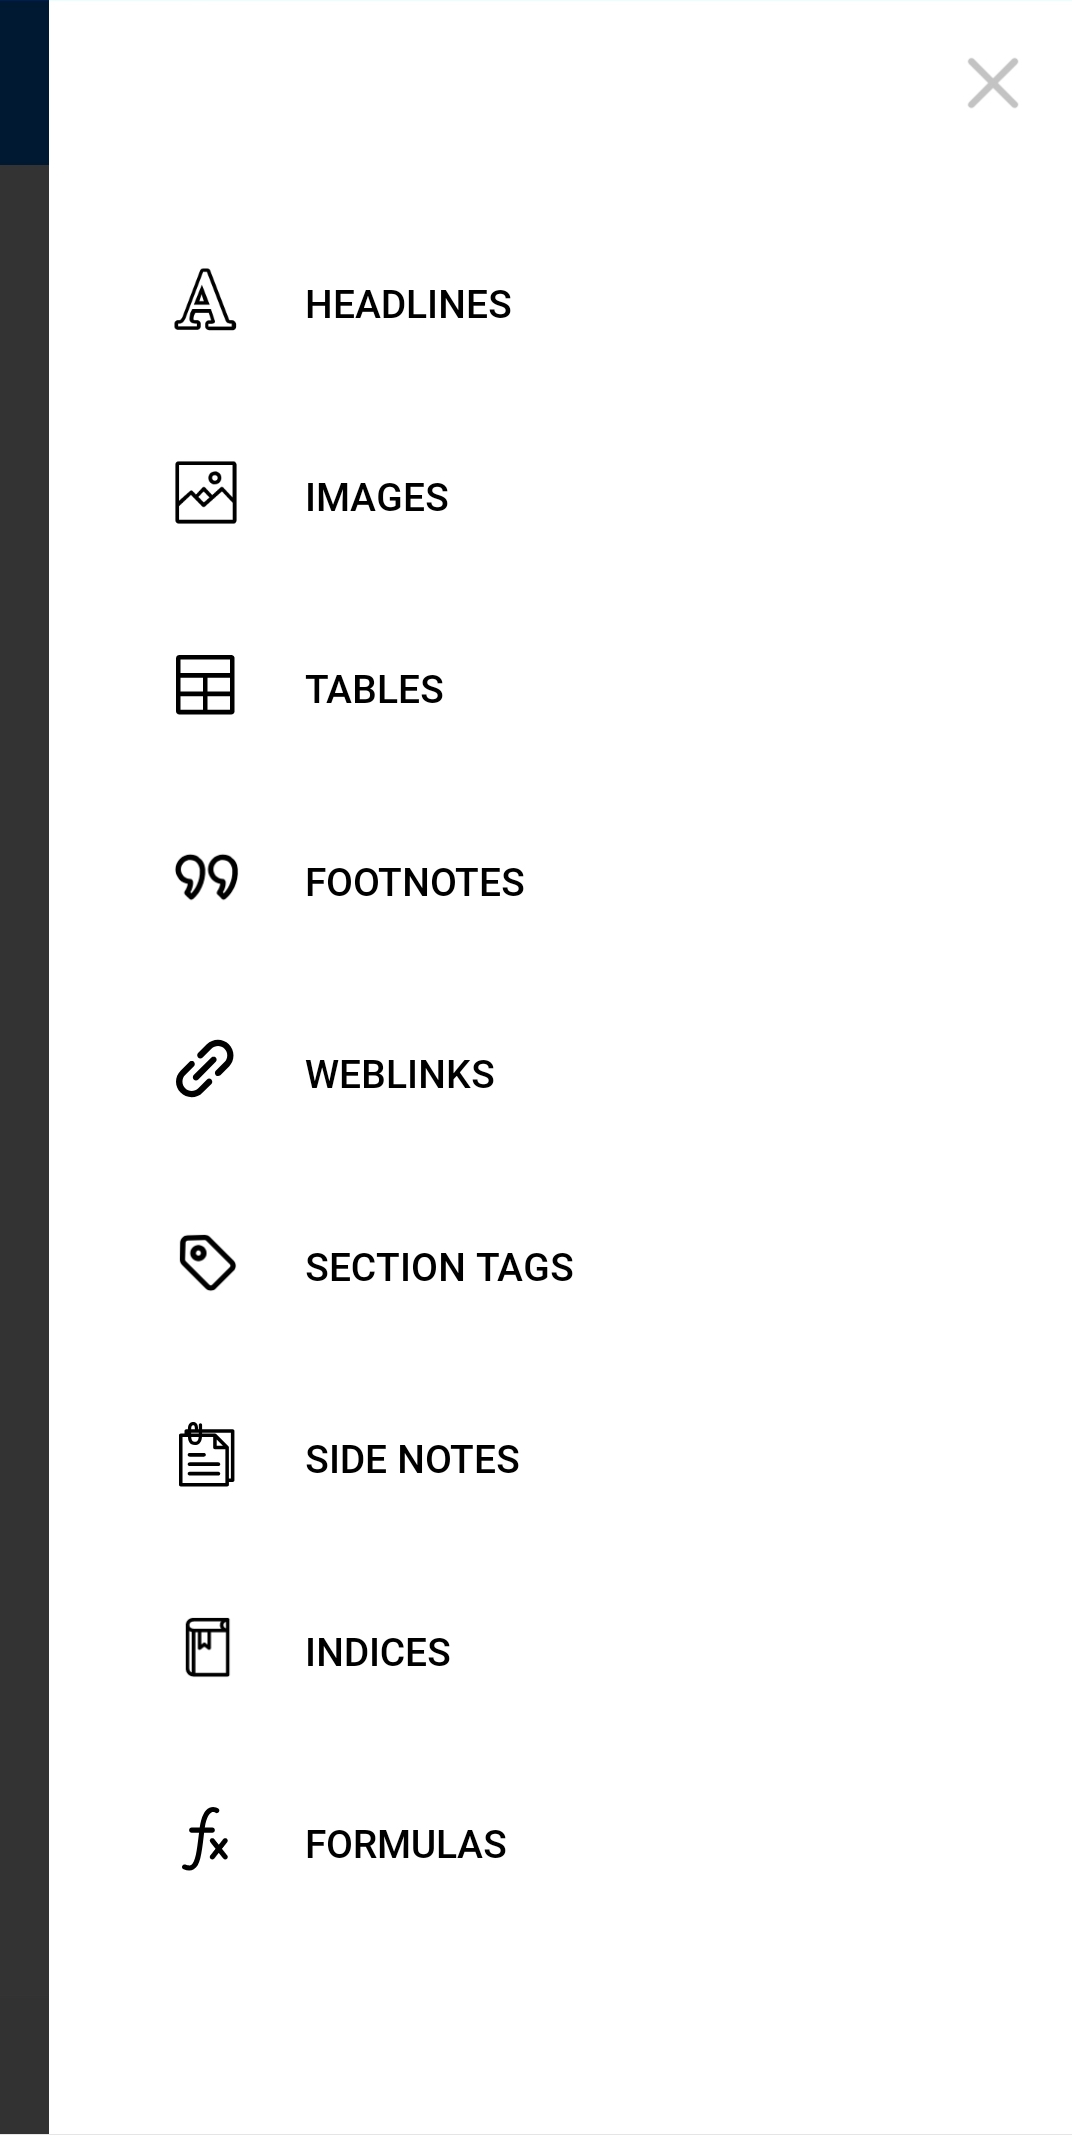
Detailed list of search points
Tap any of them and you will find the required point in your document quickly. For instance, select 'Tables' and the list of tables in your document will appear. If you have previously set numbering or inserted caption, tables in the list will be shown with these indicators.
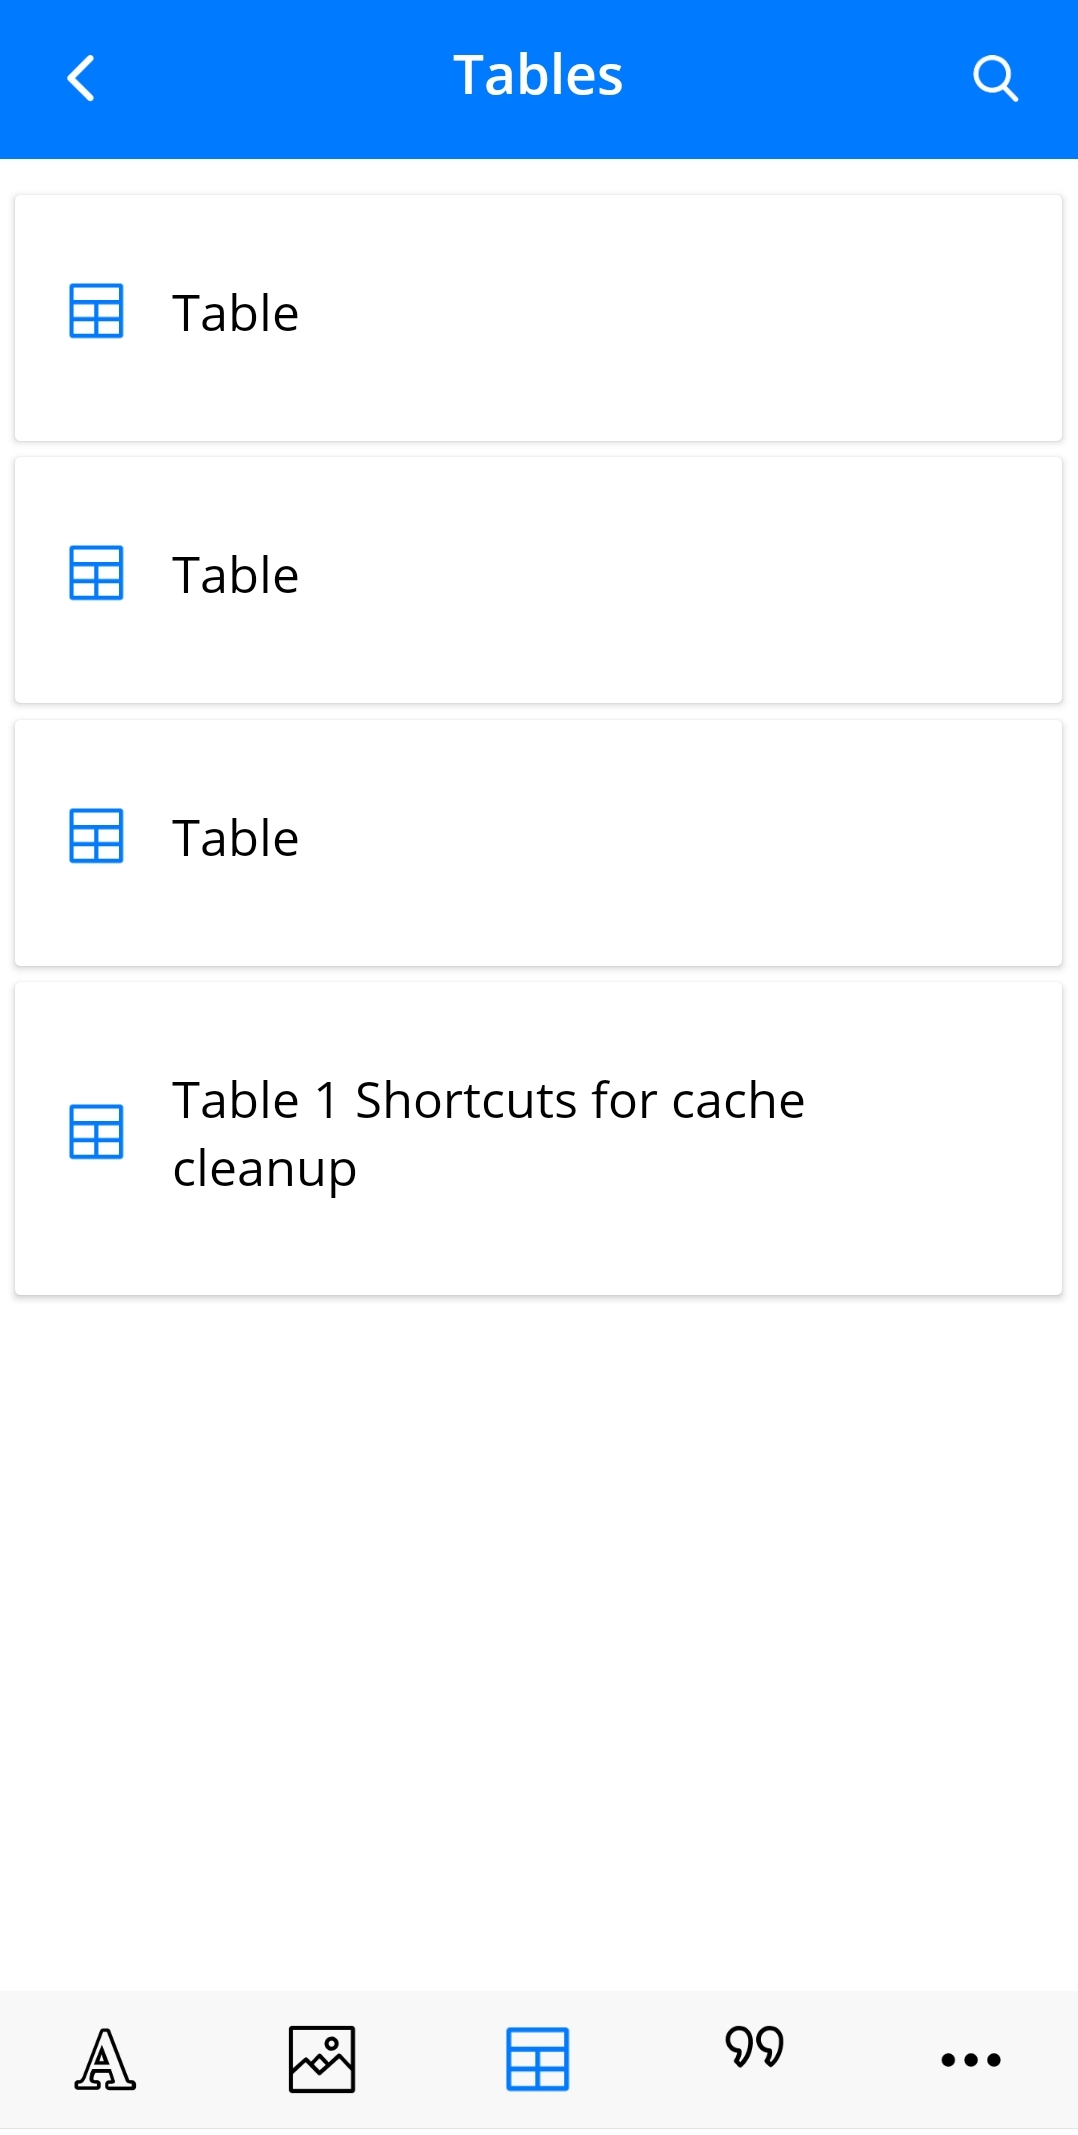
The list of tables in a document
Tap any table and the document will scroll directly to it.
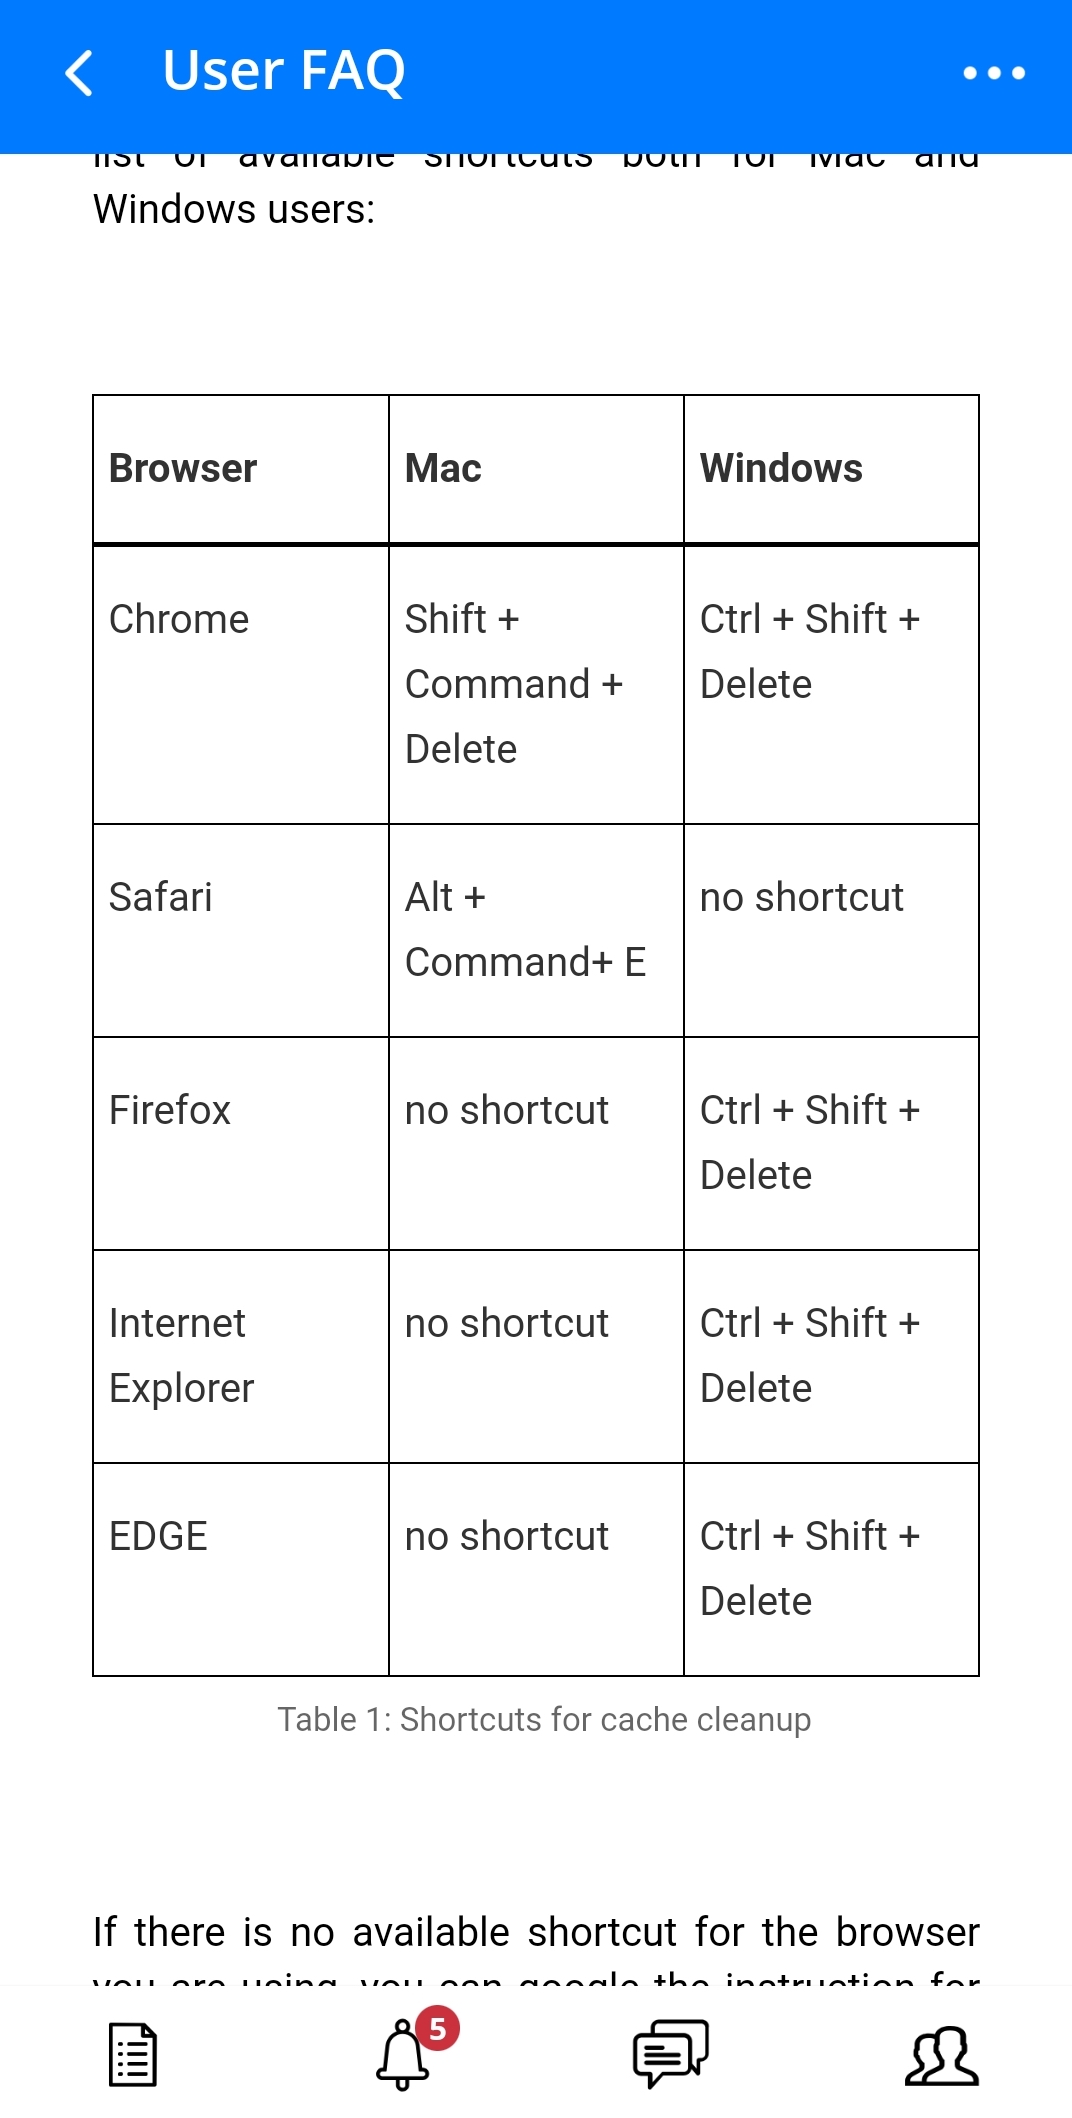
The chosen table from the list highlighted
5.2News
As soon as your document is switched to review mode, the option 'News' becomes available for you. When you choose this option and tap bell icon (see Image 27), there will appear functions that you can apply to mark components as seen, accept or reject changes in your document.
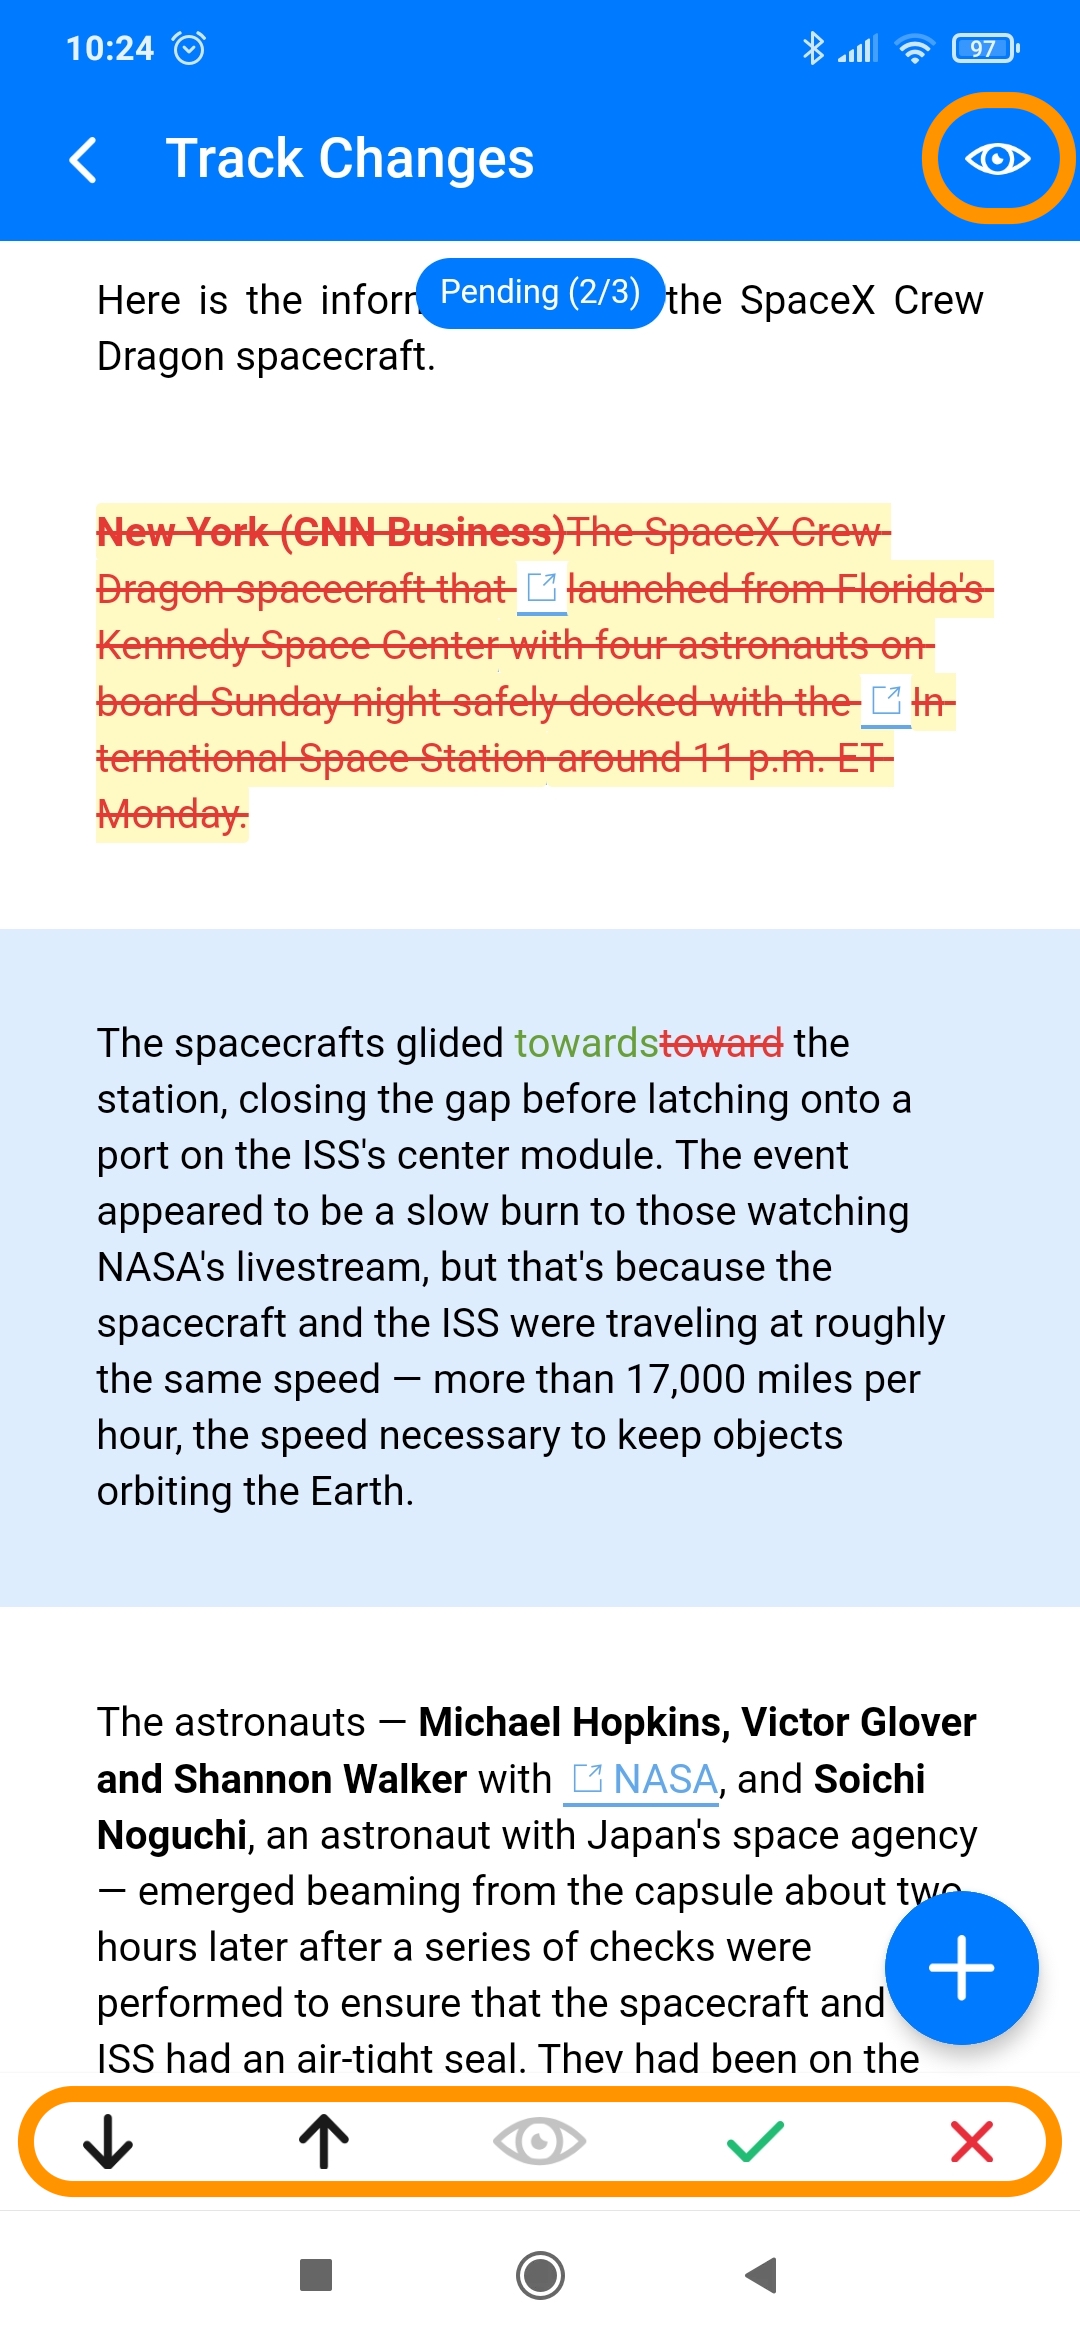
Toolbar for working with changes in the document
In the toolbar down the screen you can find buttons to move up/down to the nearest top/bottom component with open or unseen changes, mark chosen component as seen, accept/reject changes within a single chosen component. To mark all changes in the document as seen you need to press the 'eye'-button at the top (see Image 32).
It is also possible to accept or reject changes within a single component by swiping to the left and selecting a needed option in the right side of the component.

Accepting/rejecting changes within a single component
Note: in draft document 'News'-function is unavailable, so the bell icon is disabled - grayed out.
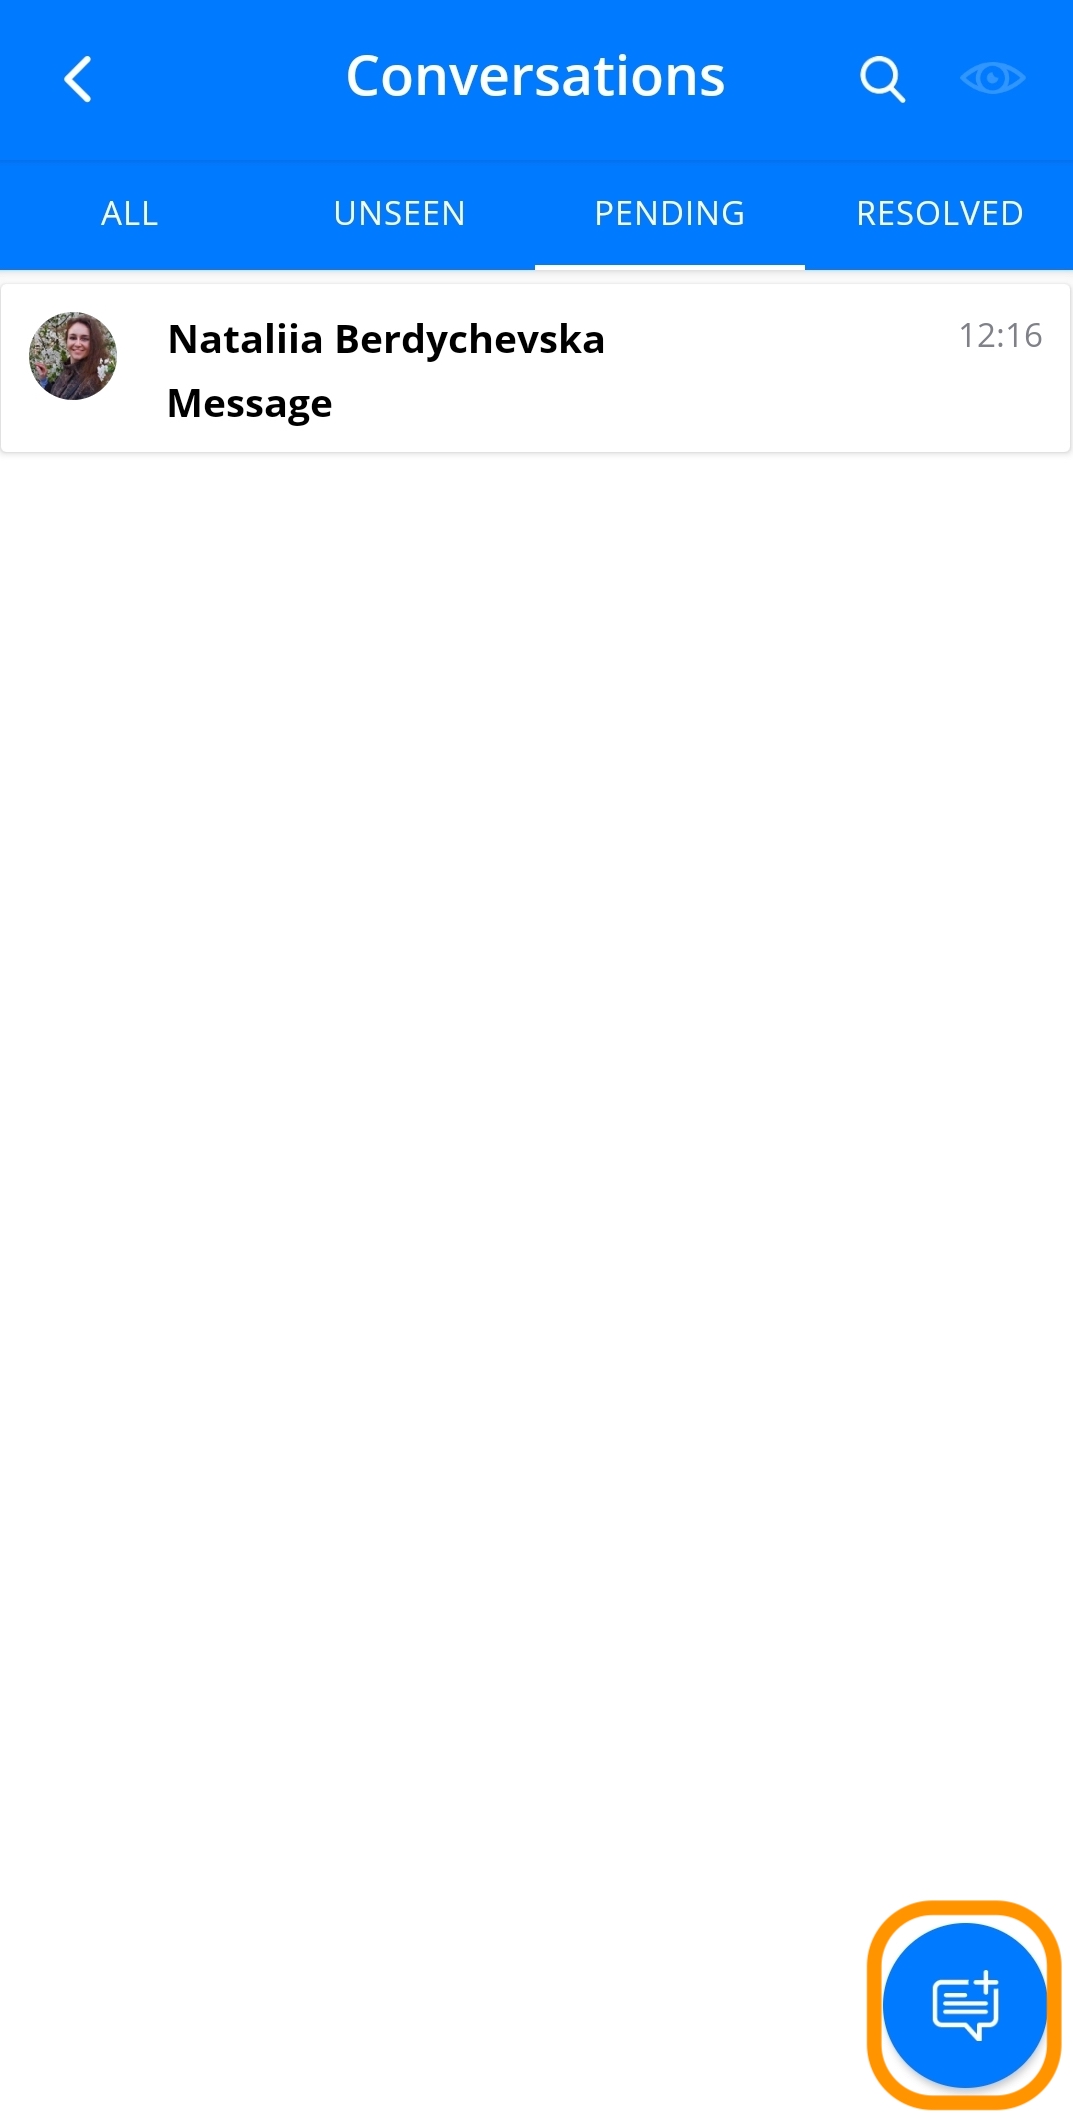
5.3Conversations
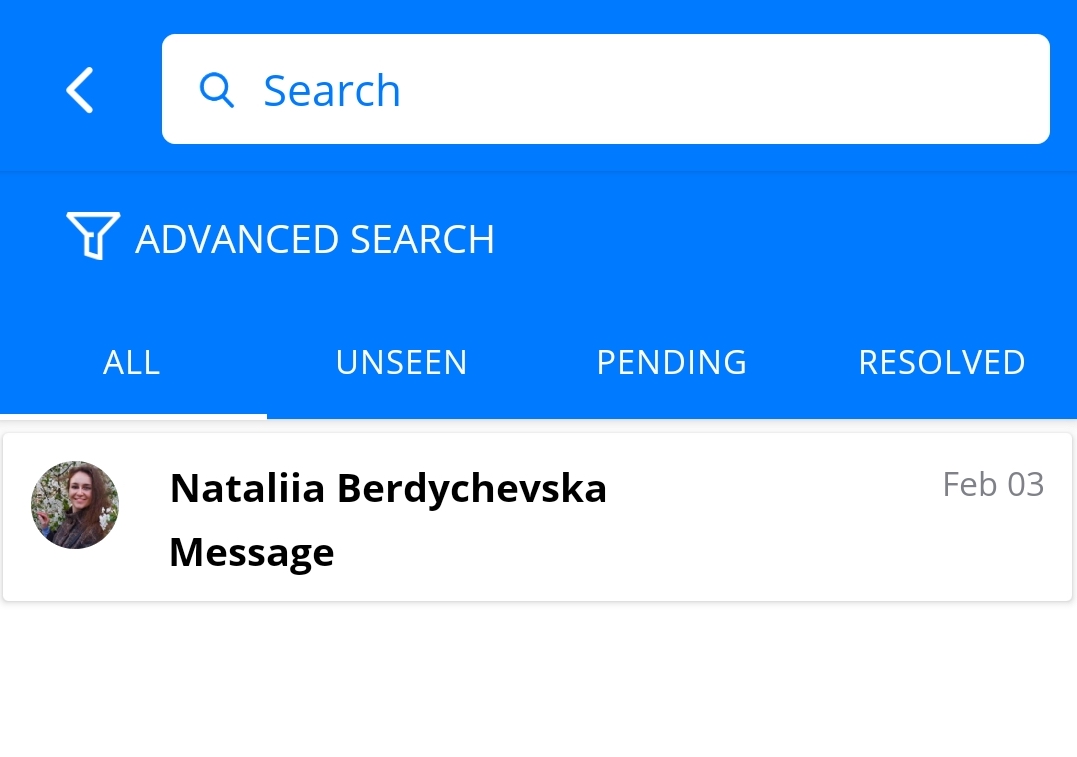
To see all comments in your document, tap 'Conversations' in the toolbar down the page (see Image 33). As a result you will get the list of all comments in the document.
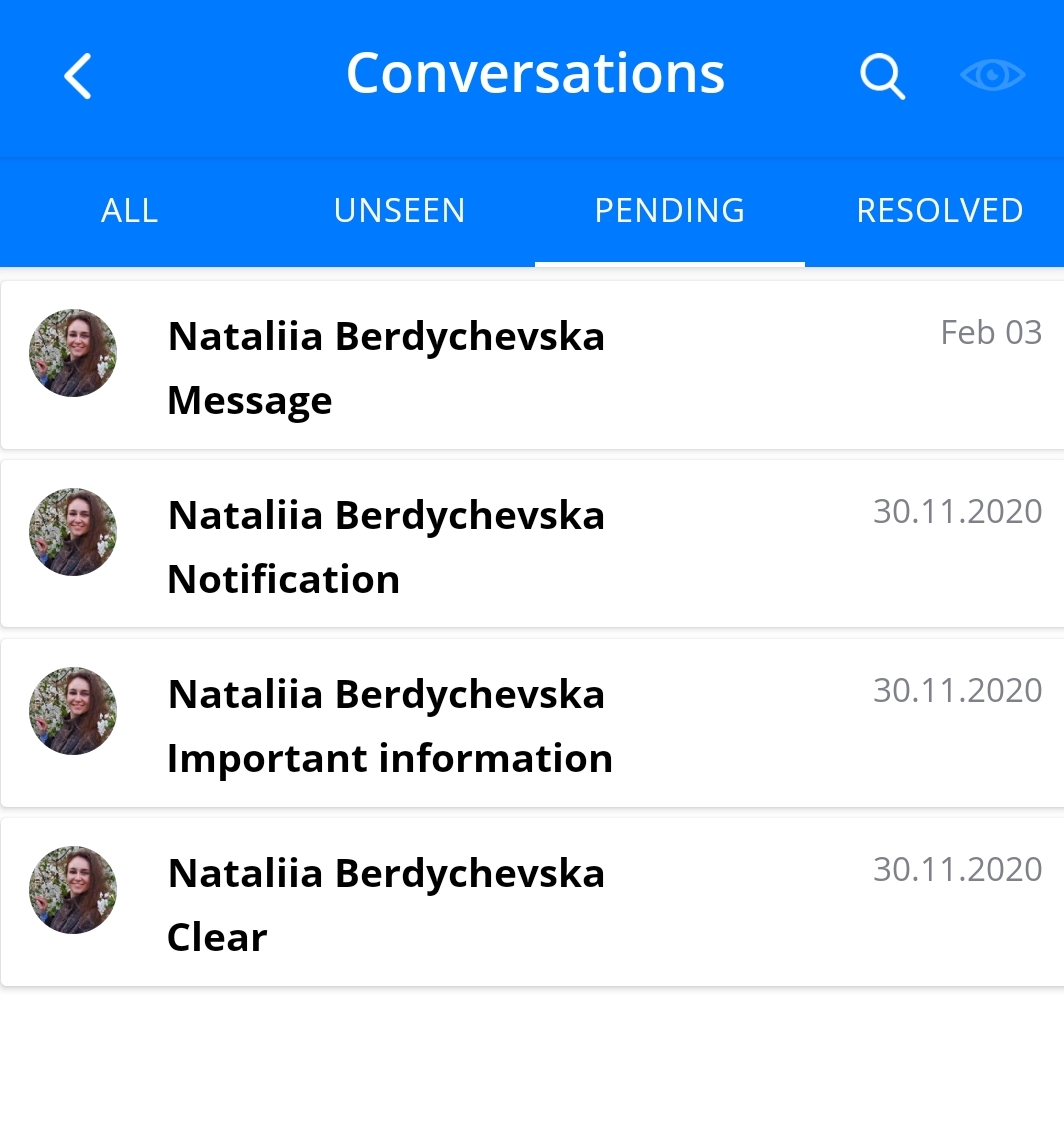
The list of all comments in the document
At the top there are different categories of comments - 'All', 'Unseen', 'Pending', 'Resolved'. Choose one that you need to find a required comment in. You can also mark all conversations with unseen changes as seen by tapping eye-icon in the top right corner (see Image 34).
There is also an opportunity to search a required comment. In the search box insert topic or message of any conversation and you will find the required one quickly.
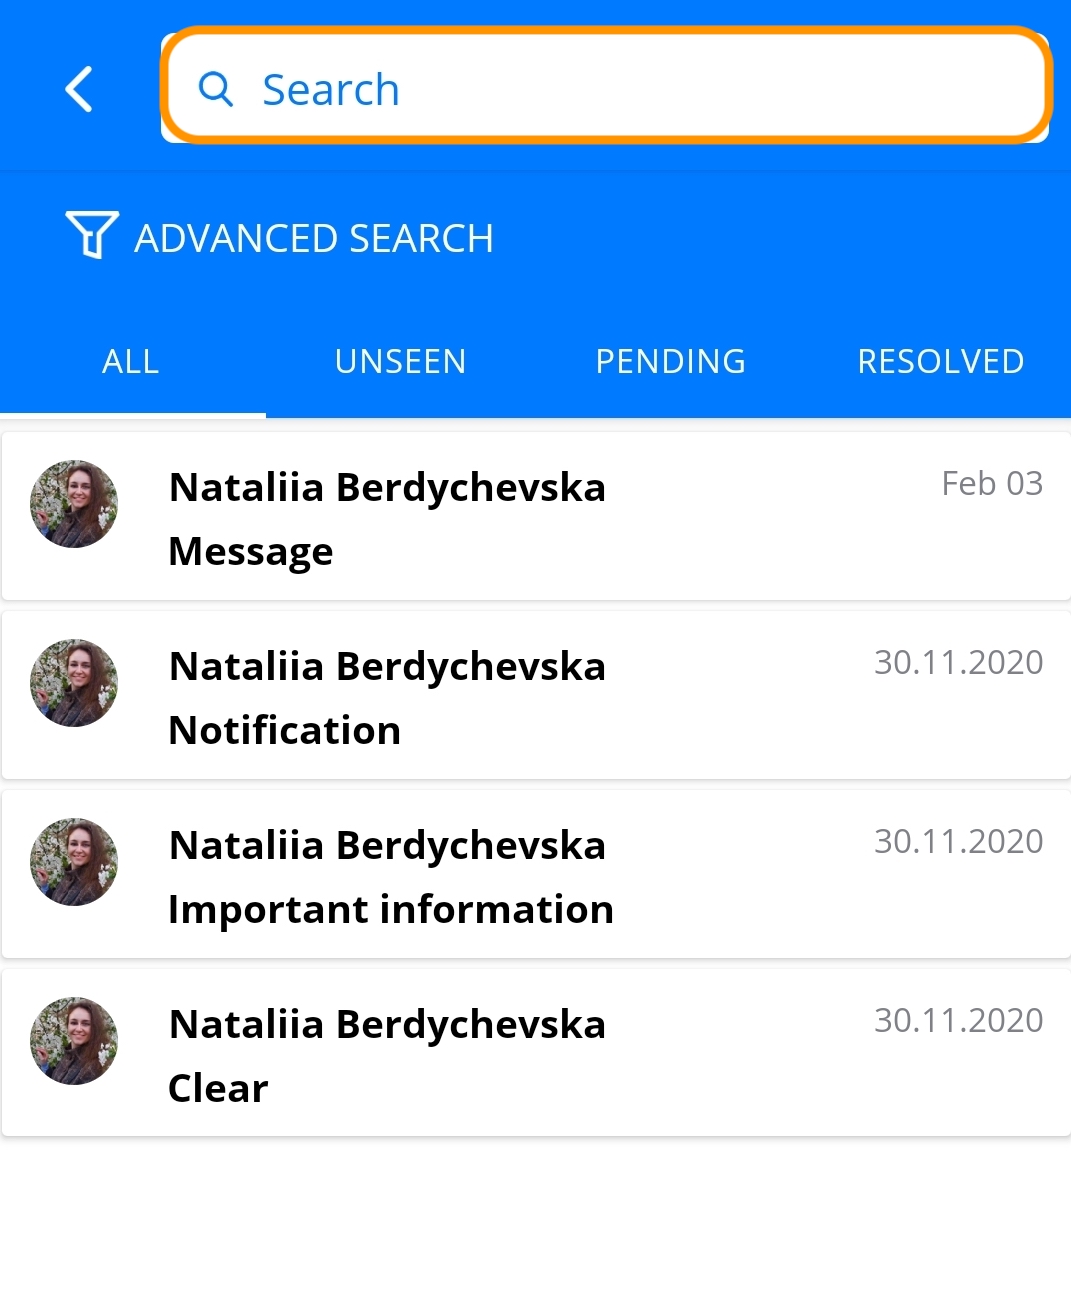
Search box for conversations highlighted
You can also use the function 'Advanced search' to find a needed comment faster. Tap advanced search (see Image 35) and a dialog window will appear where you can insert the name of creator of a comment, topic and message separately and also indicate priority, in case there is any. All fields are optional, but at least one must be filled.
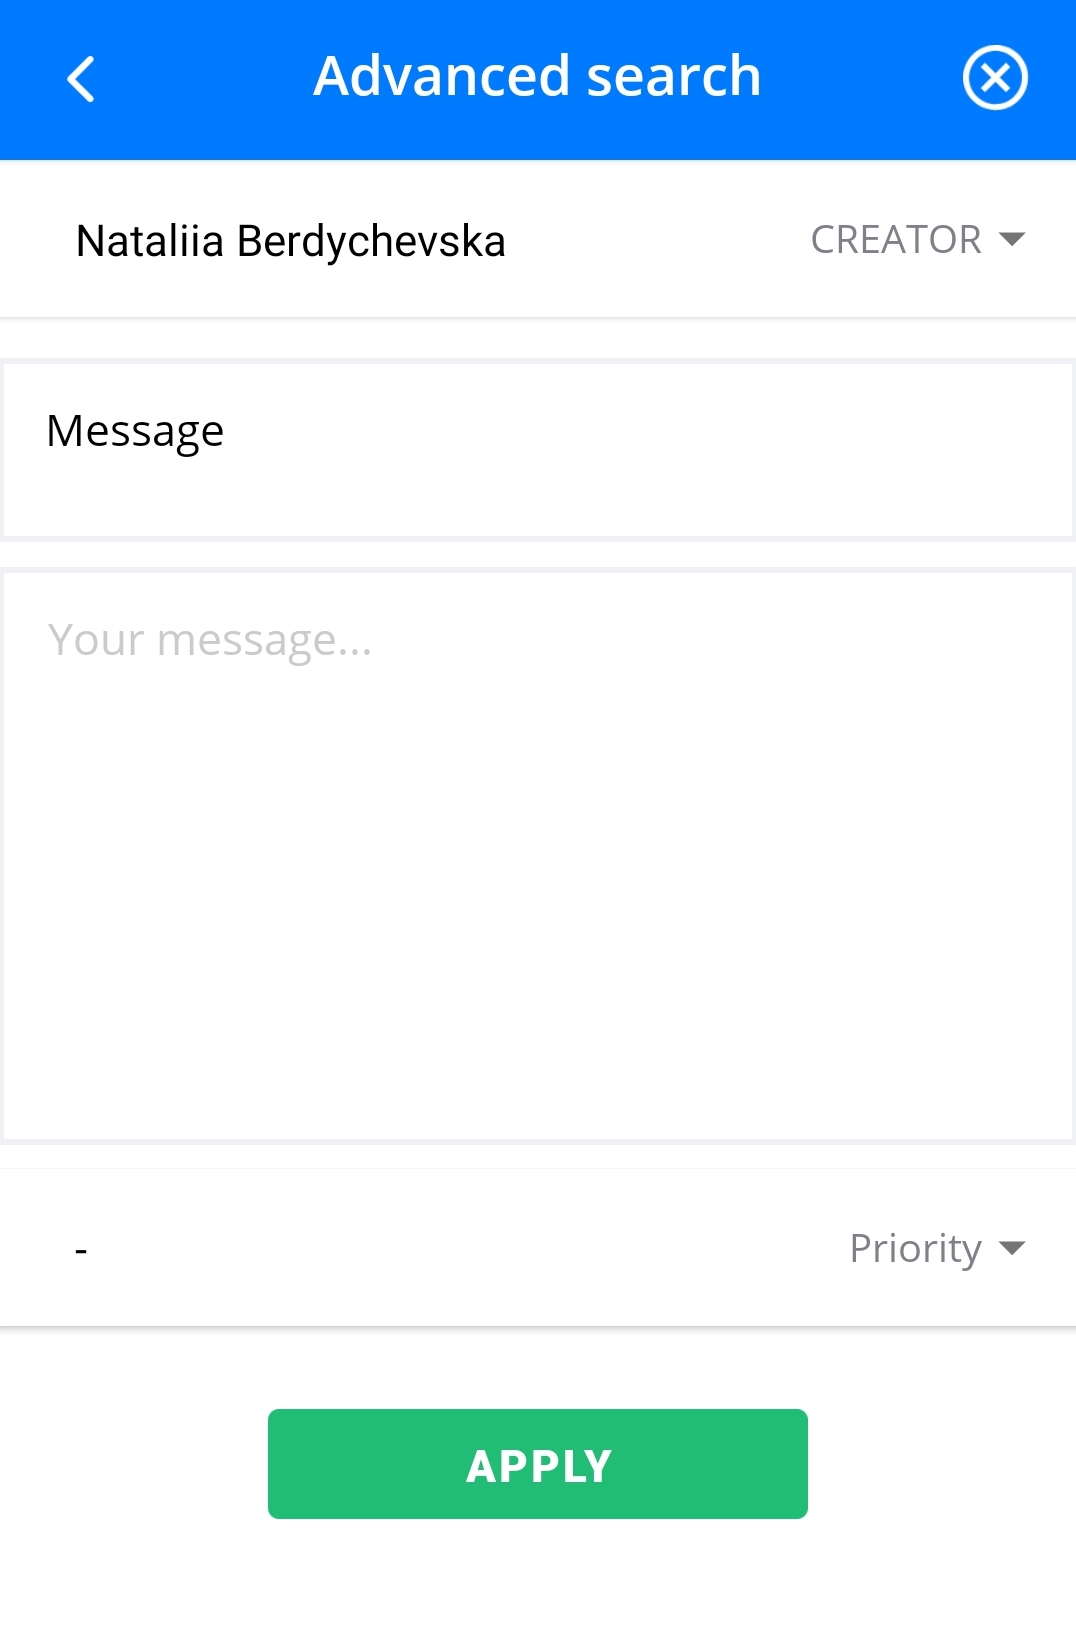
Advanced search for comments
Then tap 'Apply' and the searched comment will appear.
Searched comment through the advanced search highlighted
5.4Users
When you select the option 'Users', you get the list of users that are present in the document. There is an option with the help of which it is possible to edit user rights. Also, you can invite more users by pressing a corresponding button.
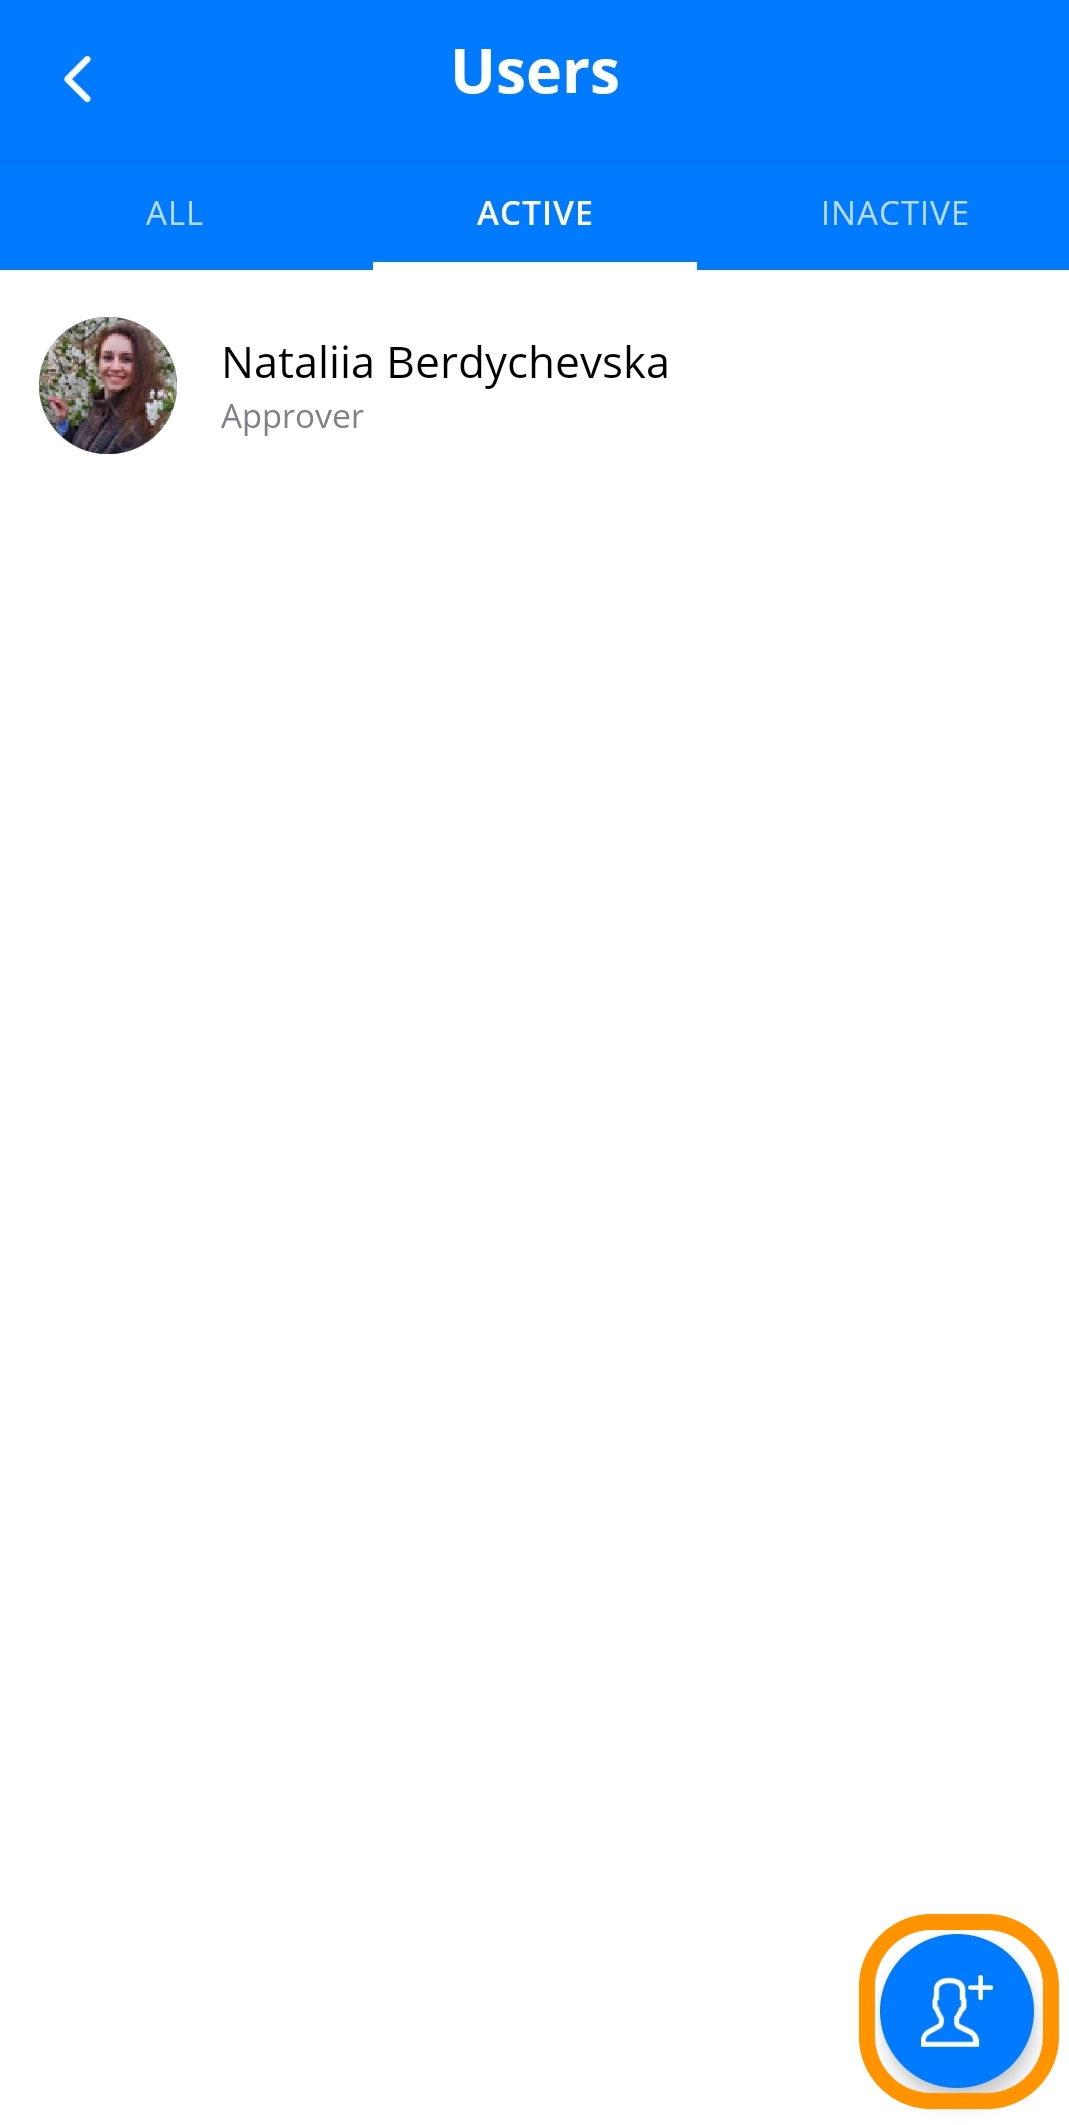
The button to invite users highlighted
There is an option with the help of which it is possible to edit user rights. Tap a corresponding user in the list and you will receive the list of rights, relating to this user, which you can change.
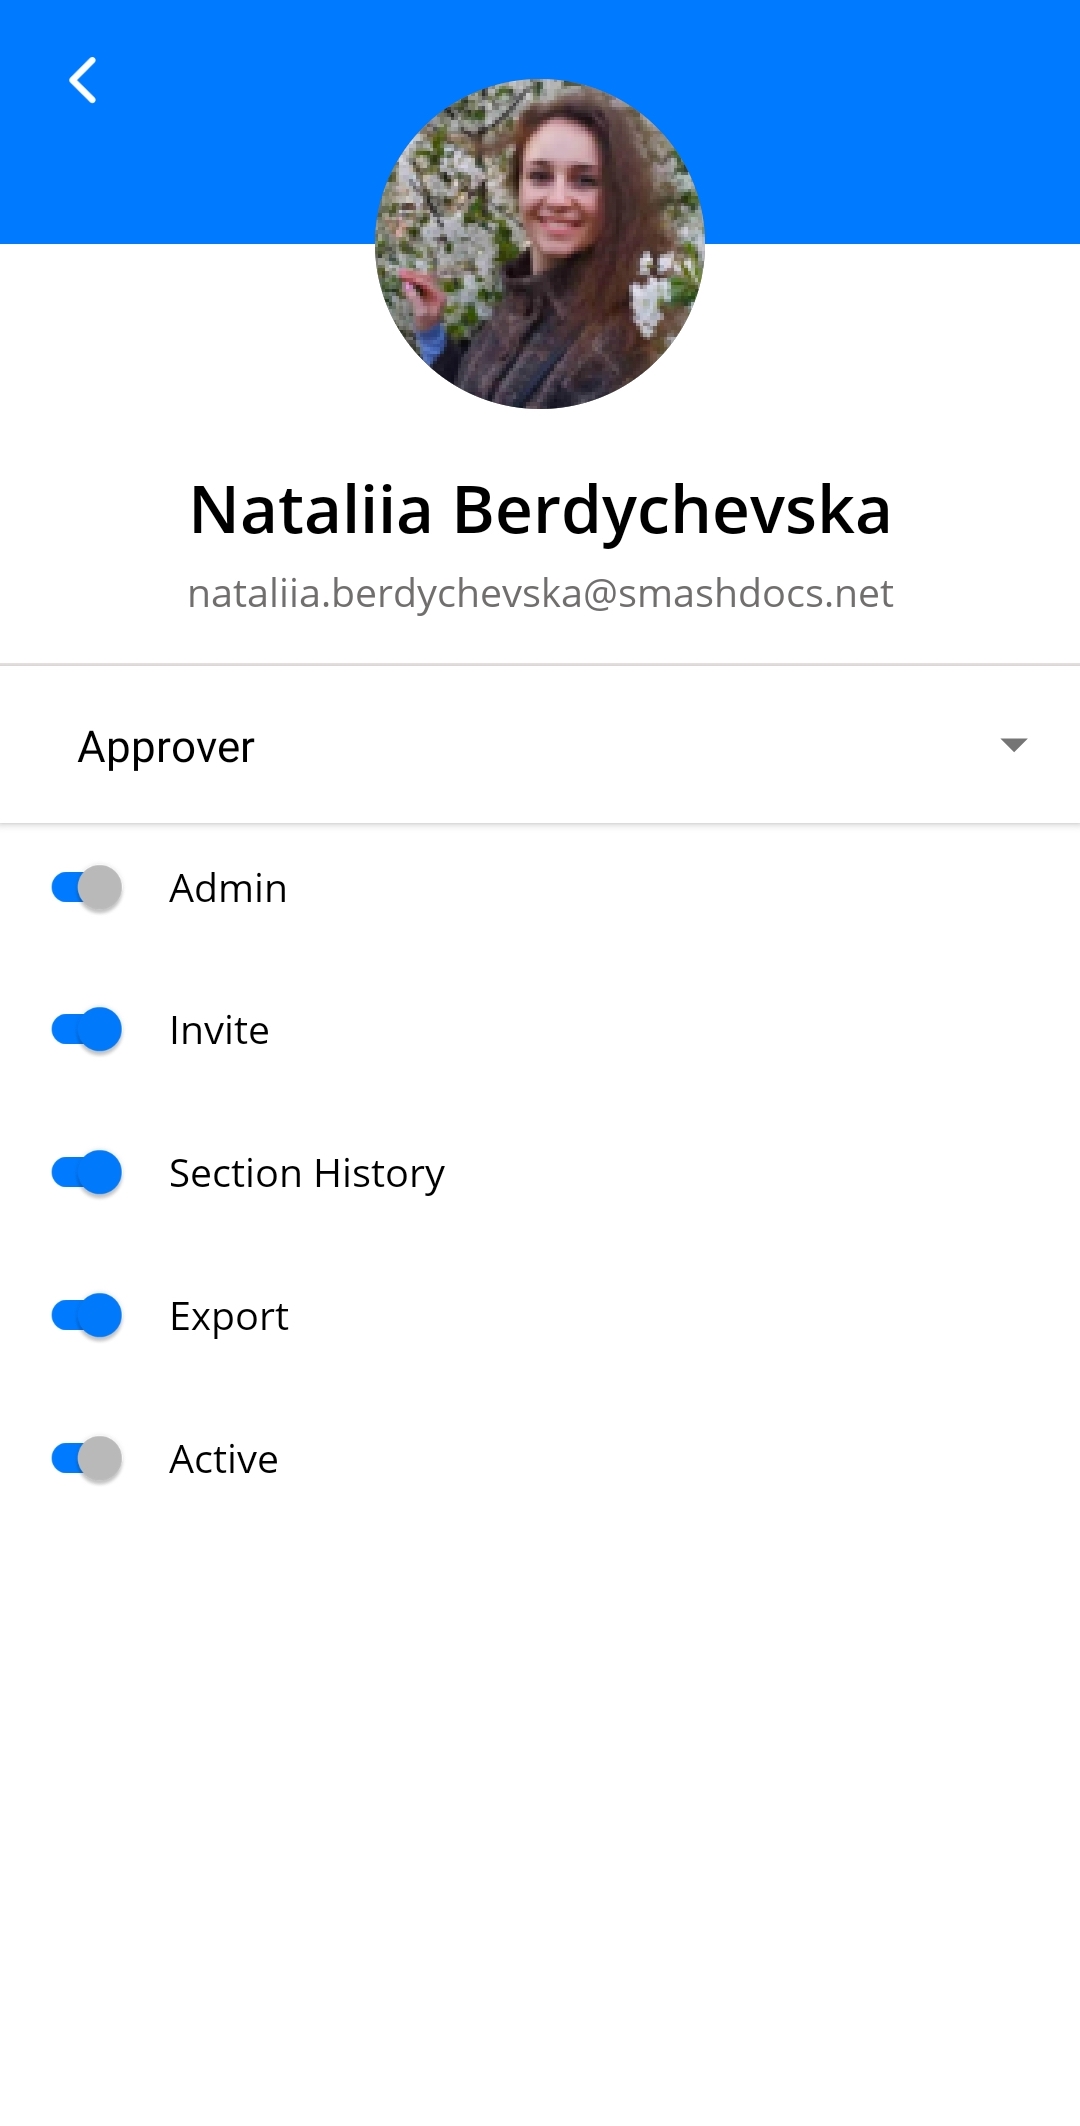
The points related to a certain user
Also, you can invite more users by pressing a corresponding button (see Image 38).
After you have tapped this, you receive a dialog, where you have to decide which rights the future participant in editing the document will have.
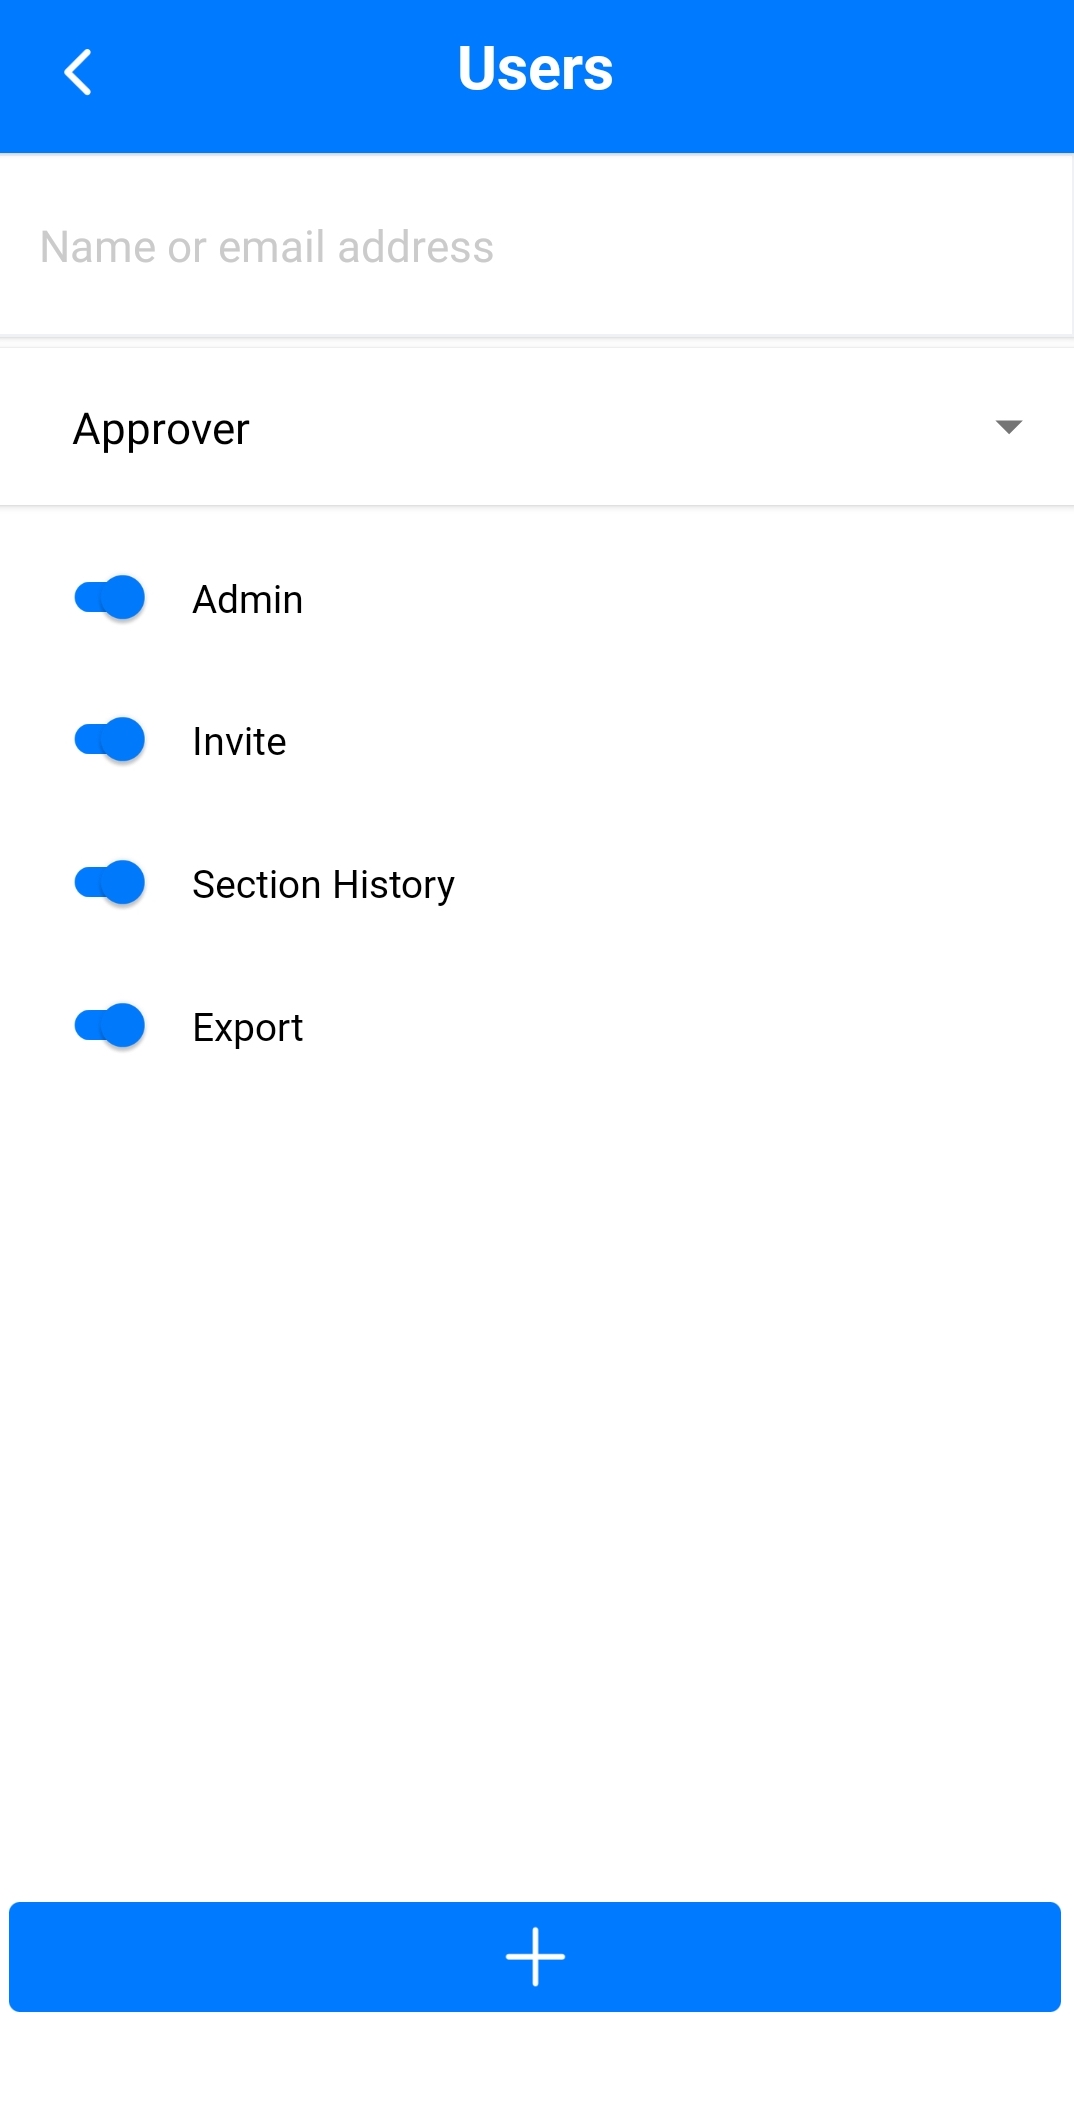
The list of rights for invited user to the document
After you have indicated all user rights, tap blue plus and you will see the next screen where you can write a message that will be sent to the invited user. The message field is optional, so you may leave it empty.
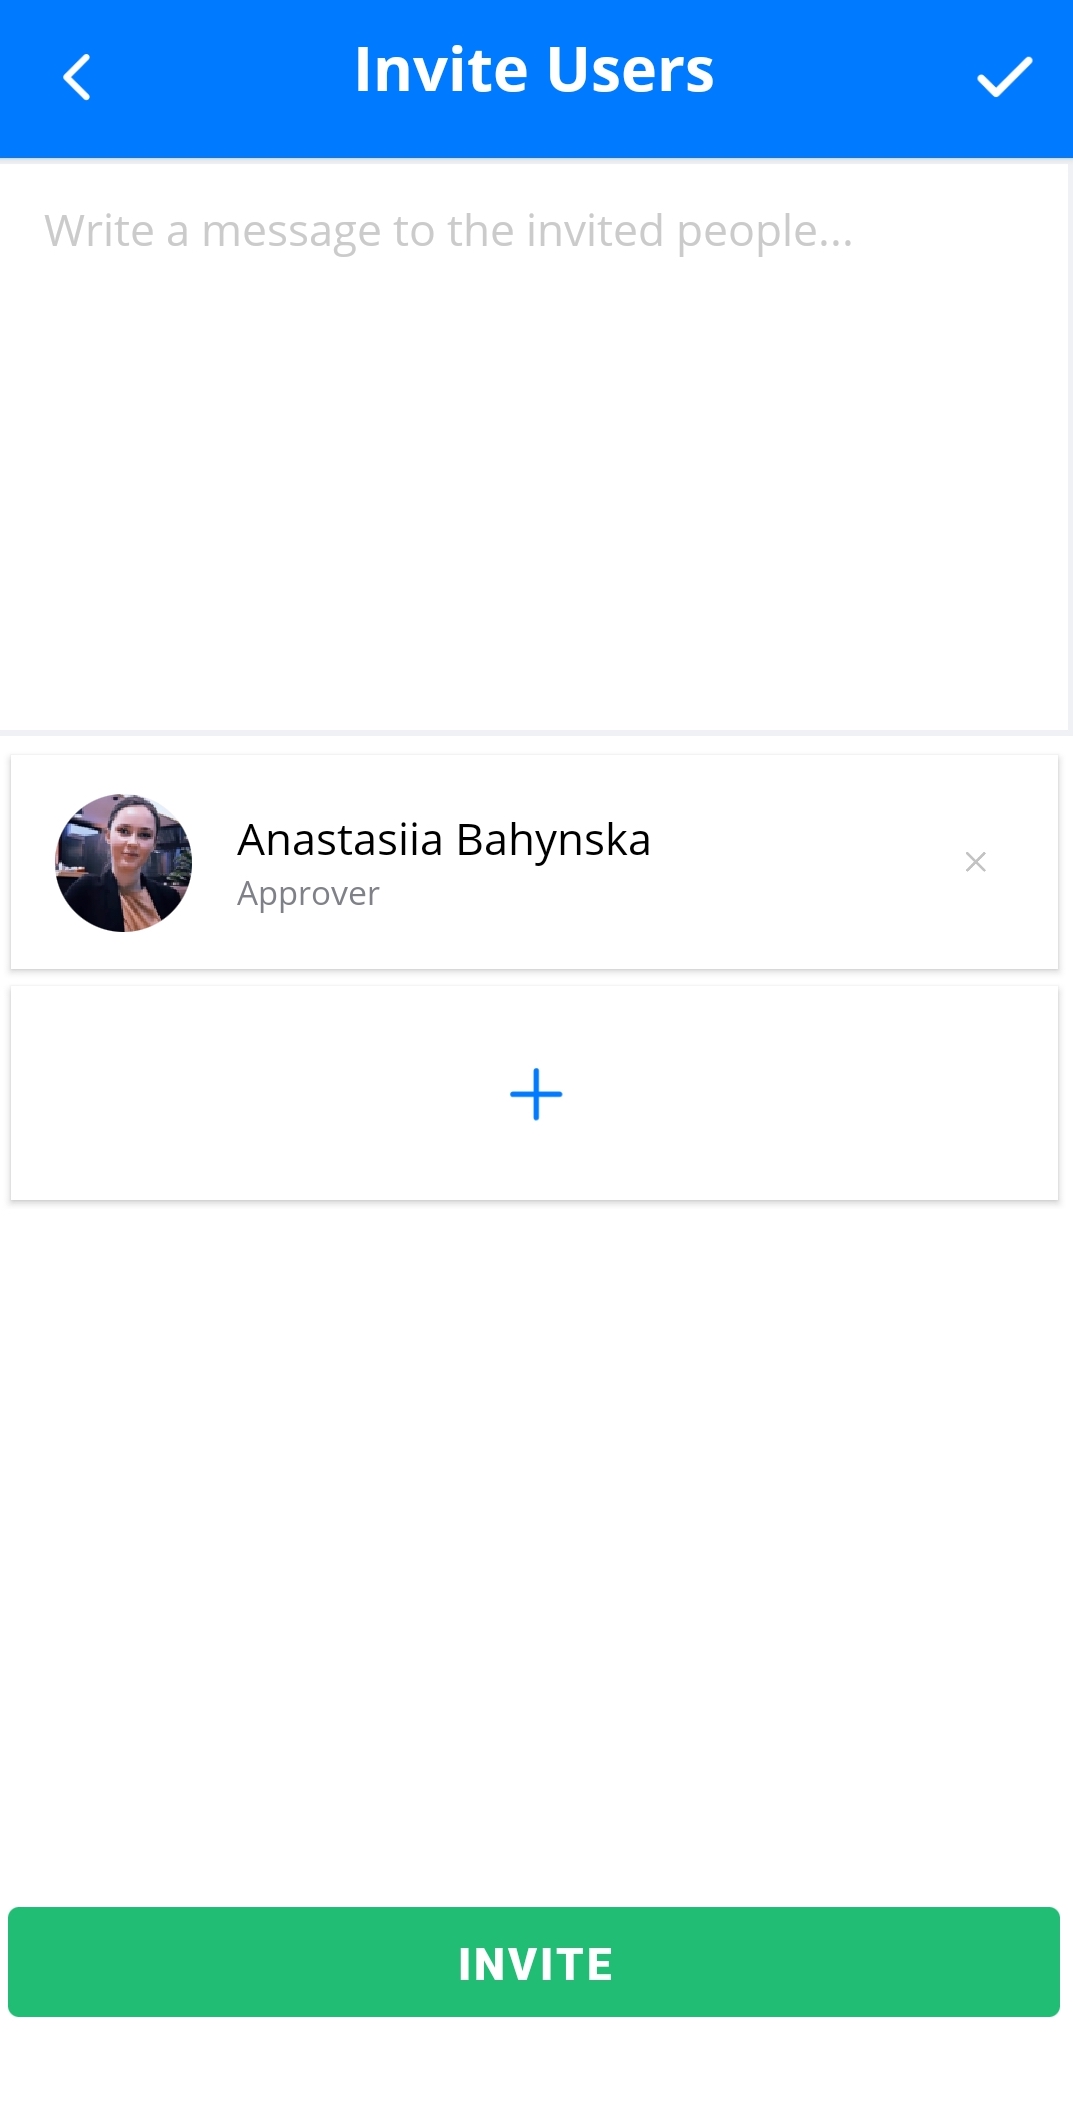
Message field highlighted
You can also see the other plus-button on the screen with message field. By pressing it you can invite more users. After you have added all needed users in your invitation list tap 'Invite' button or tick icon in the top right corner in order to send invitations. Users will receive your invitation and message per e-mail.
Note: this function to manage/invite users is available in review mode only. In draft documents the users-icon is disabled - grayed out.
5.5Document options
On the top right corner of the document there is three dots icon (see Image 33), by tapping which you will open document options. These options are different for documents in draft and review modes.
In draft mode such options are available:
●change metadata of the document;
●track changes;
●share document;
●share document link.
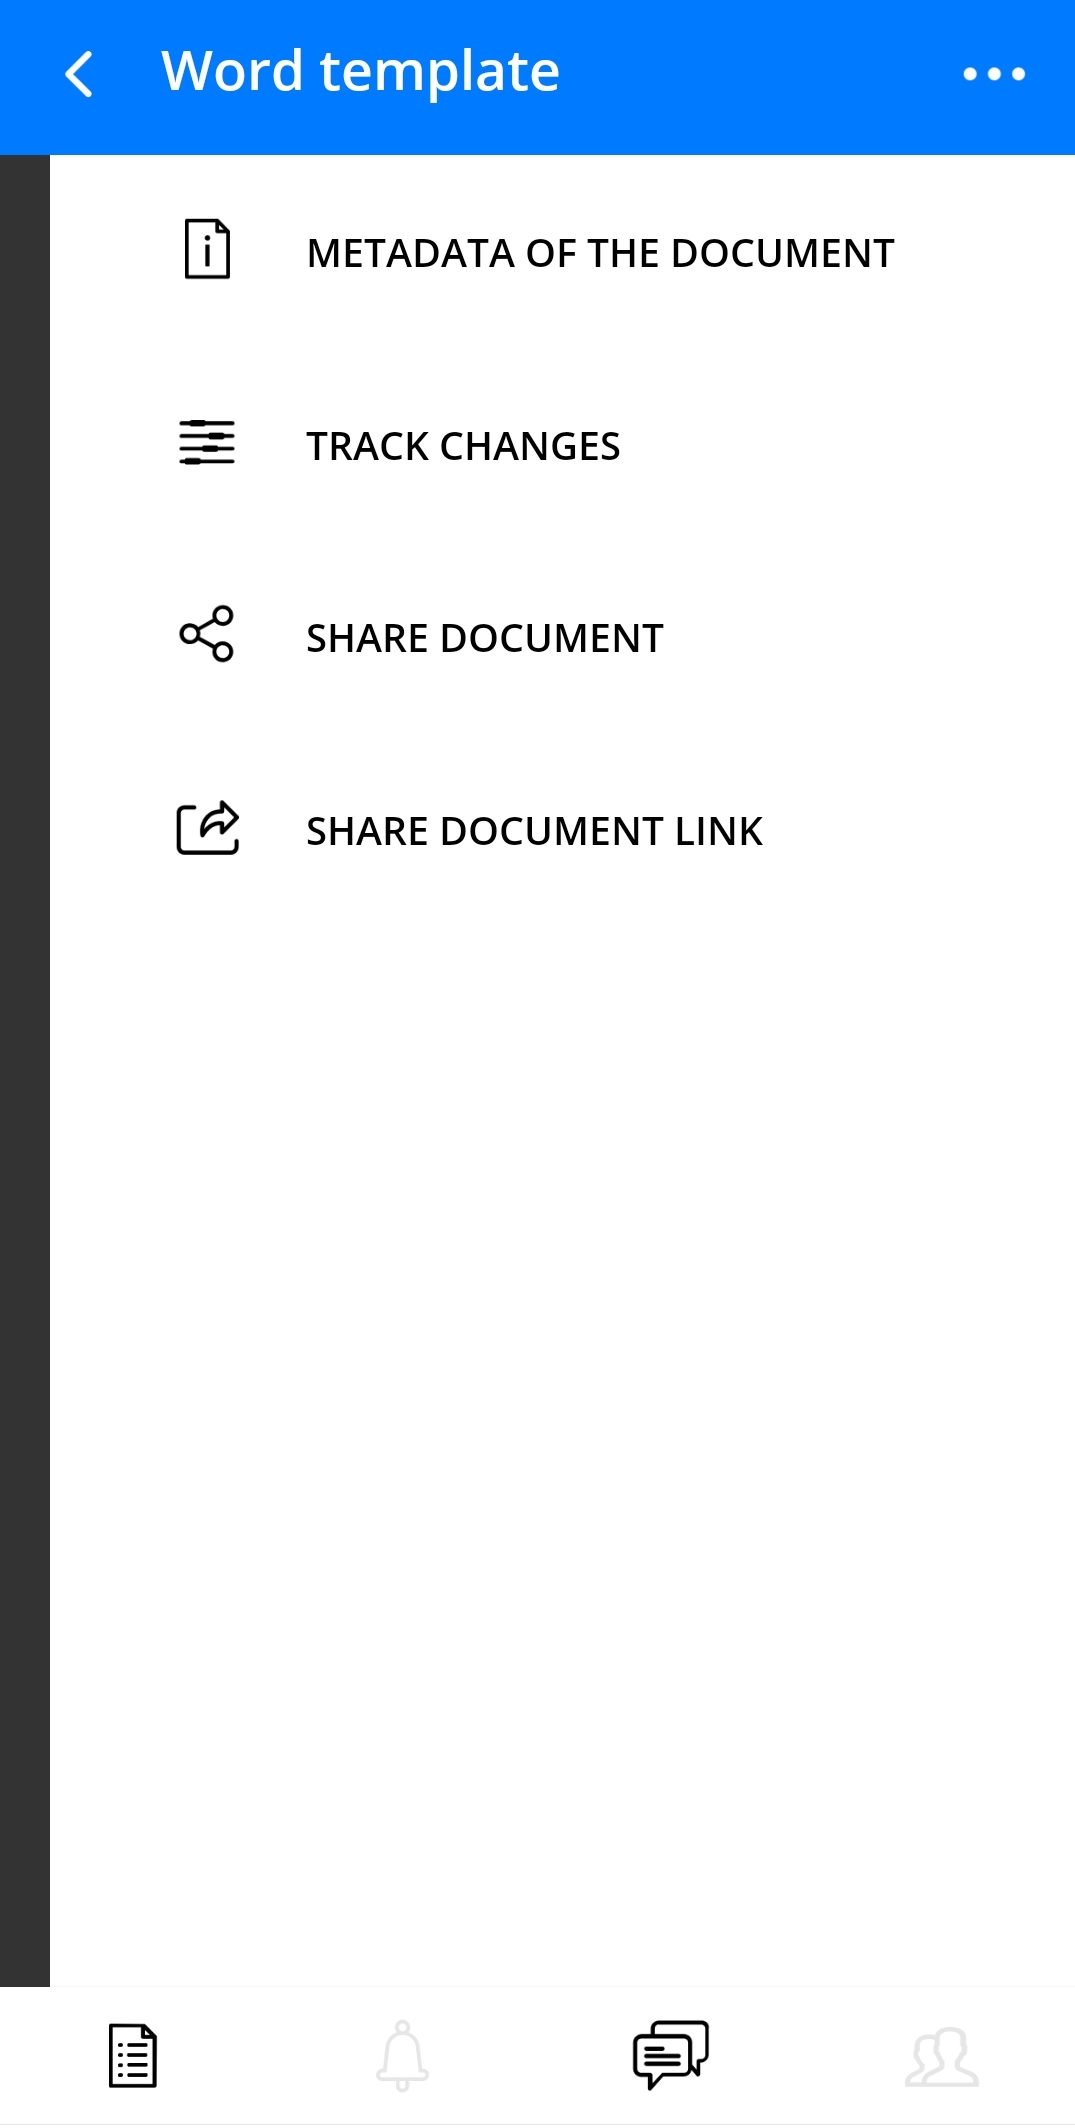
Document options for draft mode
In review mode there are such functions in document options:
●mark all changes as seen (if there are any);
●accept/reject all changes (if there are any);
●change metadata of the document;
●share all draft components (if there are any);
●mark all conversations as read (is there are any);
●create an announcement;
●share document link.
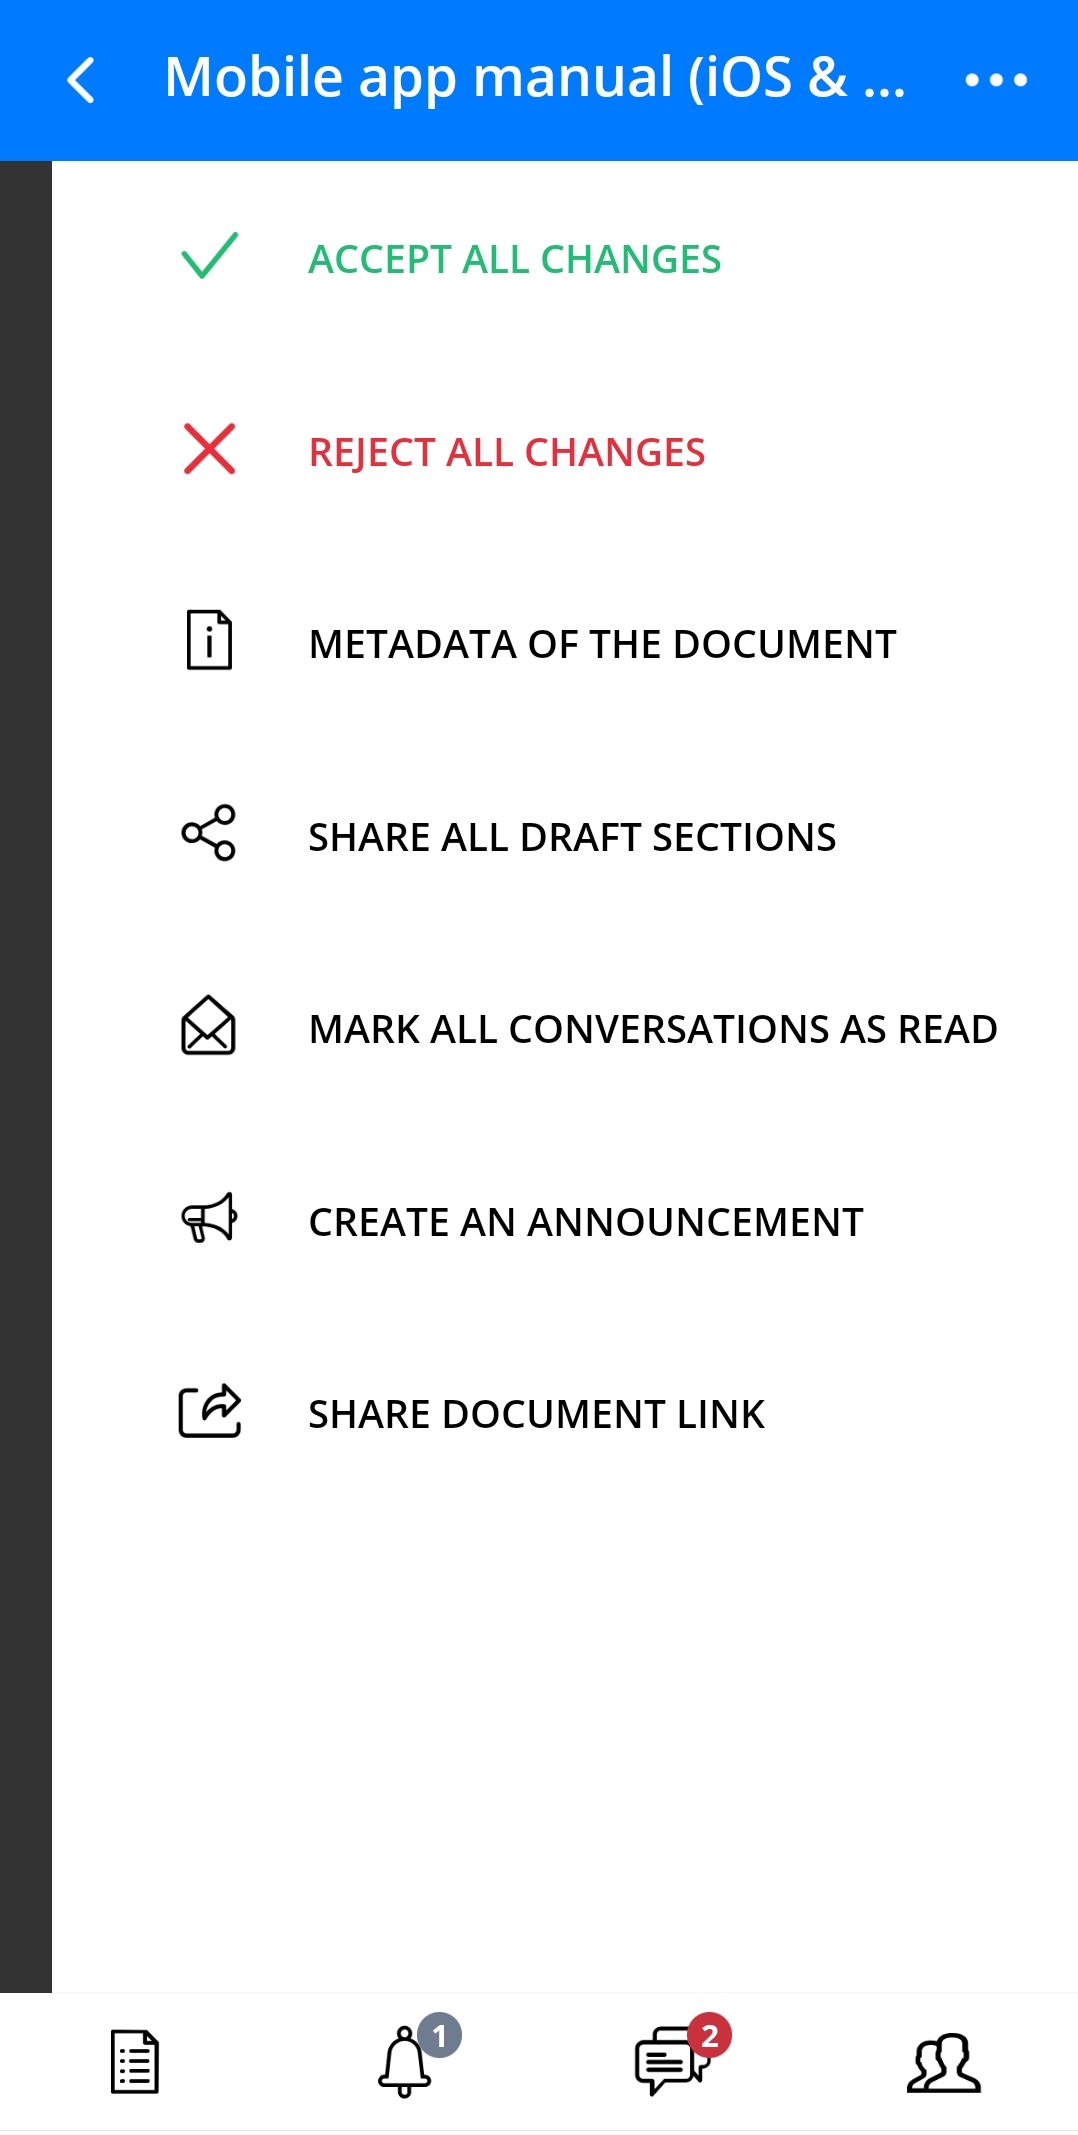
Document options for review mode
To change metadata select this option and then tap a corresponding icon.

Change metadata of the document
After that you will be able to edit all required details of your document.